
One of the biggest things I had to learn about when I moved from working in regional theatre to working in NYC was the process of shop prep (also called “shop build” or just “build”). It’s a phase of the production process that is kind of particular and unique to doing theatre here, and there is a lot to learn and money to be made doing this kind of work. Almost everyone who works as an A1, A2, or audio stagehand in NYC takes shop calls from time to time, sometimes for shows that they are mixing or A2ing, and sometimes as an additional hand on another show’s shop prep. It’s not uncommon for a sound stagehand to be building one show during the day and running another one at night (though “double-dipping” like this can get exhausting quickly). So, for this blog, I thought I would provide some basic information about shops and shop prep: what it is, who will be there, what goes on there, and a few other things that I wish I had known before showing up more or less clueless at my first shop build in January of 2019.
Part 1: Definitions
What is shop prep?
Shop prep is the part of the production process where all the audio gear that the designer has specified for the show is assembled, labeled, and tested. It takes place before the load-in period, and the goal is to get the sound design package ready to be installed in the theatre.
Why do NYC shows do shop preps?
Unlike most regional theatres, Broadway (and many off-Broadway) houses do not own any gear of their own. Everything the show needs from every department is brought in on a per-show basis and spec’d by the respective designers, especially for use on that show. Rather than purchase expensive new gear for every new Broadway show that comes to town, practically all the audio gear (including cable) is rented from one of the 3 major NYC-area audio rental shops for a weekly fee that is paid to the shop by the producers. Prior to shop prep, the sound designer, production manager, and producers will often go through a bidding process to see which of these 3 shops can fulfill the order closest to what the designer wants and what the producers have budgeted for.
Does every show do a shop prep?
With very few exceptions, every Broadway show and most touring shows will do a shop prep process. Many Off-Broadway shows do a shop prep as well, though some own enough gear that the sound designer can put together the desired system using the venue’s “rep system” or gear that the venue already owns. Some regional productions will also do a shop prep, particularly if the show that they are mounting is a “pre-Broadway Tryout” aka a show doing a run out of town before hopefully moving to NYC. In both Off-Broadway and regional theatre, sometimes a venue’s existing gear will be supplemented by a shop rental, which may or may not be complex enough for the show to need to send a team of workers for a proper shop prep. This is often the case for venues that do mostly plays and therefore might not own the gear that they need for musicals, such as a large-format mixing console and wireless microphones.
What are the “Big 3” shops, and where are they located?
The “Big 3” shops that supply the audio gear for most Broadway and Off-Broadway shows are Masque Sound, Production Resource Group (PRG), and Sound Associates Inc (SAI). Masque and PRG are both in northern New Jersey, and Sound Associates is in Yonkers, NY, just north of The Bronx.
Part 2: Know Before You Go
Ok, I’ve booked my first ever shop prep! Where is the shop and how do I get there?
DISCLAIMER: this travel information is current as of March 2022, so check with a knowledgeable friend in case things have changed since then!
Masque Sound
Address: 21 E Union Ave, East Rutherford, NJ 07073
How to get there from NYC: If you don’t have a car (or a friend with a car), the NJTransit 163 bus from Port Authority Bus Terminal is the easiest way to get there. The bus lets out right by the Staples store on Union Avenue in East Rutherford, and the shop is just down the street from there.
IMPORTANT NOTE: for the morning commute, not every 163 Bus stops at the Staples! You must be on the one that leaves at either 7:40 am or 8:10 am. Look for other sound folks with Pelican cases at the bus station, and they will help you get to the right place.
How to get back: The bus is also an option for returning to NYC, but it’s much easier to walk to the East Rutherford train station and take the train to Secaucus. From there you can transfer to a train to Penn Station.
PRG
Address: 915 Secaucus Rd, Secaucus, NJ 07094
How to get there from NYC: Take the NJTransit 129 bus from Port Authority, Gate 314. You’ll want to make the 7:50 am bus if your build starts at 8:30 am. The bus stops right outside of PRG!
How to get back: The same bus will take you back to Port Authority from the same stop where you got off. But check the schedule because if you miss it the next one might not be for a while!
Sound Associates
Address: 979 Saw Mill River Rd, Yonkers, NY 10710
How to get there from NYC: A friend with a car will be your best bet here. Often shows will rent a car for the Production Audio to get to the build, so reach out and see if you can ride with them. There is a Metro-North train that goes from Grand Central Station to Yonkers (also you can take the subway most of the way there), but neither of these options leaves you within reasonable walking distance, so you will still have to take a cab or rideshare from there to the shop.
IMPORTANT NOTE: if you are driving to SAI from NYC, put “Star Auto Spa” (999 Saw Mill River Rd, Yonkers, NY 10710) in your GPS, not Sound Associates itself! The shop is literally right next to exit 9 on the northbound side of the Saw Mill River Parkway, but you must get off one exit earlier (at Exit 7 – Tuckahoe Rd) to actually get there. Otherwise, you will arrive at the off-ramp for exit 9 only to find that you are on the wrong side of the fence, and Google/Waze will think you have arrived at your destination when in fact you’ve gone too far.
IMPORTANT NOTE WHEN TRAVELING TO ANY OF THE SHOPS: many productions (particularly Off-Broadway) will reimburse your travel costs, so ask your Production Audio if this is the case on your show, and be sure to save your tickets and receipts!
Who all will be there?
On the show side, your team will likely consist of some combination of these people:
- Designer – in charge of the entire sound design of the show. They will stop by your build a few times but probably not be there every day.
- Associate/Assistant Designer – acting on the designer’s behalf to answer questions, print labels, and coordinate between departments. This person also often manages the label database and provides rack drawings, so that you know what gear to put in each rack and what labels to put on what cables.
- Production Audio – this is the position in charge of executing the designer’s vision and making it a practical reality. As part of this, they are the supervisor of the shop build and crew. You can read more about being a Production Audio in Heather Augustine’s excellent blog article here: https://soundgirls.org/production-audio/
- Advance Audio – if your Production Audio is on another show or otherwise booked, sometimes your show will have an Advance who acts as the Production Audio prior to the show’s load-in into the theatre.
- A1 – will be responsible for mixing the show; in the shop, they will work as a shop hand like everyone else but with a particular eye towards setting up the console and Front of House, since it will be their domain for the run of the production.
- A2 – will be responsible for wireless microphones once performances start, but much like the A1 they will work as a shop hand, but with a focus of setting up the backstage area affectionately known as “ampland,” “rack world,” “RF world,” or any manner of similar descriptive nicknames ☺.
On the shop side, your main players are
-
- Sales Representative – this is the person from the shop side of negotiation that is assigned to work on your show. They will need to approve any adds, substitutions, or other alterations to the package that may occur between the time that the bid for the show is approved and when it leaves the shop at the end of the build. Your Production Audio (or Advance, if applicable) will be liaising between Team Design and Team Shop on anywhere from a daily to hourly basis to make sure the show gets the gear it needs while staying within the agreed-upon budget.
- Shop Key – think of them as the “boots on the ground” for the sales rep. Your shop key will pull all the gear that your show is going to use and bring it to your zone (the physical area on the shop floor where your show is being built). They will be a great resource throughout your build process when you think of extra things you need but forgot to ask for (or things that are on the show’s order but haven’t yet arrived in your build zone).
What tools should I bring?
Most of what you need can be provided either by the production or by your fellow shop hands, so definitely don’t feel like you have to go spend all your money on nice tools before you’ve even gotten your first shop paycheck! That said, once you do a few builds you may find it nice to have your own tools for certain tasks. A great way to carry them is in a Pelican case, and you will see many sound folks bringing theirs into the zone on the first day of a build. But do whatever works for you and your budget. Perishables such as tape, tie line, and zip ties will be purchased by the production; there is no need to bring your own.
Here is a list of the tools and other accessories that I like to have on hand for shop use: screw gun (plus a variety of bits); multi-tool; crappy knife for cutting electrical tape without gunking up your good knife; good knife for non-electrical tape jobs; tape measure; crescent wrench,; headlamp; flush cutters for cutting zip ties; scissors; screwdriver; a good pair of work gloves; Allen keys; jeweler’s screwdrivers or other precision bit set; pens/pencils, P-Touch label maker; cable tester; BNC tool; and my personal favorite: knee pads (for when you’re stuck on the ground building a rack or holding something).
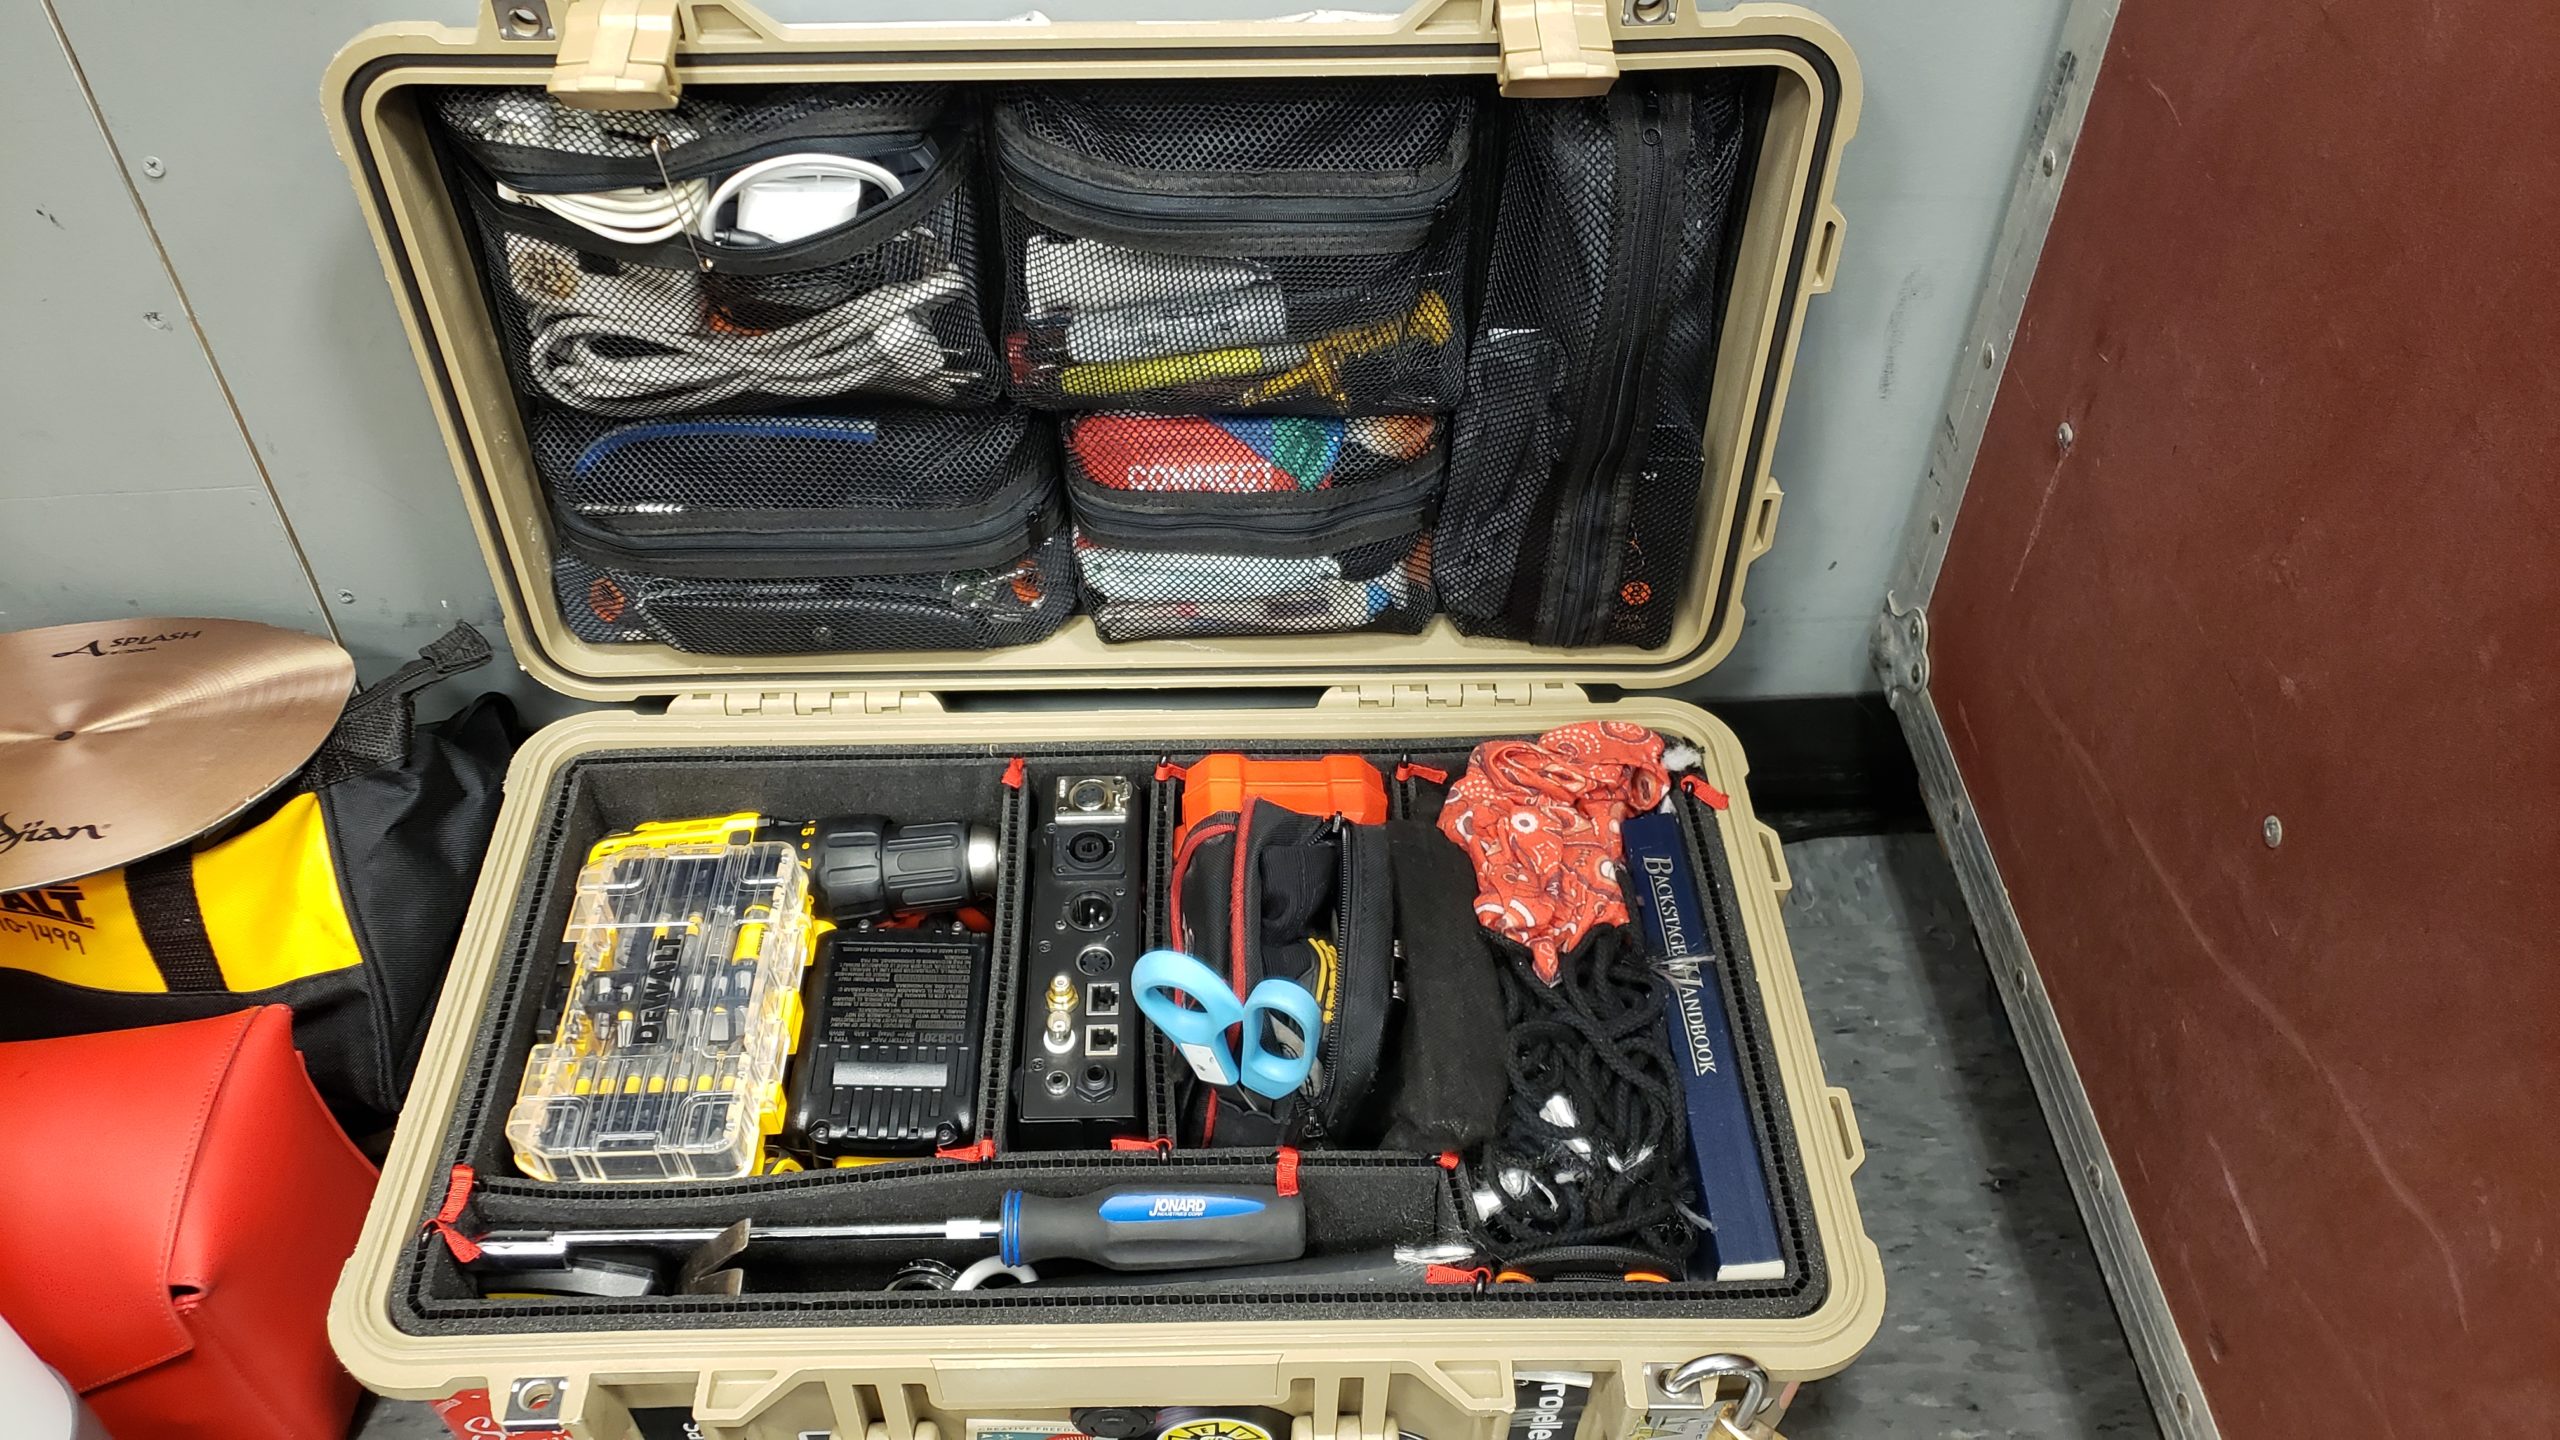
Here’s the inside of my Pelican case with most of the above-mentioned tools in it! My label-maker is in the red bag off to the side.
Part 3: Let’s Get to Work
Ok I’m at the shop! Now what?
Rather than describe the tasks of shop prep based on how much time they take, I find it helpful to think of the prep process in phases. Shop preps can vary drastically in duration, depending on the show’s budget, how big the rental package is, and how many crew members are available. Typically, a Broadway show or 1st national tour will spend 3-4 weeks in the shop, but some builds may go for even longer if there is a lot of specialty equipment and assembly needs. Smaller Broadway shows and off-Broadway shows might spend between 2 days and 2 weeks in shop prep, so it totally depends. But in most cases, there are some universal tasks that will need to be done, and usually, they go in this order:
Phase 1: Bundling, Labeling, Rack Building
When you arrive in your zone on the first day of your show’s prep, you will likely find a smattering of gear, some empty rack boxes, and lots of cable. To make the load-in process smoother and more efficient, a set of cables that runs from point A to point B (for example, from ampland to front of house) will be loomed together into a bundle. Every single cable will have a specific label, and most designers (or associate designers) will include spare runs for anything fragile like network and video cables. XLR runs will typically be done using G-block multi-cables, which come in varieties from 3-pair all the way up to 19-pair. The associate designer will have put together some version of a piece of paperwork called a “bundle sheet” which tells you the name of the bundle, what cables go in it, and, very importantly, which ends need to be grouped together so that no cable is run backwards! The associate designer will also sometimes generate cable labels using a database program such as FileMaker Pro. Many production audio people and associate designers have spent years putting together their databases to make this process easier for themselves and to avoid having to start from scratch on every new production they do.
A new-ish development in post-pandemic shop work is that show build crews are often doing the actual bundling of cables themselves. Some shows may pay to have the shops do the bundling for them, but this has not been the norm in 2022 in my personal experience. The act of bundling is done by flagging all the ends that begin at one origin (such as ampland) with colored gaff tape, then wrapping friction tape around the entire “girth” of the cable bundle every 3-ish feet, so that all the cables in the bundle can then be easily coiled up and run out together as though they were one very thick cable. It’s gonna feel like major “arm day” by the time you’re done, so prepare yourself. I personally recommend wearing long sleeves and gloves for when you’re laying out 250’ of cable and inevitably getting various dirt and schmutz all over yourself!
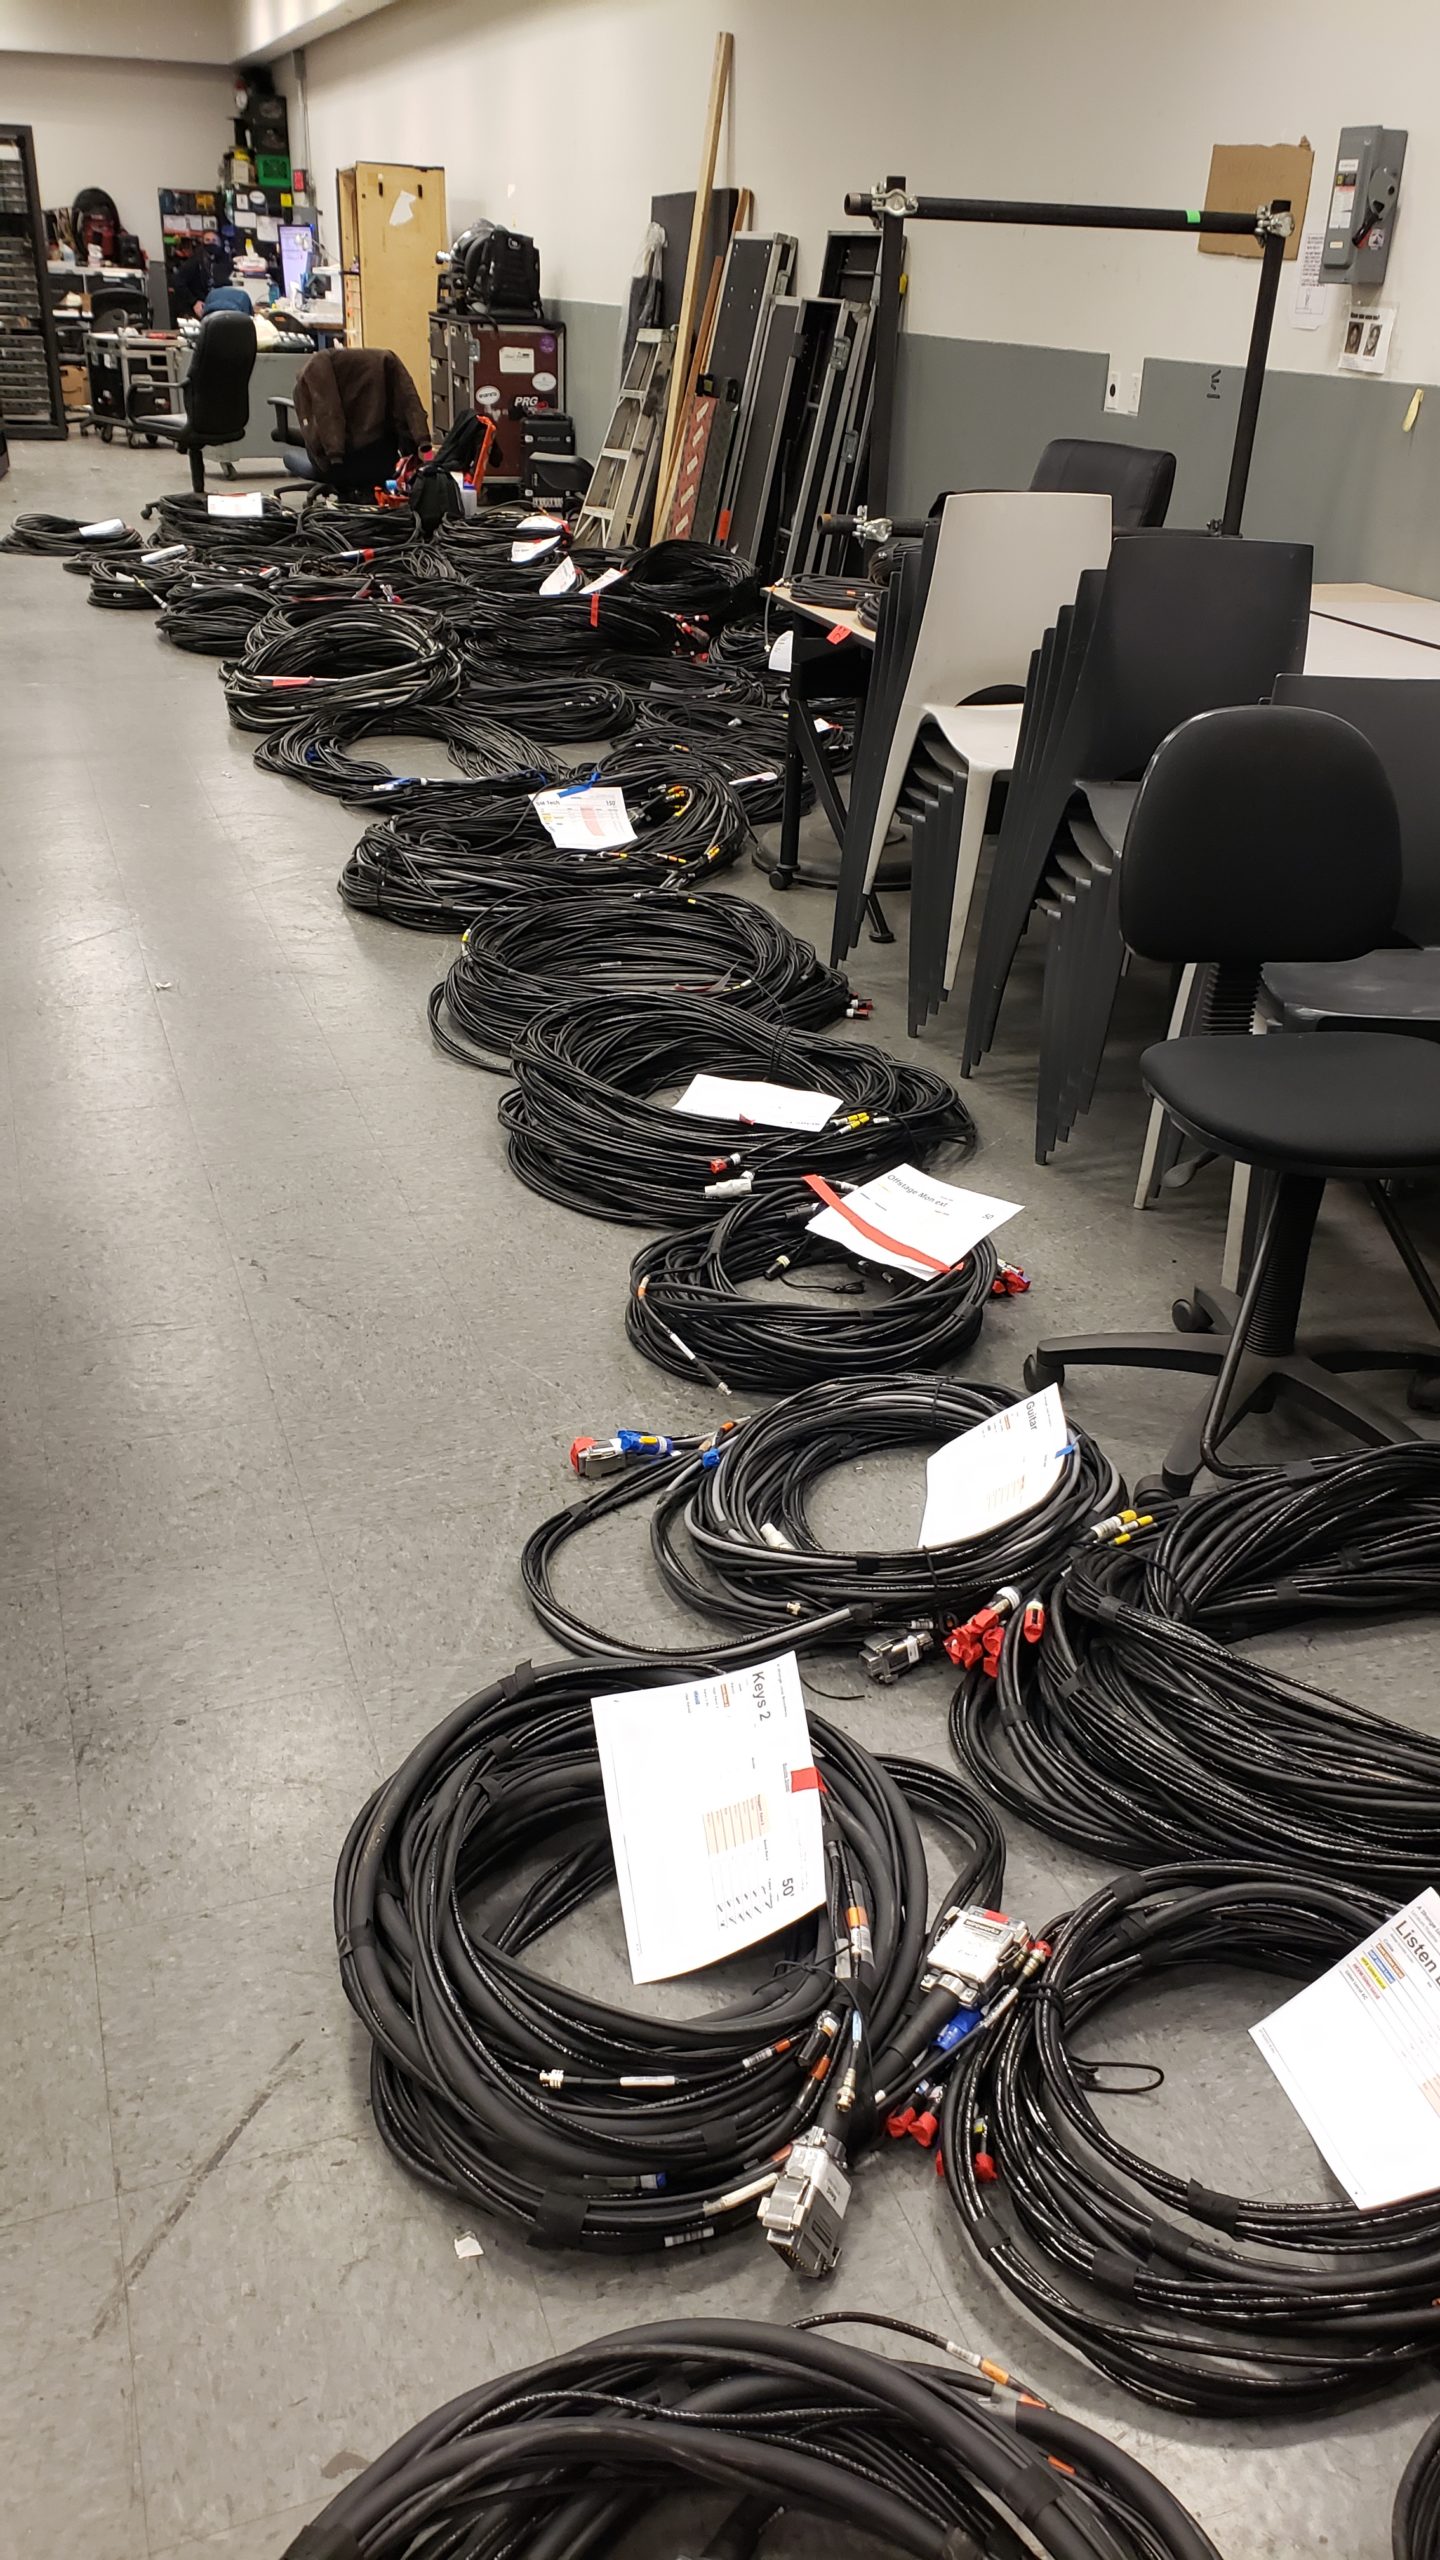
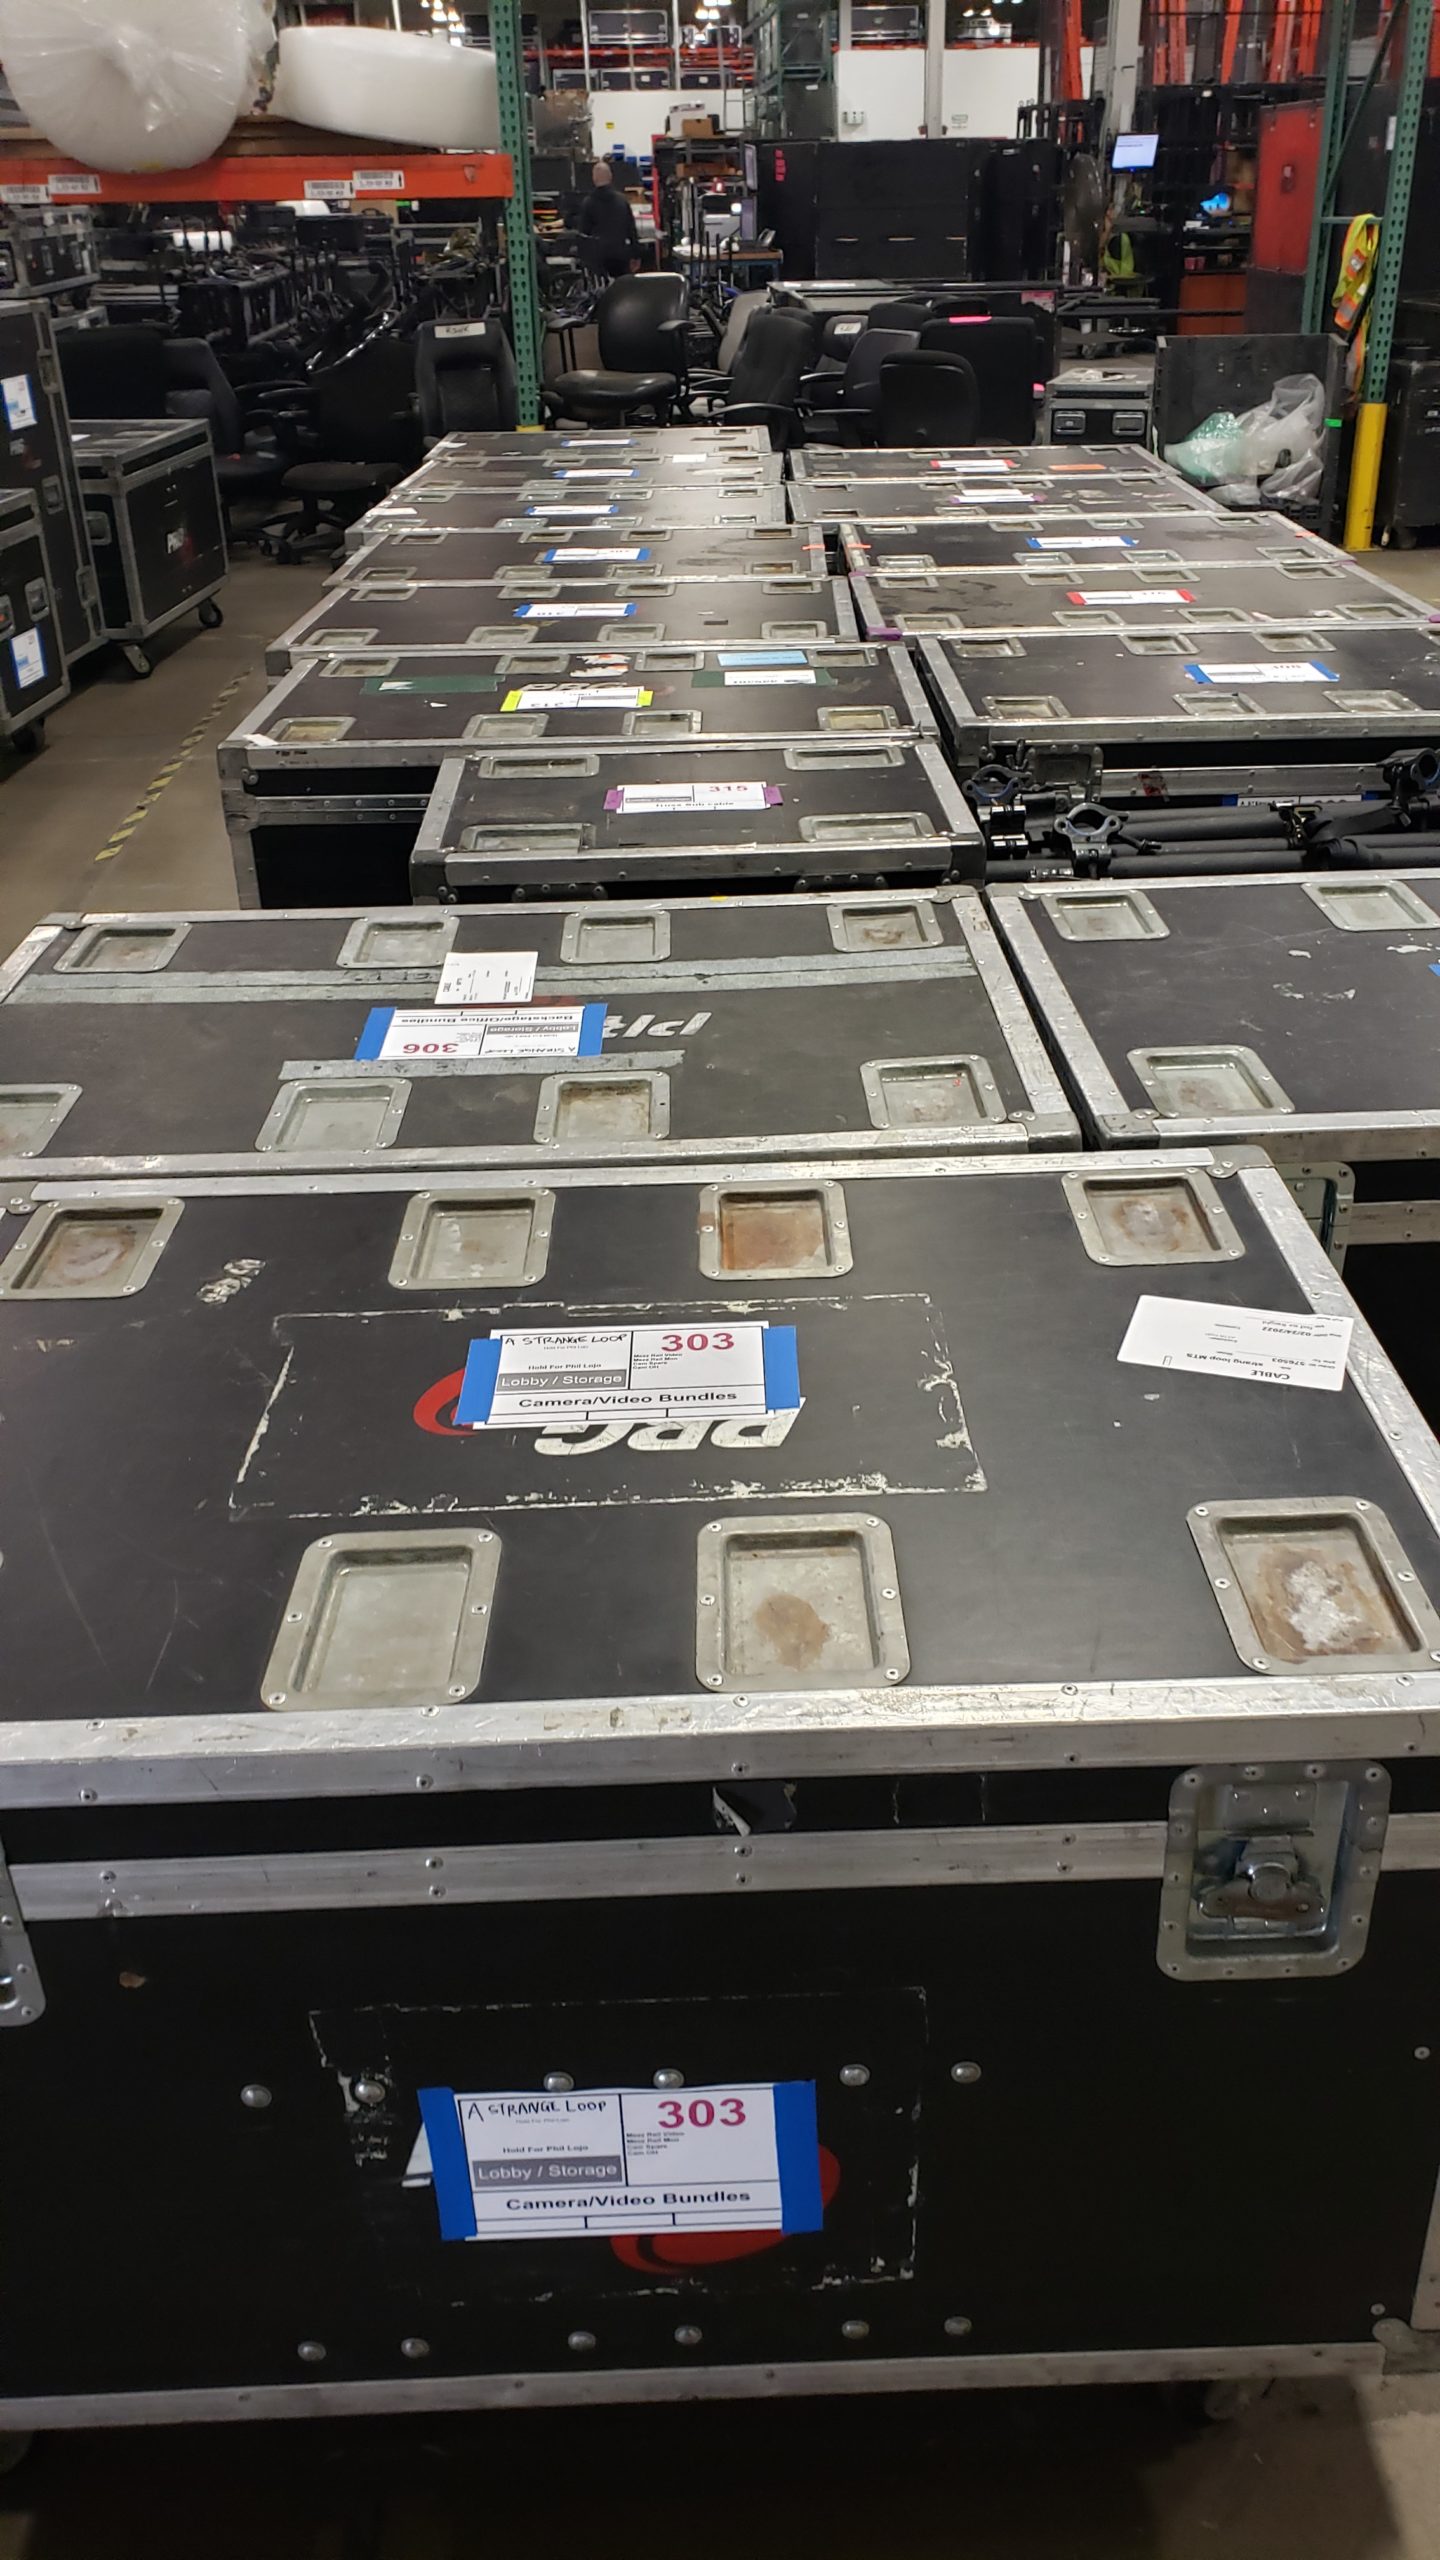
Here are some of the completed bundles for the Broadway production of “A Strange Loop.” This is a relatively small Broadway musical, but it still had 70+ bundles!
In most cases, the ends of a bundle will find themselves getting plugged into racks. Racks of gear will be designed on a per-show basis by the designer and associate designer and be articulated in a series of rack drawings. These can be made in software such as Vectorworks, Excel, OmniGraffle, or sometimes just sketched out by hand in a pinch.
Building racks means wrangling up all the gear that goes into that rack, screwing it into the slots where the drawing indicates that it should go, then elegantly labeling, running, and connecting the gear’s power supply (if applicable) and short cables known as interconnects that go between the front of the rack (where most of the gear is) and the back of the rack. On the rear side of the rack, you will usually add some sort of panel mount or Stek (brand name) panel with connector barrels on it that merge the bundle ends to the interconnect ends. That way once the crew in the theatre gets the bundles, all they have to do is plug the labeled ends into the back of the rack at the labeled ports without having to dig around inside the rack to find the right port for each connection.
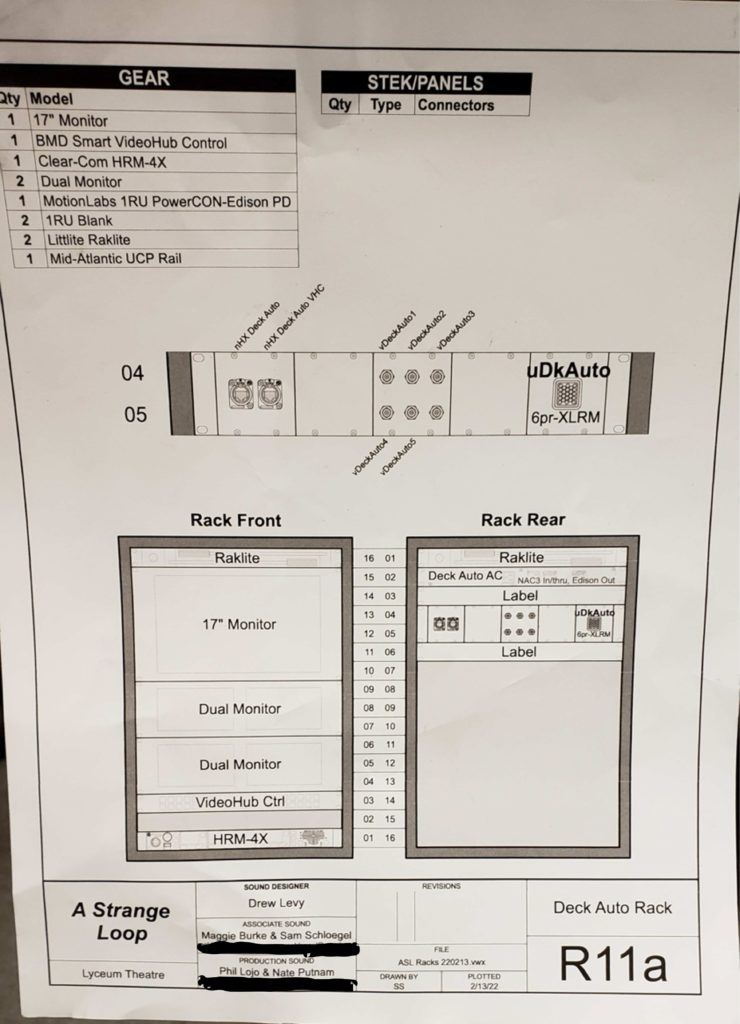
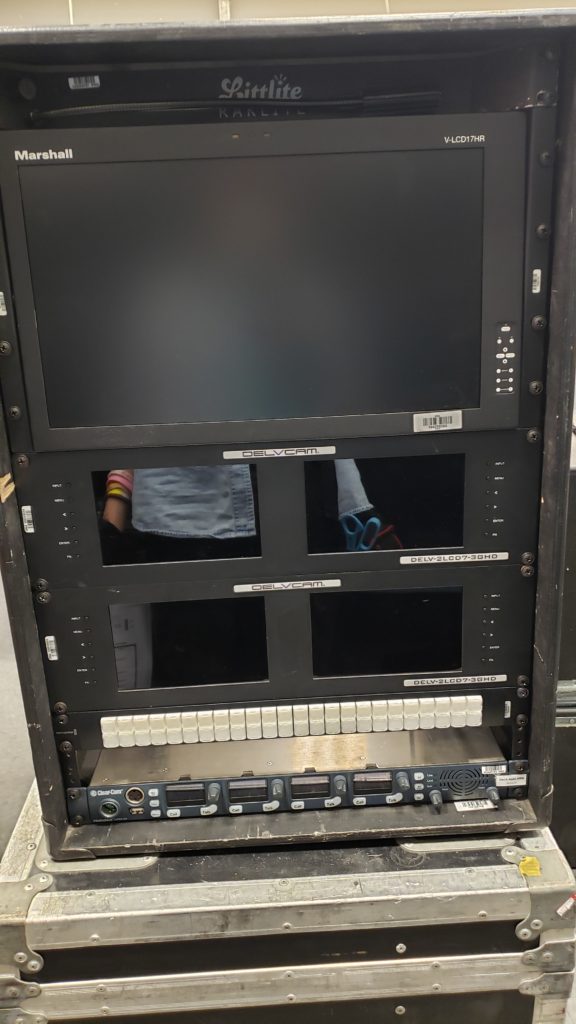
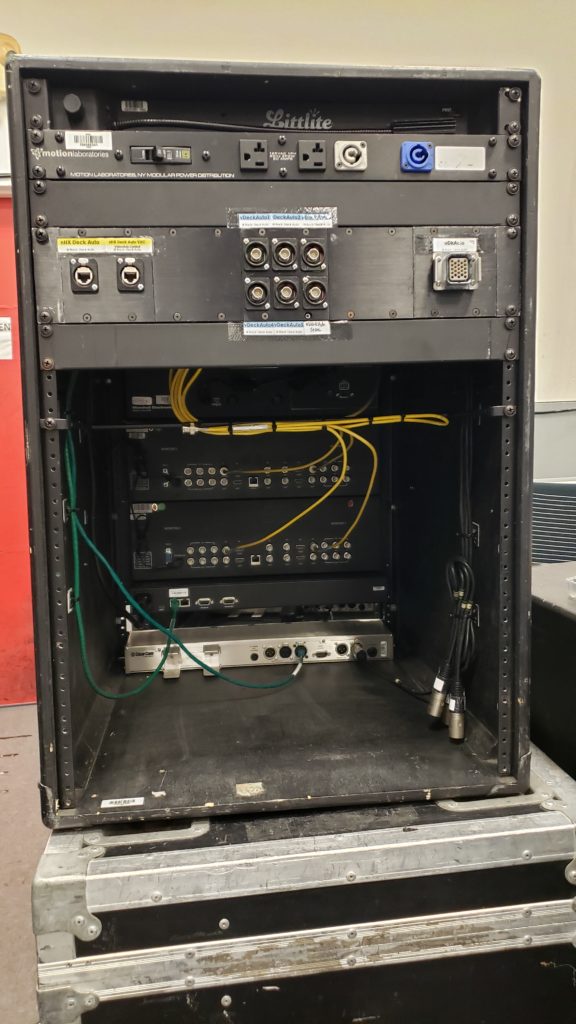
“L: the rack drawing for the Deck Automation rack for the Broadway production of “A Strange Loop”. C&R: the finished rack viewed from front and rear! Rack drawing by Sam Schloegel.”
Phase 2: Testing
Once most of your racks and bundles are built, it’s time to move on to testing! Basically, this will involve setting up a mock layout of your show’s ampland in your prep bay, then running out all your bundles between ampland, Front of House, and the other various rack locations. Simultaneously, your A1 will likely be setting up a mock-up of the mix position, both building FOH racks and setting up the basic console file. Just about everything in your bay should be tested before being brought to the theatre in as close to “show conditions” as you can get it. So, for example, to test the conductor camera, you will plug it in near your mock band area, run the bundle that goes between it and ampland, run out any other bundles out from ampland that carry the conductor image to its various destinations, then plug in every video monitor to make sure you see the image. To keep things neat and clear, a common trick when testing cameras is to stick a post-it in front of the lens labeled with what the shot should be, that way when you have 4 monitors all next to each other you can easily diagnose which camera is “MD” vs “FOH IR” vs “LADDER 3” etc. Additionally, all wired inputs, band mics, monitor mixers such as Avioms, wired and wireless com, and program feed sends will be tested, plus any other equipment that is pertinent to your show’s design.
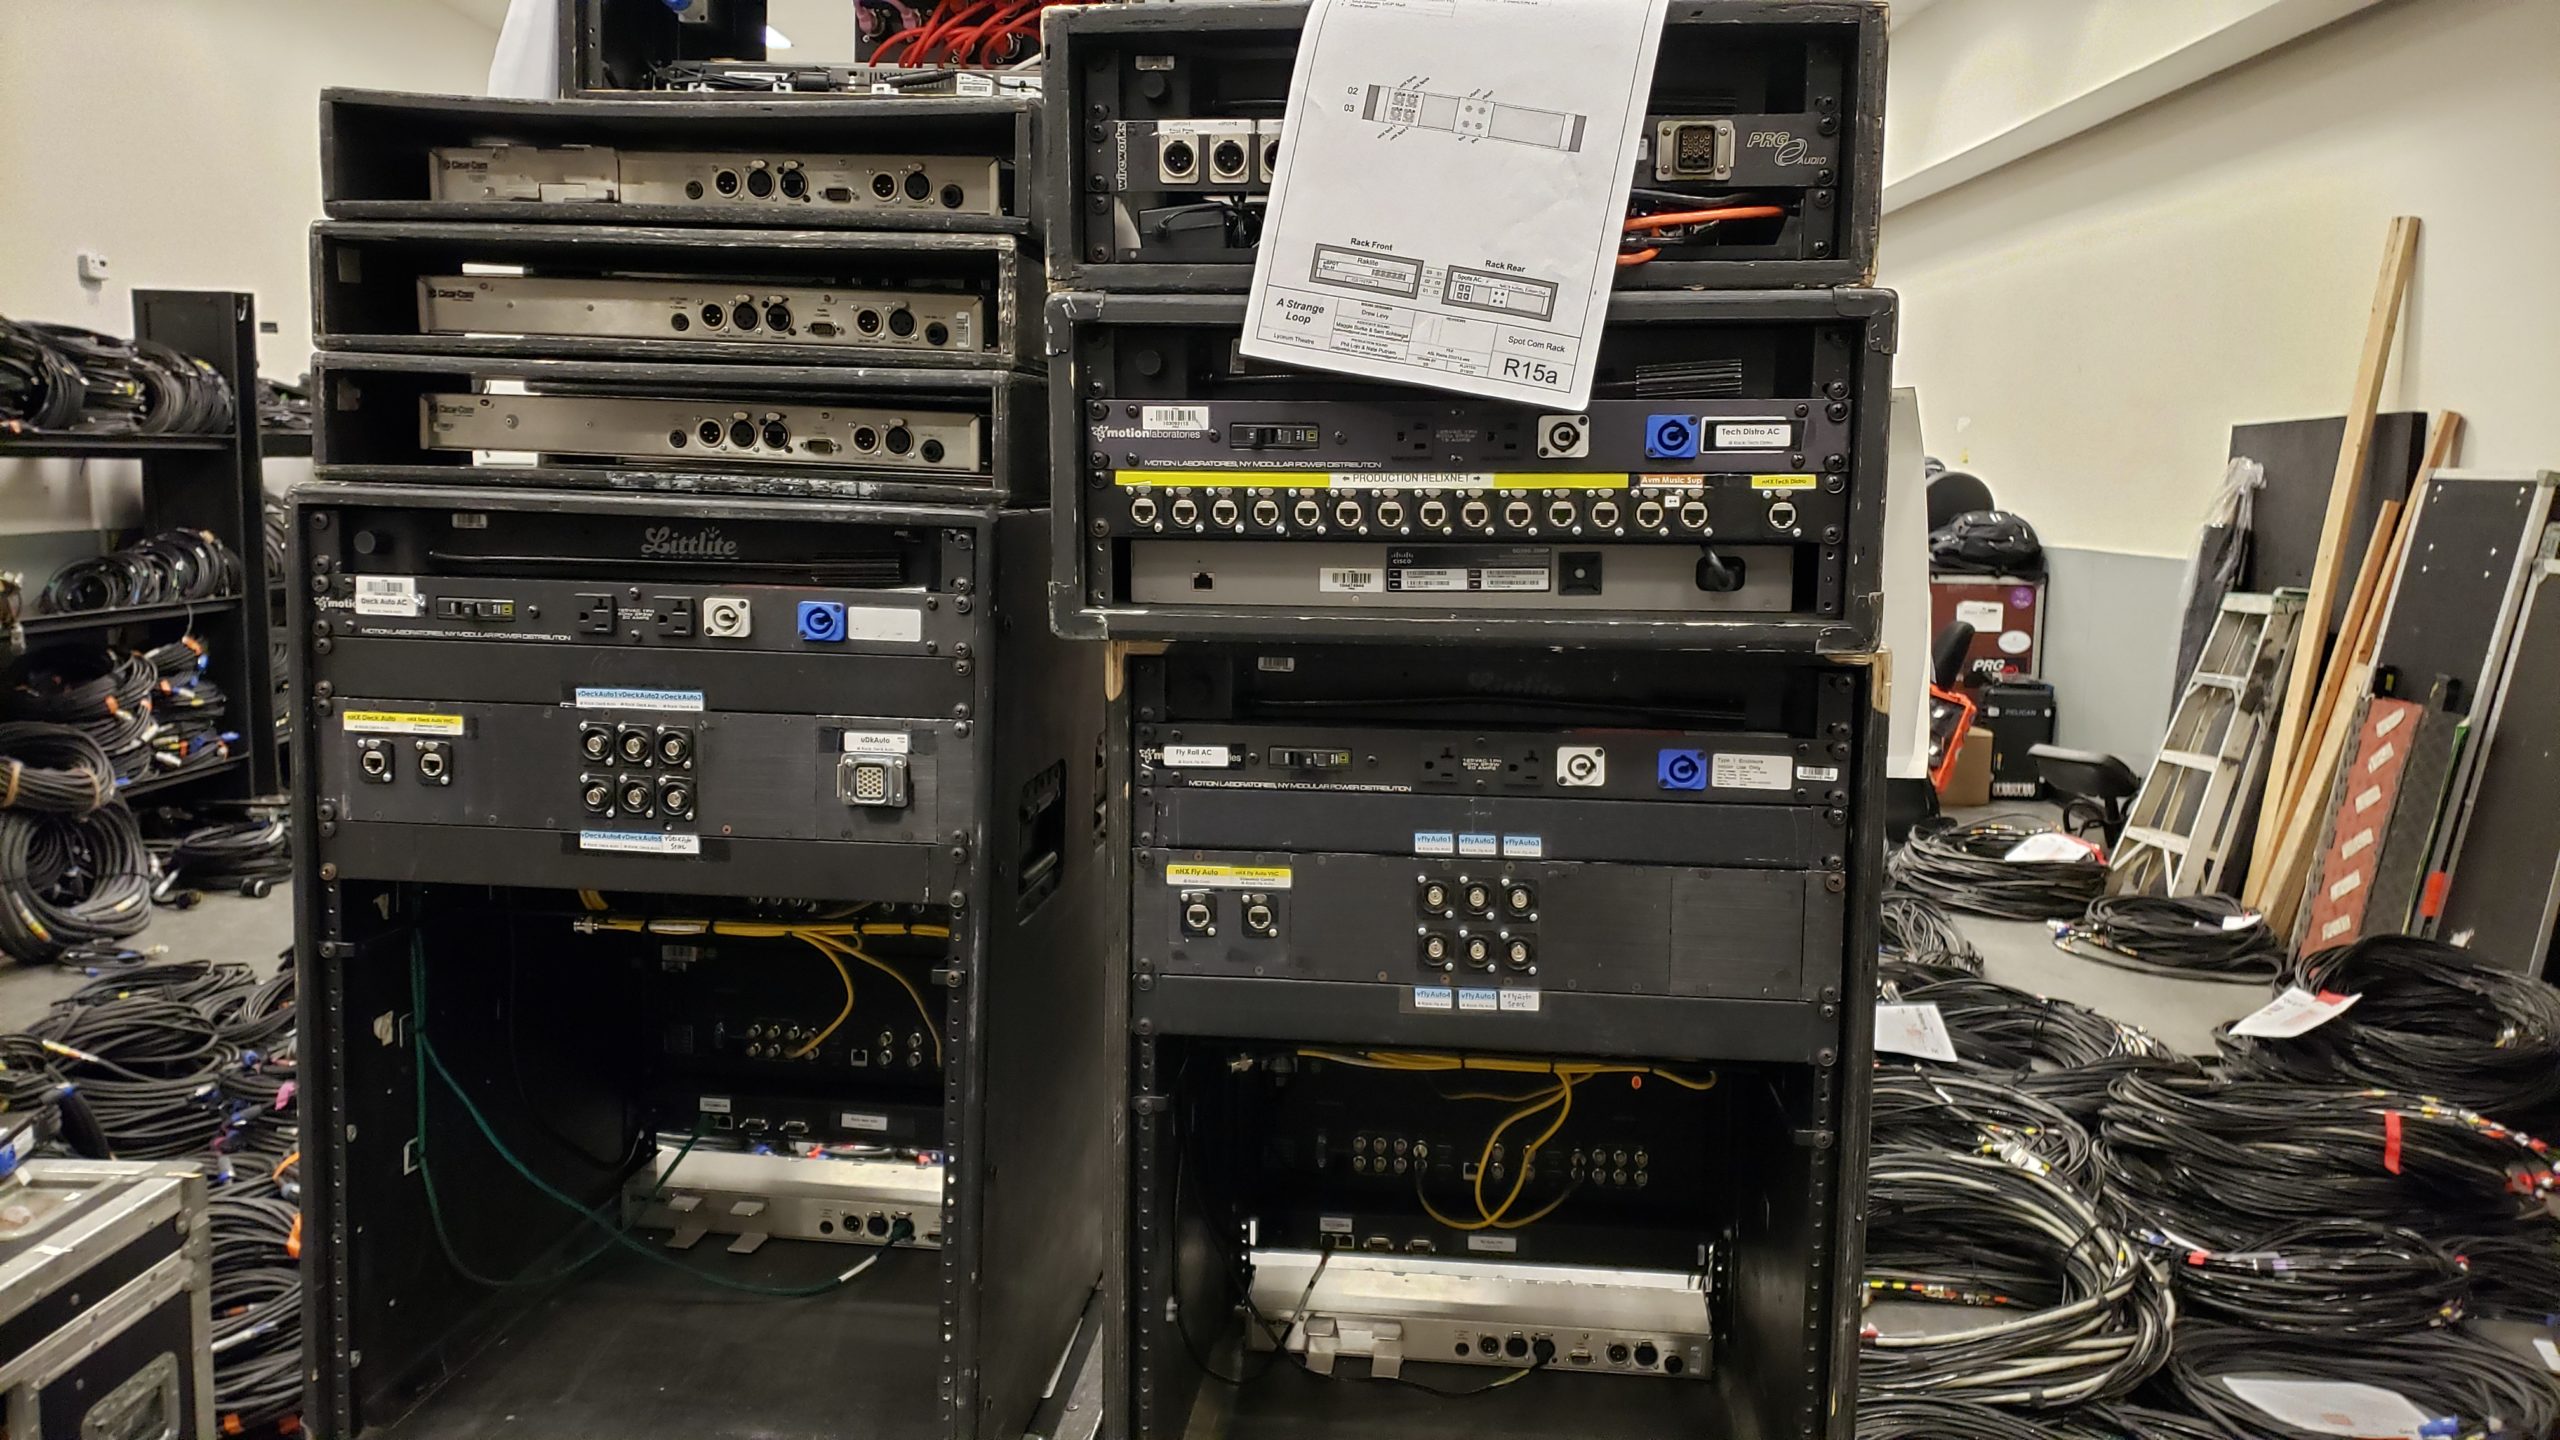
A big stack of com racks for tech rehearsals all ready to be tested!
Phase 3: Packing and Pushing
Finally, your build is coming to an end, and it is time to prepare the gear to be transported to the theatre for load-in! Racks will get packed into foam-lined rack surrounds with wheels so that nothing gets damaged on the journey. Hardware, such as mic stands and speaker yokes will usually get packed into gray road cases known simply as “greys.” Cable will get packed into road cases. Then your Production Audio will advise on where everything should be packed so that each road case can get pushed to the most relevant location upon arrival at the venue, and you aren’t carrying cable from one location to another excessively. Every box will have a box label with a box number, the contents of what’s in the box, and, for large shows, which truck the box goes on. This also helps streamline the load-in process so that things you need first, such as feeder cable, arrive before things you don’t need until later, such as spare cable.
Depending on the shop schedule, the shop may ask you to leave your boxes packed and labeled in your prep bay, or you may push them to the loading dock yourself before leaving on your last day. Whatever the case is, hopefully, you have set the show up for success so that when the truck arrives for the first day of load-in everything is ready to go!
Truck 3 for the Broadway production of “A Strange Loop” is lined up at the dock and ready to get packed!
I hope this article will help you feel less overwhelmed than I did at my first shop prep! Please feel free to reach out with any additional questions you have about this process. If there is interest, I would be happy to dive deeper into any aspect of shop prep in a future blog entry.