There are many audio repair tools on the market, and arguably the most common one is iZotope RX. And no wonder – it gives the user very fine control over audio clean-up. I have come across questions from new users in several internet groups, so I thought it was about time that I shared everything I have learned about RX.
We will cover the basics: the interface, some user preferences, and the order of operations. This article will be heavily geared towards film, radio, and podcasts, but the software is also a workhorse in the music industry – I just personally can not speak to how it is used in music. Lastly, I own RX 9 Advanced, so I am giving advice from that perspective. Take the advice in this article and apply what you can to your version of RX. RX Elements and RX Standard just have fewer modules, so a lot of this will just be extra advice. Older versions will have slightly different algorithms but much of this advice will still stand.
I do want to mention that I am in no way sponsored by, or being paid by iZotope, and in writing this I am not necessarily endorsing a single product. I just consider myself pretty good at using RX and want to share the wealth.
The User Interface
This diagram is simply an overview. Hover over any of these in the software’s interface to get the full name and use of the tools in the interface.
The Spectrogam View
The spectrogram is the “heat map” behind the waveform (when the waveform/spectrogram slider is set to center). It gives a detailed visual about the time, frequencies, and amplitude of your audio all in one graph. The loudest frequencies are the “hot” color temperature. The spectrogram helps to visually isolate audio problems like plosives, hums, clicks, buzzes, and intermittent noises like a cough, phone ringing, sirens, et cetera.
There are some settings that need tweaking for maximum efficiency, and to suit your personal preferences. Starting with the scales on the right-hand side:
The amplitude scale should be set to dB. The other options are normalized 16-bit, and percent. Set the view from the dropdown menu that becomes available when you hover over the scale and right-click.
Right-click frequency scale and select extended log. This is a zoomed-in view that allows you to see more details of each frequency range in the spectrogram.
The magnitude scale should be set to decibel. The settings for the amplitude and magnitude scales ensure the accuracy of decibel readings across frequencies in the spectrogram.
Once the scales are set, open Spectrogram Setting either by right-clicking any scale on the right-hand side and selecting Spectrogram Settings from the drop-down menu or in the menu go to View > Spectrogram Settings.
You can save different presets depending on all the parameters in this window. But I want to draw attention to the color options. The default is cyan to orange. But I recommend blue to pink. The contrast is the most obvious when using this color combination, although it does come down to personal preference. (If you want casual onlookers to think you are dealing with paranormal activity, go with the green and white color map!)
Beware the Dangers of Overprocessing!
Overprocessing occurs when the user runs too many modules or modules at heavy settings. It sounds like added digital artifacts, squashed dynamics, alterations to the original sound, or dropouts in the audio. I recommend three strategies to avoid overprocessing:
Only run the modules you have to. I have some processes I use all the time but might break my own rules if I feel like something needs a lot of one type of module. (i.e., Maybe I skip Spectral De-Noise if the bigger issue is too much room reverb, and I think I may run De-Reverb more than once.)
Run the lightest possible settings. Dial-in what you think you’ll need, then back off a bit, then render the module. It is better to run one module twice with light settings than once with really heavy settings.
Check your work by clicking back in your history window. If any version of the processed file makes the audio sound worse instead of better, undo everything up until that point. After taking a listening break, you might come back and realize that everything you have done sounds worse than the original audio. That is fine. It doesn’t make you bad at audio repair. Take a breath, and start over with fresh ears.
Ultimately, your goal is to keep it natural. Bring out the speech, and do not remove the environmental ambiance altogether. You can try to remove broadband noise so long as you can do so without affecting the audio you want to keep. Even some background noise is preferable over the distraction of noise cutting in and out in the background. Use RX as a tool to make voice intelligible, and assist in blending audio together seamlessly. And note: audio repair tools are not a substitute for a good recording.
Order of Operations
iZotope published this flowchart on their blog back in the days of RX 7. I more or less adhere to it and have managed to avoid creating digital artifacts for a long time.
Here is my current order of operations when repairing audio for podcasts and films. My process is inspired by iZotope’s recommendations, but I have tailored it. All these steps I run in the RX standalone application. I have a slightly different workflow when I connect RX to Pro Tools and will go over that in a future article.
Mixing module: I run this first, and only if the audio is out of phase.
De-hum: Only if there is a hum, and also, the HPF on it is really nice. I tend to apply a 50 Hz HPF and a 60 Hz reduction. But sometimes I might not run this if I think audio will need a lot of processing.
Mouth de-click – use on just about everything. Set to “output clicks only.” Dial-in until I hear bits of words, then back off, and back off some more. Uncheck “output clicks only” prior to rendering.
General denoising, a combination of any of the following but I will not usually run them all
Spectral denoise: Meant to target broadband noise, like hiss, or tonal noise. It tends to be super heavy-handed. Use only if I can grab a sample of the broadband audio so the algorithm can “learn” the noise profile. Set the threshold to taste. I usually do not use a reduction of more than 7 dB, but everyone has their own preference. I have had this module remove parts of the audio of a very dynamic talker, so less is more.
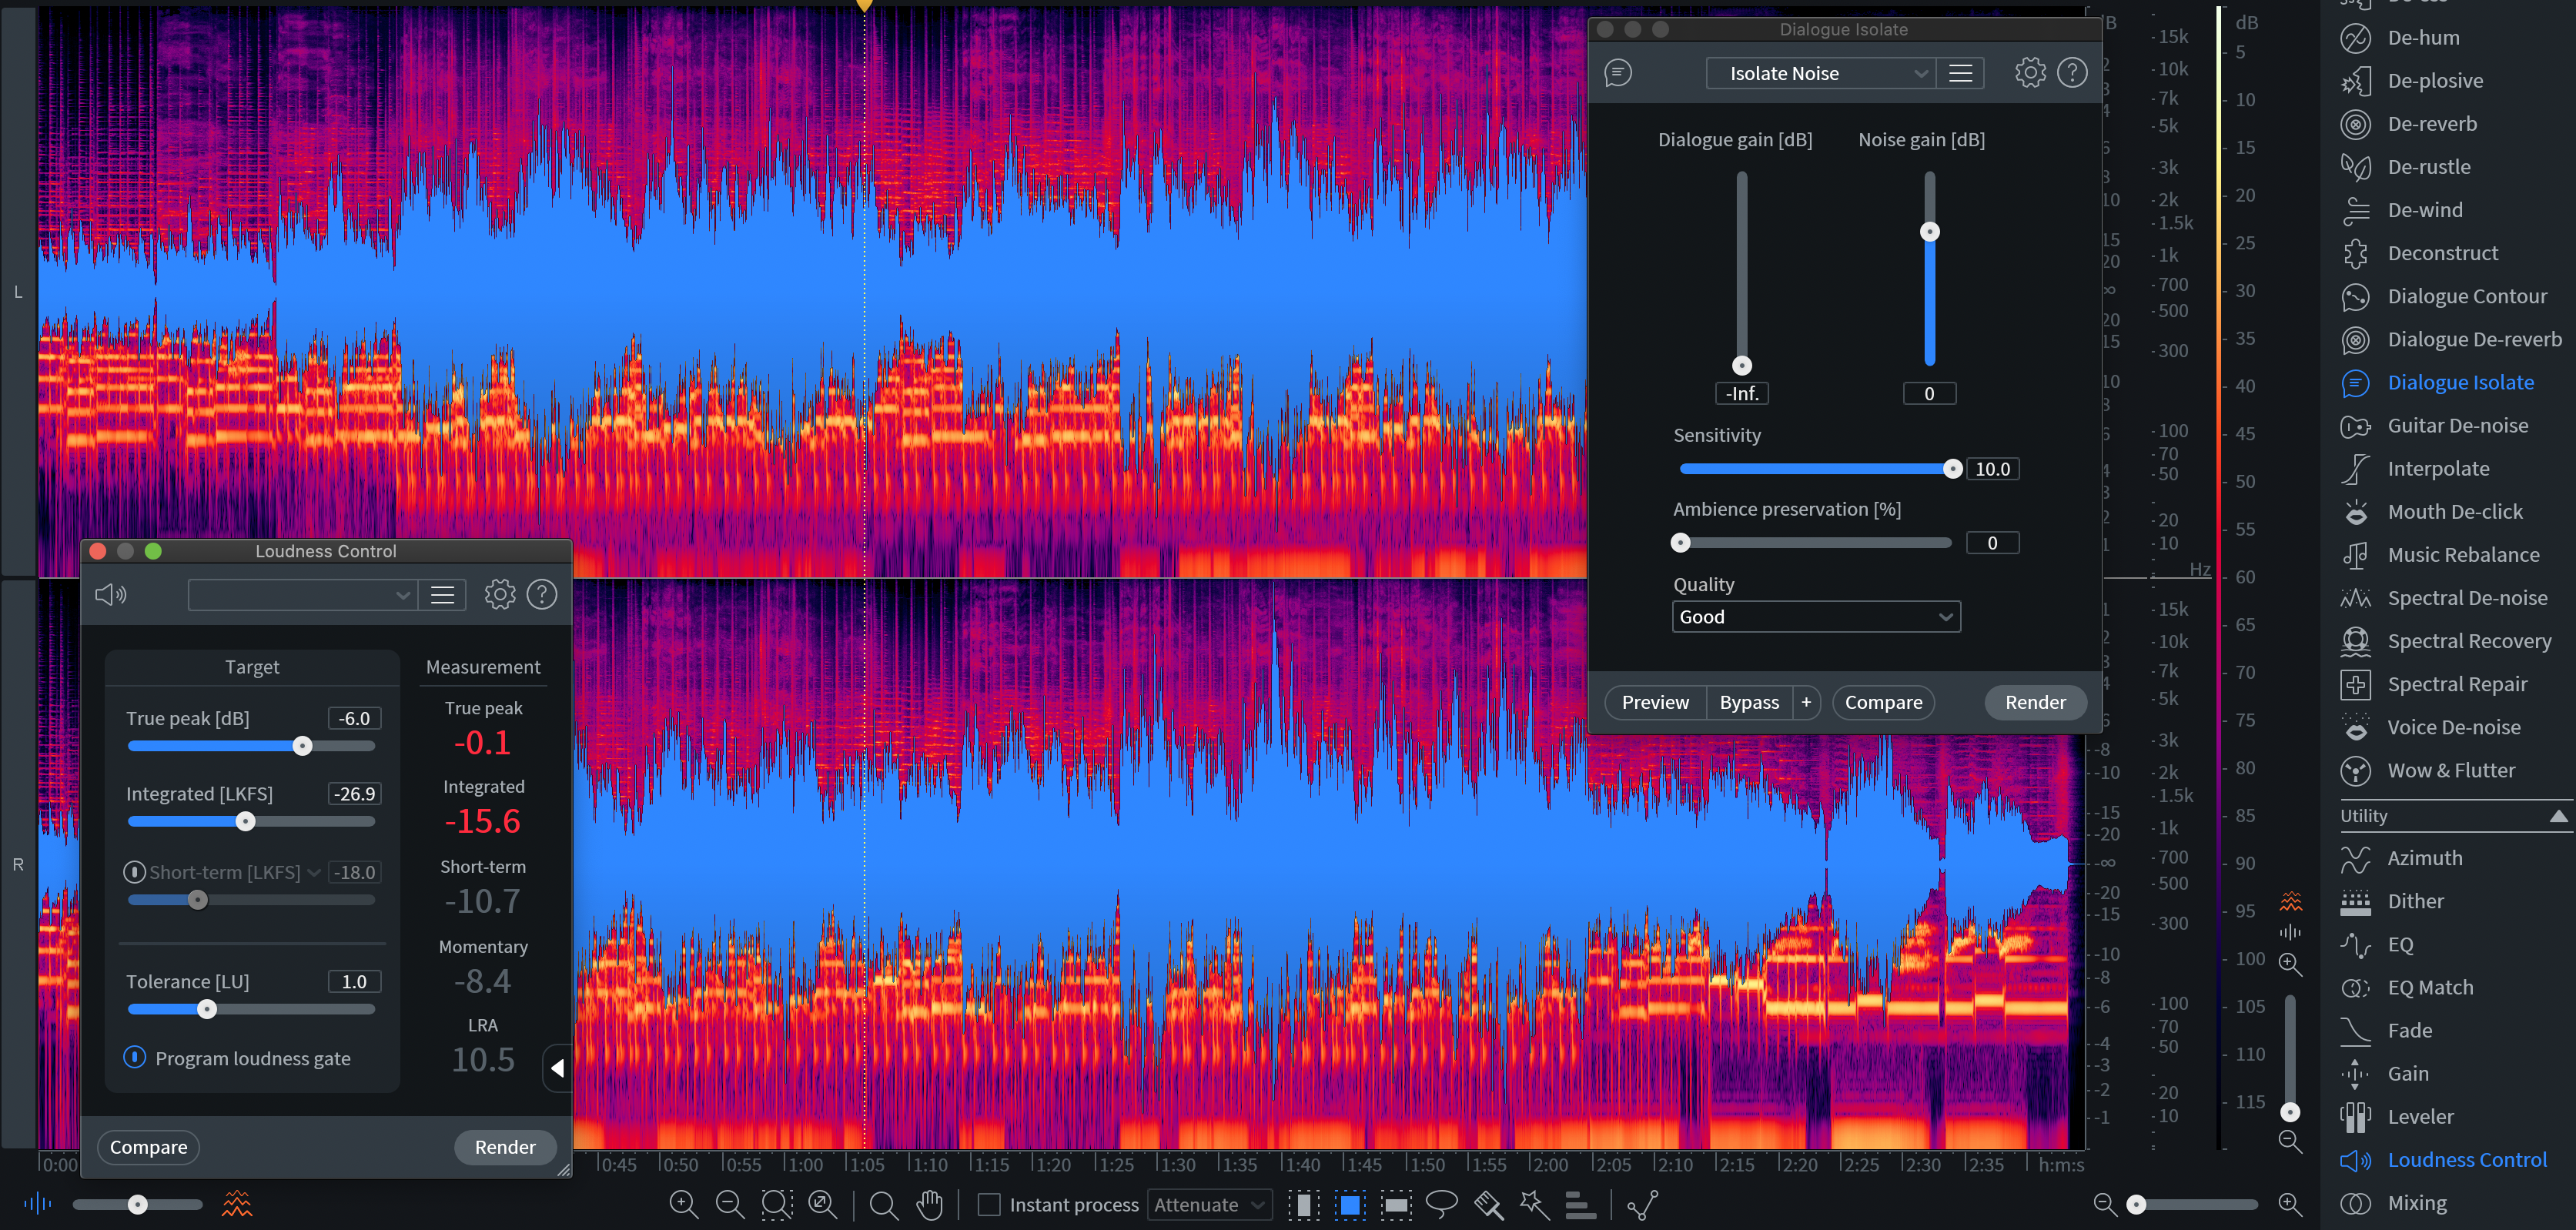
Dialogue Isolate: I use this a lot! Lowers background if not removing it altogether, depending on the content of the audio. Remember to keep it natural. Try to just enhance speech over the background.
Voice Denoise: Can also learn a noise profile from a sample. More gentle than Spectral Denoise. Sometimes I use this as a finishing touch to make vocals “pop.”
Then more manual things like painting out unwanted background sounds, plosives, and clicks that mouth de-click did not catch.
EQ is my last step if I am applying EQ in iZotope.
This should be a solid start if you are just getting started with iZotope RX. Remember to keep the audio natural and your goal is to enhance the audio quality. Although there is also creative potential with all of these tools! But having a foundational understanding will empower you to take it to a creative level. In future blogs, we will cover removing unwanted noises by hand and connecting RX to your digital audio workstation.