When I listen to my older productions, some of my first recordings on Logic, one thing that sticks out a lot to me is the vocal. This happens a lot when I listen to “young producers”—people interested in making records and being in charge of the record making process, as opposed to those that make demos and want to find a producer to collaborate with. The vocal rarely sounds as good as it could, and it often goes unnoticed.
Before continuing, I want to mention a few things, even if they seem obvious to some. First, not all music is vocal-centered. There is music with no use of voice at all. There is music with the use of vocal samples which are treated as a riff similar to how one might treat a guitar part. There is music where the voice and instrumentation are treated as two parts with equal status which weave in and out of each other.
I would also like to acknowledge that the approach to recording vocals varies greatly according to the style of music and production. One would approach recording the featured soloist of a choir very differently from how they would approach recording a singer and her acoustic guitar, and differently still is the approach one would take to recording the vocal for a pop song…and even in pop, there is a big difference between a Selena Gomez vocal and an Adele vocal. When I say “recording” here I am referring to both the engineering process (type of microphone(s), mic placement, use of compression and EQ) as well as the vocal production process (type of performance from the vocalist/s, approach to comping, approach to tuning*, approach to layering, i.e., how many Selenas are we really listening to in the verse versus the chorus; are they singing the same notes or are they harmonizing; are they all natural or are they effected in different ways and playing more autonomous roles? etc.)
I have yet to come across any reading or class that goes into depth about these styles and processes, which is surprising because it is something all listeners of music experience. We know quality when we hear it, and I think most musicians are genuinely interested in the record making process. Even if they would rather be playing, they understand it is to their advantage to know something about making records. I’m sure there are Tape Op articles about people who specialize in vocal production, and there may be a class in a university somewhere that touches on vocal production in all of its complexity (let me know! I’m curious to learn how they cover the topic!) Mostly though, I think many producers and engineers learn it by way of doing, which is fine. But what about those of us who aren’t assistant engineering (yet)? Can we study this as a subject and not as a specific recipe?
Here is a basic overview of vocal production. Depending on your level of experience, it may be worth watching a few YouTube tutorials on comping and tuning in your specific software. Vocal production is super fun, but it’s also tedious. It’s not for everyone, and it takes lots of practice. I hope with this jump start you are encouraged to give it a shot, dig in deeper, get some new skills under your belt and create dope vocals!
Step 0 is basically, decide what kind of vocal you are going to make. If you are recording a group of vocalists, decide if you want to record them together or separately, ask yourself why (sometimes the answer will be obvious). If you are recording a solo singer with some layers and/or background singing, it helps to do a little research and have a few existing recordings to use as a reference for the sound you are going for. It rarely works to have only one reference; it is more useful to have a few and create something from a place of cross-pollination. I’ve noticed that after years of being inspired by others’ vocal production techniques, I often don’t need to listen to be using something as a reference in order for it to be playing that role—it is just part of my tool belt.
Step 1. Use the best mic and preamp possible.
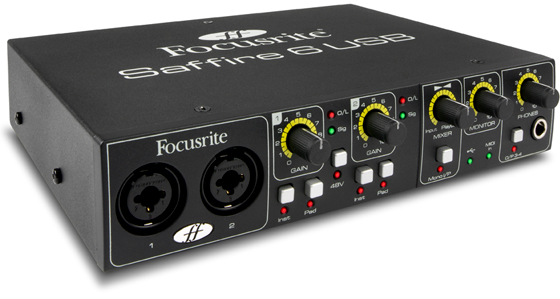
- Just starting – SM 58 and Saffire 6 (these can also become your show gear once you are ready to upgrade!)
- Pretty Serious – Apogee Duet and Rode K2 or similar
- Very Serious – Telefunken U47 and Universal Audio 6176
-

- Shure SM58
-
- Focusrite Saffire 6
-
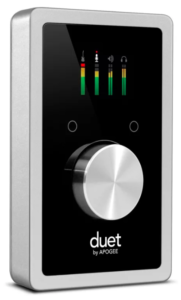
- Apogee Duet
-
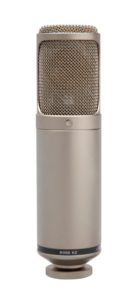
- Rode K2
-
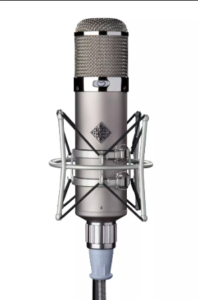
- U47
-
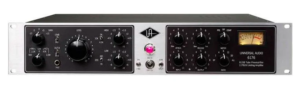
- Universal Audio 6176
Step 2. Listen to who you are recording.
What is interesting about their voice, from a sound perspective? Is it booming and loud? Does it crackle on certain vowels? Adjust your EQ and compression settings to best capture these elements you want to emphasize.
Step 3. Now listen to them again from a performance perspective.
Does the way they inhale before this one phrase feel intentional and emotionally compelling, or is it sloppy and distracting? Do you believe what they are singing? Is there consistency in their intonation/pronunciation, and how much consistency do you want there to be, AND WHY?
Step 4. Record the parts you need in a space that sounds good.
Get as many takes as you need to composite a solid main vocal. Do the same thing for a double of that main. It’s nice to have a quality double on hand for when you might decide you want to use it. Grab an octave down or octave up from the main if possible. If it’s not possible for the singer, but you want the option, grab another double. You can use a pitch shifter in your DAW to fake an octave up or down (or to play with and effect in other ways, such as a vocoder sound tucked away behind the main vocal for some added texture). Grab any background vocals you want, and remember that sometimes its fun to record these with the vocalist/s further away from the mic than they were for the other parts. Grab any harmonies you want. Record harmonies until you have too many harmonies recorded. You can take some away later. If you want, record your vocalist singing ad libs through the entirety of the song, at least one time through (three is the magic number here).
Step 5. Make good comps.
A good comp contains the best moments from all of the takes. It checks all the boxes of a good vocal recording—quality in fidelity, quality in performance, a lens into the singer and their ability to use their voice as an instrument and/or story-teller.
Step 6. Tune with integrity.
Don’t knock it ’til you try it!! Tuning with integrity adds a beautiful glistening sheen to a vocal, and is absolutely necessary if you want to make pop records. Yes, even the best singers of today are tuned, but with integrity. What does this mean? It means we use tuning to emphasize the things we worked on in steps 2 and 3. If a vocalist sang a word in a way that was so amazing that you want to use it, but is off-pitch in a distracting way, you can adjust that specific word. Take care of those instances, and then treat the rest with a light setting.
- Just starting – built-in tuning of Logic X
- Getting Serious and Very Serious – Waves Tune, AutoTune, Melodyne
Step 7. Create a rough mix (or a real mix if you are a mix engineer too!)
Your references will come in handy here as you will want to communicate the desired final result to whoever is mixing your record.
Get your relative volumes in order. How loud do you want your harmonies to be in relation to your main? Get your textures in order. Are there any effects like reverb or delay that you would like to add? Are there some harmonies that you thought you liked, but you realize now the song sounds better without them? Compare yours to your references. What work do you still have to do to make it stand up next to them? Do what you can. Push yourself. Then save up for your next piece of gear so you can make even more music!!
*There is quite a bit of literature on the history of Autotune, it’s relation to the vocoder, and how artists like oft-cited Cher and Kanye have used extreme settings for specific effects. What we don’t see as much of is a practical, reasonable description of the role tuning plays in the record making process for many, many producers who do NOT use it in extreme ways. I guess the latter isn’t all that interesting for people who don’t work in music…