
Today I’m going to be discussing a virtual instrument called Gravity by the folks at Heavyocity. It’s loaded into and powered by Kontakt Engine by Native Instruments. While Gravity itself doesn’t have a free version available, Kontakt is available as both a free version and full version. Gravity is an incredible, extensively customizable virtual instrument designed predominantly for use in modern scoring. It’s comprised of 4 instrumentation sections: Hits, Pads, Risers, and Stings. Each of these 4 main sections breaks down further into complex blends of the loaded-in beautiful, high-quality samples within the category as well as the simplified individual samples for additional customization with the effects and other adjustable parameters.
With these instruments, Gravity allows you to do a whole lot musically for composers who would like to utilize it in developing a full score, but it also can be used for some truly awesome sound designing purposes. Especially when it comes to cinematic style accents, hits, and synthy ambiances, which, as a sound editor, is what I personally have found myself using Gravity for the majority of the time.
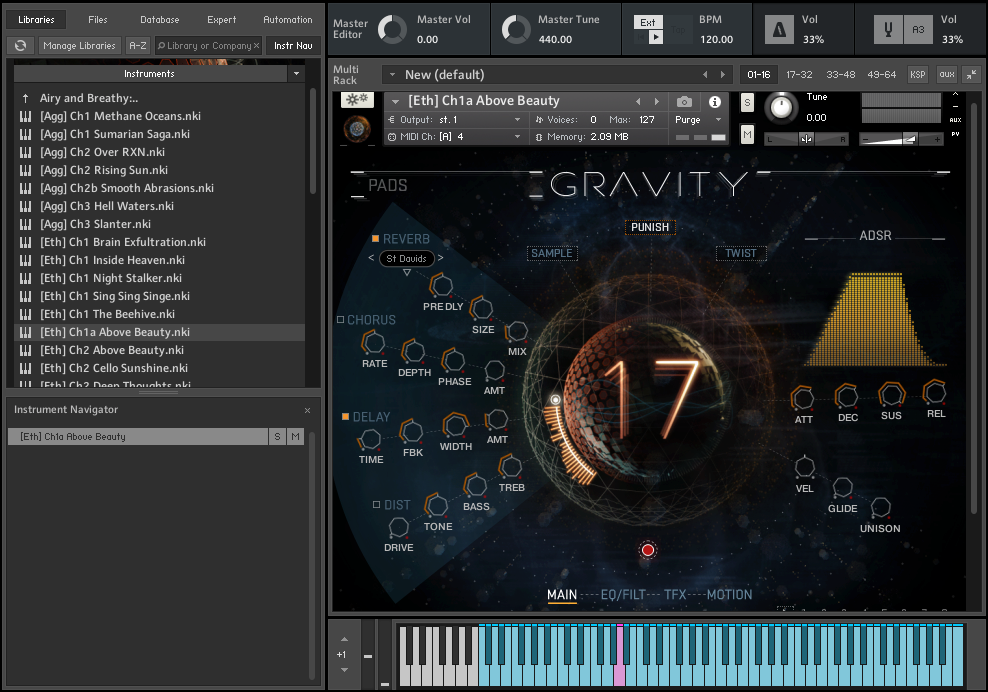
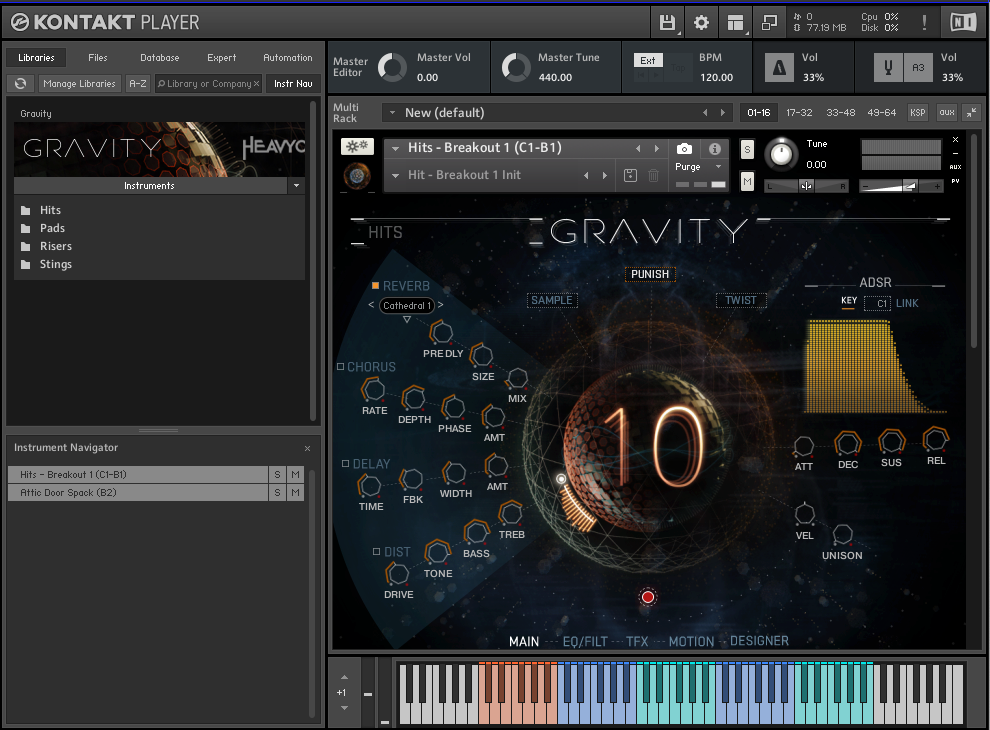
Gravity’s MAIN User Interface For Pad Instrument Section
After having initially selected which instrumentation element you want, each category of instrument breaks down into further categories to narrow down which instrument feels right for the moment. The only section that doesn’t do this additional categorical organization is the Hits partition. At the bottom of Kontakt, just below the UI, it also displays an interactive keyboard you can use if you don’t have a MIDI board to connect to your system, which you can also play by mouse click or by utilizing your computer keyboard. It highlights which keys are loaded with samples for each instrument selected as well as breaking down similar groups separated by color-coding.
There is a powerful and extensive variety of effects available to include (if desired) to whatever degree the user prefers, which are also broken down into multiple pages that you can flip between by clicking on the name of each page along the bottom of the UI (just above the keyboard).
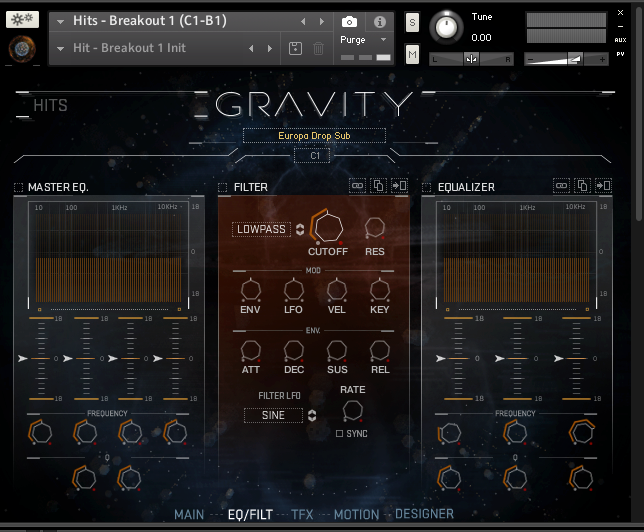
Gravity’s EQ/Filter
In the MAIN section, there is Reverb, Chorus, Delay, Distortion, and Volume Envelope with ADSR parameter controls (attack, delay, sustain, release), as well as a couple of Gravity specific effects. These include Punish – which is an effect combining compression and saturation adjusted by a single knob, and Twist – which manipulates, or…twists…the tone of the instrument which you can animate to give movement to the tone itself. There are also performance controls available like Velocity, to adjust the velocity of the notes, Glide, to glide between notes played, and Unison, which increases or decreases layers of detuned variations of the notes played to create a thicker, more complex sound.
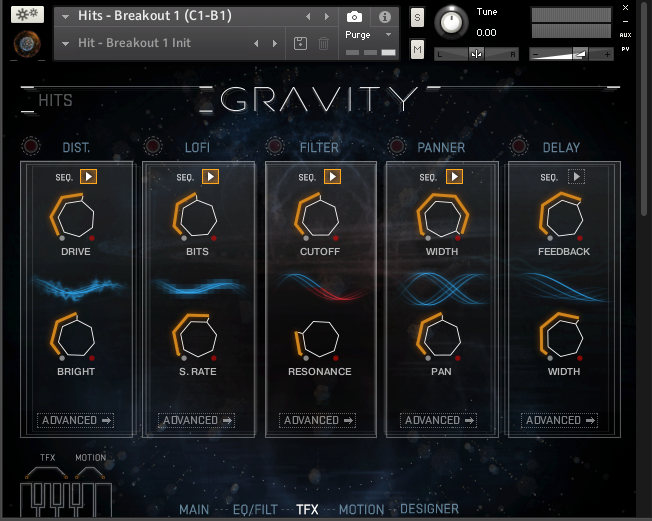
Gravity’s Trigger FX
There is also an EQ/FILTER page which of course provides a complex equalizer and variety of filtering parameters, a TFX (Trigger FX) page to temporarily alter sounds by MIDI trigger with Distortion, LoFi, Filter, Panning, and Delay. Under each trigger effect is an “Advanced” button where you can further customize the parameters of each trigger effect. Lastly, there is a MOTION page that has a modulation sequencer that adjusts volume, pan, and pitch of the sound triggered over time, and a randomize button that randomizes the variety of motion control and motion playback parameters. With this variety of motion controls, you can create patterns of motion to either utilize as an individual setting or to link a chain of motion patterns. To add to all of that, there’s an editing sequencer, and each pattern contains a sequence of volume, panning, and pitch parameters. This series of adjustable bars allows you to create a sequence of patterns. With all of these parameters to manipulate as little or as much as you’d like, thankfully, they have the option to save, load, and lock motion controls for easy recall when you find a really cool means of motion manipulation that you’d like to bring back (without taking the time to fine-tune all of those parameters all over again).
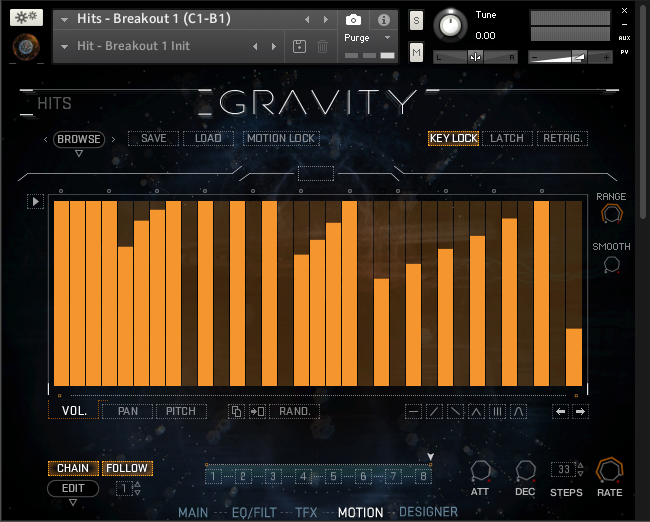
Gravity’s Sequencer
There is one instrument section that’s a little bit different from the rest and has an additional page of customization options that the others don’t. That’s when you go diving into the Hits. In the Hits section, there are multiple options of what they call Breakouts, which are an extensive array of preloaded multi-sample triggers that implement a whoosh or synth rising element that builds and builds until slamming into a powerful, concussive cinematic impact before trailing off. You can use these individually or blend some of them together for a quick means of generating complex, powerful cinematic accents, and sweeteners. These are also all broken down separately into the individual samples to trigger the impacts themselves with each MIDI keyboard note, the sub-elements for a nice touch of deep BOOM to rock the room, the tails to let the concussive hit play out in a variety of ways, and the airy/synth whooshes to rise up into the booming impact. Included in the four Breakout Hits instruments, there’s the additional page of customizable elements added to the UI that I mentioned at the start of this paragraph called DESIGNER. Because the Breakout Hits instruments each trigger a combination of this aforementioned mix of cinematic elements with each keyboard key note, inside the Designer tab, you’ll find that it allows you to modify each of those elements/samples to customize the combinations of triggers.
Hits Instrument Section
Now, after that extensive technical dive into everything that this AMAZING virtual instrument has to offer, I must say, Gravity itself is actually surprisingly easy and user-friendly to navigate and play with. It has definitely become my personal favorite tool to create a variety of cinematic style elements and accents. In being so user-friendly, once you’ve got it loaded up and either connected your MIDI keyboard or setup your computer keyboard to use in its place… simply select an instrument from the menu and you’re good to go! Have fun playing and exploring the expansive additional effects and features I’ve detailed above!