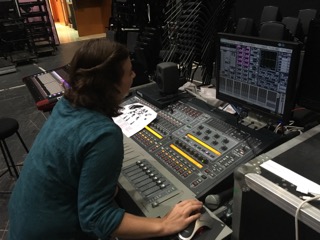
This month we welcome a new Omani team member to our department. With only a few weeks left until the beginning of the season, we are focusing on desk training. In particular, programming for monitor engineering. This article can be used as a tried and tested teaching aid for those new to monitors.
We usually use our Digico SC9 or our Venue SC48 for monitors. This step-by-step guide can be used for any desk.
1. Get a copy of the rider. Check all the stage plans are clear and that you have enough information about who needs what mix and where. It is best to clear up any ambiguity at this stage so that your programming can be as ready as possible for when the band arrives. At the opera house, we always have a senior member of the department in charge of a show who is in communication with the visiting band. This can be an extremely difficult job as quite often English isn’t the first language of the visitors. We also have at least two members of the department assigned to the stage.
2. Use a template or set up a new show file to save your work to! Sounds obvious but during the season quick load-ins and outs can often mean that files are not saved accurately. We aim to back everything up to a USB stick too. Sometimes we may need to access files after a company has departed so this is important! Good practice is also crucial to our teaching objectives for the Omanisation programme.
3. If necessary ensure that the desk is set up in the correct configuration for inputs and outputs. Both our desks can be changed during programming but it is good to think these things through before you start. Using the stage plan and rider information, label all the inputs. Don’t forget the talk-back mic and FX returns. Check your gain structure and that all EQ’s are flat and compressors and gates are switched off. It is worth doing this now rather than trying to troubleshoot later.
4. Now label all the auxes. We like to add an extra two or three auxes for effects. Depending on the desk you will also need your own monitor aux – (cue).
5. Patching next. Depending on your set up check your desk patch. We have an optocore system so the desk is fed by madi. This should be nice and straightforward!
6. Now go back to your auxes. Referring to your rider you can feed a few inputs to mix auxes in preparation. For example, the drummer will probably want some kick in his sub. Less is best at this point.
7. Set up your FX auxes. We go for a couple of different reverbs. In most cases, the internal effects in the desks are quite ample. Sometimes bands ask for specific effects units. The set up is exactly the same procedure.
8. Use the FX return channels that you labeled on your inputs earlier. Remember not to send the FX back to itself (awful, awful feedback… just don’t do it).
9. Check and save!
Other things to consider:
– Digico (and other desks) have an iPad app so that you can control the desk remotely. This is useful after the soundcheck. You can walk around and make adjustments as the band are playing.
– In conjunction with this, consider having the monitor mix on a wireless belt-pack so that as you walk around you can solo mixes and actually hear what the musicians are hearing. This is especially useful to us when there is a language barrier! Up can surprisingly often be misconstrued as down!
– You might also want to insert a graphic EQ over each aux send. This will give you a bit of fine control if needed.
