Empowering the Next Generation of Women in Audio

Join Us

Sound Engineer Needed for Independent Film – Los Angeles

Overview: Filming a SAG Ultra Low Budget short film called Yegua to later be developed into full length feature. The film revolves around Penelope ‘Yegua’ Moreno, a high school wrestler on her way to being the first girl in history to win a State Championship title when she is diagnosed with breast cancer. It’s a naturalistic, human film shooting in East Los Angeles and Ventura County. Our mission in the film is to de-victimize our hero, tear down all labels, and build up a champion.
We are a mostly hispanic cast and a crew of NYU film graduates looking to fill our remaining positions with capable and professional women who can lead our on-set Audio Department. Our on-set Audio Field Recording Artist must be experienced in capturing perfect dialogue, wild track, ambience and field foley for post-production mix. No post mixing experience is necessary but could be a bonus as we will be hiring an audio mixer when entering post production in October. The position is payed based on Artist’s quote so we are accepting all competitive bids. Must be willing and capable of putting together her own team and crew (any necessary gear or additional crew will be payed for by production based on discussion).
This is an opportunity for an up and coming sound engineer to be a part of a special film with great ambitions, high future potential to be developed into a feature, crewed by a diverse and passionate young bunch. We are accepting all bids and would be honored and privileged to collaborate with any capable professional ready to lead her own department.
Shooting September 15-25 in Los Angeles and Ventura County. Please email all bids, sound reels and submission to yeguafilm@gmail.com 

Los Angeles Intern Needed

PrintTime: Every Sunday

Call time: 7am

Band sound check: 9:30am

Service: 11am

Place: Paul Revere Charter Middle School

1450 Allenford Ave. Los Angeles. CA 90049

Console: Behringer X32

You will be assisting SoundGirl Member and Head of Audio Kate Lee. You will gain work experience setting up and tearing down backline and sound for the services working alongside Kate.

Candidates should have basic audio knowledge – signal flow, mic placement, wrapping cables, etc. This is not a paid internship – but you will gain work experience. Candidates should plan on interning for at least six weeks.

If interested please send cover letter and resume to soundgirls@soundgirls.org


Theatre Sound Heroes: Overview of the role of a Production Engineer


There’s an unsung hero in the world of theatre sound: the production engineer (PE).

As shows get bigger, sound systems become ever-more complex. Someone on your team has to make it all work together, and that person is the production engineer.

Put simply, the production engineer “works with the sound designer to physically and logistically realise the entire sound system from the microphones to the speakers and the kilometres of cable in-between” (Gareth Fry, Theatre Sound: Who Does What?, Lighting and Sound International, April 2015).

Every designer will approach a show from a unique perspective. Some designers focus on the creative aspect; others have a more practical hands-on approach. Most designers will have a definite idea of the speakers and other equipment they want to use and where. The PE makes this happen to the best of their ability and also suggests modifications to make it reliable, effective and adaptable enough to handle every quirky requirement that may come up during tech.

As with sound designers, PEs have different specialties, so it’s important to choose one that suits your show and the way you work as a sound designer. If networking is a crucial element of your show, it won’t make sense to hire a PE who is a master rigger but less knowledgeable when it comes to media networking technology.

Ideally, the PE should get involved with a show at the same time as the sound designer so that the sound design process can be as open as possible with all the creative team. Discussions with the production manager about the budget and integration of the speakers (and associated cabling) within a set are of particular importance.  Involving the PE early on in the process can also help pre-empt tricky situations down the line, for example, when a speaker position doesn’t work for the lighting designer.

The first job for a PE after initial discussions with the sound designer is to look at the size of the venue or space where the show will be staged. They’ll consider what the show needs, what the sound designer wants, how much it will cost, and build a system spec from this. As well as evaluating potential speaker positions, the PE also has to factor in whether the venue can physically support and accommodate the system. Where will racks and radio worlds be stationed? Is there enough power available where it’s needed? Where can cable runs go? Is the proscenium arch stable enough to support the hangs – an important consideration when you’re dealing with theatres that can be 100+ years old, as is quite common in the UK.

Once a system spec has been drawn up, it goes to the production manager to tender out to hire companies.

Having solid technical sound know-how is an indispensable part of a PE’s job. Just as important is their ability to manage relationships with three key stakeholders: the sound designer, the hire company, and the manufacturer(s).

The ideal relationship between a sound designer and PE is two-way. The sound designer needs to communicate their requirements so that the PE understands the show from the creative aspect as well as from a technical perspective. This way they can make informed decisions about the system without involving the sound designer at every stage. Is imaging or coverage more important for the show, for example? Does the design need to allow for high SPL, or is it more important for the speakers to be discretely integrated into the set? The better the PE understands the show, the more trust the sound designer will have in their ability to realise the design with the hire company.

The relationship between the hire company and the PE is important, as a lot of what the PE does is dictated by how the hire company works. Production engineers will, therefore, prefer to work with hire companies they know. Often a single hire company won’t be able to offer the exact system spec, in which case the spec will be redrawn and hire companies will suggest alternatives. It’s a balancing act: the PE needs to include all sound (and related AV and stage) elements of the show within the spec, and they also want to work within the resources of the hire company.Kirsty-Gillmore-Aug2016-pic2

At this point, a PE may want to involve different manufacturers to find alternative solutions for aspects of the design outside of the resources of the hire company. Keeping clear lines of communication with manufacturers is important. They can offer product-specific support as well as solutions to problems, based on their in-depth knowledge of their products. A PE may like to involve a particular manufacturer in the system spec to help them create a kit list before it’s sent to hire companies.

Of course, everything revolves around the budget. One of the central roles of the PE is to make practical decisions given the resources they have at their disposal. They may need to negotiate a compromise with the sound designer, convincing the sound designer of an effective alternative approach.

Once the spec is approved, the next step is for the PE to build the kit: stage racks, fly racks, multis, looms, the Deputy Stage Manager (DSM) post,  radio worlds and more. As well as realising the agreed spec, the PE must allow for changes that will invariably happen during the technical rehearsals, e.g. extra runs in the multicore for additional speakers. Then there’s evaluation, testing, and installation in the space, which may take days or even weeks for a large show. Followed by more testing, modifications, expansions and problem solving during the tech and dress rehearsals and previews, and finally, sign off when the show is up and running.

As you may have gathered, a great production engineer is worth their weight in gold. So if you’re a current or aspiring production engineer, let me know! I may have a job for you in the future.


Soundgirls.org Sound System Optimisation Training

PrintSoundgirls.org is pleased to offer members a two day Sound System Optimisation training seminar from September 20 – 21 2016 in Copenhagen, Denmark.

Venue: Amager Bio, Øresundsvej 6, 2300 Copenhagen S, Denmark http://www.amagerbio.dk/

Dates: Tuesday September 20 12:00 – 20:00 CET and Wednesday September 21 10:00 – 18:00 CET

This course will be taught in English.

Course Content: The two-day course will include both theoretical and practical sessions. Attendees will learn basic measurement and operational concepts through FFT-based (dual-channel) acoustical analysis software platforms, including how to measure and analyse the frequency content of audio signals, study the timing and frequency responses of electro-acoustic systems, and perform basic room acoustics analysis. We recommend that participants download and review the Smaart V8 User Guide before attending the course and bring along a laptop or pen and paper to make notes.
Instructors:

Theis Romme, project manager at Victory Tour Production and system engineer for Volbeat. Theis is a Meyer Sound consultant and is considered an expert on the SIM3 audio analyser system, as well as Smaart V7 & V8 systems.

Rasmus Rosenberg, freelance sound engineer and workshop teacher in system design and optimisation for Rhythmic Music Conservatory (RMC) in Copenhagen and KTS (Copenhagen Technical School), among others. Rasmus is a Rational Acoustics Smaart super user, involved in program creation and assisting certified Smaart instructors and distributors. Since 2008 he has had the privilege of being a beta tester for Smaart versions (v7 and v8) before they hit the market.

Cost: The cost for the training will be £50GBP (around €58EUR) per person, payable by Paypal. This will include lunch and tea, coffee  and refreshments for both days. Attendees will be responsible for their own travel and accommodation.

Attendees will also have the option of attending a group dinner at a Thai restaurant on the Tuesday night following training. The cost will be €15EUR per person, excluding beverages.

To reserve your place on the course, please email soundgirls@soundgirls.org with the following details:

1) Name of attendee

2) Your arrival date and time in Copenhagen

3) If you would like us to arrange accommodation at a private residence (see below under Accommodation.) Please note that you may need to share a room with another Soundgirls.org member.

4) If you plan to attend dinner on Tuesday night

Places on the training course are limited to 15 people. We recommend you email soundgirls@soundgirls.org promptly to guarantee your place.

This training course is an exclusive offer for members of SoundGirls.Org. If you are not already a member, please visit www.soundgirls.org to register for free.
How to get to the venue:
Airport: Take the metro to ‘Lergravsparken’, walk 100 metres south of Østrigsgade, turn right onto Øresundsgade. You will see the venue on your left after 500 metres.
Centrale station: Take the Tivoli exit. Take bus no. 5A towards Sundbyvester Plads/Airport. Get off after 9 stops at Øresundsvej. Walk for 50 metres along Amagerbrogade and turn left at the intersection. Walk for 50 metres and you will see Amager Bio.

Accommodation:
Private residence – limited free shared accommodation in a private residence is available. Please indicate in your response email whether you would like to book a place.
Airbnb – https://www.airbnb.com/
Hotel Copenhagen – http://www.hotelcopenhagen.co.uk/
Hotel Amager – http://www.hotelamager.dk/english/

We recommend www.momondo.com to search for flight tickets. SAS & Norwegian are often more reliable than budget companies.

All enquiries and booking requests should be sent to soundgirls@soundgirls.org.

We look forward to seeing you in Copenhagen!


Good Foundations – Part One

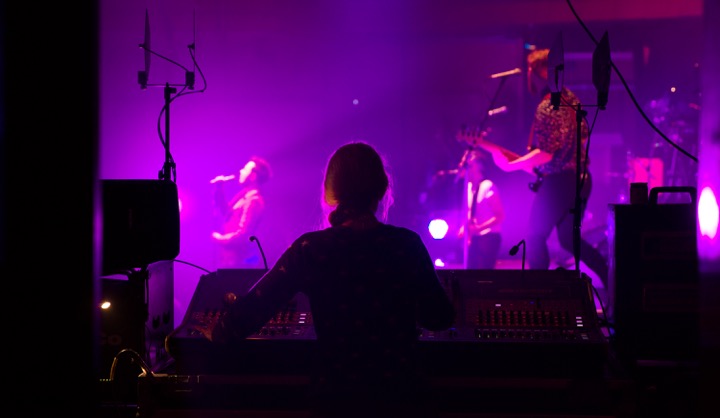
As a new monitor engineer, it can feel intimidating when the band turns up in front of you for the first time. Here’s a bunch of people who probably all know each other, who might be considerably older than you, and who all seem super-chilled and confident. And here’s you, about to play a major part in how they experience their gig, probably not knowing any of them and maybe feeling a little nervous. I’ve worked with a lot of different musicians in my 20+ years in the business, and in that time I’ve refined an ‘order of proceedings’ that has never let me down. Like so many things in live production, it mostly boils down to preparation, common sense and being methodical, and I’d like to share it with you in this two-part post.

This month we’ll look at the foundations you need to lay BEFORE you set eyes on your musos, and next month I’ll talk about how to proceed once you’re all in a room together and it’s time to make some noise. If you’re new to live work this should give you a good guide to getting started – and if you’ve been around the block a few times, I hope you’ll still find something of use here!

Step 1 – Get in Touch

So you’ve got a new gig – congratulations! Whilst it might be weeks or even months away, the work begins now – you need to get in touch with the people who can tell you the details. Depending on the scale of the show, that’s either the production manager, tour manager, PA company project manager, musical director or a member of the band. Good things to ask at this stage are the ‘W-H’ questions – who, what, where, when, how.

– Where do you need to be and when?

– Do you get to spec what gear you’d like, or are you using in-house?

– Where’s the gear coming from?

– How much prep / programming time is there, if any?

– How many people are in the band?

– What inputs are there?

– Do the band want in-ears, wedges, or a combination?

– Who’s mixing front of house?

And so on. Talking to the FOH engineer is a great idea at this stage – if they’re already working with the band, you can get most of the information you need about the stage set-up from them. If they’re new too, you can put your heads together and figure it out as a team. You need to think about what gear you want to use, and having one or two alternatives is a good idea – for example, I’ll always prefer a Digico, but a Yamaha PM5D is my second choice because you can get them anywhere in the world and they’re pretty much bomb-proof. And whilst I’d LIKE an SD7, I have to be sensible about budgets for artists with less money to spend – will an SD8, 9 or 10 do the job instead? For mics, I have my preferences but I’ll usually defer to the FOH engineer unless I feel strongly about something, because they have to cope with a far less controlled environment than I do.

Step 2 – Collate your info

When you have answers to your questions, start to get your paperwork together. It’s the dullest part of any gig, but being professional means being organised, and I promise you’ll thank yourself for it later! So make an input/output list if one doesn’t already exist, likewise a stage plot and spec (especially if you’re going places where you’re using local equipment) – Word and Excel are your friends. If you’re not sure what that all looks like, here are some examples: 

Example AUDIO RIDER – July 2016

Soundgirls example patch 2016

Soundgirls Stage plot example 2016

Be very clear and use the simplest, least ‘wordy’ language you can, especially if you’re going overseas. Think about little things like batteries – how many do you need per show? What about console software versions, which version will you be running? Don’t be shy about spec’ing things that might seem obvious, like comms and shout systems – the best gig in the world will fall over if you can’t communicate, and assumption is the mother of all f*** ups!

If there’s not much prep time, it’s a good idea to make yourself a template session file for your desk using the relevant offline editing software. Even if you just label and patch your inputs and outputs, punch in high pass filters, and set up some basic reverbs, it’s all-time saved on the day.

Step 3 – Share your info

Send your paperwork to the relevant people – FOH engineers, supply companies, production managers, house engineers (if you’re doing festivals for example). You need to know if there’s anything that can’t be supplied, any problems – it’s better to know now than find out later. Send that session file to the supply company or house engineer so they can load it up and linecheck the system. Print out a couple of copies of all the paperwork and have your session on a USB key. Get your toolkit together – if I’m doing a fly-gig where I can’t have my whole kit, I take a mini-kit with things I know I’ll need – black and white electrical tape, Sharpies, scissors, a Leatherman, RF scanner, multimeter, my in-ears, wipes and so on. If you’re prepping your gear, label everything to within an inch of its life – the simpler you can make things to set up, the quicker it will be – and labelling is priceless when things go wrong and you need to fault-find in a hurry.

Once you’ve done all that, you’re in good shape to load in and make some noise! Next month I’ll talk you through how I run things for soundchecking and getting the band’s mixes dialled in. Happy gigging!

A Teaching Guide to Monitors

This month we welcome a new Omani team member to our department. With only a few weeks left until the beginning of the season, we are focusing on desk training. In particular, programming for monitor engineering. This article can be used as a tried and tested teaching aid for those new to monitors.

We usually use our Digico SC9 or our Venue SC48 for monitors. This step-by-step guide can be used for any desk.

1. Get a copy of the rider. Check all the stage plans are clear and that you have enough information about who needs what mix and where. It is best to clear up any ambiguity at this stage so that your programming can be as ready as possible for when the band arrives. At the opera house, we always have a senior member of the department in charge of a show who is in communication with the visiting band. This can be an extremely difficult job as quite often English isn’t the first language of the visitors. We also have at least two members of the department assigned to the stage.

2. Use a template or set up a new show file to save your work to! Sounds obvious but during the season quick load-ins and outs can often mean that files are not saved accurately. We aim to back everything up to a USB stick too. Sometimes we may need to access files after a company has departed so this is important! Good practice is also crucial to our teaching objectives for the Omanisation programme.

3. If necessary ensure that the desk is set up in the correct configuration for inputs and outputs. Both our desks can be changed during programming but it is good to think these things through before you start. Using the stage plan and rider information, label all the inputs. Don’t forget the talk-back mic and FX returns. Check your gain structure and that all EQ’s are flat and compressors and gates are switched off. It is worth doing this now rather than trying to troubleshoot later.

4. Now label all the auxes. We like to add an extra two or three auxes for effects. Depending on the desk you will also need your own monitor aux – (cue).

5. Patching next. Depending on your set up check your desk patch. We have an optocore system so the desk is fed by madi. This should be nice and straightforward!

6. Now go back to your auxes. Referring to your rider you can feed a few inputs to mix auxes in preparation. For example, the drummer will probably want some kick in his sub. Less is best at this point.

7. Set up your FX auxes. We go for a couple of different reverbs. In most cases, the internal effects in the desks are quite ample. Sometimes bands ask for specific effects units. The set up is exactly the same procedure.

8. Use the FX return channels that you labeled on your inputs earlier. Remember not to send the FX back to itself (awful, awful feedback… just don’t do it).

9. Check and save!

Other things to consider:

– Digico (and other desks) have an iPad app so that you can control the desk remotely. This is useful after the soundcheck. You can walk around and make adjustments as the band are playing.

– In conjunction with this, consider having the monitor mix on a wireless belt-pack so that as you walk around you can solo mixes and actually hear what the musicians are hearing. This is especially useful to us when there is a language barrier! Up can surprisingly often be misconstrued as down!

– You might also want to insert a graphic EQ over each aux send. This will give you a bit of fine control if needed.

The Modern Church Sound

I’ve been to my fair share of church services, and more than my fair share of contemporary/modern church services. Some of the mixes I hear are fantastic! Some of them, however, are less than stellar. Many times, churches don’t have a dedicated audio person and rely on volunteer help to run the service.

Here are a few things to keep in mind when putting a mix together either as a volunteer, or as someone who wants some tips on how to clean up their own mix.

Vocals

Vocals are the number one priority, and it’s a disaster if they get buried. If no one can understand the vocals, then nobody is receiving the message. Cutting out most of the low end is always a great start. Don’t be afraid to really get in there. Perhaps cut a lot more than you might normally, but it’s necessary to make plenty of space for instruments whose fundamental frequencies reside below 500. So I place a HPF at about 150 and a low-end cut at about 500 to get rid of any boxiness. I’ve also noticed that vocalists and speakers can be a little bit throaty, so doing a notch cut around 1k really helps clear the air. Business first, though, as any problem frequencies should get ousted and the octaves just below and just above it. Parametric EQs are great for this sort of thing.

The vocals should most definitely fit right on top, right in between any melody carrying instruments.

Guitars

I love a robust and prominent guitar sound, but there’s a time and a place (read: solo) for strong loud guitars. I wouldn’t consider contemporary Christian services as that place. I can already hear the crowds boo. I regret nothing. In general, though, I whole-heartedly believe that guitars can’t always be the main instrument. They have their spot and I love really ethereal licks, but this isn’t a metal show and there are often many more instruments on stage that could use some love.

Now, if it’s a nice acoustic guitar, let it ring out and carry a larger part of the mix. So let the acoustic take center stage (aside from vocals. Never, ever push the vocals away). I like my guitars with just a little meat at around 250-300, and plenty of sparkly high end without getting too much fret noise. When I notice the fret noise is really prevalent, I can’t un-hear it. The biggest difference between acoustic and electric guitars are that electric guitars can be really sharp and intrusive if you let them get away. Acoustic guitars have a tendency to be softer and percussive. If you have an acoustic guitar and an electric guitar coming in at the same level, you’d hear the electric guitar more because it is so “in your face”. The low end of guitars can tend to be a little tedious when you begin balancing it with the rest of the low end. Try cutting at 400 or 500 while still trying to keep that previously mentioned beef at 250. This is all a balancing act most of you are familiar with.

Drums

Drums can be considered the 2nd most important piece of the band behind vocals. Sometimes, congregants in churches have issues keeping on beat, so we need to make sure that a nice crisp clear drum set can be heard. Kick and snare, like most of the time, are vital. I like a very fat low end with a cracked snare. I boost my kick around 60 or 80 hz depending on what the feel of the song is, and boost just a tad at about 1k to keep some of that pedal in. When I’m able to have the top and bottom of the snare mic’d, I try boosting the top at about 250 or so with a deep cut at 500 so I can have that warmth. Then the bottom of the snare has a sharp boost at 1k to really give it that snappy cracked sound. I typically blend the two with slightly more top than bottom. I would recommend experimenting with the blends of the top and bottom, and even try flipping the EQ to see what that sounds like. Never be afraid to do something really strange. If it works and it sounds good, don’t question it.

I like my toms present, but not overwhelming. I enjoy my cymbals bright, but not harsh. If you aren’t slapping HPFs on things, you’re asking for some trouble.

I find a lot of churches use drum enclosures which adds a certain level of complexity to the mix. I love the isolation, but I really hate how boxed in it can sound. You’ll have to fight that in almost every mix on your kit. Start at 500 and sweep the low-mids until you find that ‘sweet’ spot. As far as miking goes, you shouldn’t put the overhead/cymbal mics too far away from the source. The further away you get, the more room you’re getting, which in this case is not a good sound. You should always do some pretty close miking to drums in live situations (at least more so than you would in the studio) but you just need to be very cautious when your drums are in a tiny Plexiglas case. Look anywhere from 250-1k on all your drum mics, a lot of grossness will be hiding there. If you have any say in it, I would recommend not completely enclosing the drum kit. Leaving the back unenclosed can give you so much more space while still directing a bulk of the sound away from the audience. With the back open, you’ll get less muffled bleed, and you can get nice deep meaty sounding low-end without having to erase the entire low-mids. With some of the smaller rooms, that may be difficult, but it makes a significant enough difference to maybe rearrange the stage plot.

Bass

I love a smooth bass line. I am a bassist, and I really enjoy when I can’t pick out weird sounding (or overpowering) bass in mixes. And by that I mean a nice round low end (I don’t always like the sound of frets on a bass) with a HPF on 60 with just enough finger noise around 2k or so to distinguish accented notes without overpowering the kick, or worse, the vocals. The kick and bass should be working harmoniously, not stomping all over each other. Don’t be afraid to use ducking to get them to behave. Multi-band compression, if you haven’t gotten to play with it yet, is a fantastic tool. Use it to punch through some of the lows while leaving the higher octaves a little more airy.

Keys

Pianos have been in churches for as long as they have been in existence. Nothing can replace a really incredible pianist. I envy those of you who can tickle the ivory fingers. Pianos are so naturally beautiful that there often isn’t much needed. That’s not to say I don’t slap on a HPF every now and again, but you should try to stay true to the piano and let it do it’s thing. The only thing I can say is make sure everyone can hear it in the mix.

Everyone mixes differently, and every congregation likes their music a little bit different. Because of the generation I grew up in, my mixes tend to sound a lot funkier and modern than some generations before me. As you should, I try to keep that in mind when I’m mixing.

You won’t always be mixing for a “funky” crowd. Sometimes you may need to mix a little bit outside your favorite or most comfortable style to suit the room. You should also try to be very careful about taking care of your ears. Sometimes, churches like their music really loud, and often times they like it really really quiet. Don’t rely on volume to make your mix sound better. Go and explore. Churches are great communities to express yourself without having any lash back. Play with that New York style compression in your live mix, see what happens! Don’t discount anything until you try it.

If I had to stress only a few points to take away from this, it’s that listen with your ears. If you just walked in off the streets, could you understand what the vocalist was saying even if the words weren’t on screen? Would you be able to hear every instrument? Would you want to come back again and listen to music in this room?


Losing your Footing as a Freelancer and Getting it Back

Three years ago, something happened to me that could happen to any freelancer: I woke up one morning to an email from a production company terminating my freelance employment with them. In one click I lost a gig that brought in over half my monthly income at the time. Cue significant worry and mild panic!

The company who employed me assured me that it was nothing to do with the quality of my work, there was suddenly just not enough work to go around. I had been hired as a freelancer when the company was experiencing growth, but as that growth had unexpectedly slowed down to a trickle, my services were surplus to requirements.

It’s hardly an uncommon story in today’s economic climate, especially in the arts. Venues close every week, events stall due to lack of funds; production companies decide it will be cheaper to do certain jobs in-house instead of hiring freelancers. Losing income, especially from a regular gig, can send even the most level-headed freelancer or small business owner into a slump. However, throwing a pity party isn’t going to make the situation easier to manage. As hard as it feels, in my experience what will get you through the tough times is a plan of action. Three years on, I’ve had many more uncertain periods of employment, and each time I’ve been better equipped to bounce back.

Vent offline

We all know moaning about our lot on social media makes us look unprofessional, but it’s so much harder to resist doing it when it seems life has dumped us in it. Resist, resist, resist! Get someone to hide all internet-capable devices if necessary. You can get the sympathy you deserve from your significant other, friends or family. Unless you’re part of a high-powered family firm, you can afford to sound desperate, whiny and disheartened to your nearest and dearest  – but you definitely can’t afford social-media-savvy potential employers to see you that way.

Accept the situation and turn it to your advantage

It sucks but constantly wondering “why me?” isn’t going to change it. It’s happened, now it’s time to move onwards and upwards. If your contract ended for any reason other than your incompetence, a thank you email is a great way to show your appreciation for the company and your employer. You can also use it as an opportunity to offer your services for future work and to ask your employer to recommend you to other clients.

Acknowledge the lessons learned

If you haven’t had a clear answer why your services are no longer required, draft a polite email to your employer and ask them. Take the time to consider all the feedback you receive, positive and negative. It’s a great learning tool and can highlight areas for improvement that you haven’t considered.

Think about what you could have done that might have changed your current situation. Could a written contract have helped avoid this situation? Should you have been clearer about your hours of work, availability, turnaround times, etc.? Something I learned was not to be so quick to consider this job as “regular” income after only a few months. I’ve since taken steps to be better prepared for similar situations by establishing multiple revenue sources, rather than trusting it would come from the same source month after month.

Retrace your steps

How did you get that work in the first place? You must have done something right to get your foot in the door, and it may be worth repeating the same steps.

Go back to your application or cover letter and highlight what you think may have made you stand out to that employer. Revisit the CV, demo or portfolio sample you sent them – did you tailor it to them, or was it more a sample of your strongest work? Re-read any correspondence you had with them before, during, after the job – is there anything about your application, work, or business practices that they single out? If you got the job through personal recommendations, consider why your contact would have recommended you – or better yet, ask them!

Embrace the opportunity

If the work you lost was a large ongoing project or regular work, chances are you’ll have some holes in your schedule. Sure, a portion of that time will be taken up with finding work to replace the work you’ve lost, but you might well find you still have a bit of spare time.

Take the opportunity to work on those projects you’ve put to one side while you concentrated on “real work”. If you’ve put in the time and effort into your business, the work will return, but until then, why not use the time productively and tick off some of those tasks you’ve been saving for a slow period? Updating accounts, revamping your website, polishing and learning new skills, catching up with colleagues, making sure your portfolio is up to date, getting out and experiencing inspirational gigs and shows, all of which can get lost and forgotten in the process of day-to-day money-making. Now’s your chance to catch up.

I remember that in the weeks following losing my major gig three years ago, I became very thankful for the extra time it gave me. I reassessed my priorities, make progress on projects, caught up on articles that I’d been meaning to read, and you know, had a break.

Losing work can be scary, but it doesn’t have to be the end of the world. In fact, it may even increase your chances of being employed in the long run.

Living and Learning

Eid Al Fitir was announced last week, marking the end of Ramadan. The opera house is currently dark as we are out of season. This means that the strict rules of no music, no eating, or drinking are more easily adhered to during this holy month. Many expats choose to take their annual leave during this period. However, the Sound and Broadcast department uses this quieter time for maintenance and training. For us, this is pretty exciting!

Post formal education, the training normally received ‘on the job’ in our industry can vary wildly. From workshops with experts at hire companies, to companies selling their equipment to learning a new mix for a show. In my experience, given the nature of our work, we are always very grateful to receive any guidance at all.

Training at the opera house takes two different but intrinsically linked paths. Primarily as expats, we are employed to train Omani colleagues as part of the Omanisation programme. We also have to consider the development of the skills of all team members for an effective show running.

On my arrival last July, under the guidance of our technical director, Ric Green, and head of the sound and broadcast department, Mike Compton, I started developing a skills competency framework. It was imperative at this stage, that we were careful to limit the framework to the most basic skills that we needed our trainees to perform during the season. This would mean that progress could be easily tracked. My previous three years spent in teaching was invaluable in applying solid educational theory to teaching and learning in this new environment.

The development of the framework depends on the whole department’s collaboration. The sound and broadcast department covers two areas, so we chose to have two separate frameworks- one to cover sound and the other to cover broadcast. Because of the nature of our season, we wanted the framework to be trainee-led. After agreeing on the areas that we wanted to cover, we then created four levels of competency. Since we have to presume any trainee arriving at the opera house has no experience of a particular area this is where we started.

Based on Bloom’s taxonomy, three further levels were then developed:

None: No skill in this area

Level 1: Can memorise equipment required or reproduce a basic skill after a demonstration

Level 2: Can interpret instructions or compare suitable skills in order to select the best method to complete a task

Level 3: Can demonstrate skill by applying knowledge

The frameworks have now been in place for 12 months. They have been successful in engaging the trainees, mainly due to the clarity of showing exactly what is required of them. It is easy for us expats to forget that we come from a culture of hundreds of years of western theatre, opera, and ballet. Oman has an incredibly rich heritage of music and performance and with the opening of the opera house, it has just embarked on its engagement with classical western arts. With this in mind, we must remain open-minded to this fusing of cultures.

In a recent department review of the skills competency frameworks, we discussed how we should now move forwards. It was agreed that we shouldn’t ‘add’ increasingly more difficult levels. This is because once basic skills have been mastered, trainees are able to engage in the work and develop at their own pace- much as most trainees in western theatre environments. However, we are leaving a legacy to any future leaders of the department and we are cautious that we should develop a training ethic that can be followed. With this in mind, we will work on an approach that identifies needs and pinpoints specific areas for development.


X