Empowering the Next Generation of Women in Audio

Join Us

So. When Can I Expropriate the Sound Guy?


While I was working at South by Southwest, I went to go check out a performance from a friend’s band downtown. The bar was the usual dive, narrow and rectangular, not much in the way of sound equipment. While the friend’s band was setting up, I noticed that the engineer was, to put it mildly, drunk as a skunk. Not only was he slurring his speech and making jokes that he’s checking out porn on his laptop, but he was dropping mics right on their heads, knocking over equipment, and had a rat’s nest of cables sitting in the back corner of the stage.

Once the performance began, the mix was just horrible; the vocals were overpoweringly loud, you could barely hear the drums, and the guitar and bass were just swallowed whole. Periodically throughout the performance, the sound guy left his post at the board to go to the bathroom and the bar, sometimes gone for whole tunes. At one point the singer’s mic cable got tangled with some of the lighting equipment, and the engineer was nowhere to be found.

I felt horrible for the talented musicians that were on stage. They didn’t deserve the terrible sound the venue stuck them with. To me, this brings up the question of when, if ever, is it okay to expropriate the sound guy? He was clearly unable to effectively do his job, and the music suffered for it, not to mention the fact that he was causing damage to the venue’s gear. It made me feel so angry for the band, and I was astonished that someone would do this kind of work while completely fershnickered; almost like an affront to professional sound engineers the world over, dive bar or no dive bar.

I was taught, and firmly believe, that one always respects the lead of a project, no matter what. If there is a problem, you quietly take the lead aside and address your concerns. But this was no studio, and this was certainly not a collaborative project. And whether I liked it or not, this guy was employed by the venue to provide sound for the band. As much as I wanted to be that knight in shining armor, it would’ve been in bad taste to just kick the current reigning sound guy out with a cup of coffee… Or would it?

For now, I think I’ll go write a Yelp review.


The Encounter: A Sound Design Review, Part 2

Part 2: The sound operators – behind the scenes with Ella Wahlström and Helen Skiera

Last month, I reviewed Complicite’s The Encounter from a sound design perspective. This month, I wanted to get an insider’s view from the sound operators, Helen Skiera, and Ella Wahlström.

KirstyGillmore-March2016-pic1
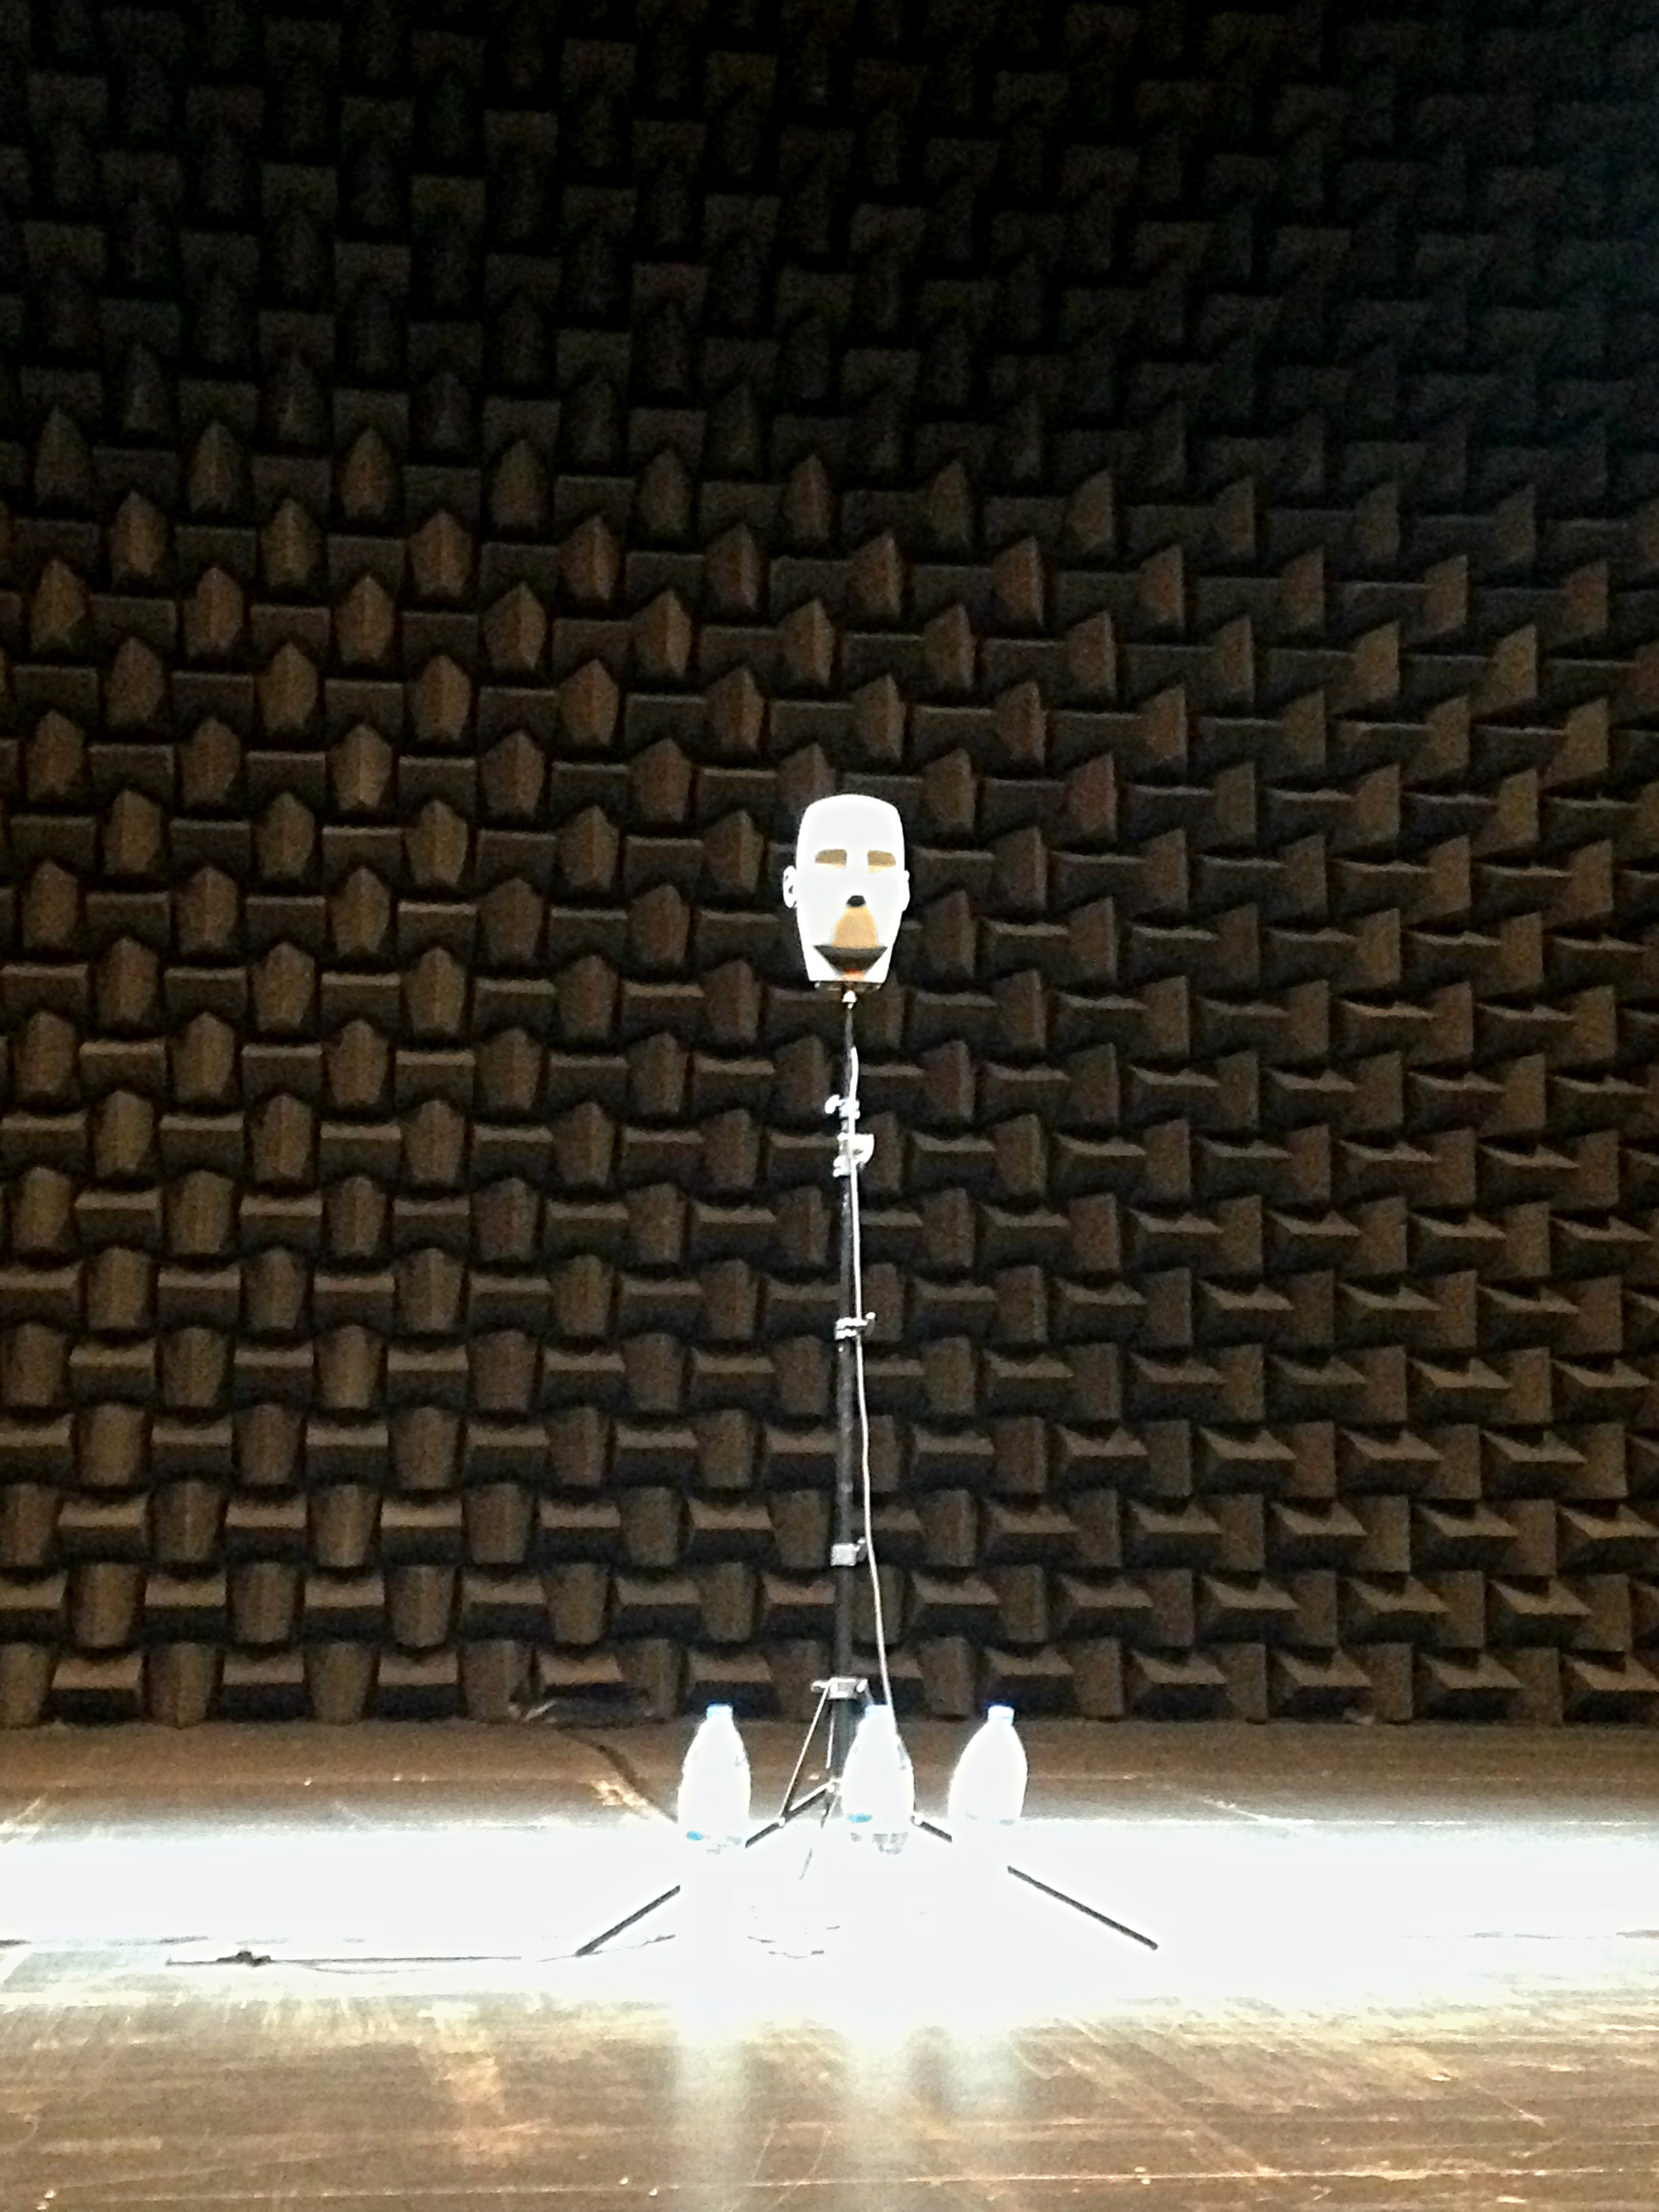
A quick recap for context: The Encounter is a one-actor show directed and performed by Simon McBurney, with sound design by Gareth Fry with Pete Malkin. It incorporates binaural technology, voiceovers, live looping, and sound effects to transport us into different environments as diverse as the Amazon and Simon’s living room. The audience experiences the sound through headphones worn throughout the two-hour performance.

I’ve heard The Encounter described as a play for “one actor and two sound operators”, and I feel this sums up the important role of the sound design in the show. I think any audio person who has watched the play will recognise the astounding feat of achieving that level of accuracy, clarity, and subtlety night after night. So how does the magic happen? Over to you, Ella and Helen.

You’re both sound designers as well as operators. Can you tell me a bit more about your respective backgrounds in sound?

Ella: I’ve studied violin since I was a child and had been part of my school’s tech team when I discovered theatre sound design as a teenager. It suddenly seemed to combine all my areas of interest and skills. For a couple of years, I did various amateur and semi-professional sound gigs in Finland before I decided to move to London in 2010, and here I completed a Bachelor of Arts in Performance Sound at Rose Bruford College of Theatre and Performance. Over the past six years, I’ve gradually built up my portfolio as a Theatre Sound Designer in London.

Helen: I started as a musician, and I took an interest in technology to record the bands I was in, and actually, my GCSE music pieces – that was back in the days of small Tascam Portastudios. Using various home/school recording setups, I started to understand how a desk worked, and with that knowledge I ended up, while at university, working with the Dundee Rep Community Theatre, making music and setting up PA systems for shows. I also started to get work as a live sound engineer for bands when I lived in Edinburgh. It wasn’t until much later that I discovered sound design was an actual role in theatre. When I did, I wanted to learn from the beginning, so I observed designers whose work I enjoyed,  and work experience, and every low/unpaid fringe show that I could take on. I was very fortunate to be taken on as an operator at the Royal Court Theatre and spent about two years working on some incredible shows. These included one of Gareth Fry’s  – Sucker Punch, which was the first time I’d seen Ableton and a Launchpad, which was very influential for me.

How did you become involved with The Encounter?

Ella: I had worked for Gareth Fry as an associate sound designer before, and I’ve also done a couple of Complicite research & development workshops as a sound operator and designer. So I guess I was a safe choice to be asked to come on board.

Helen: Gareth was looking for someone to do something in rehearsals for two weeks. I had no idea what it was, but I was free, and I’ll take any opportunity to work with Gareth. That was September 2014, and I’m writing this from Athens where we are currently performing the show, and, amongst other projects, I’ve been working on this ever since then.

The Encounter requires two sound operators, which is unusual for theatre production, and in particular for a solo show. What are your different responsibilities on the show?

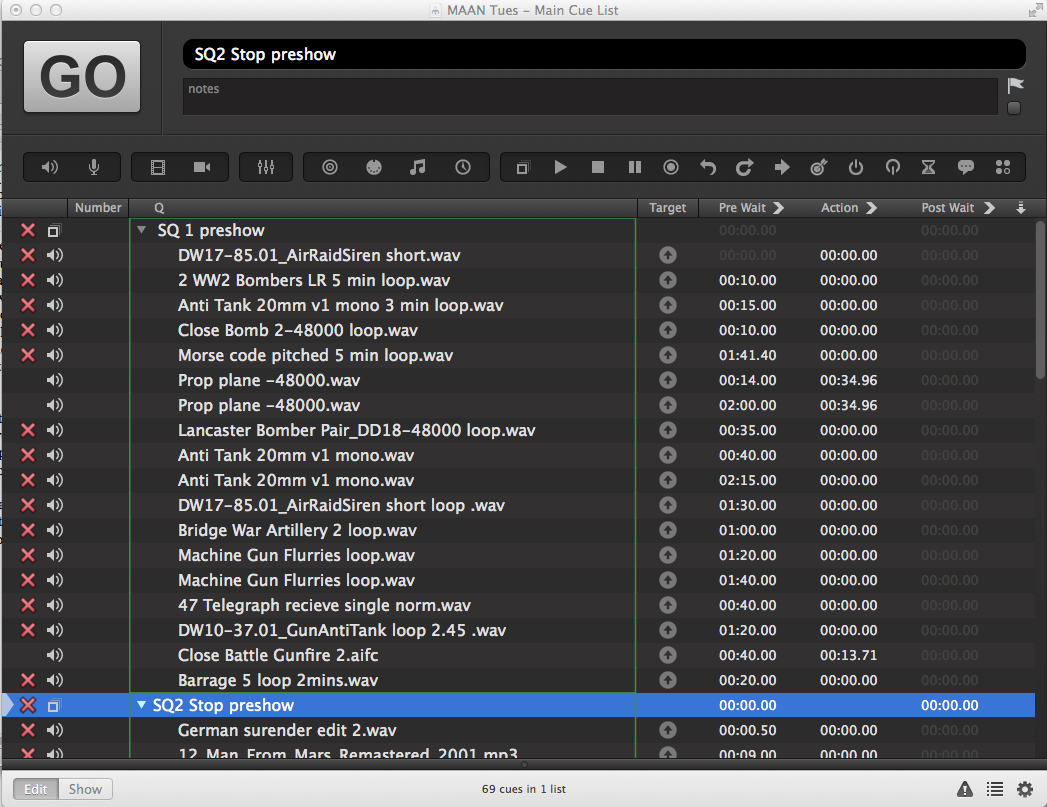
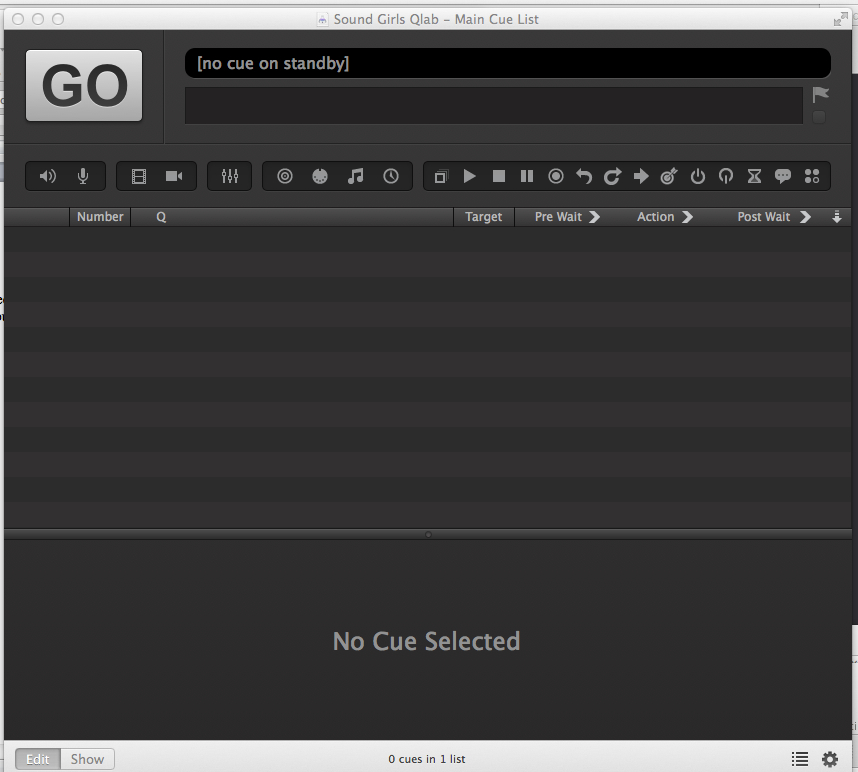
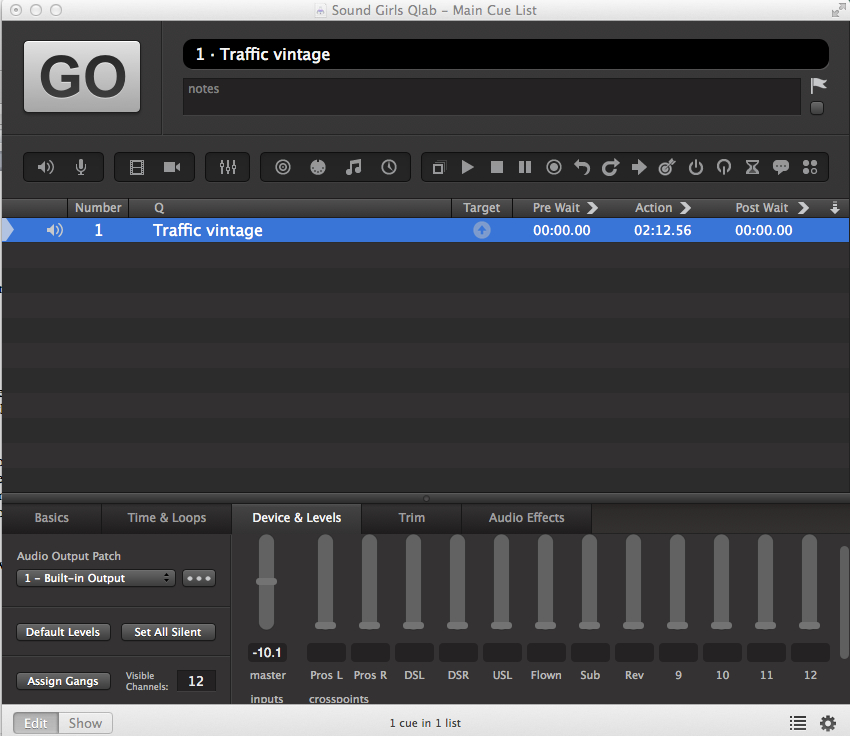
Ella: I operate the music and sound effects side of things. I have a Mac Mini and a YAMAHA QL1, I run QLab and Ableton Live on the Mac, using a go-button, two Beringer BCF2000 controllers with eight faders each, and a launch pad.  We’ve programmed the big sequences in QLab, and we use Ableton to run a lot of continuous tracks, like music, atmos and drones. The QLab cues trigger and reset Ableton tracks so that I can ride the volume levels on the BCF faders according to the performance. On the launch pad I have spot effects and some backup tracks on Ableton, this allows me to fire tracks out of the QLab sequence.

Whenever there are any changes made to the show, which there are quite often, I’m responsible for reprogramming and implementing new recordings into the show. I do a daily rig check, which includes checking all my operating equipment, the PA, onstage speakers, the show iPod, and my MIDI connection to lighting and video. Luckily our sound supervisor has the responsibility of checking all the headphones daily with the in-house crew. I often run Midi Monitor to gather logs of the show, so after every show, I save these logs and the current QLab file.

Helen: I operate the microphones and a system of devices that loop Simon’s voice and assist him to loop himself. I have a Yamaha QL1 desk, two Mac Minis (one for backup) running Ableton Live (for looping and some vocal effects), and two Qlab files, with no audio, but MIDI commands to enable all the control surfaces, desk and software to communicate. There’s one BCF fader bank, one Bob (custom-made button box), one launchpad, and one icon fader bank. For my preshow checks, I check that everything works: all mics, all pitches, vocal effects, looping from my controls, and looping from the controls on stage. There’s no written check-in program, so it’s probably less formal than the average show checks.

What backups do you have in place?

Ella: Pretty much everything that can go wrong has gone wrong at some point during the show or rehearsals, so there are a lot of backup solutions implemented. I’m running a backup computer, which tracks the main computer so if anything happens to the main computer I can just swap over and change to a backup patch on my desk to continue the show on the backup. Within the show system, on my launchpad, I also have backups of all the tracks played on stage through the iPod and also all the main atmos, drones, and music tracks, so if anything happens to QLab, or on stage, I can bring in a track to cover or mask. On my desk, I also have the option to route the onstage speaker’s feed straight to the audience headphones in case there’s anything wrong with the wireless speaker or the radio receiver on it.

Helen: I have a second Mac with the same software, but if other units were to fail, we would have to revive them or continue without them. Because there isn’t a series of linear events that has to happen the same way each night in the same order, there are generally more options of how to do the same task, so there have been occasions when I’ve had to be a bit creative with problem-solving mid-show.

Yes, I imagine that operating sound for a show as aurally complex as The Encounter has both challenging, and rewarding, aspects.

KirstyGillmore-March2016-pic2Ella: The most challenging aspect of operating the show is definitely the ever-changing performance. It’s a one-man show and Simon treats us as fellow performers and likes to keep the show alive by trying new things and changing things around a bit. He knows our restrictions quite well but ever so often pushes the boundaries and keeps us on our toes. It’s also just over two hours long and full of sound, I think my longest break between sound cues is about two minutes. So operating takes a lot of concentration, and you really need to get into the story and the performance to keep up and stay within the rhythm. But when it all works together and I create a good flow with the voice-over dialogues I have with Simon, and I can feel his next move on stage, it’s a magical show, and it’s very rewarding to be part of the experience we create for the audience.

Helen: The challenging parts are kind of similar to the rewarding parts – it takes a lot of concentration and focus, and this is continuous throughout rehearsals as well as performances. We’re so actively part of it all the time. During rehearsals and performances, we create the material as it happens; it’s not the same as when you just replay the creative elements that you made earlier. So it can be exhausting, and very daunting at times, but this is also what makes the show such a brilliant experience for an operator.

In what other ways is operating The Encounter different from operating sound for other, more traditionally produced, plays?

 Ella: In more traditional theatre productions, the operator aims to deliver the same show night after night, and the sound designer should be able to come in at any time during the run and find the show pretty much as they left it on press night. On The Encounter we’re adapting the show all the time, I save a new QLab file every other night after having reprogrammed something.

Helen: For a traditionally produced play, in my experience, design is aiming to create the same experience for every audience every night, with fixed levels and cue points that cannot be changed, and would not be changed by an operator anyway. With The Encounter, it is more like being armed with a series of tools, or instruments, ever-developing, and the show starts, and you do whatever you think/feel should be done. Yes, the main structure of the show has a rehearsed form and what I do is within that form, but potentially, something different can happen at any moment. I do have to look at the stage, and particularly Simon, pretty much for the entire two hours. I can glance down to operate the loopers, but looking away for more than a second usually means I miss something.

I imagine that having to work at that level of responsiveness might require you to create bespoke hardware solutions?

Helen: We initially mixed the show conventionally, but found it was getting more and more difficult to do the changes quickly. Taking other mics down as well as bringing up a fader, and doing that with one hand while using the other to loop wasn’t efficient enough. Gareth’s solution was to create “Bob”, which is a box with 12 buttons that each send a MIDI message (like a Qlab GO box). The MIDI messages go into Qlab, and Qlab sends control changes to the QL1, to bring up individual microphones and pitches, and take the others down instantaneously. We are currently on Bob Mark 2; the original Bob had the buttons arranged in a single line, which meant I needed to look at the buttons to get the right ones. For Bob 2, I designed a pattern for the buttons arranged in threes, which means I can feel around the surface without having to look down.

As well as multiple mics, Simon uses various devices to create and playback sound on stage, including a wireless domestic hi-fi speaker and an iPod. I remember Ella saying the wireless speaker requires you to trigger occasional bursts of noise to prevent it from switching off. Are there any other little quirks that you have to be aware of during the show?

Ella: The iPod is another risk-averse element as it’s on stage and out of our reach, so whenever Simon plays anything from it, I have to be ready to play a backup track, in case he turns the volume down accidentally or something else unexpected happens.

Speaking of unexpected sounds, using live looping must run the risk of inadvertently involving the audience when they cough or make other sounds. I’ve heard the story about when a school group came in and made a lot of noise which was picked up by the binaural head, and the group thought it was hilarious when they could hear it played back as part of a loop. How do you cope with unexpected ambient sounds?

Helen: I do have backups, but they are definitely a last resort. Usually, I grab the loop; then if there is a cough, I delete it and grab another one. It’s a risky game, though, as each time you discard a loop, the source sound may stop being made, and then there’s not much you can do. But Simon is very adept at noting when there is coughing, and he will keep making the sound for a bit longer to allow for a clean loop.

How does the show change from a sound perspective when you take it on tour – what do you need to take into account when you’re in a different venue?

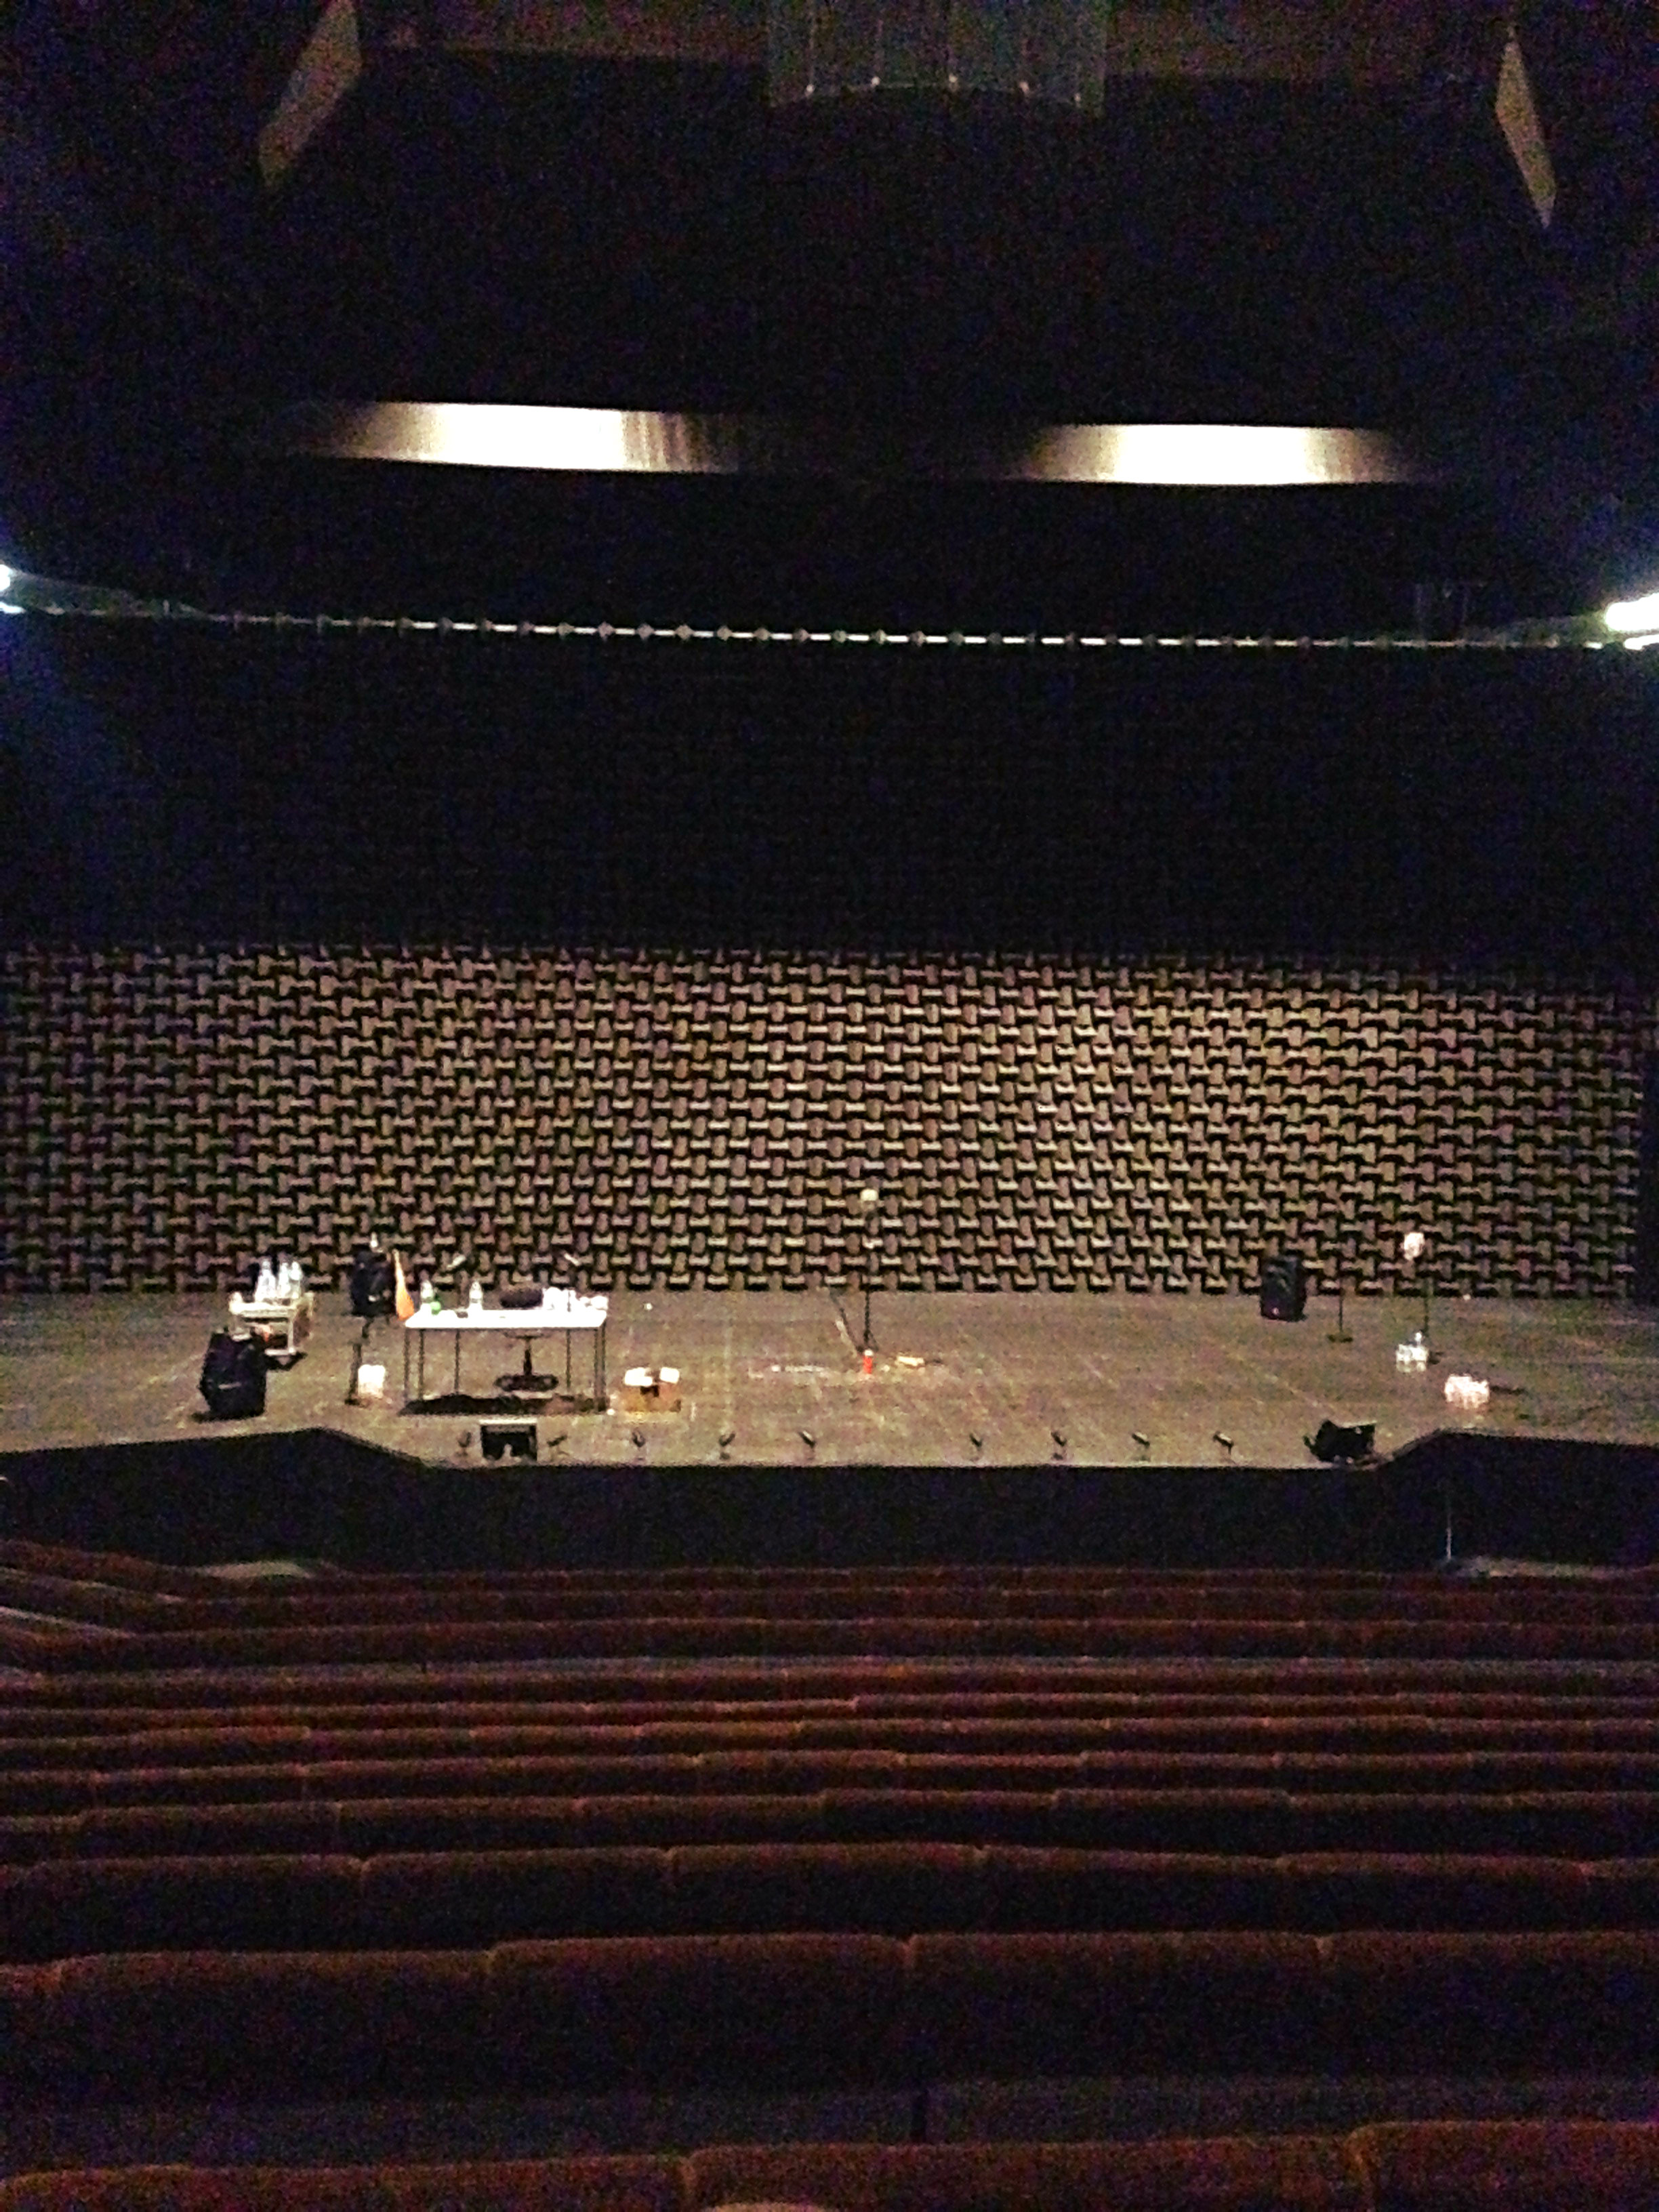
Ella: We install the headphone system in each venue, which means our sound supervisor has to plan all the cable runs and amp placements every time as the venues vary in shapes and sizes. You would also think that a show that you only hear through headphones wouldn’t be too dependent on the acoustics of the room, but the acoustics affect the clarity of the sound quite a lot. Also, the noise level of an auditorium is crucial to the flow of the show as the binaural head is used throughout. If the space has noisy air-conditioning, for example, it can be problematic when swapping between the close-up microphones and the binaural head. When you create layers by looping the binaural recordings the noise floor rises with each layer.

Many thanks to Helen and Ella for this interview. There’s more about the making of The Encounter here and for upcoming tour dates go here and scroll down under “Tour”.


QLab: An Introduction


QLab is my software of choice for playback in musicals and plays. QLab is a Mac-based piece of software that I have found it to be robust, flexible, and quick to program. If you need a playback engine for music tracks or sound effects and you have a Mac, then it’s absolutely worth looking at.

When you first open up QLab, you will see an untitled workspace (Fig. 1).

Fig. 1

In order to optimize things while you are programming, it’s wise to set a few preferences. These can be changed later, but I’ll share the way I set things up. At the bottom right-hand side of the workspace is the icon of a cogwheel. Click that and you get to play with the settings behind the screen. (Fig 2)

Fig. 2

If you click on the audio menu on the left-hand side, it will take you to the section where you can set the output device, label the outputs, and set the levels for any new sound cues. I set new cues to be silent with all the cross points in so that I can fade them up to set level rather than fade them down. Then I select the group menu and select the “Start all children simultaneously” option. Clicking “Done” will flip the screen back to the workspace.

Getting audio in is as simple as drag and drop. When you drop something in, a new set of tabs appear at the bottom of the workspace in the inspector. (Fig 3) The tabs I use the most are Device & Levels, Time & Loops, and Audio Effects. As this particular sound effect is something that will run continuously under a scene, I’m going to want to loop it. I’ll need to select the outputs it’s going through and I also may want to add some EQ. That’s all available there in the software.

Fig. 3

Playing just traffic on its own could get a bit monotonous, so I want to add a few car horns, but I don’t want to trigger them all individually. In order to do this, I need to create a group cue.  By clicking on the square outline on the top menu bar (or select it from the cues menu) a box will appear in the workspace. As I’ve chosen all children at once, it will be a green one.  Drag in the audio files you want to include in this cue.  They can now be treated together.

If I were to trigger this cue as it is, then both wavs would start playing at the same time and the traffic that I had looped would play forever. That’s not what I want to happen. To fix this, I’ll put a pre-wait in on the car horn so it starts a bit later. At some point, I’m going to want the traffic to fade out, so I will need a fade cue. I can drag the faders icon onto the workspace and assign the cue I want to effect by drag and drop.  The fade length can be changed, as can the fade curve. (Fig 4)

Fig. 4

At the moment, you only have a cue list and not really a show file, so you need to bundle the workspace.  This will collect all the audio files you have dropped onto the workspace, make a copy of them and place them together in a folder with the workspace.  When you do this, you can transfer the whole folder to anywhere you want and take your show with you. Fig 5 is an example of what happens when you don’t bundle a workspace. The red crosses show that QLab can no longer find the audio files.

Fig. 5 shows the preshow of a show I recently designed. The show was set at the end of World War II and you can see there are lots of loops triggering. In the pre-wait column, you can see the delay time I put in for each of the audio files to trigger. They then looped at various lengths until the next cue, which stopped the preshow and the SFX that started the show were triggered.

Fig. 5

QLab is made by figure 53. You can download a free version of it here: http://figure53.com/qlab/ The free version gives you two channels and doesn’t give you anything under the audio effects tab. You can still use it to create a show and then rent the software by the day from figure 53. Or, if you can make do with only two outputs, you can use it to run a show.

With this information, you can create a basic cue-list and get a show together. As you dig deeper, you will find you can vamp and de-vamp cues, trigger or be triggered by midi, and much more. QLab can also be used for video.  The complexity of your cue list is up to you, and everyone will use it in a way that suits how they create a show.

Being The Boss (Even When You Aren’t) – Part 2

by Samantha Potter

This is the second part of my blog about being an efficient and successful boss. I think we’ve all got what it takes to make a difference in our team’s lives. Help them help you.

Be Organized

organizedA good leader knows the ultimate goal, the steps needed to attain it, and the timeline in which to accomplish it. If you aren’t organized, things can get out of hand quickly and all of a sudden, there are four different fires you need to put out.

Be comfortable delegating responsibilities for certain tasks to team members or groups, and check their work without micromanaging. If you know plans have just changed, inform your group and adjust things accordingly. Even if something goes completely haywire, try to remain calm. If the leader starts wigging out, the team is going to lose confidence, as well as wig out. Tackle problems one at a time, take deep breaths, and relax as much as possible. Plans and events change all the time. Be prepared for anything.

Confidence

Radiate confidence, even if you’re faking it. Seeming confident gives your team confidence. There may be occasions where you get overwhelmed, it happens to the best of us. Simply relax and exude. Tackle problems, go in prepared. Help raise the confidence of your team. Your team is your lifeline, so don’t leave them scared and helpless. You don’t gain confidence overnight. You earn confidence over the course of a career, or life, or job. Even when you earn confidence it can be easily flustered.

A note for the women reading this: you’ve got more confidence than you’re giving yourself credit for. Trust me.

Confidence can come from knowing your surroundings, organizing your plans of attack, and opening up communication lines (a lot of things talked about in this post). You don’t always have to be confident, but you need to act confident.

Appreciation

Thank you cardArguably, the most important part of leadership is showing your appreciation for your team’s hard work. If they know you care and are aware that their hard work doesn’t go unnoticed, they are much more likely to go that extra mile. Smile and thank them after the show. Tell them they did an excellent job and that you’re proud of the finished product. Do something special for them every once in a while: buy them pizza, get them a ‘Thank You’ card, get them something special during the holidays, buy them a cupcake on their birthday. Even little things like an email showing your gratitude can go a long way. Gratitude is something you don’t realize you need until you aren’t getting it anymore. If the client is treating them poorly, or your boss is taking something out on you, don’t pass that along to your team. Be the one that rises above and helps make your team better.

Responsibility

It’s easy to take credit when things go well. It’s when things go wrong that people can struggle to take the blame. I’ve dropped the ball once or twice, and if one of my team members drops the ball, it’s on me as well. Taking responsibility for mistakes is all the more reason to communicate freely and know your team so that tasks can go off as flawlessly as possible. When something does go wrong, don’t just let it rain down onto your team. You can let them know what went wrong and how to fix it without destroying confidence. It is your responsibility to lead the team to success and to correct it when it is a failure.

Being a leader is hard.
Being a leader can be extremely rewarding.
It’s all about how you tackle it.
Be the boss that everyone wishes they had.


img_4983-150x150 Samantha is an IT Media Supervisor and Audio Engineer for the largest Methodist Church in the US and a Production Manager for Funk Syndicate located in Kansas City. Working closely with IT, Producers, Coordinators, and Musicians, Samantha oversees audio and other media technology while mentoring and training women in STEM fields. Additionally, Samantha is the Chapter Head of the SoundGirls KC Chapter.

Safety First: A Few Basics to Working on a Catwalk

When you hear the term “catwalk”, you probably think of a fashion show. The deep house music beings to play in your head (which I’m actually playing as I type).  You can almost see the bright lights and picture the fashionably dressed models “cat walking” on the narrow runway, dressed in the clothing and accessories of different designers. The full picture of a high fashion show comes into reality, I know.

In a sense, you can keep that vision. In this piece, however, I am referring to the catwalks you find in some venues. They house a great amount of equipment: loudspeaker systems, work lighting, house lighting, truss and motors controls, videos hubs, venue sprinkler systems, and more. Most of the time a catwalk can be found simply by looking up before or after a production. Some are hidden above ceiling clouds, which are mostly located within worship centers or theater-type settings.

As an audio technician, you’ll probably have to take a trip up to the catwalk a time or two. Why? Because it comes with the job. You might have to feed power or microphones down onto the stage, or you might need to bring some truss in to hang your line arrays. Here are a few things to keep in mind while working on a catwalk.

The catwalk is located at one of the highest part of the building.

As I mentioned, you can usually lookup to locate a venue’s catwalk, which can range anywhere from 25 feet to 200 feet or more off the ground. When working that high in the air, the best thing to be is mindful. Be in the moment and pay attention. You don’t want to be the one to make a bad decision when working that high up off the ground.

Place Your Gear to The Rear

Once you make it up to the catwalk to begin a task, make sure your walkie-talkie and all other tools are clipped towards your rear before you begin. You don’t want anything falling over, or accidentally getting caught up on a railing or cables.

Feeding and Pulling Cable

Whether dropping cables in or pulling cables out, CALL IT OUT. You must communicate with all workers in the air with you, as well as below, for everyone’s safety. Keep cable management front of mind. Loose cables can be dangerous when working and walking the catwalk. You don’t want to trip yourself or anyone else on the team.

When feeding cables in, secure them with a rope by tying it with a bowline knot and slowly dropping the cables in until a member below lets you know you’re clear. Be sure all cables being fed in are clear of any other hanging objects. Pull your rope back up and out of the way. Then secure additional slack on a railing with tie line in a bow knot (or shoelace knot).

When pulling cables out, be sure to properly roll the cable (over, under). If doing in-house work, you should be able to properly coil the cable and tie it in place with a bowknot to secure the cable. If not, strike what needs to be struck and continue on to the next task.

Never Go Out on the Beams

Most of the time, beams are extended from the catwalk across the facility floor layout. These beams will house motors, which you use to hang truss. Truss can hold lighting, line arrays, or large projectors screens. DO NOT go out on the beams for any reason, unless you are rigging certified. Here you can find certified riggers nationwide, as well as full details on how to become certified yourself. You will need proper training and specific gear to go out on these beams. I suggest you take one step at a time and let the riggers handle that part for now. I also want to encourage you to become a certified rigger if you want to do more work within this part of the field.

These few basic guidelines will help you stay safe while you strut your stuff up on that catwalk.


Bad Interview Stories: The Five Minute Interview


One of my first interviews in LA – and worst interviews – came through an industry job website. I saw an ad for a sound mixer for a “film with an up-and-coming director”. I sent my resume asking if they needed a sound assistant. I was interested in learning production audio but didn’t have any credits or gear. To my surprise, I got a call back a few days later from their production assistant.

“We already started filming and our sound mixer had to leave the project. We need someone immediately. Are you available?”

“Yes,” I said. “But I haven’t worked on a set before.”

“That’s fine,” She replied.

“I also don’t own gear. Are you providing any?” She urgently replied yes, so I asked what they had. She couldn’t remember exactly, so I started naming off some gear.

“Yeah, it’s something like that,” she said, cutting me off. “Why don’t you just come in for a meeting and we can sort it out.”

We arranged to meet at their headquarters (a house in the Hollywood Hills). It was my first time in the Hollywood Hills, so I was prepared for mansions and expensive cars. After an hour in traffic to get to Hollywood, I weaved my way through the hills only to find a lot of run-down houses, overgrown lawns and beat-up cars. I pulled up to an average-looking home with a ton of cars out front.

I was greeted by the woman I spoke with on the phone. She told me to sit at a table (which was oddly placed in the entryway two steps from the front door). She returned with a guy who introduced himself as the production manager. He asked for my resume and looked it over briefly.

“Umm, yeah, it looks like you don’t have production experience,” He said. “Do you have your own equipment?”

“No…” I replied, confused from the phone conversation I had earlier.

“Well, April, we’re looking for someone with equipment. But, we still need production assistants, if you’re interested in doing that.”

“Maybe,” I said. I figured I might as well hear him out since I had driven all the way up there.

“Basically, you would be one of the first ones on the set and the last to leave. You make sure the food is there and set up on tables and that everyone is in the right places. Sometimes it’s running errands and just whatever else we would need. It would be six days a week, 12 hours a day for the next six weeks. We can’t pay you, but if there’s extra time you could probably help out the lighting guys. The sound guy usually doesn’t need help.”

I told them I would consider it and would get back to them. I was in and out in less than five minutes. I didn’t call them back.

Looking at it now…

There were a lot of red flags that I missed because of inexperience. As someone new to town, the idea of working with an “up and coming director” was exciting – but what I didn’t know is that there’s a lot of people who think they are up and coming. Anyone with a camera can call themselves a filmmaker and put up an ad looking for crew. It’s also a common tactic to name-drop to recruit people to work for low or no pay. Sometimes jobs like those can still be a good opportunity, but you have to ask yourself: What else about this opportunity is valuable? How many hours a week am I willing to commit for no pay?

On the phone, I assumed I was speaking to someone in a managerial position like a producer, associate producer, or production manager. The person who called was a production assistant (PA), which is typically an entry-level job – the same job they offered me in that 5-minute interview. If I had that phone call today, I’d ask a lot more questions. I’d try to gauge if it was a professional, semi-pro, or amateur film. Instead of accepting vague answers, I would ask for an email or call back before agreeing to come in for a meeting (so we’re not wasting anyone’s time). It’s ok to ask about the hours, location, job duties, gear, or pay range – especially if they didn’t provide that information. It’s not rude or pretentious to ask: “Could you clarify some things for me? I want to make sure I’m available and can provide what you need.”

Sometimes gig listings (especially online) use the wrong terminology or job title. For example, “sound mixer” is usually the title for production sound or location mixer. In online ads, “sound mixer” can mean anything from location mixer to sound editor, sound designer, music mixer or re-recording mixer. I once had someone contact me to do a mix when they actually needed a composer. There’s a lot to learn from amateur and semi-pro projects, but it’s good to know going in that there could be a learning curve – you may have to teach your client what your job entails (or the proper title for your job).

Sometimes it’s good to do interviews just to gain experience, but commuting over an hour each way for a 5-minute meeting wasn’t worth it. It’s ok to politely turn down an interview if you’ve changed your mind – but it’s also ok to keep the interview if you see value in the experience, relationship, or the potential for a future opportunity.

Creating an Effective Soundcheck


I am constantly teaching new students how to soundcheck. Sometimes I even need to teach the band how to work through a soundcheck. A good sound check can make for a very successful event.  Over time, I have developed helpful tips to make a soundcheck successful. The tips include communication, technical skill, knowledge of the performing group, and being aware of some common mistakes in the process so you don’t make them.

Communication – A key component of soundchecking

communication

Communication is a key component of sound checking and starts long before the true technical soundcheck occurs. This starts immediately as the group walks in the doors by introducing yourself and getting to know them. Simple small talk and introductions can go a long way.  At this point you are providing your first impression to the group, make it a good one.

Be organized, have the stage clean and ready for the event.  Also, set up devices that will help you navigate the impending soundcheck. Include your FOH mic; have it pre-sent through the monitors so you can address the group. Label your board, know the stage plot, and help the group make any changes to the setup so you know where the mics get moved.

As you get into the actual soundcheck, address them by their names. Tell them your process and how they can help you. For example, if you take the hand-raising approach to set monitors then communicate that to the group. Provide them some training on your process to have soundcheck go smoother and so they can get what they need.

Technical Skill – Know your equipment and its limitations

techskill

Technical skill is obviously a large aspect of soundchecking, but sometimes the lack of skill is what makes it so difficult.  Before you initiate your soundcheck, here are a few tips to help make you more successful.  First, get comfortable and know your board. Before you are at the soundcheck point spend time getting lost in the board and working your way out. Be familiar with everything that can be done and find the best way for you to navigate through all of the options.

Once the show comes, finalize your patching and line check beforehand if you can. Know your monitor placement and the people by them.  Label your board! Go above and beyond by adding the names of performers under the input labels so you can address each member by name during your soundcheck.

Know your room and how the sound reacts in the space. Adjust accordingly to create the best sound. Work with the group to get amps pointed in proper directions, or let them know where their wireless mic will drop out, or even let them know if they stand right there they will be blinded by that one light.  Finally, use your FOH mic. Don’t scream back and forth or just wait for the band to do what they are going to do. Direct them to do what you need them to do to be able to create your best mix for the night.  

Knowledge – Know who you are working with

knowledge

Help yourself create a better mix and be prepared for the performance by getting to know the group you are about to work with before they arrive.  Be able to answer questions like; how many people are in the performance group?  What genre of music are they playing?  What is their performance style? Are they a national act or are they just getting started in their career? Do they have any special tech needs, like a particular instrument you’ve never worked with before? For me this would be something like a group touring with a pump organ. I had to do some research to learn about the best micing techniques for that instrument.

If you can, spend time getting to know the group you are going to work with before you even meet them. Listen to their performances from their website. Get a feel for their style/genera so you can assist with their sound choices.  See the venues they are playing before and after this stop. Are they playing similar venues or is yours a bit different? Acknowledge the difference with the group so there aren’t many surprises.  Gather some information so you can be best prepared for your event to come.

Common mistakes – Things that could make your soundcheck more difficult

commonmistakes

There are many things that could run off course or go wrong in a night, but there are a few common mistakes that can throw a soundcheck off course that can create a stressful event. Avoiding these mistakes can help you stay on track and in control of your soundcheck to produce the best show possible.

First, don’t lose your communication. Let the performers know what you are doing-especially if you need to troubleshoot something.  Don’t leave them hanging in a state of wonder and awe of what the heck is the soundperson doing and asking, “Can we finish the soundcheck yet?” Tell them what is going on.

Second, remain in control. Move the group forward as you can to get each part of their show set. Tell them you are working on monitors and continue to communicate how it will work best for you to achieve their needs.  Use your FOH mic.

Third, stay organized and keep things labeled as they change. Keep track of inputs that are set and move onto the next. Consider your EQ process; copy and paste what you can to speed the process up a bit.

Fourth, don’t forget about the big picture. Soundcheck to the volume of the venue, plan ahead for what the show needs to be for the night, and prepare for that. Don’t get yourself stuck in a feedback mess or with monitor volume issues because you set everything according to the empty room. Also, don’t forget that louder does not always equal better. Try to produce a clean mix for the awesome sound; don’t blow the audience away because it’s too loud.


SXSW: A First-Time Tour Manager’s Guide

For a slightly control-freakish girl like me, the massive, squalling, sensory overload that is South by Southwest (SXSW) is a wee bit intimidating to think about (there’s a reason I like to work in studios). However, despite my aversion to large, inebriated crowds and out-of-tune performance spaces, I ended up having a blast working for the powerhouse electro-rock duo Twin Scars and learned a LOT about touring, show management, and coping with mental and physical overloads.

My official title for the week was “Tour Manager,” which confused me at first because originally I thought all that tour managers did was book shows (and I’d had about diddly-squat to do with that).  But by the end of the very exhausting seven days, I figured out that the role of TM was much more valuable and extensive. I thought I might share what I learned in the most effective way possible: a listicle.

Before the tour:

  1. Get your physical strength in check. You will be lifting lots of heavy gear, and you need to make sure your body is up to the task (especially your back). Visit the gym, do some yoga, etc. Invest in braces for body parts that are a little weak (for me, knee braces would’ve been a lifesaver).
  2. Stock up on essentials. That means comfy clothes, supportive shoes, business cards, and LOTS of earplugs and hair ties! I always had extra earplugs on me in case the band forgot theirs, too.
  3. Brace yourself psychologically. There will be noise and people in abundance. For females, be prepared to be called “sweetie,” “bitch,” “honey,” and “darlin’.” Know that it has nothing to do with you or how well you do your job. Arms and waists will be touched and/or grabbed, no matter how many times you lift 30 lb speakers over your head. Develop quick relaxation techniques for when you’re about to explode from rage at the patriarchy.

At each show:willasxsw1

  1. Load your gear in FAST and get it to a safe, out-of-the-way area.
  2. Keep your eye on said gear; make sure it doesn’t get “accidentally picked up” by one of the hundreds of other people in attendance while you’re waiting to set up.
  3. Locate the event manager. Find out where in the venue the band will be playing, what time they will be playing, how long each performance is, and how much set-up time you will be allowed.
  4. Locate the sound person. Find out about any sound restrictions for the area. Inform them what gear your band has, and communicate any specific sound needs for the band.
  5. When the band before you finishes, hold your horses; wait a few minutes for them to get off the stage before you start loading on. (If after five minutes they still haven’t moved, start getting your stuff onstage anyways. They’ll move after they throw a brief temper tantrum.)
  6. Be swift like the wind!! Get everything set up and ready to go within the allotted amount of time; the event managers/sound crew/other bands will love you for it.
  7. No matter what, KEEP YOUR HEAD. BREATHE.

While the band played their set, I set up the merch box, walked around the room to make sure the band sounded good in as many areas as possible and collected emails from audience members for the band’s email list; all the while taking pictures and videos to post to the band’s social media accounts. When the set was over, I checked with the sound engineer to make sure everything was zeroed, then helped whisk everything off the stage as quickly as possible.

At the end of the day:

  1. Relish alone time. Rest your ears and body, then gear up and get ready to do it all again tomorrow.

willasxsw4Check out Twin Scars!

Website: http://twinscars.com
Facebook: https://www.facebook.com/Twinscarsband/
Instagram: https://www.instagram.com/twin.scars/
SoundCloud: https://soundcloud.com/twinscars

Signal Flow


In Yvonne’s Top 52 Tips To Remember, signal flow was one of the things I flagged as important, so I thought it might be a good idea to cover that in more detail. You have a bunch of awesome equipment, you have awesome musicians, and you need to get the sound from the musician or SFX playback computer through all that awesome equipment and out into the world or recorded in some way. Once you understand signal flow, troubleshooting will become a whole lot easier.

No matter how big the system is, the same principles of signal flow apply. If you are responsible for that system going together or responsible for keeping it working, then it’s important you understand the signal flow of that system.

Signal flow in relation to fault finding

Signal flow in its most basic form can be expressed as Fig. 1

sigflow-fig1

Fig. 1

.

Assume you have plugged mic one into line one on the stage box and line one is patched into channel one on the desk. Assume you have done the same thing for mic two – mic two to line two to channel two.

If you aren’t getting signal into the desk from mic two, and when you swap the mics the problem doesn’t move, you know the problem isn’t with the microphone. The signal from mic one to the desk works, the signal from mic two to the desk doesn’t. If the only thing you have done is swap the mics and the signal still isn’t getting to channel two, then the fault is further up the signal chain than the microphone. If you swap the XLRs between the mics and the stage box and the fault still doesn’t move, you know it’s further up the signal chain. Work your way up the signal chain swapping equipment until the fault moves. When you manage to get the fault to move, you will know which piece of equipment is faulty – or at least where in the signal chain the fault is likely to be. This is fault-finding in its most basic form. Sometimes a cable will start working again, though not for long because you touched it and made the dry solder or loose connection make contact.

sigflow-fig2

Fig. 2

Internal to the desk, the same principles of signal flow apply (Fig. 2). The signal flows from the input through the group or aux into the matrix and out of the desk. If you can follow the signal through the desk, then you should be able to find the fader that has been left down or channel that is muted, or where the fault is.

Signal flow in relation to monitoring when fed from the FOH desk.

Imagine you have a band with an Aviom or wireless in-ear system and a stage that you’ve put into different time zones. There is a DSM/show caller that needs to hear the vocals, a feed going off to archive, and the band and an offstage vocal booth who need to hear what’s happening on stage. Where in the signal flow do you tap off the vocal monitoring to feed the different needs of the listeners?

If you send the vocal feed from the radio mics pre-fader (i.e before the fader in the signal flow), the person listening will hear the cast offstage and in their dressing rooms. But if you want to send the feed off to multitrack or a broadcast truck where it will be mixed later, then pre-fade may be the correct think to do.

The band and the vocal booth aren’t going to want to hear the radio mics pre-fader; they will only want to hear the mics that are live to front of house. So you’ll want to send post-fade. But do you want to send it to the band/vocal booth direct from the channels or from the vocal group? If the vocal group has a changing delay time to allow for stage position, what would happen to the vocal booth if they were singing along to it? What would happen to the band if they had a feed that was time-delayed before it reached them?

Signal flow in system design

When using compression, where in the signal flow should it be: on an individual channel, on a group, or across the outputs? Do you want to EQ something that’s been compressed, or do you want to compress something that’s been EQ’d? The effect is different depending on which way round you do it.

Putting processing in different places in the signal flow can have very different results. If you needed to use EQ on a signal processed with reverb, should you EQ the aux send to the reverb, or should you EQ the return channels from the reverb back into the desk? There are no correct answers, other than what fits the situation at the time But understanding the signal flow will enable you to make better decisions in order to achieve the results you want.

X