How to Make Tech Easier: Be Prepared
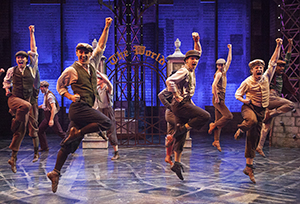
In my last blog, I talked about what goes into mixing a Broadway-style musical, and there’s a lot to do. For almost every production you work on, you’ll be expected to mix the show mostly line-by-line with some dynamics and (hopefully) few mistakes from day one. Having a smart layout for your DCAs and a clear script can be the difference between an incredibly stressful or a delightfully smooth tech process.
Once you have the script, first things first: read it. The entire way through. If you don’t have a good idea of what’s going on from the beginning, the rest of the process is going to be guesswork at best. Next, go through the script again, this time with an eye out for where scenes might go; either where a natural scene change happens in the script, or where there are more actors talking than you have faders. (The number of DCAs you’ll have is usually 8 or 12, determined by the console you’re using. DCAs are faders in a programmable bank that can change per scene so you only have the mics you need or can consolidate a group, like a chorus, down to one or two faders.)
There are two common ways of programming DCA’s. The first is a “typewriter” style where you move down the faders in order for each line and if you run out of faders, you take a cue and go back to the first fader, then repeat (i.e. 1, 2, 3, 4, 5, CUE, 1, 2, 3, etc). This is very useful in larger scenes where characters have shorter one-off lines and you quickly move from one character to the next. The second approach is where each principal actress and actor is assigned to a constant fader (Dorothy is always on 1, Scarecrow on 2, Tin Man on 3, Lion on 4, etc), and will always be on that fader when they have dialogue. In shows where you mostly deal with a handful of reoccurring characters, this is friendlier to your brain as muscle memory brings you back to the same place for the same person each time.
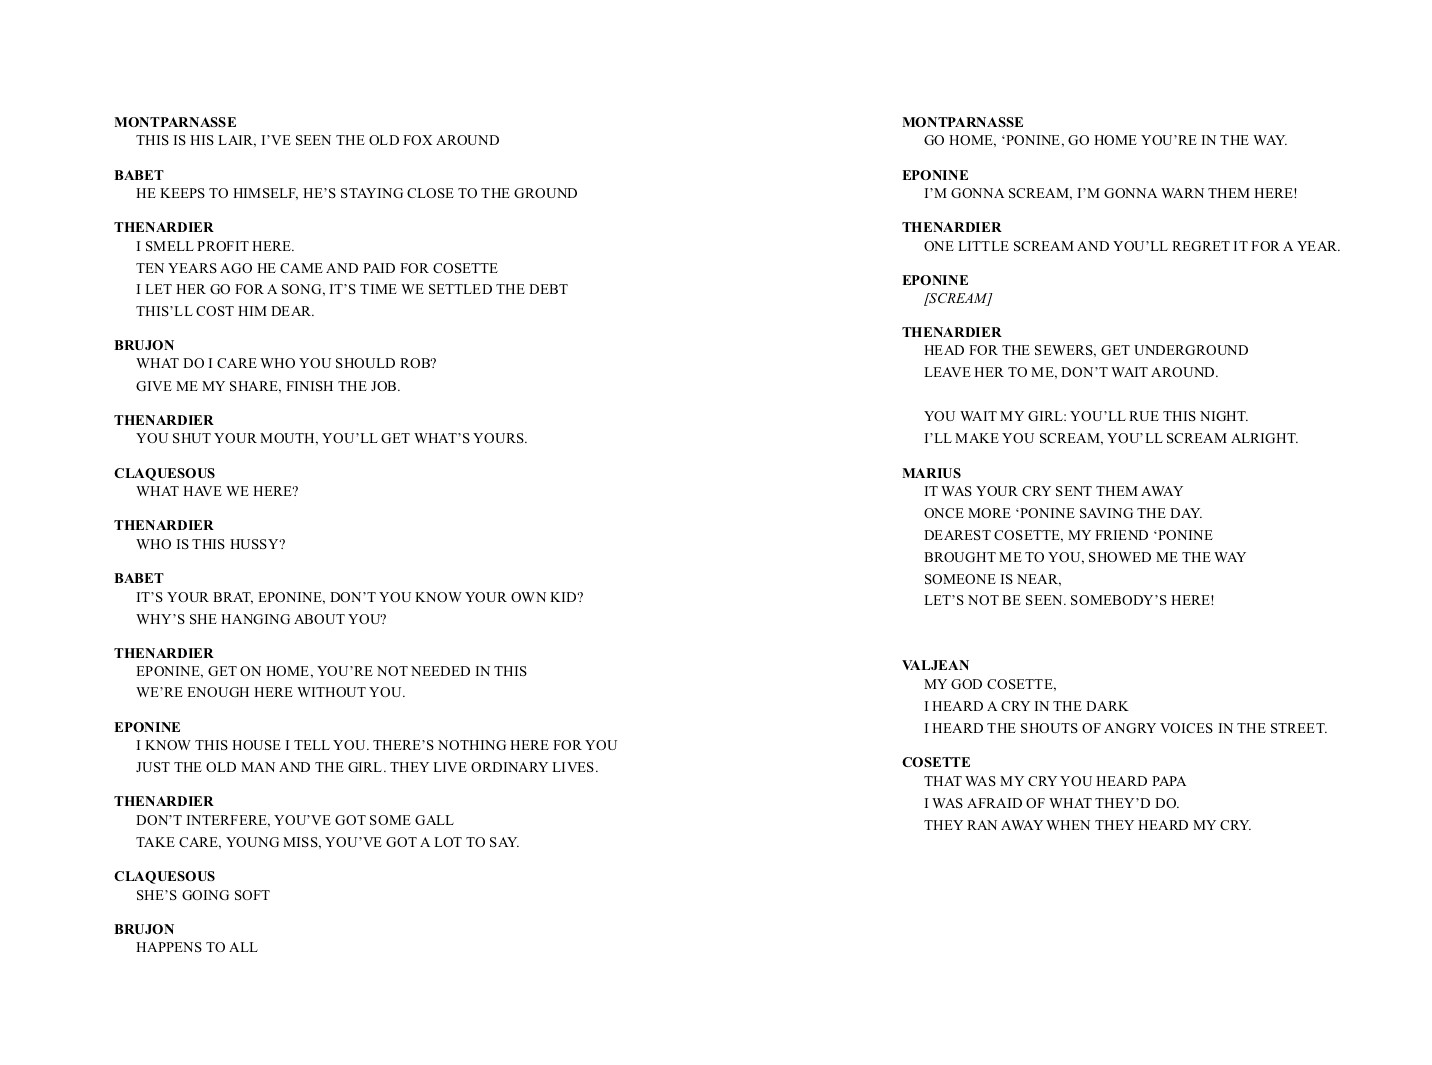
As an example, let’s say we have 8 faders for dialogue and take a look at “The Attack on Rue Plumet” from Les Mis (if you want to listen along, it’s the dialogue from the 2010 Cast album for the 25th Anniversary production):
A typewriter approach to mixing would assign DCAs in increasing order each time a new character speaks (first lines are highlighted):
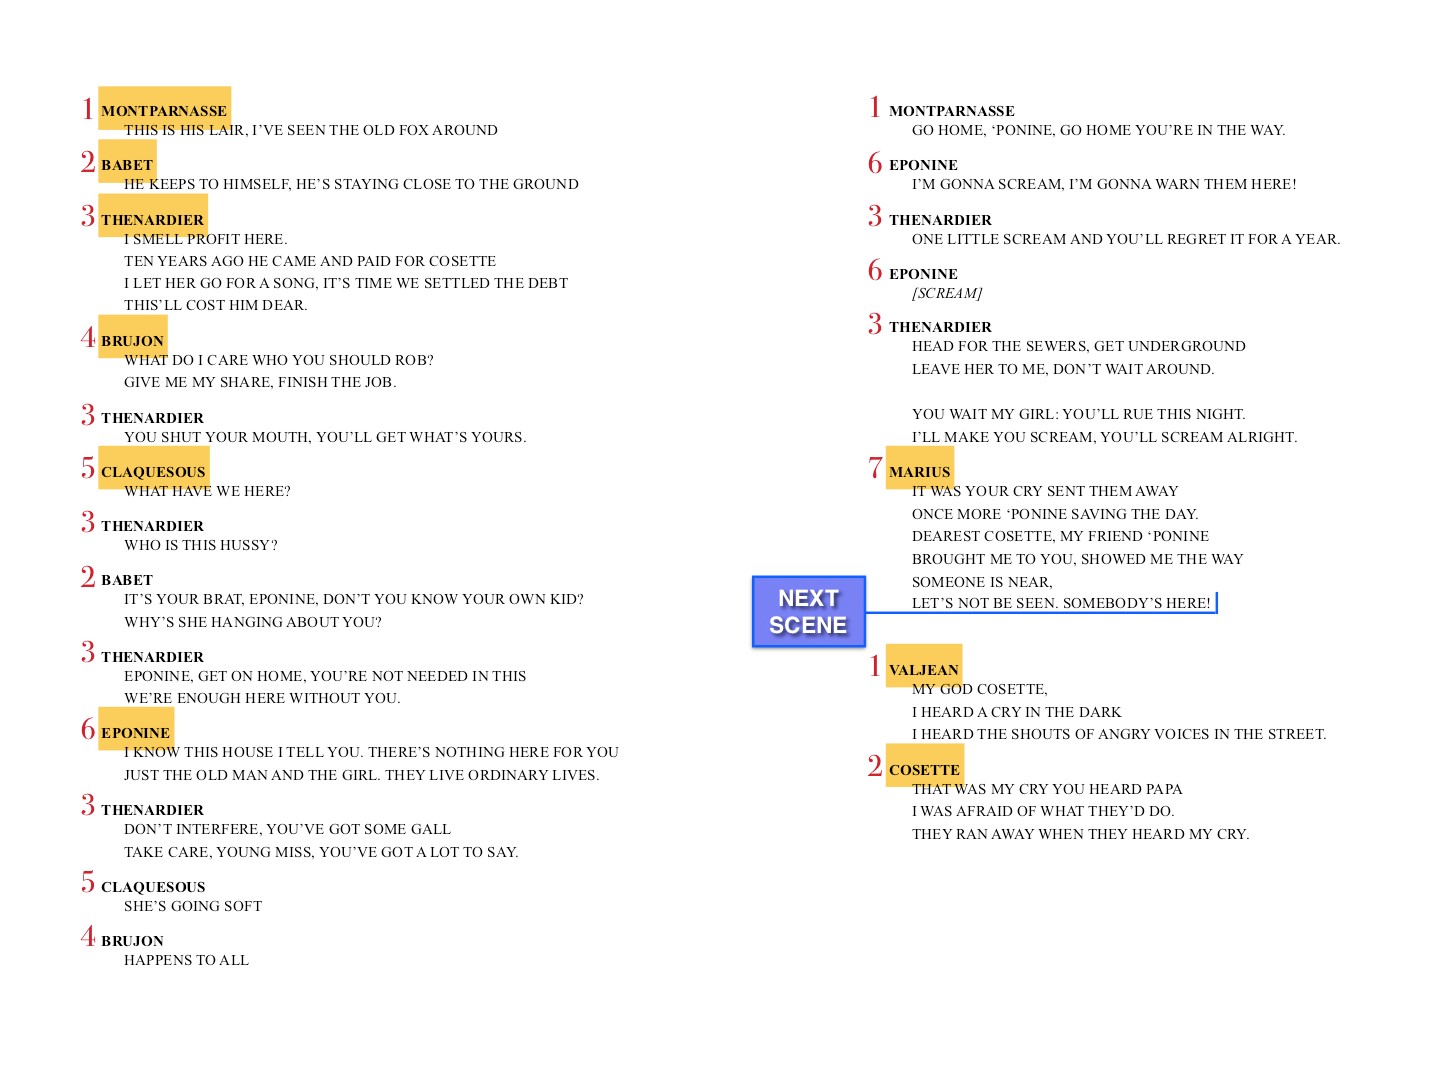
By the time we get to Marius, we’re almost out of faders, and there’s a natural change in the scene when Thenardier’s gang runs off and Valjean enters, so it works to take a cue between those two lines and start over with the DCAs.
But Les Mis is an ensemble show that’s centered around a core group of principals, so assigning characters to designated fader numbers is another option. If we’re mapping out the entire show, we find that Valjean, as the protagonist, ends up on (1), Marius, the main love interest, on (2), and Cosette and Eponine can alternate on (3) as they interact with Marius most frequently, but usually aren’t in scenes together. Thenardier could go a couple of places: he leads in scenes like “Master of the House” and “Dog Eats Dog,” but in scenes with the other principals, he typically takes a secondary role, so we’ll put him on (4) in this scene. The chorus parts, Montparnasse, Claquesous, Brujon, and Babet (first lines are still highlighted below), are easiest to put in typewriter style after Thenardier since they only appear once or twice in the show, so don’t have a designated fader number.
The mix script for this approach would look like this:
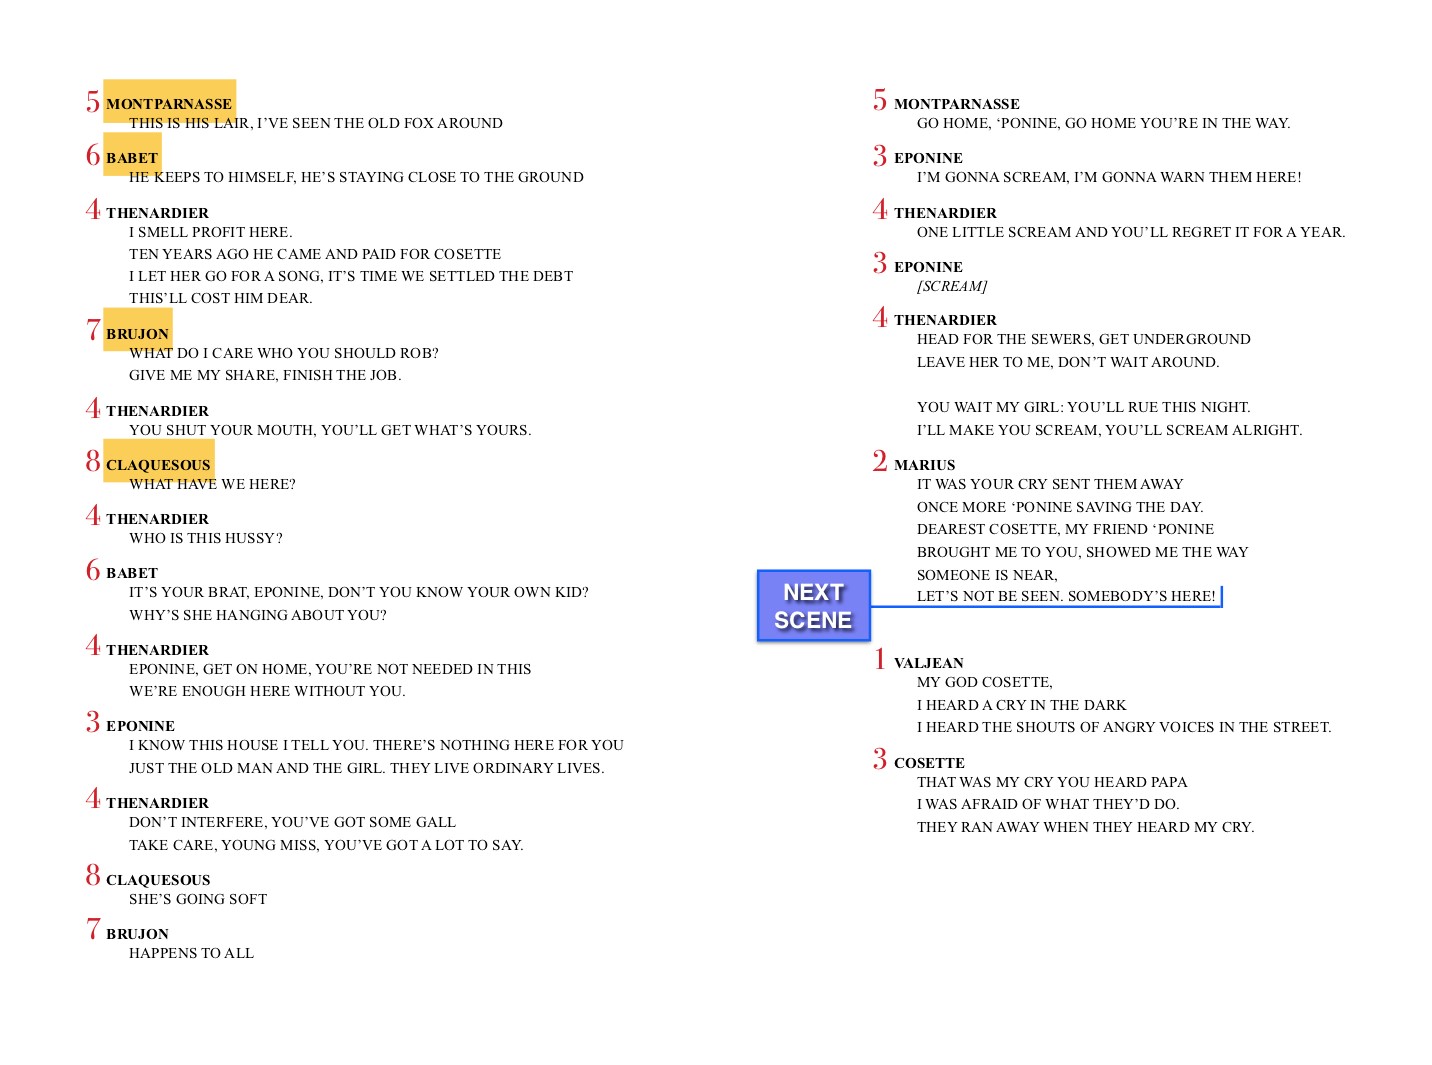
Here, Thenardier (4) is still right next to his cronies (5), (6), (7), and (8), but is also right next to Eponine (3) for their bits of back-and-forth. The scene change still ends up after Marius’s line, as it’s a natural place to take it, and Cosette replaces Eponine on (3), getting ready for the next scene “One Day More,” where Marius (2) and Cosette (3) will be singing a duet, with Eponine (4) separated, singing her own part.
With this particular scene, neither approach is perfect, as all the characters have multiple lines (and not in the same order every time), but either one would be a legitimate way to set it up.
Typically, you’ll use a combination of both approaches over the course of a show, with one that you default to for scenes that could go either way, like the example. Personally, I like to use a spreadsheet where I can see the entire show and get an overview of what the mix will look like. This makes it easier to spot patterns or adjust potentially awkward changes in assignments. (The colors for major characters in the examples are just visual aids that I added for this blog.)
For example, here’s a layout that’s mostly typewriter. Characters may stay on the same fader for connected scenes, but overall the assignments go in order of lines in a scene:
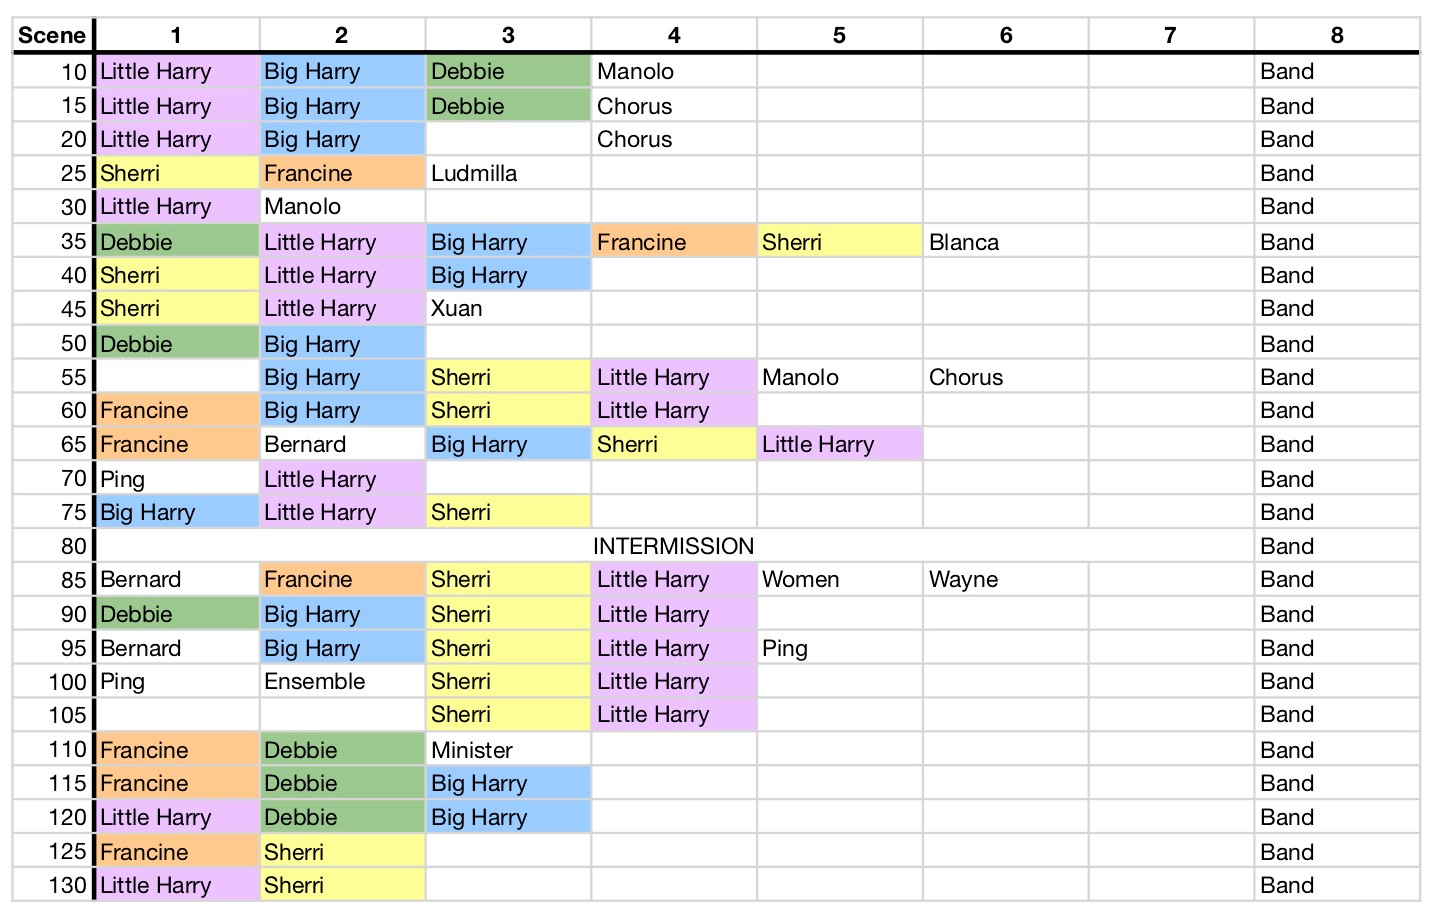
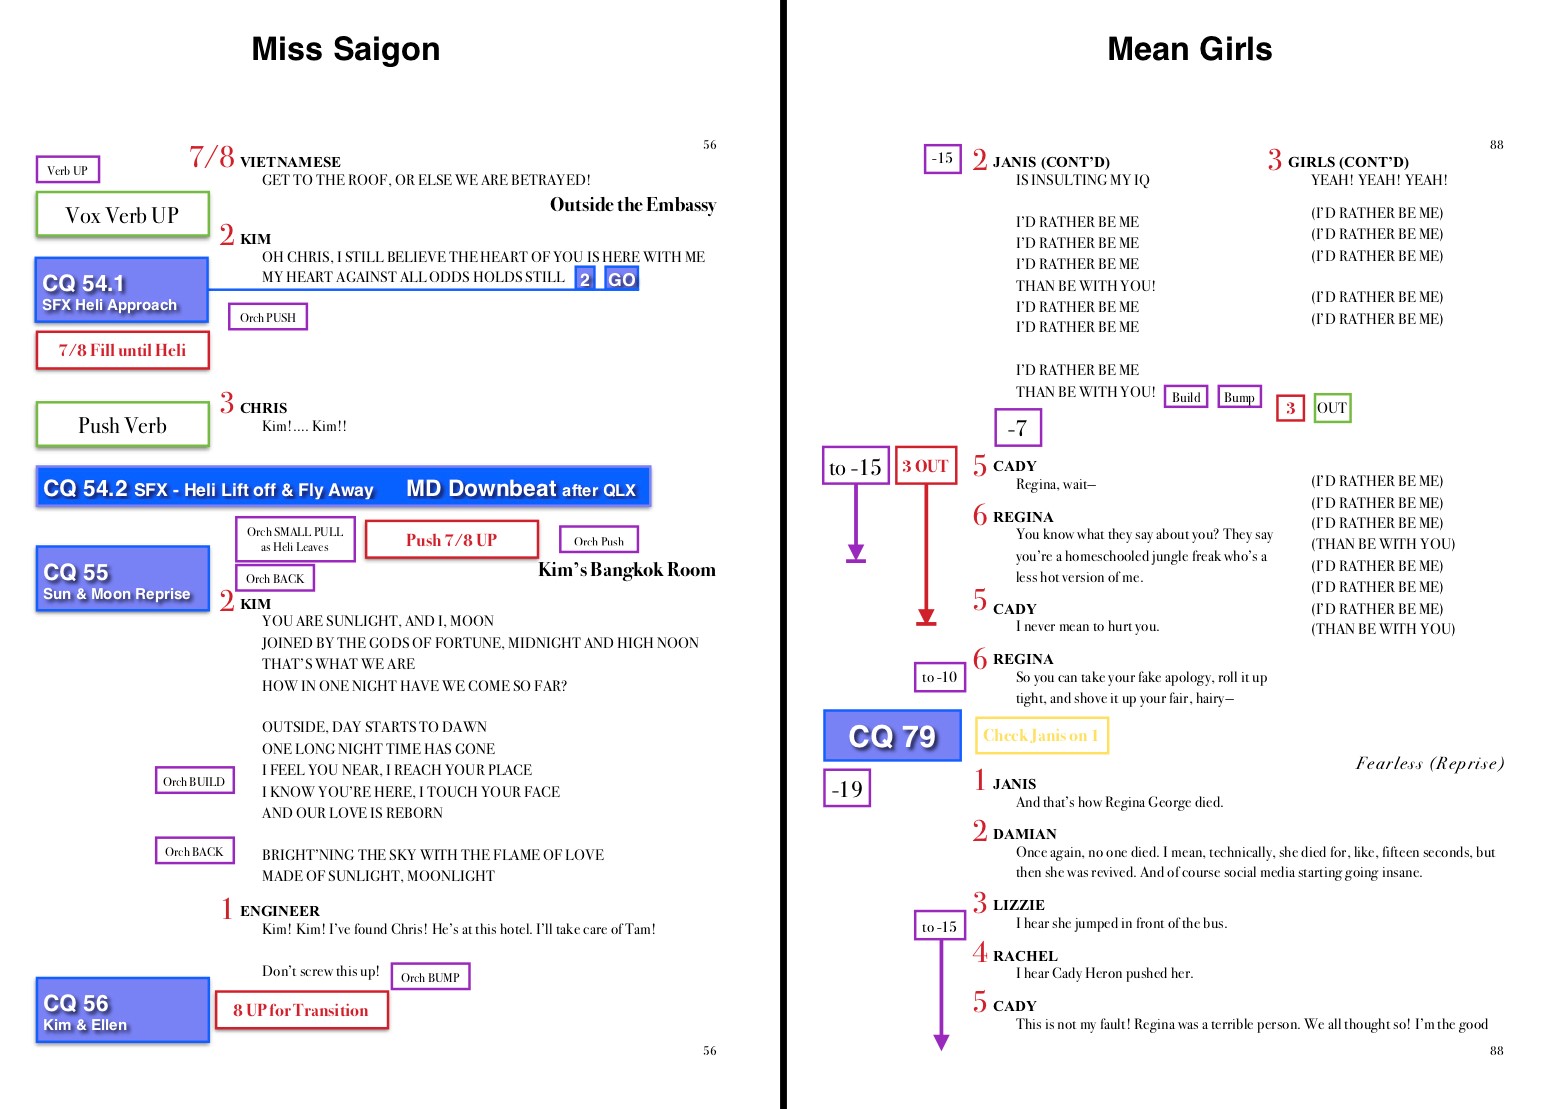
As another example, there is a core group of four actors that are in almost the entire show and a couple of reoccurring supporting roles, so using a designated fader for those characters works much better. There are times that the pattern breaks for a scene or two to switch to typewriter, but largely everyone stays in the same place:

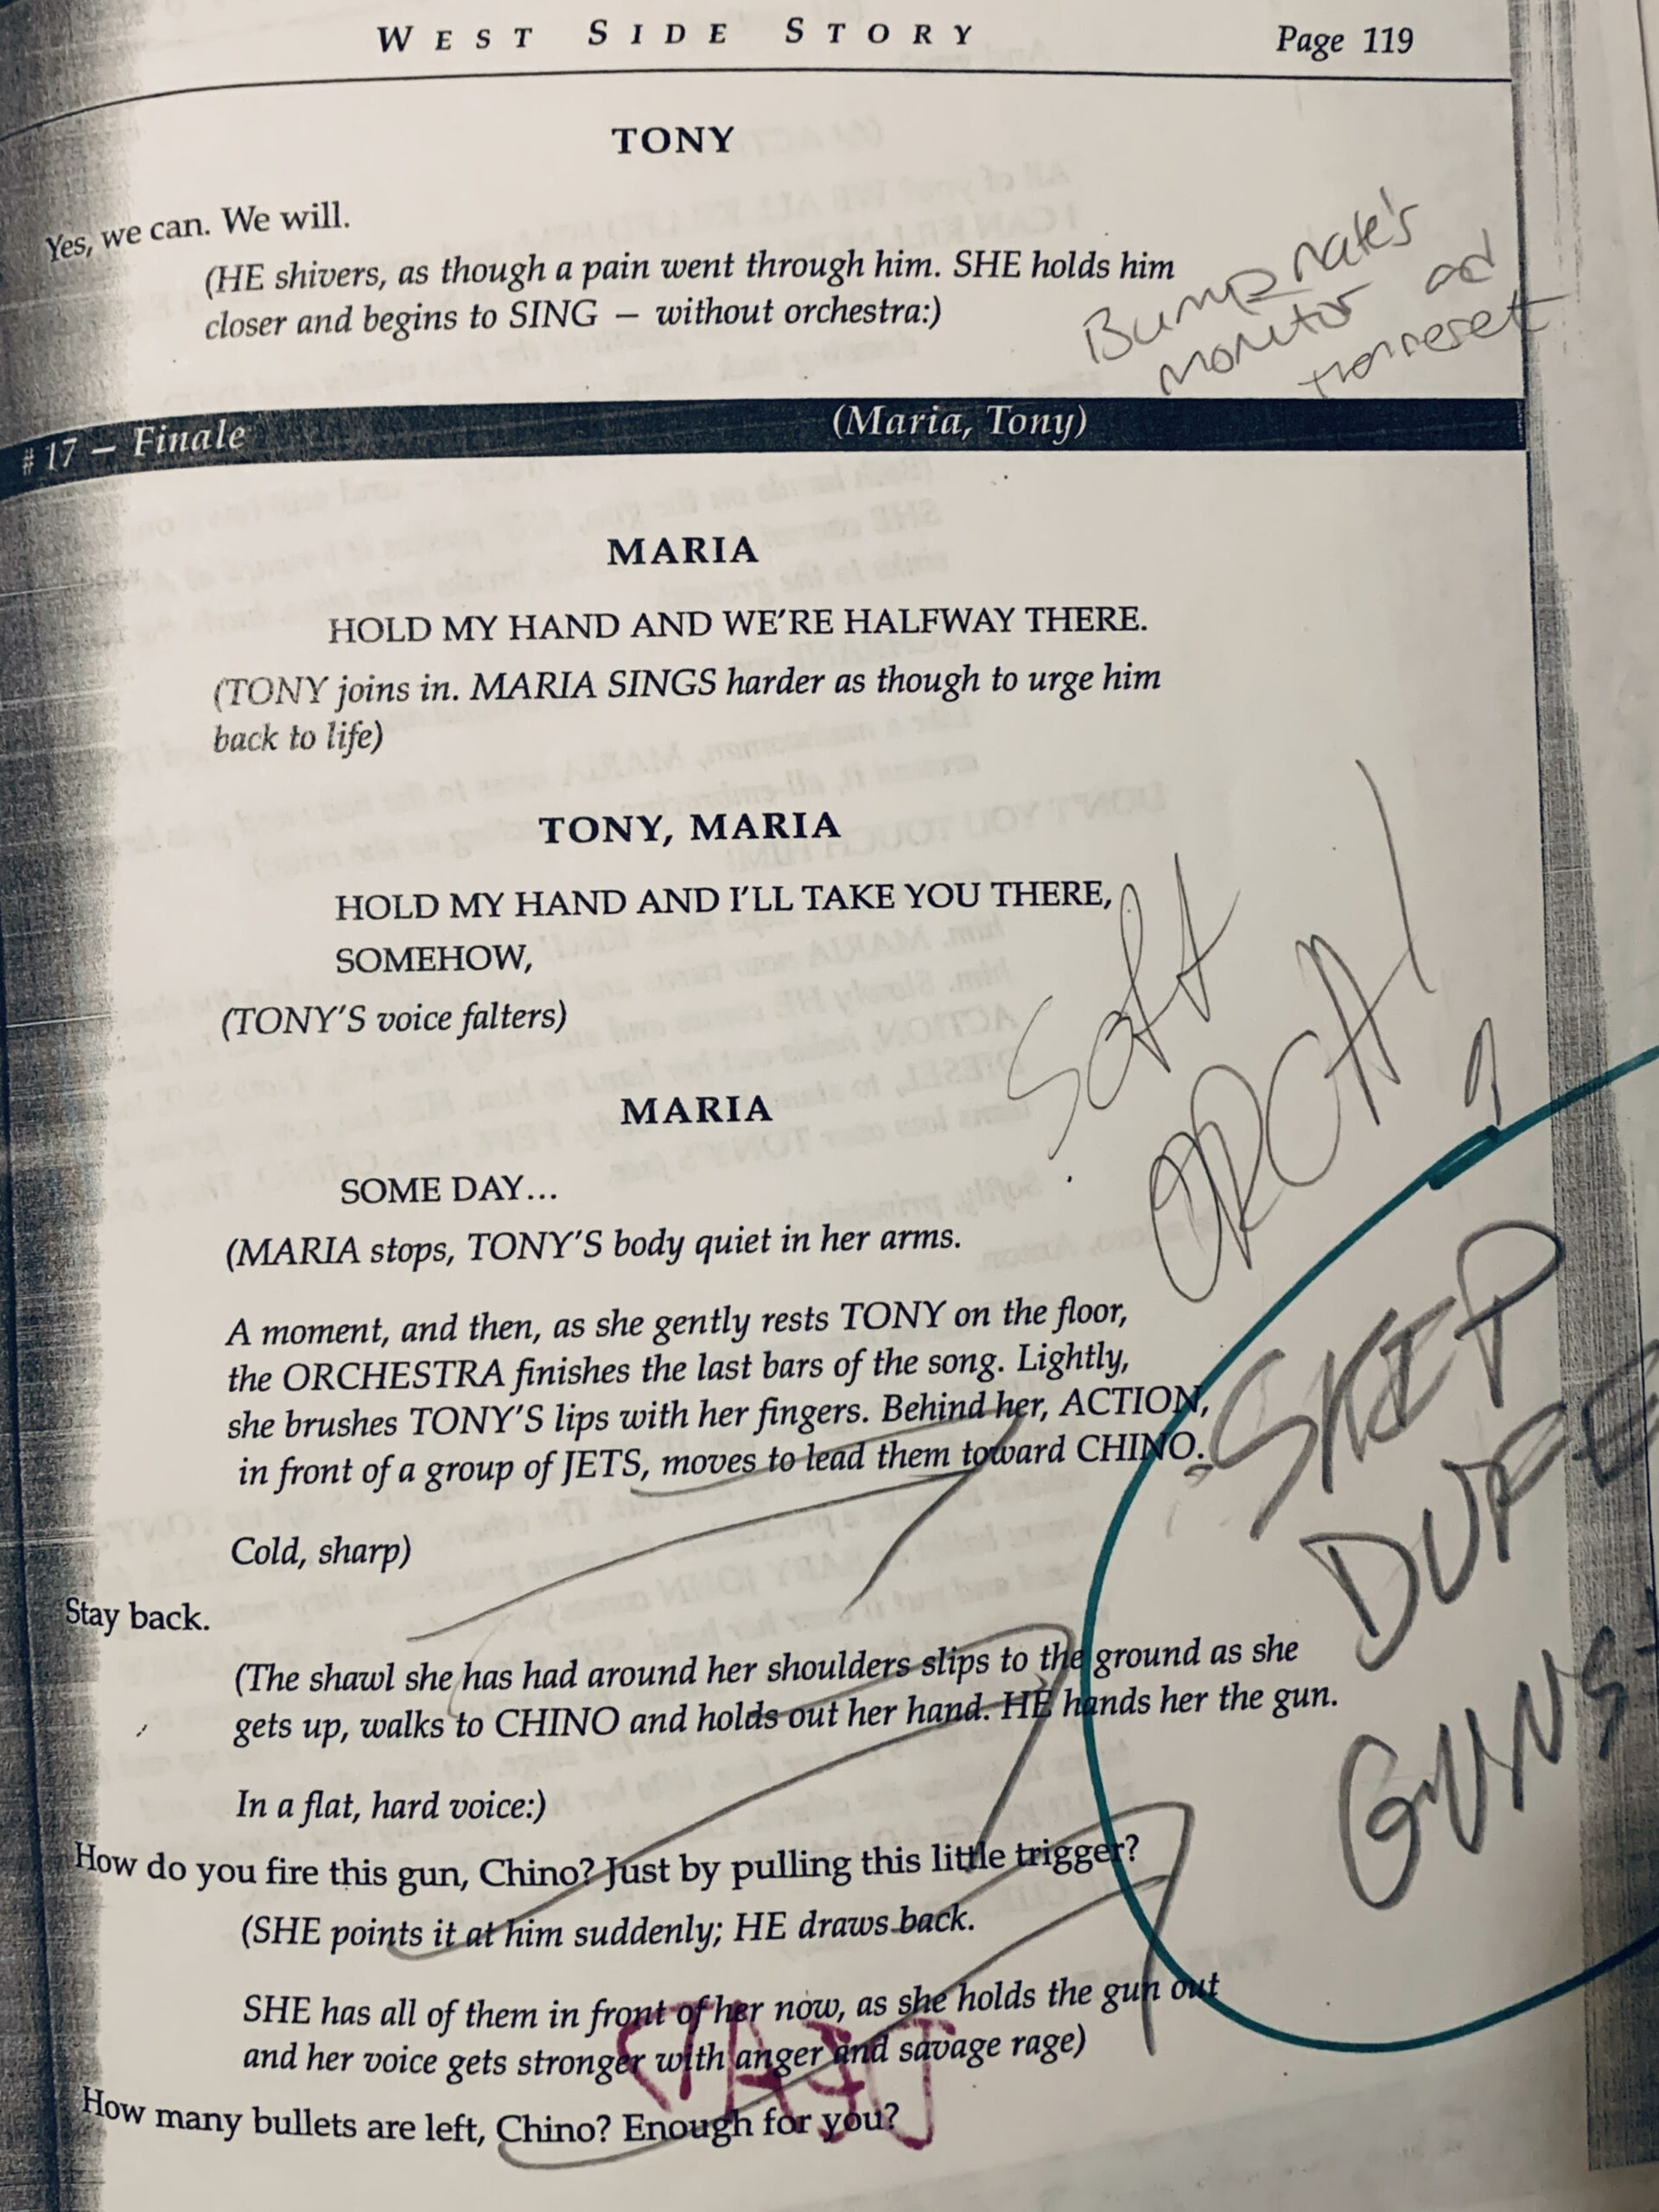
Once you have the DCAs planned out, you can start to format a mixing script. The first example from Les Misérables gives a basic version of that: putting numbers next to lines for the DCA assignments, notes for where cues will go, but you will also eventually add in-band moves, effect levels, and other notes.
Personally, I like the majority of my information to be in the left margin, and if I have enough time I’ll retype the script into my own format so I can mess with it as much as I want. My scripts look like this (I thoroughly enjoy color coding!):
Each show might have slight differences, but the broad strokes are always the same: cues are in lavender boxes with a blue border (for cues taken off a cue light, the colors are inverted, so blue box with lavender border), band moves are in purple, vocal verb is green, red are mic notes as well as DCA numbers, and yellow is anything that I need to pay attention to or should check.
Here’s another example and an explanation from Allison Ebling from her script for The Bodyguard tour (she’s currently the Head Audio on the 1st National Tour of Anastasia):
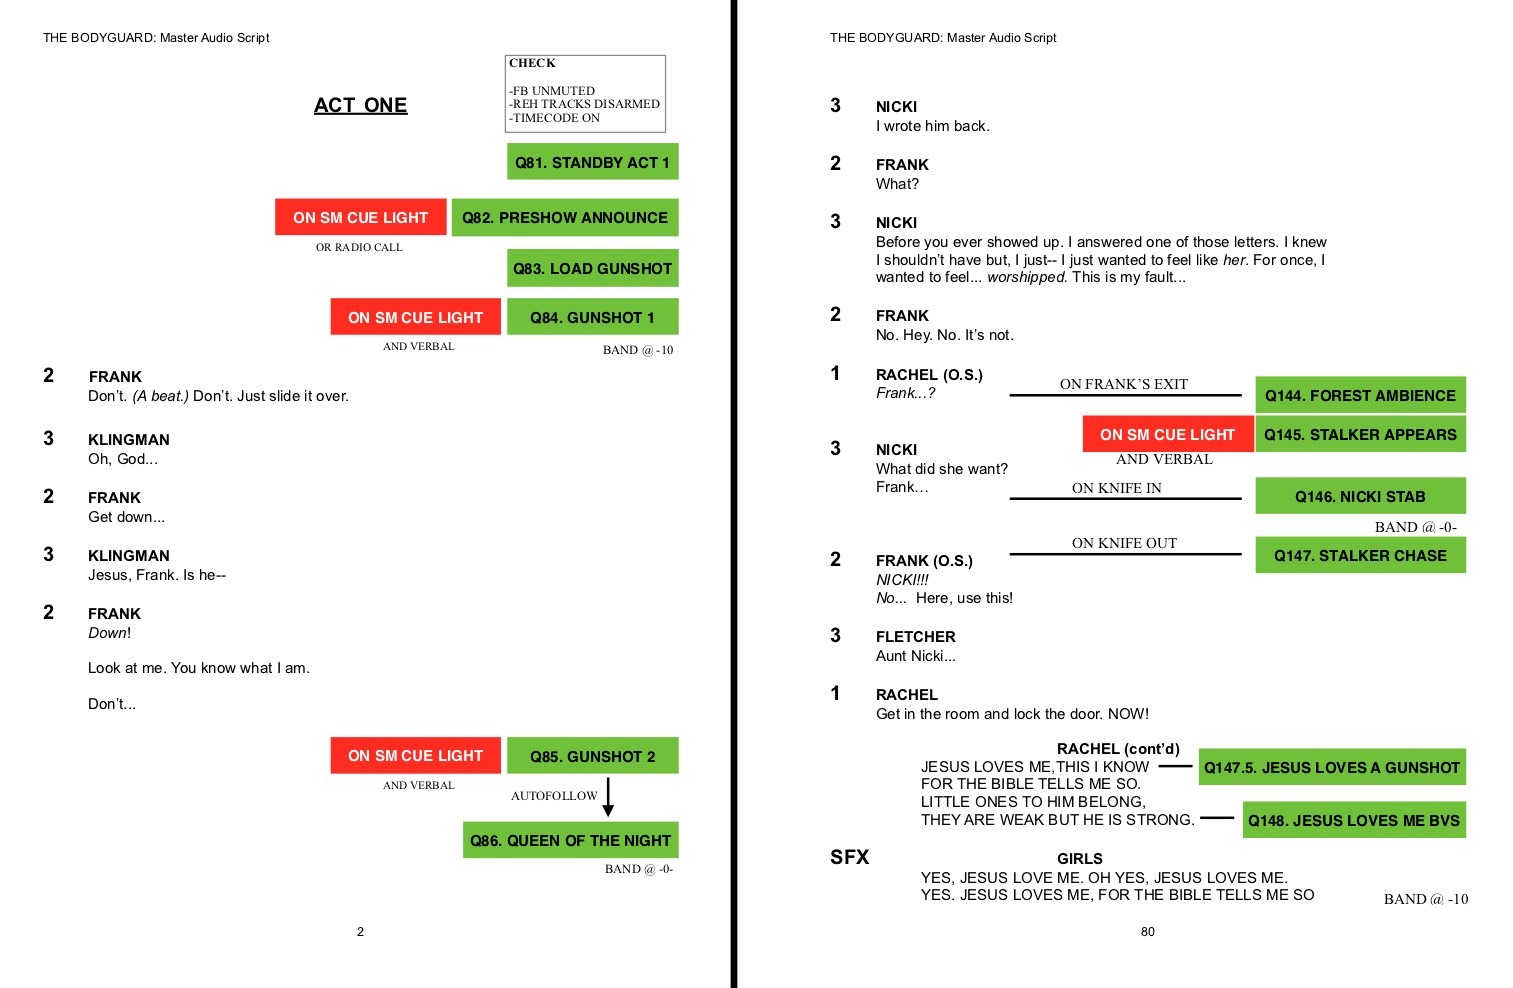
“One is the top of show sequence which had to be verbally called and on Qlite due to the fact that it was a bit jarring for audiences. (LOUD gunshots and all the lights went off without warning, our preshow announce was played at the scheduled start and downbeat was 5 [minutes] after.)
The other is a sequence in the second act where I took one cue with the SM, and the rest were on visual. It also has my favorite Q name ever… ‘Jesus Loves a Gunshot.’
I also like reading my script left to right, so I usually end up reformatting them that way.”
And another example and explanation from Mackenzie Ellis (currently the Head Audio on the 1st National Tour of Dear Evan Hansen):
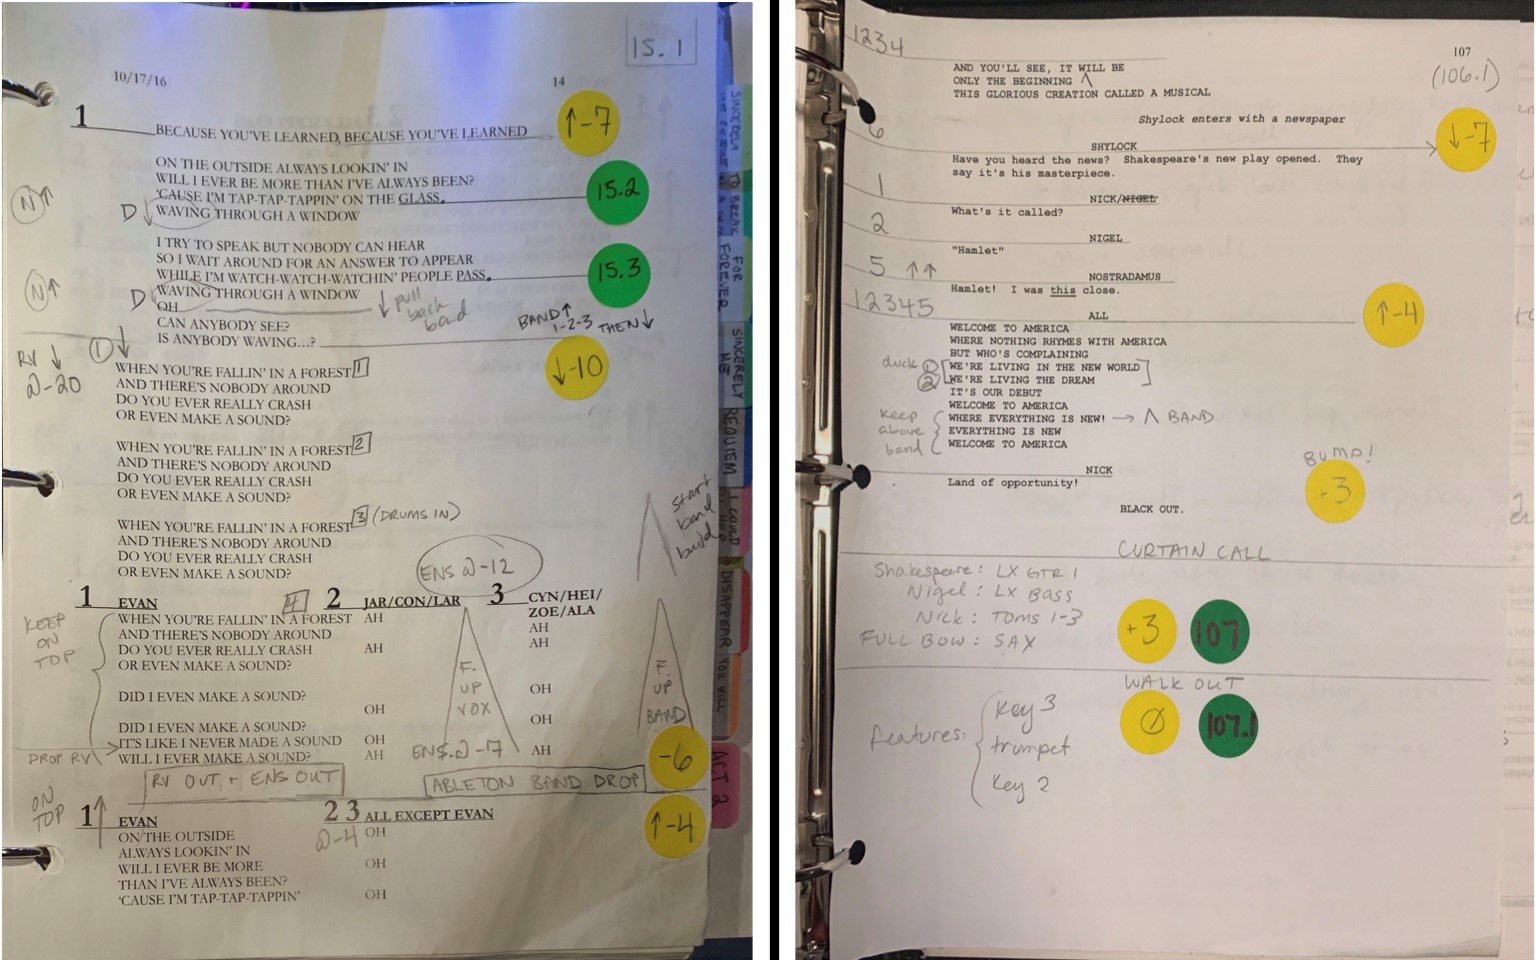
“Here are some from my DEH tour script [Left], and some from the Something Rotten [Right] first national tour, both of which I am/was the A1 for. Both scripts were adapted from the Broadway versions, created by Jarrett Krauss and Cassy Givens, respectively.
Notes on my formatting:
- Yellow dots are band levels/moves
- Green dots are console cues (console cues that trigger sound effects have a different color shadow)
- Vocal notes, including reverb levels – left margin (where possible)
- Band notes – right side (where possible)
- Arrows / initials / names generally indicate “push harder for S understudy”, etc
- Carrots < are crescendos, either vocal or band depending on placement/notation
- These carrots ^ are usually band features / little bumps
- Top right corner is what console cue I should be in at the beginning of the page”
As you can see, there are different styles and endless ways to customize a mixing script. How you arrange or put notations in your script is purely a personal preference, and will constantly evolve as you continue to work on shows. As a note: not only should you be able to read your script, but to be truly functional, it should be clear enough that an emergency cover can execute a passable show in a pinch.
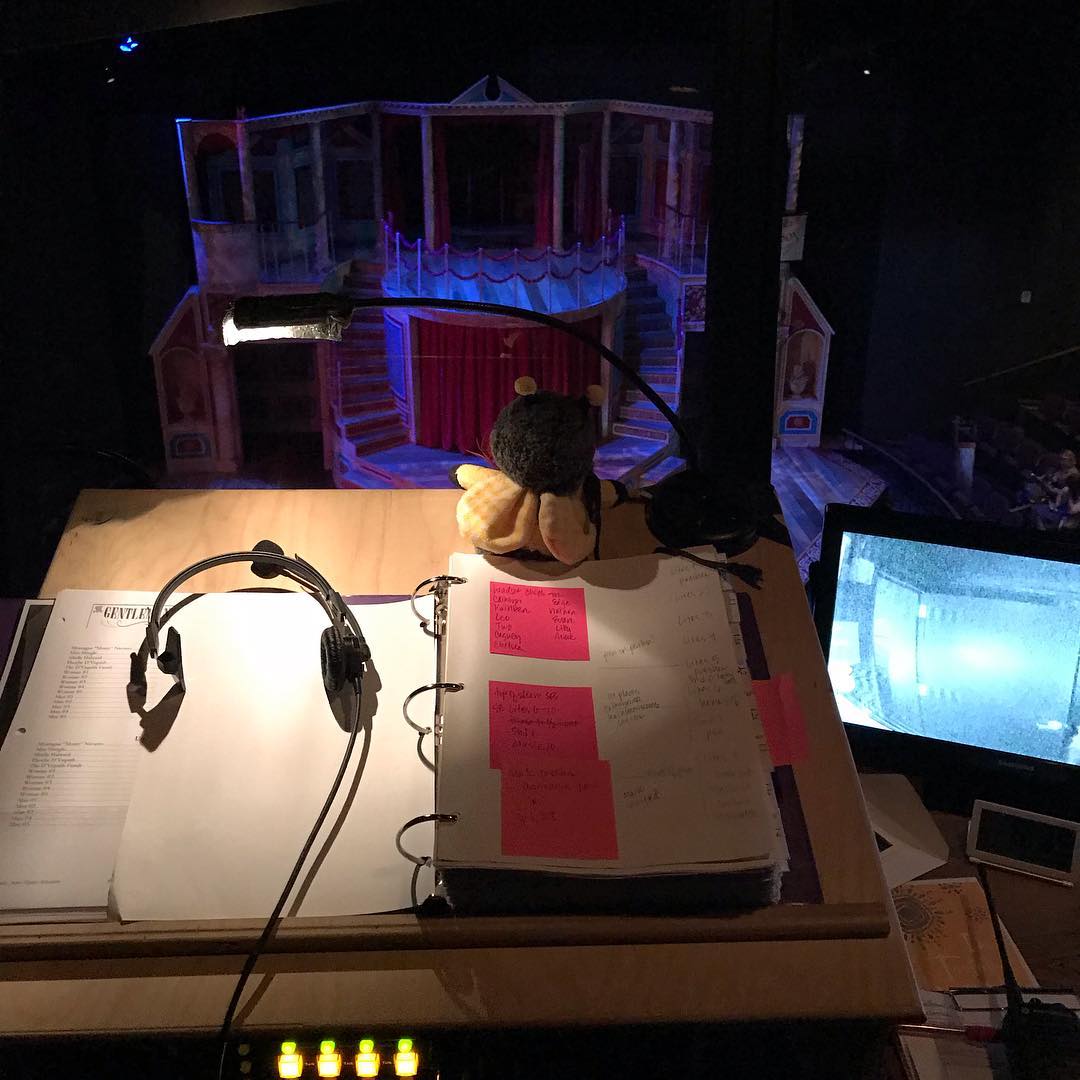
At this point, you have your script ready and a solid plan for how the show will run. If there’s still time before tech, you can start practicing. Practice boards are becoming more and more popular and are incredibly helpful to work out the choreography of a mix. Casecraft makes one that is modeled after the DiGiCo SD7 fader bank. Scott Kuker (most recently the mixer for Be More Chill on Broadway) made a custom, travel-size board for me a couple of years ago that I absolutely love. It immediately became an integral part of learning the mix for both me and my assistants!
I highly recommend getting one if you’re career plans involve mixing theatrical shows, but if you don’t have one, there’s the tried and true option of setting up coins to push as makeshift faders (pennies tend to be a good size, but some prefer quarters). Whatever method you use, the point is to start getting a sense of muscle memory and timing as you work through the show. It also gives you an opportunity to work through complicated or quick scenes, so you get a feel for the choreography or can even look at adjusting the DCA programming to make it easier.
After prepping a script and getting in some practice, walking up to the console in tech doesn’t seem as daunting. If you’re well prepared, you’re able to keep up and adapt to changes faster. Plus, if you’re self-sufficient at the board, your designers can trust you to mix the show and take more time to focus on their job of getting the system and the show the way they want it, which will help you in the long run.