Empowering the Next Generation of Women in Audio

Join Us

Glossary of Sound Effects (Part 2)

Our first Glossary of Sound Effects post was so popular we decided it would be fun to expand on it. This time around we not only included more specific search terms, but also a handful of modifiers. These terms, such as ‘by’ ‘up’ or ‘quick’ speak to the characteristics of the sound choice you are looking for. Try adding them to other terms (i.e. ‘zip quick’ or ‘violin up’)  to further narrow down your search.


Ambiance – Atmospheric sounds to build the space of a scene. Also look up: background, amb, environment

Beam – A steady synthetic sound. Also, look up: glow, ray, phaser

Beep – The tonal sound of a button press. Also, look up blip

Bork – A cartoonish sound that conveys disappointment.

Brush – The sound of leaves or foliage. Also, look up: leaves, bush, foliage, twig

By – This modifier should be added to searches for moving objects like Jet or Car, characterized by an increase and decrease in volume as the object passes by.

Chatter – A repetitive sound that conveys shaking, commonly associated with cartoonish teeth movement. Also, look up: shake, rattle

Chitter – small animal noise, repetitive and often cute sounding. Think squirrel or hamster.

Doppler – A sound that changes pitch as it passes by. Think truck horn starting from a distance and dropping in pitch as it crosses your path.

Drop – The sound of something falling to the ground.

Electricity – The sound of an electrical current, often wavering in volume and intensity. Also, look up: arc, crackle, spark

Flutter – Any sound with a very fast cycle of volume from low to high. Think of a humming bird’s wings or pod racers from Star Wars.

Ghost – Ethereal, often melodic and scary in nature. Also, look up: spirit, whisper

Hydraulic – The very distinct sound of something propelled by liquid moving in a confined space. Think forklift or fancy door hinges. Also, look up servo

Impact – The sound of a collision, be it small or large. Also, look up: hit, crash, smash

Debris – A cacophonous sound, usually starting thick and eventually settling. Can be used as the aftermath of an event as big as an explosion or as small as kicking up dirt.

Konk – A hollow hit, usually tonal in nature. Also, look up: bonk, coconut, hollow

Laser – The sound of a synthetic weapon. Also, look up: ray gun, pulse, beam

Movement – This modifier can be added to any search requiring both material and motion. Also, look up in short form: mvmt

Old – A modifier for sounds that are typically somewhat poor in quality, as though they were recorded a long time ago. This term is about looking for a specific character in your sound. Also, look up: old, classic, antique

Poink – A short, pointy sound. Also, look up: pluck, doink

Quick – Use this modifier when looking for sounds with very short duration. Also, look up: fast, short, sharp

Ratchet – A repetitive clicking sound Also, look up: crank, pulley, latch, turnstile

Ricco – This shorthand for Ricochet is the sound of a bullet bouncing. Can be used in cartoony moments when a character zips off screen very quickly.

Ruckle – The repetitive, throaty warble character of a sound. Typically emanating from the depths of a large animal or monster. Think of the T-Rex growl from Jurassic Park.

Rummage – Quickly digging through various materials. Also, look up junk

Servo – Short for servomechanism, this is the sound you would typically associate with the moments of a robot or other motorized electronics. Also, look up robot

Slide – This modifier signifies a changing in pitch; a character often associated with violin recordings or whistles to convey emotion in cartoony moments.

Splinter – The sound of small breaking or cracking wood. Also, look up: twist, stress, crack, wood break

Stinger – A musical sweetener that helps place emphasis on a dramatic moment. Also, look up: trailer hit, action

Telemetry – Rhythmic and somewhat repetitive beeps. The sound of calculating technology. Also, look up: computer, scan, beeps, tech, process

Up/Down – Add these modifiers to your search to convey the pitch motion of your sound. Slide whistle Up, for example, would start at a low pitch and end on a high pitch.

Valoop – The sound of something squeezing out of a small space.

Wobble – A repetitive, quick pitching sound used for moments of shakiness. Also, look up: warble, hypno, flutter

Zip – Any fast movement, often with some sort of musical character. Also, look up zing

See the original post here.
 

Glossary of Sound Effects (Part 1)

One of the major hurdles of becoming a sound effects editor is learning your library.  This means knowing what keywords to search in a given situation as well as building up a mental catalog of “go-to” sounds.

While it is always a good idea to start by looking at the picture and then thinking of descriptive words to search, it helps if you know which words will yield the best results.  This is where onomatopoeia enters the scene.  Onomatopoeia is defined as the formation of a word from a sound associated with what is named (e.g., cuckoo, sizzle).  Following is a beginner’s guide to onomatopoeic sound effects search words.  Some of these terms can be found in any dictionary, and some are unique to sound effect library naming conventions.


crackle – a sound made up of a rapid succession of slight cracking sounds. Also, look up: sizzle, fizz, hiss, crack, snap, fuse, fuze, burn, fire

crash – a sudden loud noise as of something breaking or hitting another object. Also, look up: bang, smash, crack, bump, thud, clatter, clunk, clang, hit

body fall – a sound made by a body falling onto a hard surface. Also, look up: body hit, land

boing – the noise representing the sound of a compressed spring suddenly released. Also look up: bounce, bouncing, bonk, jaw harp

boom – a loud, deep, resonant sound. Also look up: explosion, slam, crash, drum, taiko, rumble

buzz – a humming or murmuring sound made by or similar to that made by an insect. Also look up: hum, drone, insect, neon, fluorescent

chomp – munch or chew vigorously and noisily.  Also, look up: munch, crunch, chew, bite

click – a short, sharp sound as of a switch being operated or of two hard objects coming quickly into contact. Also, look up: clack, snap, pop, tick, clink, switch, button

creak – a harsh scraping or squeaking sound. Also look up: squeak, grate

flutter – the sound of flying unsteadily or hovering by flapping the wings quickly and lightly.  Also look up: beat, flap, quiver, wing

glug – the sound of drinking or pouring (liquid) with a hollow gurgling sound. Also look up: pour, drain

groan – a low creaking or moaning sound when pressure or weight is applied to an object OR an inarticulate sound in response to pain or despair. Also, look up: creak, squeak; moan, cry, whimper

honk – the cry of a wild goose. Also look up: gander, goose

ahoogah – the sound of a particular type of horn.  Also look up: model a, model t, antique horn, bulb horn

jingle – a light ringing sound such as that made by metal objects being shaken together.  Also, look up: clink, chink, tinkle, jangle, chime, sleigh bells

neigh – a characteristic high-pitched sound uttered by a horse. Also, look up: whinny, bray, knicker

poof – used to convey the suddenness with which someone or something disappears.  Also look up: puff

pop – a light explosive sound. Also look up: bubble, cork, jug, thunk

puff – a short, explosive burst of breath or wind.  Also, look up: poof, gust, blast, waft, breeze, breath

rattle – a rapid succession of short, sharp, hard sounds.  Also look up: clatter, clank, clink, clang

ribbit – the characteristic croaking sound of a frog. Also look up: frog, toad, croak

quack – the characteristic harsh sound made by a duck. Also look up: duck, mallard

rustle – a soft, muffled crackling sound like that made by the movement of dry leaves, paper, cloth, or similar material.  Also look up: swish, whisper, movement, mvmt

rumble – a continuous deep, resonant sound.  Also look up: boom, sub, earthquake

scream – a long, loud, piercing cry expressing extreme emotion or pain.  Also, look up: shriek, screech, yell, howl, shout, bellow, bawl, cry, yelp, squeal, wail, squawk

screech – a loud, harsh, piercing cry.  Also, look up: shriek, scream, squeal

skid – an act of skidding or sliding.  Also look up: slide, drag

slurp – a loud sucking sound made while eating or drinking.  Also, look up: suck, drink, straw, lick

splash – a sound made by something striking or falling into liquid.  Also, look up: spatter, bespatter, splatter, bodyfall water

splat – a sound made by a wet object hitting a hard surface.  Also, look up: squish

splatter – splash with a sticky or viscous liquid.  Also, look up: splash, squish, splat, spray

squawk – a loud, harsh, or discordant noise made by a bird or a person.  Also, look up: screech, squeal, shriek, scream, croak, crow, caw, cluck, cackle, hoot, cry, call

squeak – a short, high-pitched sound or cry.   Also, look up: peep, cheep, pipe, squeal, tweet, yelp, whimper, creak

squish – a soft squelching sound. Also look up: splat, splatter

swish – a light sound of an object moving through the air.  Also look up: whoosh, swoosh

swoosh – the sound produced by a sudden rush of air. Also look up: swish, whoosh

thunk – the sound of a cork being pulled out of or placed into a bottle or jug.  Also, look up: pop, cork, jug

twang – a strong ringing sound such as that made by the plucked string of a musical instrument, a released bowstring, or a ruler held steady on one end and plucked from the other.  Also, look up: ruler twang, boing twang, ripple, pluck, violin, guitar

whip crack – the loud and sudden sound of a whip moving faster than the speed of sound, creating a small sonic boom. Also look up: bullwhip, whip, swish, whoosh, swoosh

whoosh – a heavy sound of an object moving through the air. Also look up: swish, swoosh

woof – the sound made by a barking dog.  Also look up: bark, howl, yelp, whimper, dog

yelp – a short sharp cry, especially of pain or alarm.  Also, look up: squeal, shriek, howl, yowl, yell, cry, shout

zap – a sudden burst of energy or sound.  Also look up laser, beam, synth, sci-fi

See the original post here.
 

One Is Not Enough: Understanding Bias in the Audio Community

The studio owner skimmed my resume and nodded several times. He glanced up at me, back down at the resume, and then carefully set it back on his desk.

“Your credentials are great. The chair of the Sound Recording Department recommended you very highly, and we have a close relationship with him. So, we will hire you… We will hire you, but you won’t last. We will make sure of that.”

He paused, and I waited for an explanation.

“We don’t hire women. Studio policy,” he stated matter-of-factly.

Unfortunately, he was right: I didn’t last. I worked as hard I could imagine meticulously recording patch bay settings and outboard gear levels, setting up drum kits, moving gobos that were many times my weight, and carefully calculating my mic placements. I silently fought my way to being one of the studio’s best assistant engineers. All the while, my shifts were cut, I was offered up as entertainment to the clients and was goaded with sexual comments and sometimes worse.

After a long year of staying simply to prove the owner wrong, I quit. I had realized that by remaining there, I was succeeding only in making myself miserable.

That was my first experience in the industry.

Luckily, that kind of overt discrimination is rare even in an industry that is so male-dominated. For the most part, over the course of my ten-year-plus career, my co-workers have been my biggest supporters and have often become close friends.

Thus I would like to discuss something much more prevalent and subtle than overt discrimination: bias. By this, I specifically mean the assumptions that we make about any group as a whole based on our own previous interactions with members of that same group.

Fei Xu, a development psychologist who has researched this phenomenon, has reported that this is a natural instinct, even a necessary one. This innate human talent for using our past experiences to make assumptions about new things has helped us throughout our evolutionary existence. We have come to recognize that if a new animal has sharp fangs, it is likely a predator and not a friend. We have come to categorize small, round, red things as berries and have then innately known that they will be sweet and a stupendous source of energy. This ability to categorize based on our past experiences has single-handedly lead to our continued survival on Earth.

Unfortunately, it has also led to bias. Our evolutionary programming tells us to trust our previous experiences and draw natural conclusions based on them. Thus, our experience tells us that on the mix stage, the men are most likely the technical employees and the women the clients. It tells us that at sound industry award shows, the men are the nominees and the women are the wives and girlfriends.

As a supervising sound editor, I was once asked to add a Dolby E-encoded printmaster to my deliverables for a project. I had not encountered this request before, so I read up on the process and then made an appointment with our layback department to discuss it. When I showed up for that meeting and began to ask technical questions, the engineer responded to each one starting with the phrase “Tell your boss that he should…” Clearly, it had not occurred to him that I was the boss.

I did not correct him, and perhaps I should have. As uncomfortable as it made me to have him assume that I was someone’s assistant, I knew that his responses were not ill-intentioned. This was a case of an honest mistake based on actual real-life experiences. Most likely, he had never personally encountered a female supervising sound editor.

Furthermore, women are not immune when it comes to bias. I, too, have found myself wondering who that new producer is only to find out that she is, in fact, a sound editor or mixer. We all live in the world as it is, and our minds create the necessary assumptions to accommodate that world. We are not bad people for this. We are simply people.

As you can imagine, it is difficult to not only exist but thrive, in an environment that finds my pure existence to be a surprise. Add to that the constant visual reminder that no one else looks like me, that I am “other,” and you will understand the force of impact that this has had on my professional life. This impact is purely facilitated by numbers, not the environment. As long as there are so few women in audio positions, this issue of bias will remain.

So what should we, as an industry, do? The answer should be obvious: hire more women. Previously, I had thought that there was a general lack of women in the industry because young women were not pursuing audio engineering in school or as a career. However, since becoming a partner in a post-production sound studio of my own, I have been inundated by resumes, requests for coffee meetings, and emails asking for advice from the exact set of young women which I did not previously think existed. Not only are they there, but they are hungry for careers.

So, my request to you is twofold:

First, I ask that you do something scary. I ask that you create a situation in which you will be “the only one.” Put yourself in a position where you are a willing participant in a situation where everyone else is different than you. Go to a mommy and me yoga class, attend a service at a Sikh temple, drive to East Cesar E Chavez Avenue and spend an afternoon chatting with the shop owners and eating at a restaurant. It is important that you do this alone.

You will most likely feel out of place and isolated as if everyone is looking at you even when they aren’t. Those feelings underline the fact that as welcoming and accepting as any environment is, it is impossible to feel completely at ease when you are “the only one.” I challenge you to understand that one woman in a company or even in a department is not enough to claim diversity or to dispel ideas of gender inequality or workplace discomfort.

That brings me to my second request: I ask that you do your best to help women find a place in the audio community. If you are in a position to do so, interview more women when you have a job opening. Suggest female candidates to your boss. Answer LinkedIn requests. Give career advice. Brush aside the idea that your assistance may be misconstrued as a romantic interest. If there were more women, young female audio engineers would surely contact them to ask for coffee meetings and phone calls (a fact made evident by my now-flooded inbox), but for now, you are their best chance for an inside perspective.

More resources for A More Inclusive Industry

See the original post here.


Creating Monster Vocals with Voxpat

People often ask us why we choose to work in such a niche market, sound for animation, and for us, the answer is simple.  Live-action sound design has its own challenges and rewards, but more often than not, you’re recreating the sounds of the real world.  While working in the animated realm, week after week we get to work inside imagined worlds, create sounds for unknown creatures, and image futuristic technology conceived in the minds of the world’s most fantastic artists.  These new worlds give us the opportunity to use ever-evolving sound design techniques to breathe life into them.

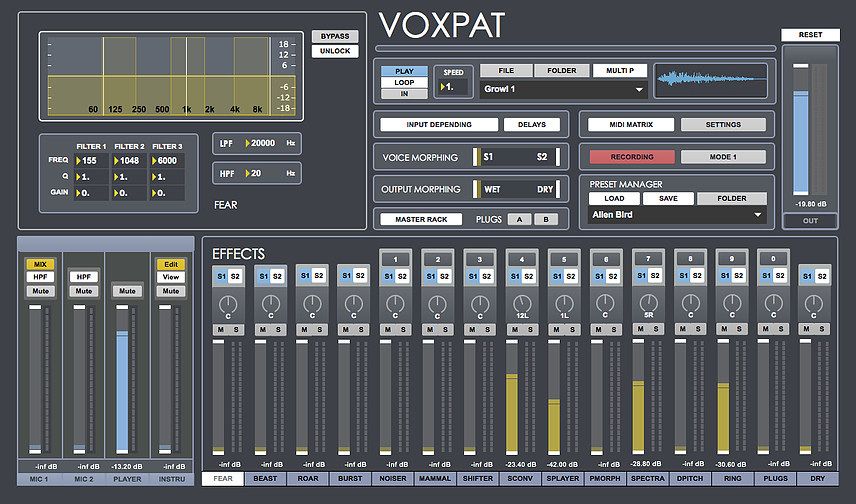
We found such a technique when the software developers from Digital Brain Instruments approached us with the opportunity to create new presets for their stand-alone application, Voxpat, which is a sound design tool for creating monsters, creatures, and robot vocals.

The Software

In the past we’ve used our usual suite of plugins as well as Dehumanizer for this task, so we were interested to try out a new creative avenue.  It turns out that Voxpat is a sound designer’s dream if a slightly complex one.  It combines all of the different vocal processing plugins you might want to use into one massively powerful application: convolution, sample player, ring modulation, harmonizer, FM synthesis, spectral pitch shifting, delays.  And the list goes on, and on, and on.

This plethora of sound design tools all packed into one application means that you need to read the manual to use it to its full potential.  But, once you do, the sky is the limit in what this application can do.  What Voxpat lacks in intuitiveness (and it is somewhat lacking here), it certainly makes up for with power.

Recording the Samples

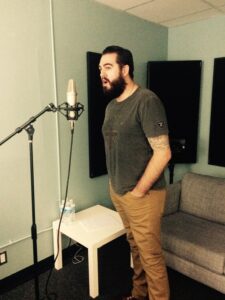
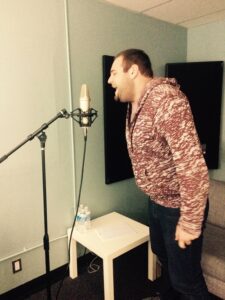
This month, we used our creative team meeting to have a mini masterclass on how to use Voxpat.  Then we opened up a mic to record raw new monster vocals to use for processing. The team had a blast coming up with interesting types of creatures so that we could play with the full harmonic spectrum in Voxpat.  We recorded ourselves as a screeching monster, a giant serpent, an ogre, and even a gargle monster (our intern almost choked, but we assured her it was worth it. Anything for a great sound!).


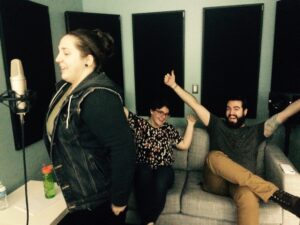
Eric and Tess applaud Jessey for her awesome squealing alien sounds. Here are a few of the raw samples:


You can listen to their samples

Creating New Voxpat Presets

You can download a demo version of Voxpat here, and check out the Boom Box Post preset pack.


Troubleshooting (and Avoiding!) Common Problems in ProTools

We all have technical difficulties from time to time, especially when using software as intricate as ProTools.  But, after years of making what seems like every mistake in the book, hanging out on Avid DUC, and stalking Gearslutz.com, I pride myself in my ability to overhear frantic technical freakouts and supply solid advice on the best course of action. Here are a few of the problems I see most often, and how to get through them while salvaging as much of your work and sanity as possible.


Problem: My Session Is Missing Audio Files

This happens all the time.  And as a supervisor, nothing is more annoying to than sitting down to review work and then finding that not everything links up.

How to Solve It

When you open a session with this issue, a dialogue box will pop up tell you that you have missing files.  Always choose “Manually Find & Relink.” Letting your computer automatically do so will take forever. Select the files you wish to relink (hopefully, all of them), and check out the path.  This will tell you where the session believes that the files live. Most likely, this will be on another drive or another computer. Once you see where the files are, you have a few options:

  1. Plug in the drive that contains the files, select that drive in the area to search, and choose find links and then commit links once the files have been found.  At that point, any files which were missing will still be missing from your audio files folder. They will only be linked to the session when the drive is plugged in.  So, you will then need to “Save Session Copy In” to save a session which does include all audio files.
  2. If you know that the files also live somewhere else on your local computer (such as a library drive), relink to that drive. Again, you will need to Save Session Copy In if you would like the files to be saved into your audio files folder where they belong.
  3. Find all of the missing files manually, and then drop them into your session’s audio files folder.  Then, relink to that folder. You may need to choose to relink the file name only if it does not work to use file name and ID.  There is no need to Save Session Copy In.
  4. If the files ARE in fact in your audio files folder, but ProTools isn’t recognizing them, you may need to search your audio files folder and relink by file name only instead of file name and ID.  Every once in a while, the file IDs become corrupt, and ProTools mistakenly can’t use them to locate your audio files.

How to Avoid It In the Future

When saving your work to give to another person or to take to another computer, always use either Save Session Copy In or Export Selected Tracks as New Session.  Doing so gathers all audio files that are linked to your session from locations other than your audio files folder (like if you didn’t have “copy on import” selected or chose to import tracks by linking to files instead of copying) and copies them into the new session’s audio files folder so that they live in one place.  If you simply click and drag your working session’s folder, any files which are linked from other locations will not be copied and will be missing once the session has been moved.


Problem: My Session Keeps Crashing While Saving

This is one of the most aggravating things that can happen and always seems to occur at the end of a really long day. But there’s hope!

How to Solve It

In my experience, the most likely culprit is that your drive is near capacity.  Check the drive to which you are attempting to save, and make sure to clear off enough space.  Even if you technically have just barely enough space, this can cause the bits to be written in every tiny nook and cranny on your drive, which makes it take forever to process the request.

If drive space isn’t the issue, then you’re probably dealing with a corrupt file.  Here are your options:

  1. Close your session, open the most recent backup in your Session File Backups folder and save it off with the correct name (if you can). Then, you’ll need to redo any work between that backup and where you ended.
  2. If the above does not work, then there is probably a corrupt file somewhere in your session.  The next thing to try is to close your session, create a whole new session (checking that all of your settings such as frame rate, sample rate, etc. are the same), and then import all of your tracks through the Import Session Data file menu.  Make sure to copy all audio files instead of linking.

How to Avoid It In the Future

Keep track of your available drive space at all times.  Have a system in place for archiving old work onto separate drives to make sure that your project drive always has space.


Problem: Whenever I try to use the function keys to change tools or modes, nothing happens, or another application opens.

If you’re working on a mac, you will need to disable the function key features in order to select your tools/modes with the keyboard function keys.

How to Solve It

Open System Preferences, and click on Keyboard. Then, check the box that says, “Use F1, F2, etc. keys as standard function keys.”

How to Avoid it in the Future

Once you check this setting, you won’t have to think about it again until you purchase a new computer or reinstall your operating system.


Problem: All of the waveforms appear to have the audio zoomed in to different degrees.  Quiet-sounding files have waveforms that look huge and vice versa.

This is the result of using the audio zoom in function when you are not showing all tracks.  Clicking on the audio zoom in/out button only affects clips which are visible in your current display of tracks.  When you show all tracks, the newly displayed tracks will have non-zoomed waveforms. Yet, the audio which was visible when you zoomed in/out will continue to display the new size.

How to Solve It

To reset all waveforms to their actual size, use the quick key Control+Option+Command+[ on a mac.

How to Avoid It In the Future

If you want to avoid this issue altogether, only zoom your waveforms while all tracks are visible. Otherwise, the key command is a very quick fix.


Problem: I keep spotting my video into place, but when I re-open my session, the first frame of the video is off by a frame or more.

This is most likely the result of having your session set at an incorrect frame rate.

How to Solve It

  1. Open your video in QuickTime and hit Command+i to get info.  This will display the video’s frame rate.
  2. In ProTools, open your Session Setup window and choose the corresponding frame rate.
  3. Re-spot your video into place.

How to Avoid It in the Future

Always check the frame rate of your video in Quicktime before importing into ProTools. If you prefer not to do this, your video track in ProTools displays the frame rate below the track name. If your video’s frame rate does not match your session’s frame rate, the number will appear red. Change the frame rate in your Session Setup window to match the video.


Problem: I keep spotting my video into place, but the ProTools timecode display gets further and further away from the timecode burned into the video.

This issue is known as drift and is the result of having your session set to an incorrect frame rate.

How to Solve It

  1. Open your video in QuickTime and hit Command+i to get info.  This will display the video’s frame rate.
  2. In ProTools, open your Session Setup window and choose the corresponding frame rate.
  3. Re-spot your video into place.

How to Avoid It in the Future

Always check the frame rate of your video in Quicktime before importing into ProTools. If you prefer not to do this, your video track in ProTools displays the frame rate below the track name. If your video’s frame rate does not match your session’s frame rate, the number will appear red. Change the frame rate in your Session Setup window to match the video.


Problem: I accidentally worked on a project at the wrong frame rate.  When I was done, I set the frame rate to the correct one in the Session Setup window, but now everything is out of sync.

If you have already begun working on a project with your session set to the wrong frame rate, you cannot fix the problem by simply setting your session to the correct frame rate.  You must perform a sample rate conversion to re-sync your work.

How to Solve It

  1. Open your video in QuickTime and hit Command+i to get info.  Check the correct frame rate of the video.
  2. Open a new ProTools session with the correct sample rate and bit depth.
  3. Open the Session Setup window and choose the new (correct) frame rate to match your video.
  4. Go to File > Import Session Data, and navigate to your project, which was done at the wrong frame rate.
  5. Select all of your tracks, and make sure you are copying all audio (not linking).  Click the Apply SRC checkbox, and choose the correct pull-up/pull down from the Source Sample Rate dropdown menu. To do this, choose your sample rate from the bottom of the list and then choose which direction you need to adjust.
  6. Click OK.
  7. Import your video, and re-sync it to your session.
  8. Check that the timecode burn-in matches the ProTools timecode window.  Your audio should be in sync.

How to Avoid It in the Future

Always check the frame rate of your video in Quicktime before importing into ProTools. If you prefer not to do this, your video track in ProTools displays the frame rate below the track name. If your video’s frame rate does not match your session’s frame rate, the number will appear red. Change the frame rate in your Session Setup window to match the video.


Problem: I was working in ProTools, and now my computer is displaying the “spinning beachball.” I can’t click on anything.  What should I do?

Your session has crashed.  You will need to force quit and open one of your backups (and pray that it was set to back up fairly recently).

How to Solve It

  1. Use the key command Control+Option+Command+Esc to bring up the force quit window.
  2. Force quit ProTools and any other applications that are listed as not responding.  If you still cannot click on anything, you may want to force quit the Finder as well.
  3. If that does not work, you will need to “hard restart” your computer by holding down the on/off button on the computer until you hear it restart.
  4. Once you are able to use your mouse again, navigate to your Session File Backups folder and choose the most recent version. You will need to redo any work that was accomplished after that copy was saved.
  5. Re-save this as your original file name and it will replace your previously saved session.

How to Avoid It in the Future

Crashes are unavoidable. But, you can usually get used to which actions in ProTools are most likely to bog down your system. Take note of what you were doing each time this happens, and try to avoid it in the future. If a particular file is causing the crash, try to save a new copy of the file, or revert to an old version which doesn’t cause the issue.

Creative Self-Marketing Ideas for the Audio Professional

As studio owners, Jeff and I get tons of requests for advice regarding how audio professionals can either kick start or amp up their careers. In an industry that doesn’t necessarily post jobs on a website, use recruiters, or have a standard interviewing process, how are talented creative people supposed to get their foot in the door? There are so many different ways to answer these questions, but at least one large chunk of this is personal marketing.

I read a lot in my spare time, and I love to get my brain working with business books of all kinds. Unfortunately, I’ve found personal marketing books tend to be, in my opinion, relatively useless for those of us in the sound field. They seem to be full of tips either so obvious that they’re painful (Make a website! Write an amazing resume!) or filled to the brim with antiquated business advice (Make sure you have professional business cards!).

So, I thought that I would put together a few interesting ideas that I’ve seen people use to creatively market themselves in the field of audio. Here they are!

Offer to write member interviews for your industry guild’s publication.

I know a mixer who did this years ago when she still lived on the east coast and was attempting to jump-start her career. She interviewed tons of top mixers in a thoughtful and engaging way. Then, when she decided to take the plunge and move to Los Angeles, she already had a bevy of contacts who had personally interacted with her. She never would have gotten to know all of those top industry professionals if she hadn’t volunteered her time for her industry magazine. To this day, whenever I’ve heard her name mentioned in passing, everyone is always quick to say, “Oh, you know her, too? Everyone knows so-and-so! She’s so amazing!” She put in the hard work upfront and it paid out tenfold in the long run.

Offer to write articles for an online professional magazine.

In this case, you can really present yourself as an industry influencer and/or technical expert. I mean, how amazing would it be if a potential employer googled your name, and fifteen plugin reviews from a top online audio magazine came up with your headshot and byline? You would definitely appear to be a cut above the rest. This is a great way to absolutely crush your SEO. If you go this route, you may want to prepare a spec piece to give them a sample of the kinds of things you would like to produce. Also (added bonus!), don’t be surprised if writing interesting product reviews also results in offers to try out new plugins for free! This is a great way to build your audio arsenal and your online brand.

Engage with your community on social media.

Follow sound professionals you admire on Twitter and comment on their tweets. Join some audio Facebook pages (I love Game Audio Denizens, Sound Girls Private, and Professional Freelance Sound Mixers) and comment on posts. Like your favorite studios’ Instagram pics. People love to feel connected, and it’s easier than you might imagine to feel like you “know” someone after you’ve interacted a few times on social media. This is the virtual version of hanging out in the right room. If you’re there long enough and you make your presence known (in a non-annoying way), you will inherently be seen as belonging. I would caution you to start small with commenting and liking, then move on to posting when you’re more confident. Definitely, don’t just jump in and post every day. That’s like crashing a wedding and then hopping on stage to give a speech.

Volunteer at a non-profit that involves your prospective clients or co-workers.

I’m a member of the non-profit group Women in Animation whose mission is to advance women in the field of animation. Their current goal is to reach 50/50 (men-to-women ratio) by the year 2020, which is absolutely amazing! You might ask why I’m into Women in Animation rather than SoundGirls, which has a similar goal but for the audio field. I’m actually in both, but the distinction is extremely important: I’m involved in the animation group for my personal/business marketing and the sound group for my own enjoyment.

That’s because when your aim is personal marketing, you want to put yourself in the “right room.” And that means a room with the people who can get you work, which is very different than a room filled with your peers. Boom Box Post does sound for animation, and we’re hired by animation studios. So that means that the main place I need to network is with animation professionals. For freelance sound editors, that might mean going to guild events to connect with new supervising sound editors. For mixers, it might mean attending a charity golf tournament sponsored by the post department of one of the big studios. The most important thing is to write down the top three people/job titles that could help you to find work, and then brainstorm places that those people might be.

Start your own professional networking group.

I know a few people who have done this. This can mean putting together speakers for a quarterly professional panel discussion, or maybe just setting up drinks at a local bar for like-minded audio professionals.  Whatever it is, you can put yourself on the map and meet a lot of amazing people along the way. If you’re facilitating networking and/or learning opportunities for others, chances are that one day they will want to reciprocate the investment you made and help you out. Plus, you’ll get to have a fantastic time along the way!

Start a Lunch & Learn club.

Jeff and I came up with the idea of holding monthly “Lunch and Learn” sessions a few years back, and we’ve been blogging about it ever since! Every month, we get our team together for lunch, and then one person gives a demonstration of anything at all at which they consider themselves an expert. This can mean using a certain plugin, cutting a slo-mo sequence properly, using Soundminer to the max, etc. It’s a great way to keep everyone both learning and teaching, and also gives the team a go-to person should they ever have questions on the topic in the future.

Since beginning to blog about this, we’ve had numerous people tell us that they’ve started their own Lunch and Learn at work. We absolutely love this! Keep the good karma going and share your knowledge.  Lunch and Learns not only show everyone involved in the best light as creative professionals, but they also give everyone a chance to invest their time and energy in helping those around them. And an investment in others is always something that can pay dividends down the line when those same people are in a place to hire you, recommend you, or even just walk your dog when you’re on vacation!

Start a virtual freelancers club.

If I had to guess, I would say that the number one group of people Googling “self-marketing” are freelancers. It’s hard to know where to start in making connections and positioning yourself correctly for a fab career in the future when you work from home and rarely interact with others. If you don’t get a lot of time with peers, starting a freelancers club is a great jumping-off point in marketing yourself!

For most professions, a freelancers club usually means meeting up once a week with other freelancers at someone’s home or a coffee shop and working in the same space so that you can be a little more accountable regarding how you spend your time and also get to feel like you have co-workers. Obviously, the need for a desk full of audio gear doesn’t exactly make this practical, at least in its usual incarnation.

But, I love the idea of starting a Slack channel or using other e-workplace software to create a virtual freelancers’ club. We all need other people to bounce ideas off of, get tech support from, bullshit with, and (most importantly) share stupid .gifs about things like our bad lunch habits and Golden Girls obsession. So go ahead a get e-out there! Having a set small group that you always interact with will make your workday much more enjoyable, eventful, and help you to bond with others who could help to vouch for you in the future.

Career Paths in Film and TV Sound: Stories of Tenacity

This past fall, I took part in a panel put together by SoundGirls, and hosted by Sony Studios, called Career Paths in Film and TV Sound. SoundGirls, if you haven’t heard of them, is an amazing non-profit organization whose mission is to inspire and empower the next generation of women in audio. Furthermore, they strive to create a supportive community for women in audio and music production, providing the tools, knowledge, and support to further their careers. Despite their women-focused mission, SoundGirls is not only for women. In fact, their membership is open to anyone with a desire and drive to succeed in professional audio, and their membership is currently 65% women and 35% men. They put on a lot of really amazing events, so no matter who you are, you should check them out.

Before I tell you all of the awesomeness that happened during this panel, let me get something out of the way. I know that the internet is a dark place where unanswered questions sometimes fester. So, I’m going to tell you all of the things that this panel wasn’t—just so we’re all clear. It wasn’t a gripe-fest about all of the trials and tribulations that we faced while being part of the 5% of the audio workforce which is comprised of women. It wasn’t a “safe space” to get really girly and gab about our kids, boyfriends, or spouses. It absolutely WAS NOT a chance to prop up some ladies who are at the top of their lady game, but not quite cutting it out there in the real world of pro audio.

No, this was a kickass panel with audio professionals from all different backgrounds, with all different backstories and insights, who are at the top of their game. We talked about what drew us to the sound profession in the first place. We talked about working our way up with unerring drive and determination from the machine room, the tape vault, the intern desk. We talked about staying all night to observe mixers and read manuals. This was a panel about tenacity. And it just happened to be led by women.


The Panelists

Let me introduce you to the audio professionals involved.

Onnalee Blank

During the panel, Onnalee told her personal story of being a professional ballerina with the New York City Ballet. She was injured and had to turn to a new career. She brought the same tenacity of spirit that took her to the top of the ballet world to her career in sound. She began assisting Rick Ruben, moved on to work with Johnny Cash and Danny Elfman, and she is currently a re-recording mixer at Formosa. She has mixed Girls, Black Sails, and Game of Thrones. She has won five CAS Awards and four Emmys, not to mention her countless other nominations.

Karol Urban

Karol was legally blind as a child, until the age of five, when she underwent an operation to correct her vision. While her sight was impaired, sound was a huge part of how she identified the world around her. She spoke about being a young sound-focused student in the south, who got her start in front of house. She went on to undergraduate school for post-production sound. Karol is the re-recording mixer for Grey’s Anatomy, New Girl, Scandal, among numerous other television series and films. Shortly after this panel, she was elected as the President of the Cinema Audio Society.

April Tucker

April is truly a “Jill of all trades” as the moderator, Anne Marie Slack, pointed out. She currently works as a supervising sound editor, re-recording mixer, foley mixer, ADR mixer, and music editor. April thought that she wanted to be a classical violinist, but soon realized that she was more passionate when behind the console as a scoring mixer. After receiving her master’s degree, April moved to LA and posted Craig’s List ad to meet other audio professionals, and those connections have brought her contractor work in every facet of the industry of post-production sound. She has worked as the re-recording mixer on The Bachelor, music editor on Transparent, and ADR mixer on Conspiracy.

Kate Finan (me!)

My passions as a student were clarinet, math, and physics. When planning my future, I assumed I would have to choose between my interests. But, then I was inspired by a fellow student who went to college for sound recording technology. As soon as I found out that I could get a bachelor of science degree in sound from within a music conservatory, I was hooked. After college, I moved to LA and never looked back. As you all know, I now own Boom Box Post with Jeff and work as a supervising sound editor and re-recording mixer on several animated television series.


Watch the Panel


Listen to it in Podcast form from Tonebenders

Just in case you’re more of a podcast person, check out the panel on Tonebenders. This edited-down version starts with a special interview with April Tucker who gives context to the conversation by first discussing all of the amazing things that the SoundGirls organization has on its docket.


Five Things I’ve Learned About Editing from Mixing

I have been a sound effects editor and supervising sound editor for a long time now.  But, I have recently begun mixing a television series here at Boom Box Post.  I am enjoying how much I learn each and every time that I sit down at the board, and I am by no means ready to start spouting mixing advice to anyone.  But, I can say that I’ve come to appreciate certain editorial practices (and absolutely abhor others!) through my new vantage point as a mixer.  Things that I thought of like a nice way to make your mixer happy have turned into practices that are essential to me being able to start my mixing day right.  Seriously, these five things can be the difference of hours added to my predub day.  So, here are five editorial practices that I’ve realized are absolutely essential to a smooth mix.

#1: Stick to the template.

In short, don’t add tracks!  Adding tracks to an established template causes numerous headaches for your mixer during the setup, and it’s easy for issues to crop up later without him or her realizing it.  Every time a track is added, your mixer needs to adjust his or her inserts, sends, groups, VCAs, markers, and more.  That is a ton of extra work, and if one of those hasn’t been checked and adjusted before beginning to mix, issues can crop up along the way.

Adding more tracks to your session to squeeze in those 18 dirt debris sound effects that you added to a car peel out is a huge no-no.  I am especially annoyed when I see that tracks were added just to put one or two sound files on them in the entire session.  Your mixer or supervising sound editor has thoroughly thought through the needs of the project before creating your template.  So, if you feel that you need more space to spread out, you probably need to re-think the way you’re approaching your builds (see number four below…).  But, if having more tracks seems absolutely essential to you, make sure that you reach out to your mixer ahead of time and clear the change with him or her.

#2: Cut foley in perspective.

Foley is often one of the things that makes a project really come to life.  It truly helps the action to feel more real.  But, it’s also something that is often mixed so that we feel it instead of truly recognizing it with our ears.  Your mixer probably won’t be using the footsteps to make a sonic statement during a big monologue or music montage.  But, it does often make sense to feature them when characters are moving in or out of a scene.  It helps the audience to track where they are located in the story and aids the flow between shots.

In these instances, the panning is often at least as important than the volume.  And in order to pan people walking, for instance, off screen-right and then immediately into the next shot from screen-left, the foley needs to have been cut for perspective!  I’ve had numerous foley editors say that they’re uncomfortable cutting in perspective because they want to give the mixer options.  But, you’re truly not giving your mixer options.  Instead, you’re tying his or her hands (or, rather, making them need to scoot over to the computer and recut it themselves when they’d rather focus on mixing)!

But perspective cutting for foley can be a bit confusing.   So, let me break it down for you: you should cut your foley in perspective if there is a drastic change in volume necessary, or if characters need to be panned in our out of a shot.  Panning within a shot does not require perspective changes (e.g., a character walks around a room during the same shot).  Zooming in does not require a perspective change (this can be done with a fader move and is not a change between shots).  Here are some examples that would require perspective changes:

  • Perspective change for volume: We start on a long shot of a character dancing on stage, shot from deep in the audience.  Then, we cut into an extreme close-up on his feet.  Bam!  Perspective change!
  • Perspective change for panning: Two characters and standing around talking, and they realize they’re late for an important meeting.  They run off screen-right.  Then, we immediately cut to them running into a different room from screen left.  Give that sucker a perspective change!

#3: Color code your builds.

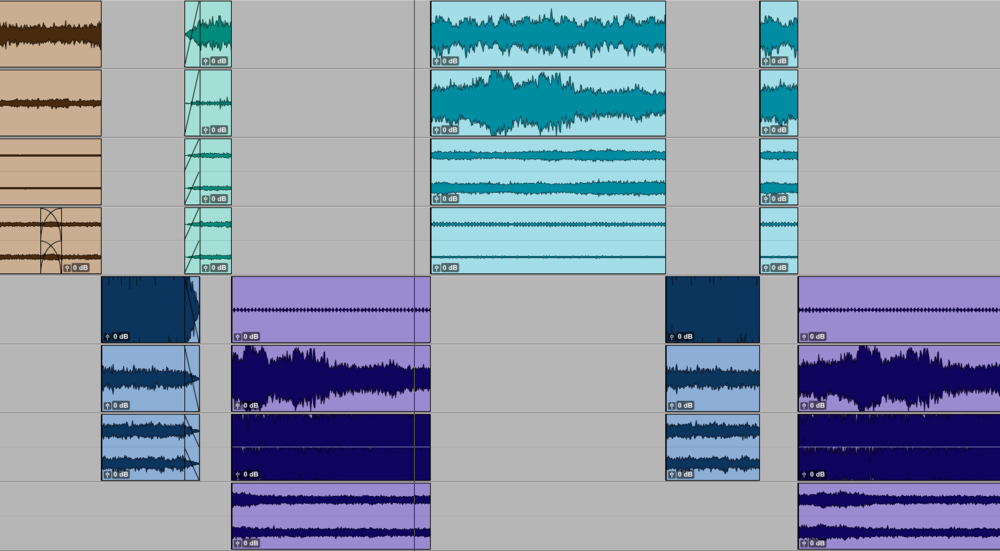
This is not by any means an industry standard, but I seriously appreciate it. I see it!  Want your mixer to love you now and forever?  Then color-code your builds!  I would recommend color-coding the regions that make up each BG location the same color each time that location is used as well as color-coding the regions within each FX build.

For BGs this is helpful to your mixer because he or she can easily copy and paste the volume automation onto each instance of the same location in just minutes!  This is such a great time-saver for getting to a reasonable starting point on BG balance.

For FX, make sure to color-code your regions according to what the build is covering on-screen rather than the kind of elements they are.  That way, it’s easy for your mixer to identify what to adjust by just glancing at your session (without necessarily soloing every single file).  For example, when cutting a door open, you may have a handle turn, a wood door open, and a long creak.  Color-code all three of those suckers brown!  Extra points go to color-coding something that makes sense for the thing you’re covering (blue for water, brown for a wooden door, yellow for a yellow remote-control truck, etc.).  And make sure that each time that same door opens happens, you color code it the same way.  By doing that, your mixer can easily find a balance he or she likes and then paste it onto every instance.  That makes adjusting it to work in a specific scene so much easier.

#4: Choose fewer, better FX.

Let me say this: more is not better.  Not by a long shot.  Yes, in a lot of cases, you should cut more than one layer to get a textured and full sound without tying the hands of your mixer.  But, you also don’t want to veer too far in the opposite direction and cut way too many elements.  Sound effects editorial is an art-form, and like any true art, it takes forethought and vision to do it well.  That means deciding which layers you want before you start digging through your library, and then editing yourself to create the most robust but clear and simple build possible.  I never start pulling sounds without a game plan, no matter how simple the build might seem.

In general, I like to stick with a rule of three: choose three files max that cover three frequency ranges (low, medium, and high) and also three different sonic textures.  For example, when cutting a steady forest fire, I would choose a low-end rumble element to give it size, a mid-range thick whooshy element (maybe with a little phase for motion) for fullness, and a high-frequency steady crackle to give it motion, life, and to help it poke through the mix without needing to turn the volume way up.  Without a game plan, I might be left throwing in a dozen elements because they seem like good choices.  But with a little forethought, I can easily cut down the number of elements I use and make each one count.  Honestly, it also makes things sound a lot better.

Sticking with the rule of three also helps your mixer!  After all, he or she can easily grab up to four faders (three is even easier!) and adjust the volume without needing to create a group and then disable it after making the adjustment.  So, there’s basically no reason not to cut like this.  It helps you and your mixer to work better, smarter, and faster!

#5: Use clip gain instead of volume automation to balance FX builds.

So, you’ve toiled over creating the perfect balance between your elements in a single build.  And mixers love it when you do some of the work for them!  They’ll definitely want to adjust that balance to make it work within the mix, but having a solid starting point is key.  The problem with adjusting your balance during editorial with volume automation is that as soon as your mixer grabs the faders, that balance is completely erased and replace with whatever his or her fingers do.  So, do yourself and your mixer a favor and balance within builds using clip gain.  That lets your mixer have all faders sitting at zero (and not popping up and down all over the place during playback), and thus each adjustment he or she makes is on top of what you’ve already accomplished.

A few caveats on this:

  • Make sure to use volume automation rather than clip gain when adjusting volume for perspective changes.  Always first balance your build with clip gain, then cut it in perspective and make any volume changes for perspective with the volume bars.
  • Do not ever clip gain a sound down to the point of being inaudible.  That makes it impossible for your mixer to turn up the volume with a fader without seriously compromising the signal-to-noise ratio.  Furthermore, if you find yourself turning anything down that much, just delete it!  You obviously don’t actually like it, and you need the space so you can follow #1 and #4!  Take the opportunity to edit yourself!
  • Do not clip gain BGs.  Use volume bars instead to adjust the balance.  This is a good practice for two reasons: First, BGs often need to be super low in volume, and if you use clip gain, your mixer won’t be able to turn them up enough with the fader.  Second, since these are long, steady elements, it’s nice to see where the volumes are on the faders rather than having them all at zero.  But mostly, this is a signal-to-noise ratio issue.
     

Designing Signature Sounds


The Project

I recently had the pleasure of creating signature elements for a new animated series which will likely air near the end of 2019.  We were brought into the process at a very early stage, the first animatic, which was incredibly exciting. If you aren’t already aware, in animation, an animatic is essentially a video of storyboard panels timed to work with the recorded dialogue and then exported as a video.  An animatic is a very thorough blueprint for the animation studio to follow. Adding sound design to an animatic can do a number of things: it can bring the animatic to life for the animation studio which allows them to better understand how to animate important moments. It can help executives to better understand the action when reviewing the animatic for approval. And it can establish signature elements early on so that the sound can help to inform the animators’ creative concept for the series.  Having clients who appreciate the importance of bringing the sound team into the mix (pun intended!) early on is a wonderful thing for us here at Boom Box Post! So cheer to all of our amazing clients!


The Process

Step 1: Brainstorm about an Overall Aesthetic

The key elements of the series are birds and babies (sorry to be cryptic about the premise, but it’s too early to share too much about this project!). My mind immediately started churning about how to incorporate these in a way that would be nuanced and special.  When designing sounds for a new project, it’s also important to consider the audience. This series is geared toward preschool-aged children. So I also wanted to create a soundscape that would be friendly and familiar to viewers in that age group.

First, I decided to make all of the items in this animated world sound like they are made out of materials familiar to preschool kids.  This would involve recording a ton of children’s toys to really let these textures shine through in the mix. The set locations look high tech and designing in that aesthetic is always fun. But isn’t it much more fun to design a baby’s take on tech?  Now that would be a challenge.  Second, I decided to incorporate the bird aspect of the series by creating new sci-fi sound effects for all of the tech elements by processing bird calls.  I didn’t want the bird calls to be in your face. After all, it doesn’t take much creativity to just throw a bunch of hawk calls on everything. But, folding them into my tech builds sounded like a fun challenge that would result in a truly unique signature sound aesthetic for the entire series.

Step 2: Decide which elements should be stand-out signature designs.

I consider anything that will clearly appear in a series again and again to be signature.  And so, even if it’s a mundane item, to me it’s an opportunity to add a little special flavor.  You might think it’s a waste of time to create special door open sound effects or record all-new hand grabs. But creating a new palette from scratch for all reusable elements can ensure not just stand-out sound design moments but an overall signature aesthetic for an entire series.

For this series, I decided that the sounds for all of the things in the main location should be signature: all doors, all grabs of items and furniture, all mechanical elements, etc.  Basically, anything that will clearly be seen again and again needed to be custom.

Step 3: Create a Custom Recording List

When I’m creating a recording list, I like to brainstorm things to record which might add to the overall aesthetic I’m trying to achieve while keeping in mind what I need to cover.  Sometimes, if you map out exactly what to record for each signature element, you close off your brain to considering other options during the process. Think about the general aesthetic you would like to achieve and come up with items that you think may help to achieve that aesthetic–whether you think you’ll use them now or they may just be handy to have in the future.

Here was my list.  Notice that I’m focusing on what I want to hear and not marrying myself to specific items just yet:

  1. Toy ratchet
  2. Toy click into place
  3. Different plastic items for grabs
  4. Toy rolling
  5. A toy which “pops” or “thunks”

Step 4: Browse for Items to Record

I took this list to a local children’s consignment store and roamed the aisles looking for interesting items and listening to how they sounded.  I chose a consignment store because it was cheaper, but also because the toys were not in their original packaging, so I was free to test them out.  Often browsing for things to record is best done in your own home or a friend’s closet for this very reason. Keep in mind that the best recordings are made from items which are different from what you actually see on screen. You want to achieve a certain texture, a certain sound, a certain feel. You don’t want to just record the exact thing you see in the picture.  Think about how an old loose doorknob is often used for gun foley or a piece of celery is broken for a good bone crunch. When choosing items to record, shut off the visual part of your brain that’s telling you to go for the obvious, and start listening to everyday items with your creative hat on. Evaluate each item solely on its ability to give you the sound properties you’ve already brainstormed in the above list.

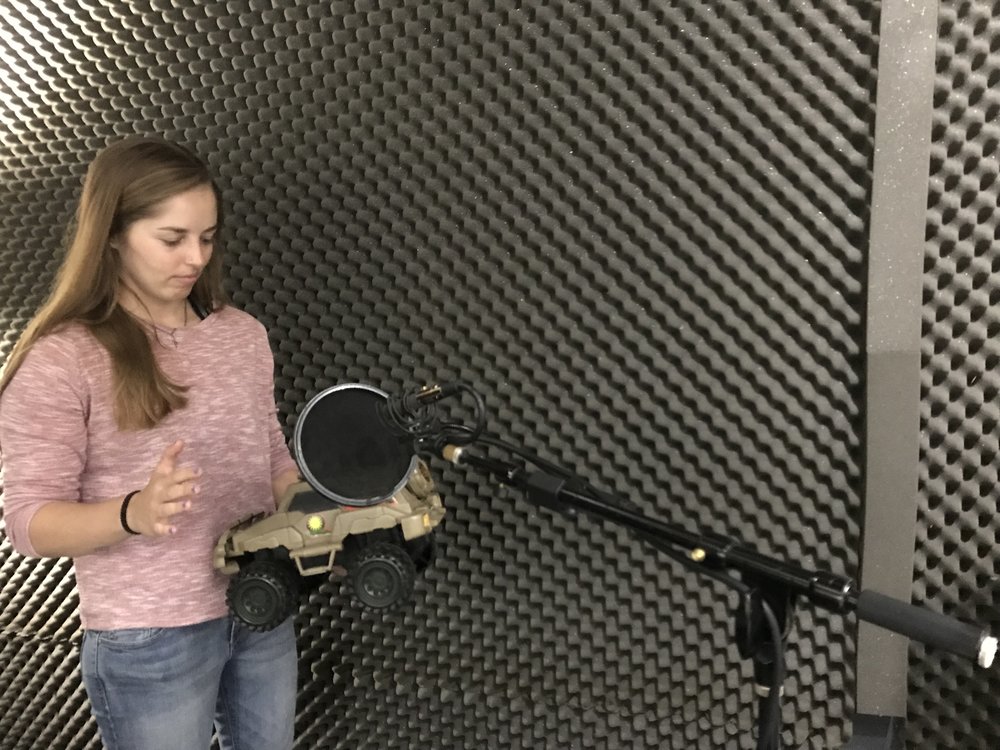
Step 5: Record new sounds

Step 6: Edit your recordings to work with the picture.

Once you’ve recorded all of your new (or old) props, bring everything into your DAW and start playing.  Often I find that elements I recorded in hopes of covering a certain signature element actually work best for something else.  Don’t be afraid to play around and try new things. Use the clean recordings, process them to the point that they are unrecognizable, or mix them together with sounds from your library.  In this step, you are the sonic painter. Give yourself the creative freedom to use your full palette and don’t be afraid to make a mess. That’s how the best discoveries are made!

Step 7: Collaborate with your clients.

Sound is never a job that’s pursued in a vacuum.  We’re part of a larger project team, and most often that project is the creative property of someone else.  Once you’ve come up with your most alluring signature sounds, share them with your clients and let the collaboration ensue.  It’s incredibly important to realize that the creative process doesn’t end with you: it’s easy to think that your signature sounds are the best they can be when you’ve finished designing.  In fact, I find that they often get even better when I present them to the clients and they offer tiny tweaks and new creative insights. Sometimes muting one element or incorporating something else that you never even considered is the key ingredient to the perfect sound.


The Sounds

Here are a few of the original recordings I made with the help of our intern, Sam, and the signature elements that I designed using those recordings.  The recordings and designs may sound simple, but remember that signature sounds compound with each other in order to create an often nuanced and distinguishable scape for the series as a whole.  It’s the totality of all of your creative ideas that form an overall new and exciting aural aesthetic.


X