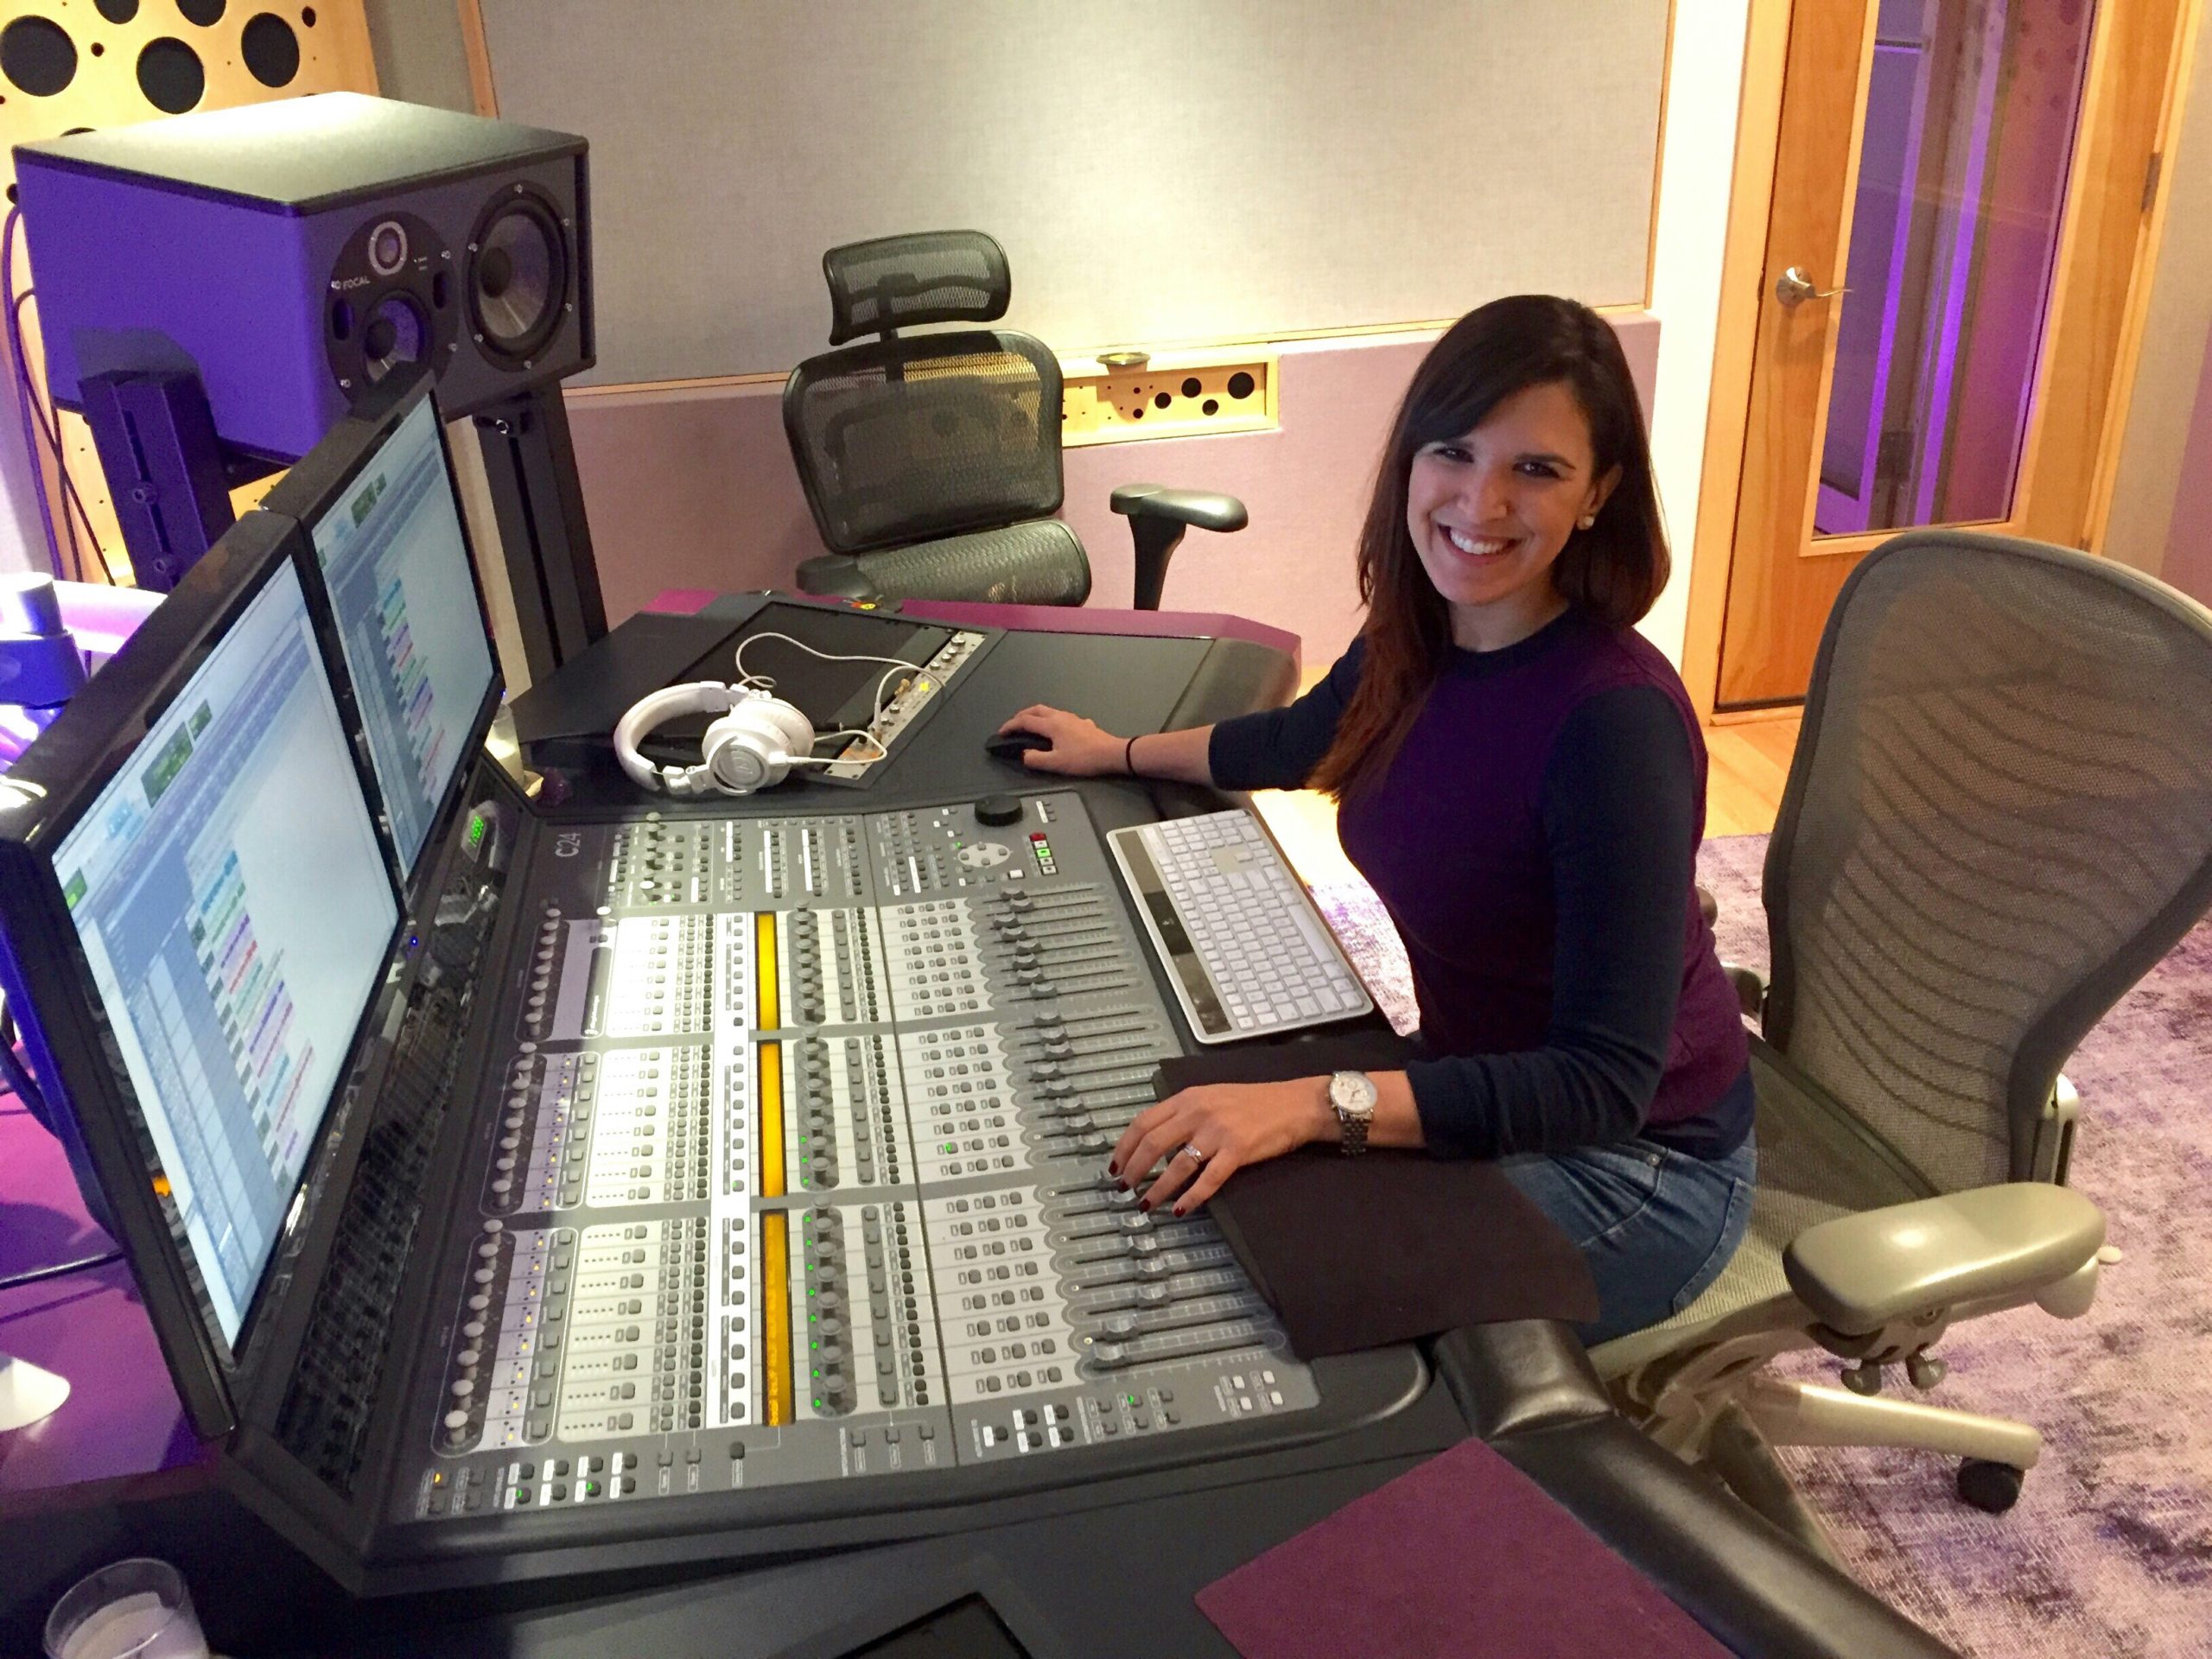
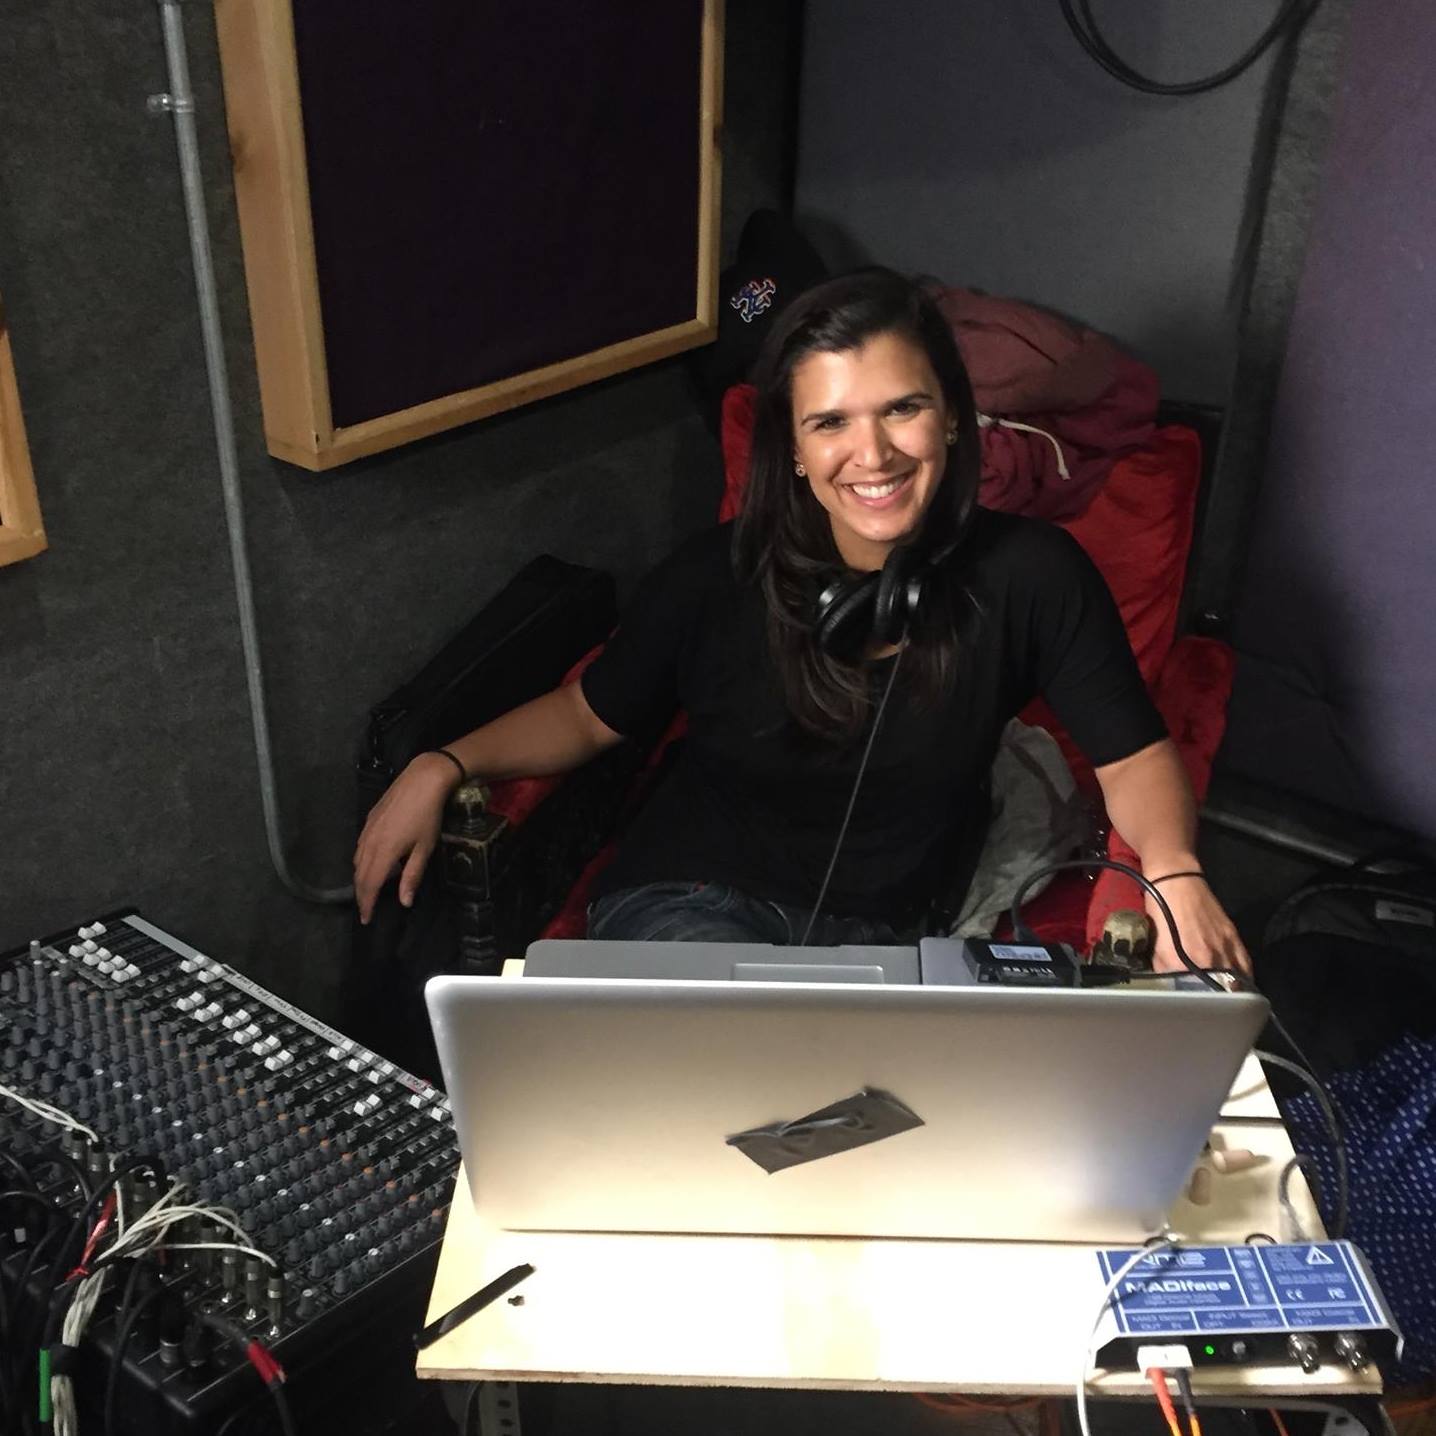
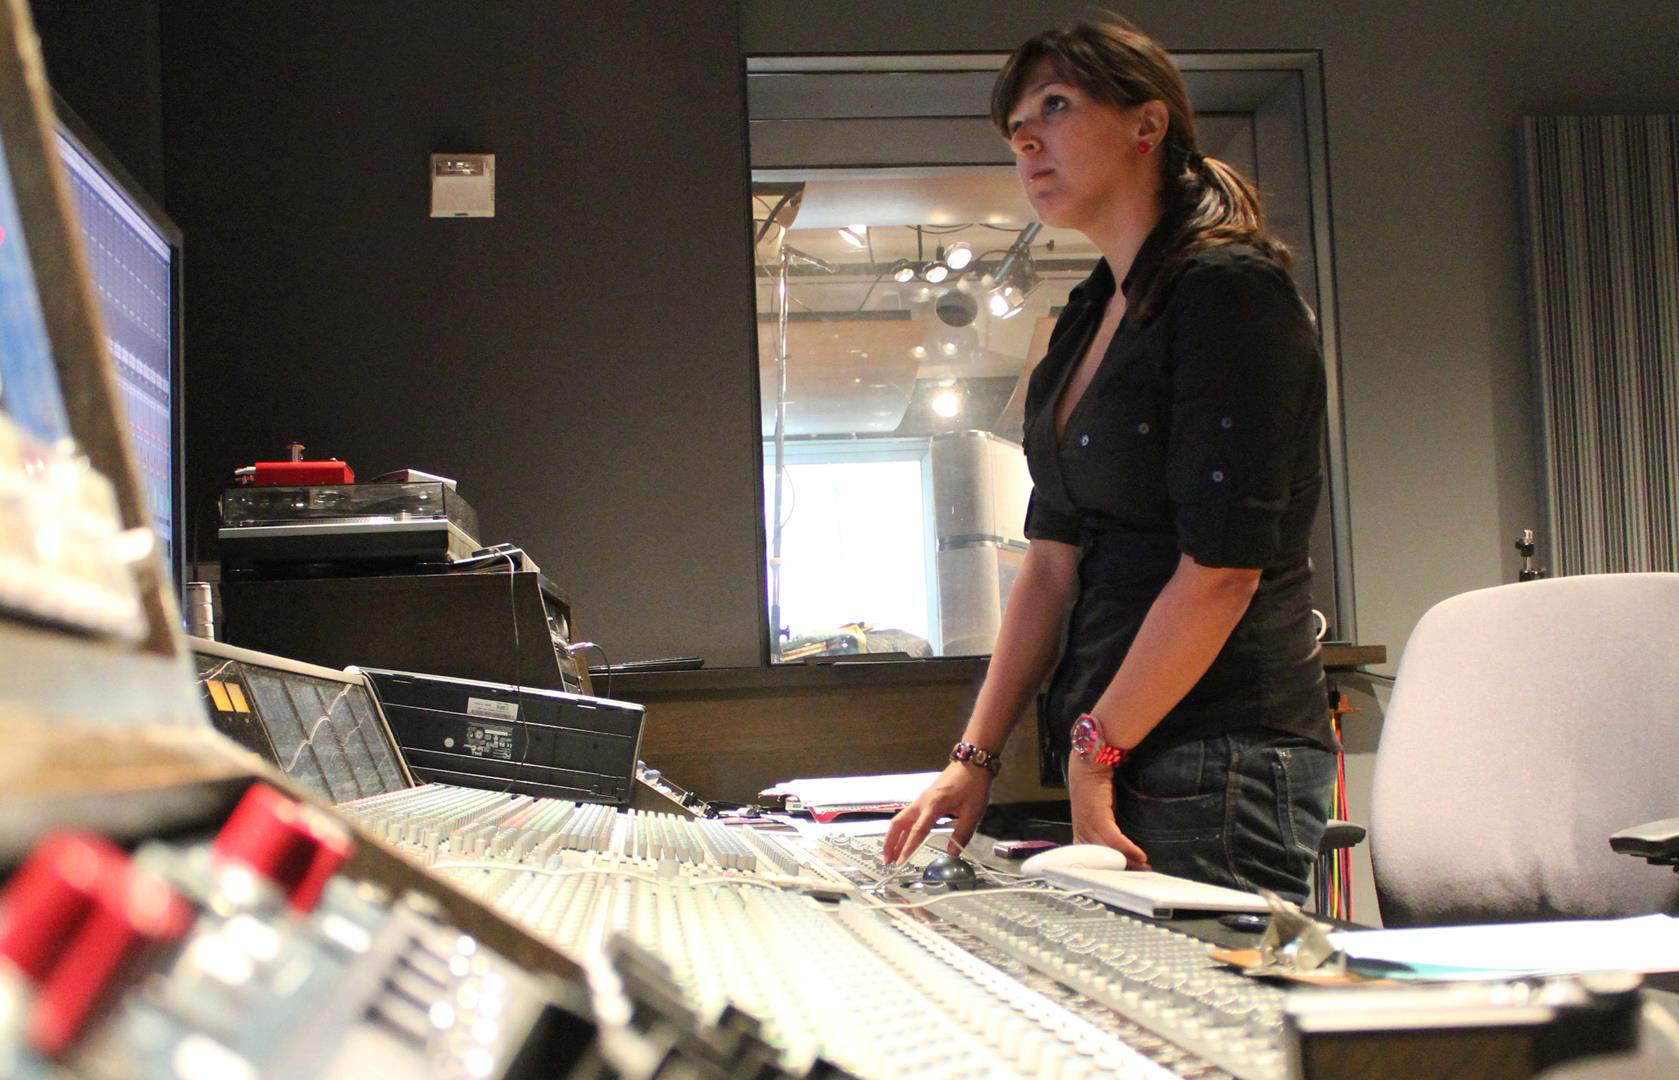
Empowering the Next Generation of Women in Audio

Join Us

The Psychoacoustics of Modulation

Modulation is still an impactful tool in Pop music, even though it has been around for centuries. There are a number of well-known key changes in many successful Pop songs of recent musical decades. Modulation like a lot of tonal harmonies involves tension and resolution: we take a few uneasy steps towards the new key and then we settle into it. I find that 21st-century modulation serves as more of a production technique than the compositional technique it served in early Western European art music (this is a conversation for another day…).

 Example of modulation where the same chord exists in both keys with different functions.


Nowadays, it often occurs at the start of the final chorus of a song to support a Fibonacci Sequence and mark a dynamic transformation in the story of the song. Although more recent key changes feel like a gimmick, they are still relatively effective and seem to work just fine. However, instead of exploring modern modulation from the perspective of music theory, I want to look into two specific concepts in psychoacoustics: critical bands and auditory scene analysis, and how they are working in two songs with memorable key changes: “Livin’ On A Prayer” by Bon Jovi and “Golden Lady” by Stevie Wonder.

Consonant and dissonant relationships in music are represented mathematically as integer-ratios; however, we also experience consonance and dissonance as neurological sensations. To summarize, when a sound enters our inner ear, a mechanism called the basilar membrane response by oscillating at different locations along the membrane. This mapping process called tonotopicity is maintained in the auditory nerve bundle and essentially helps us identify frequency information. The frequency information devised by the inner ear is organized through auditory filtering that works as a series of band-pass filters, forming critical bands that distinguish the relationships between simultaneous frequencies. To review, two frequencies that are within the same critical band are experienced as “sensory dissonant,” while two frequencies in separate critical bands are experienced as “sensory consonant.” This is a very generalized version of this theory, but it essentially describes how frequencies in nearby harmonics like minor seconds and tritones are interfering with each other in the same critical band, causing frequency masking and roughness.


Depiction of two frequencies in the same critical bandwidth.


Let’s take a quick look at some important critical bands during the modulation in “Livin’ On A Prayer.” This song is in the key of G (392 Hz at G4) but changes at the final chorus to the key of Bb (466 Hz at Bb4). There are a few things to note in the lead sheet here. The key change is a difference of three semitones, and the tonic notes of both keys are in different critical bands, with G in band 4 (300-400 Hz) and Bb in band 5 (400-510 Hz). Additionally, the chord leading into the key change is D major (293 Hz at D4) with D4 in band 3 (200-300 Hz). Musically, D major’s strongest relationship to the key of Bb is that it is the dominant chord of G, the minor sixth in the key of Bb. Its placement makes sense because previously the chorus starts on the minor sixth in the key of G, which is E minor. Even though it has a weaker relationship to Bb major which kicks off the last chorus, D4 and Bb4 are in different critical bands and if played together would function as a major third and create sensory consonance. Other notes in those chords are in the same critical band: F4 is 349 Hz and F#4 is 370 Hz, placing both frequencies in band 4 and if played together would function as a minor second and cause sensory roughness. There are a lot of perceptual changes in this modulation, and while breaking down critical bands doesn’t necessarily reveal what makes this key change so memorable, it does provide an interesting perspective.

A key change is more than just consonant and dissonant relationships though, and the context provided around the modulation gives us a lot of information about what to expect. This relates to another psychoacoustics concept called auditory scene analysis which describes how we perceive auditory changes in our environment. There are a lot of different elements to auditory scene analysis including attention feedback, localization of sound sources, and grouping by frequency proximity, that all contribute to how we respond to and understand acoustical cues. I’m focusing on the grouping aspect because it offers information on how we follow harmonic changes over time. Many Gestalt principles like proximity and good continuation help us group frequencies that are similar in tone, near each other, or serve our expectations of what’s to come based on what has already happened. For example, when a stream of high notes and low notes is played at a fast tempo, their proximity to each other in time is prioritized, and we hear one stream of tones. However, as this stream slows down, the value in proximity shifts from the closeness in timing to the closeness in pitch, and two streams of different high pitches and low pitches are heard.

 Demonstration of “fission” of two streams of notes based on pitch and tempo.


Let’s look at these principles through the lens of “Golden Lady” which has a lot of modulation at the end of the song. As the song refrains about every eight measures, the key changes by a half-step or semitone upwards to the next adjacent key. This occurs quite a few times, and each time the last chord in each key before the modulation is the parallel major seventh of the upcoming minor key. While the modulation is moving upwards by half steps, however, the melody in the song is moving generally downwards by half steps, opposing the direction of the key changes. Even though there are a lot of changes and combating movements happening at this point in the song, we’re able to follow along because we have eight measures to settle into each new key. The grouping priority is on the frequency proximity occurring in the melody rather than the timing of the key changes, making it easier to follow. Furthermore, because there are multiple key changes, the principle of “good continuation” helps us anticipate the next modulation within the context of the song and the experience of the previous modulation. Again, auditory scene analysis doesn’t directly explain every reason for how modulation works in this song, but it gives us ulterior insight into how we’re absorbing the harmonic changes in the music.

Master the Art of Saving Your Live Show File

Total recall for a better workflow and to avoid embarrassment 

If you found this blog because your show file isn’t recalling scenes properly, skip to the “in case of emergency” section and come back to read the rest when you have time.

We learned as soon as we started using computers that we need to save our work as often as possible. We all know that sinking feeling when that essay or email we had worked so long and hard on, without backing up, suddenly became the victim of a spilled drink or blue screen of death. I’m sure more than a few of us also know this feeling from when we didn’t save our show file correctly, maybe even causing thousands of people to boo us because everything’s gone quiet all of a sudden. Digital desks are just computers with a fancy keyboard, but unlike writing a simple essay, there are many more ‘features’ in show files that can trip you up if you don’t fully understand them. Explaining the ins and outs of every desk’s save functions is beyond the scope of this article (pun intended), but learning the principles of how and why everything should be saved will help to make your workflow more efficient and reliable, and hopefully save you from an embarrassing ‘dog ate my show file moment.

The lingo

For some reason, desk manufacturers love to reinvent the wheel and so have their own words to describe the same thing. I have tried to include the different terms that I know of, but once you understand the underlying principles you should be able to recognise what is meant if you encounter other names for them. It really pays to read your desk’s manual, especially when it comes to show files. Brands have different approaches which might not always be intuitive, so getting familiar with them before you even start will help to avoid all your work going down the drain when you don’t tick the right box or press the right button.

Automation: This refers to the whole concept of having different settings for different parts of the performance. The term comes from studio post-production and is a little bit of a misnomer for live sound because most of the time it isn’t automatic as such; the engineer still needs to trigger the next setting, even though the desk takes care of the rest (if you’re really fancy some desks can trigger scene changes off midi or timecode. It is modern-day magic but you still need to be there to make sure things run smoothly and to justify your fee).

Show file/show/session: The parent file. This covers all the higher level desk settings, like how many busses you have and what type, your user preferences, EQ libraries, etc. It is the framework that the scenes build on, but also contains the scenes.

Scene/snapshot: Individual states within the show file, like documents within a folder. They store the current values for things like fader levels, mutes, pan, and effects settings. Every time you want things to change without having to make those adjustments by hand, you should have a new scene.

Scope/focus/filter: Defines which parameters get recalled (or stored. See next section) with the scene. For example, you might want everything except the mutes and fader levels to stay the same throughout the whole show, so they would be the only things in your scenes’ recall scope.

N.B.! Midas (and perhaps some other manufacturers) defines scope as what gets excluded from being recalled, and so it works the other way round (see figure 1). Be very sure you know which definition your desk is using! To avoid confusion, references to scope in this post mean what gets included.

Store vs. recall: Some desks, e.g. Midas, offer store scope as well as recall scope. This means you can control what gets saved as well as how much of that information later gets brought back to the surface. Much like the solo in place button, you need to be 100% sure of what you’re doing before you use this feature. It might seem like a good idea to take something you won’t want later, like the settings for a spare vocal mic when the MD uses it during rehearsals, out of the store scope. However, it’s much safer to just take it out of the recall scope instead. It’s better to have all the information at your disposal and choose what to use, rather than not having data you might later need. You also risk forgetting to reset the store scope when you need to record that parameter again, or setting the scope incorrectly. The worst-case scenario is accidentally taking everything out of the store scope (Midas even gives you a handy “all” button so you can do it with one click!): You can spend hours or even days diligently working on a show, getting all your scenes and recall scopes perfect, then have absolutely nothing to show for it at the end because nothing got saved in order to be recalled. Yes, this happens. It’s simply best to leave store scope alone.

Safe/hardware safe/iso (isolate): You can ‘safe’ things that you don’t want to be affected by scene changes, for example, the changeover DJ on a multi-band bill or an emergency announcement mic. Recall safes are applied globally so if you want to recall something for some scenes and not others, you should take it out of the relevant scenes’ recall scope instead.

Global: Applies to all scenes. What parameters you can and can’t assign or change globally varies according to manufacturer.

Absolute vs. relative: Some desks, e.g. SSLs, let you specify whether a change you make is absolute or relative. This applies when making changes to several scenes at once, either through the global or grouping options. For example, if you move a channel’s fader from -5 to 0, saving it as “absolute” would mean that that fader is at 0 in every scene you’re editing, but saving it as “relative” means the fader is raised by 5dB in every scene, compared to where it was already.

Fade/transition/timing: Scene changes are instantaneous by default, but a lot of desks give you the option to dictate how gradually you change from one scene to another, how the crossfade works, and whether a scene automatically follows on from the one before it after a certain length of time. These can be useful for theatrical applications in particular.

The diagram from Digico’s S21 manual illustrating recall scope (top) and the Midas Pro2 manual’s diagram (bottom). Both show that if elements are highlighted green, they are in the recall scope. Unfortunately Digico defines scope as what does get recalled, while Midas defines it as what doesn’t. Very similar screens, identical wording, entirely opposite results. It was a bad day when I found that out the hard way.

Best practice

Keep it simple!: With so many different approaches to automation from different manufacturers and so many aspects of a show file to keep track of, it is easy to tie yourself in knots if you aren’t careful. There are many ways to undo or override your settings without even noticing. The order in which data filters are applied and what takes precedence can vary according to manufacturer (see figure 2 for an illustration of one). Keep your show file as simple as possible until you’re confident with how everything works, and always save everything and back it up to your USB stick before making any major change. It’s much easier to mix a bit more by hand than to try to fix a problem with the automation, especially one that reappears every time you change the scene!

Keep it tidy: As with any aspect of the job, keep your work neat and annotated. There are comment boxes for each show and scene where you can note down what changes you made, what stage you were at when you saved, or what the scene is even for. This is very useful when troubleshooting or if someone needs to cover you.

Be prepared: Show files can be fiddly and soundchecks can be rushed and chaotic. It’s a good idea to make a generic show file with your preferences and the settings you need to start off with for every show, then build individual show files from there. You can make your files with an offline editor and have several options ready so you can hit the ground running as soon as you get to the venue. If you aren’t sure how certain aspects of the automation work, test them out ahead of time.

Don’t rely on the USB: Never run your show straight from your USB stick if you can avoid it. Some desks don’t offer space to store your show file, but if yours does you should always copy your file into the desk straight away. Work on that copy, before saving onboard and then backing it up back to the USB stick. Some desks don’t handle accessing information on external drives in real-time well, so everything might seem fine until the DSP is stretched or something fails, and you can end up with errors right at a crucial part of the performance. Plus, just imagine if someone knocked it out of its socket mid-show! You should also invest in good quality drives because a lot of desks don’t recognise low-quality ones (including some of the ones that desk manufacturers themselves hand out!).

Where to start: It can be tempting to start with someone else’s show file and tweak it for your gig. If that person has kept a neat, clear file (and they’ve given you permission to use it!) it could work well, but keep in mind that there might be settings hidden in menus that you aren’t aware of or tricks they use that suit their workflow that will just trip you up. Check through the file thoroughly before you use it.

Most desks have some sort of template scene or scenes to get you started. Some are more useful than others, and you need to watch out for their little quirks. The Midas Pro2 had a notoriously sparse start scene when it first came out, with absolutely nothing patched, not even the headphones! You also need to be aware of your desk’s general default settings. Yamaha CL and QL series take head amp information from the “port” (stage box socket, Dante source, etc.) rather than the channel by default. That is the safest option for when you’re sharing the ports between multiple desks but is pretty useless if you aren’t and actively confusing if you’re moving your file between several setups, as you inherit the gains from each device you patch to.

Make it yours: It’s your show file, structure it in the way that’s best for you. The number of scenes you have will depend on how you like to work and the kind of show you’re doing. You might be happy to have one starting scene and do all the mixing as you go along. You might have a scene per band or per song. If you’re mixing a musical you might like to have a new scene every few lines, to deal with cast members coming on and off stage (see “further resources” for some more information about theatre’s approach to automation and line by line mixing). Find the settings and shortcuts that help you work most efficiently. Just keep everything clear and well-labeled for anyone who might need to step in. If you’re sharing mixing duties with others you will obviously need to work together to find a system that suits everyone.

Save early, save often: You should save each show file after soundcheck at the very least, even if nothing is going to change before the performance, as a backup. You should also save it after the show for when, or in case, you work with that act again. Apart from that, it’s good practice to save as often as you can, to make sure nothing gets lost. Some desks offer an autosave feature but don’t rely on it to save everything, or to save it at the right point. Store each scene before you move on to the next one when possible. Remember each scene is a starting point, so if you make manual changes during the scene reset them before saving.

Periodically save your show under a new name so you can roll back to a previous version if something goes wrong or the act changes their mind. You should save the current scene, then the show, then save it to two USB sticks which you store in different places in case you lose or damage one. It is a good idea to keep one with you and leave the other one either with the audio gear or with a trusted colleague, in case you can’t make it to the next show.

In case of emergency

If you find that your file isn’t recalling properly, all is not necessarily lost. First off, do not save anything until you’ve figured out the problem! You risk overwriting salvageable data with new/blank data.

Utility scenes

When you’re confident with your automation skills you can utilise scenes for more than just changing state during the show. Here are a few examples of how they can be used:

Master settings: As soon as you start adjusting the recall scope, you should have a “settings” scene where you store everything, including parameters you know won’t change during the performance. Then you can take those parameters out of the recall scope for the rest of the scenes so you don’t change them accidentally. It is very important that they are stored somewhere, to begin with though! As monitor engineer Dan Speed shared:

“Always have a snapshot where all parameters are within the recall scope and be sure to update it regularly so it’s relevant. I learnt this the hard way with a Midas when I recalled the safe scene [the desk’s “blank slate” scene] and lost a week’s worth of gain/EQ/dynamics settings 30 minutes before the band turned up to soundcheck!”

I would also personally recommend saving your gain in this scene only. Having gain stored in every scene can cause a lot of hassle if you need to soft patch your inputs for any reason (e.g. when you’re a guest engineer where they can’t accommodate your channel list as is) or you need to adjust the gain mid-gig because a mic has slipped, etc. If you need to change the gain you would then need to make a block edit while the desk is live, “safe” the affected channel’s gain alone (and so lose any gain adjustments you had saved in subsequent scenes anyway), or re-adjust the gain every time you change the scene: all ways to risk making unnecessary mistakes. Some people disagree, but for most live music cases at least, if you consistently find that you can’t achieve the level changes needed within a show from the faders and other tools on the desk, you should revisit your gain structure rather than include gain changes in automation. A notable exception to this would be for multi-band bills: If a few seconds of silence is acceptable, for example, if you’re doing monitors, it is best to save each band as their own show file and switch over. Otherwise, if you need to keep the changeover music or announcement mics live, you can treat each set as a mini-show within the file and have a “master” starting scene for each one, then take the gain out of any other scenes.

Line system check: If you need to test that your whole line system is working, rather than line checking a particular setup, you should plug a phantom-powered mic into each channel and listen to it (phantom power checkers don’t pick up everything that might be wrong with a channel. It’s best to check with your own ears while testing the line system). A scene where everything is flat, patched 1-1, and phantom is sent to every channel makes this quick and easy, and easy to undo when you move on to the actual setup.

Multitrack playback: If you have a multitrack recording of your show but your desk doesn’t have a virtual playback option, you can make your own. Make two scenes with just input patching in their recall scope: one with the mics patched to the channels, and one with the multitrack patched instead. Take input patching out of every other scene’s recall scope. Now you can use the patch scenes to flip between live and playback, without affecting the rest of the show file. (Thanks to the awesome Michael Nunan for this tip!).

Despite the length of this post, I have only scratched the surface when it comes to the power of automation and what can be achieved with it. Unfortunately, it also has the power to ruin your gig, and maybe even lose your work. Truly understanding the principles of automation and building simple, clear show files will help your show run smoothly, and give you a solid foundation from which to build more complex ones when you need them.

Further resources:

Sound designer Kirsty Gillmore briefly outlines how automation can be approached for mixing musicals in part 2 of her Soundgirls blog on the topic:  https://soundgirls.org/mixing-for-musicals-2/

Sound designer Gareth Owen explains the rationale for line by line mixing in musical theatre and demonstrates how automation makes it possible in this interview about Bat Out of Hell: https://youtu.be/25-tUKYqcY0?t=477

Aleš Štefančič from Sound Design Live has tips for Digico users and their sessions: https://www.sounddesignlive.com/top-5-common-mistakes-when-using-a-digico-console/

Nathan Lively from Sound Design Live has lots of great advice and tips for workflow and snapshots in his ultimate guide to mixing on a Digico SD5:

https://www.sounddesignlive.com/ultimate-guide-creative-mixing-digico-sd5-tutorial/

Review of Behind the Sound Cart


If you are looking for a master class in production sound, Behind the Sound Cart: A Veteran’s Guide to Sound on the Set by Patrushkha Mierzwa is just that.  From gear to career development this book covers it all.  With her many years of experience as a Utility Sound Technician (UST), Mierzwa provides more than tips and tricks.  Packed in each chapter is a guide to best practices and the reasons why.

Behind the Sound Cart is divided into chapters based on topics beginning with an overview of the UST’s duties.  Also known as 2nd Assistant Sound, they work on everything sound-related not covered by the Mixer or the Boom Operator, even then the UST might have to use a second boom, or even cover for the mixer.  In light of how flexible the UST must be, it makes sense to use them as a focal point for a guidebook on production sound.  Mierzwa has the reader follow her footsteps through nearly every scenario a UST might face.  I cannot believe I ever set foot on a set without Behind the Sound Cart.

Mierzwa stresses the importance of safety with every chapter.  Current events show us that this emphasis is always necessary.  However, safety is not just protection from a dolly running you over:  heat, stress, and fatigue can also be deadly.  Don’t skip the sections on first aid and COVID protocols either.  Gear cleaning and maintenance fall into this category as well.

From cover to cover, Mierzwa leads by example of professionalism and integrity.  Do not expect this book to be full of celebrity anecdotes.  Part of being a respected UST is respecting the cast. One might expect a book on the basics of production sound to be dry without juicy gossip, but there are plenty of stories and jokes peppered through each chapter.  Attached in the appendices are forms, paperwork, and other documents used throughout the film production process.  Those alone are worth the price of this book.  Refreshing is the way Mierzwa uses “she/her” as the default pronouns over “he/him.”  Sure, a more neutral pronoun like the singular “they” would be optimal, it allows one to imagine a film crew that is more diverse than the “industry standard.”

I recommend Behind the Sound Cart to anyone looking to succeed in the film industry.  That includes early career professionals, as well as students and production assistants.  I would even recommend this book for fledgling directors and cinematographers.  Patrushkha Mierzwa has put a career’s worth of information into a manageable package, and it should be in every production sound engineer’s library.

Do Musicians Need to Know About Sound?

Music and Sound: Part 1

Modern and changing times have pushed people to learn and use technology more and more, especially musicians. But particularly during the pandemic, many musicians have had the need to record themselves, edit and mix their own music.  Does this mean now that they have to master a new career as sound engineers too besides being musicians?

I would say yes, but only if it is their true interest. Diving into a sound career implies a lot of technical terms to learn, gear to buy, and aptitudes to have. So, I would say no, if you are not much of a technophile and you don’t want to consume your instrument study time into troubleshooting equipment or learning about deep theoretical and technical aspects of sound.

That being said, my first and best advice would be to always hire a professional sound person to help you set up your home studio, teach you how to do your recordings and mixes, and give you professional advice. However, if you are still thinking to give it a try and set up your own home studio, mix your own music, and doing it all by yourself, I may have some tips for you.

Technical aptitudes are part of the important things to consider: computer skills and good problem-solving skills are basic aptitudes you’ll need to enhance to set up, use, and master your own music studio. Keep in mind that you might have to update or buy a computer that can manage recording and music software requirements. Most websites have now a specific list of technical requirements to use their products, so you might want to take a look through their websites to make sure your computer is up to date. The most important things to consider for a computer to be able to manage music and recording software are mainly: processor type, operation system version, RAM size, disk space, ports, etc. If any of these terms are in a foreign language for you, you may also need help from a person how knows about computers.

Here is an example of Ableton Live Computer requirements for a Windows Computer:

Windows 10 (Build 1909 and later)

Intel® Core™ i5 processor or an AMD multi-core processor.

8 GB RAM

1366×768 display resolution

ASIO compatible audio hardware for Link support (also recommended for optimal audio performance)

Access to an internet connection for authorizing Live (for downloading additional content and updating Live, a fast internet connection is recommended)

Approximately 3 GB disk space on the system drive for the basic installation (8 GB free disk space recommended)

Up to 76 GB disk space for additionally available sound content

Digital Audio Workstations

The next thing you will need to consider is getting digital audio workstations (DAWs) and/or music creation software. DAWs are computer programs designed to record any sound into a computer, manipulate the audio, mix it, add effects and export it in multiple formats.

You will need to choose according to your needs and preferences among many workstations that are available online from free versions to monthly subscriptions or perpetual licenses. Some of the most popular DAWs between professional sound engineers are Pro Tools, Cubase, Logic Pro, Ableton Live, Reaper, Luna, Studio One, but you can also find others for free or less than USD $100:

To learn how to use any of these DAWs you will be able to find many resources online on the manufacture’s websites, Google or YouTube, such as training videos, workshops, live sessions, etc. Here is an example of a tutorial video for Pro tools that can be found on Avid’s YouTube channel: Get Started Fast with Pro Tools | First — Episode 1: https://www.youtube.com/watch?v=9H–Q-fwJ1g

Some theoretical concepts will also come up when doing recordings and mixing, like stereo track, mono track, multitrack, bit depth, sample rate, phantom power, condenser mics, phase, plugin, gain, DI, etc. Multiple free online resources to learn about those concepts are available all over the internet. Just take your time to learn them.

You can read about educational resources at https://soundgirls.org/educational-resources/

Audio Interface

The next thing you are going to need is an Audio Interface, but why?

Audio interfaces are hardware units that allow you to connect microphones, instruments, midi controllers, studio monitors and headphones to your computer. They translate electric signals produced by soundwaves to a digital protocol (0s and 1s) so your computer can understand it.

Depending on your requirements as a musician you may need to record one track at a time or more. For example, if you play drums you may need more than one mic, but if you are a singer probably one mic is just enough. This means that you will find audio interfaces with different amounts of inputs where usually the price is attached to it, the greater the number of channels and preamps, the more money you’ll need. Audio interfaces will also have different types of inputs: for microphones, for instruments (with a DI), or both (combo), make sure you choose the proper one for your needs. Especially, make sure it has a built-in preamplifier in case you are using condenser mics to record.

There are also microphones that you can plug directly into your computer or phone via USB, this means no audio interface is needed (it’s built-in). This type of mics might be helpful for podcasters, broadcasters, video streamers. However, bear in mind that even if you try your best, this type of recordings may not have the same results as a professional recording and mixing.

Microphones

Learning about microphones and microphone technics might take lots of blogs to read and videos to watch, so I will narrow it down: there are no straight formulas for sound or strict rules to follow regarding to microphones. The mic you choose can vary depending on your budget, the type of instrument you play, and what you are using your microphone for. For this, you will need to search and learn about types of mics depending on their construction (dynamic, condenser, ribbon, etc.), types of polar pattern (cardioid, super-cardioid, Omni, etc), and some recommendations of mics based on the instruments you’ll record.

For example, you may find definitions for commonly-used terms for microphones and Audix products on their website: https://audixusa.com/glossary/. Or you can register for Sennheiser Sound Academy Seminars at https://en-ae.sennheiser.com/seminar-recordings.

If you want to read more about Stereo Microphone Techniques you can also check: https://www.andreaarenas.com/post/2017/11/06/stereo-microphone-techniques

Midi Controllers

Midi controllers: Musical Instrument Digital Interfaces are mostly used to generate digital data that can be used to trigger other equipment or software, meaning that they do not generate sound by themselves. A MIDI controller can be a keyboard, drum pad-style device, or a combination of the two. You will need to learn how to program and map your midi controller to be able to use it creatively for your productions.

You will also find many resources online that will help you learn about midi controllers, such as Ableton on how to set up your midi: https://www.youtube.com/watch?v=CWOXblksDxE

Acoustics

The acoustics of the room is also important, the lack of acoustic treatment can make your recordings sound different, and usually in a bad way. Sound gets reflected and absorbed in all surfaces present in a room and noise can interact with your recordings too. If you are in an improvised room in your house and no professional acoustic treatment is possible to make, you might have in mind some basics like avoiding recording in rooms with parallel walls, square or rectangle design pattern with square corners and hard surfaces, minimizing the reflected sounds with carpets, soft couches, pillows, etc.

Once again, considering hiring a sound engineer as a consultant might be your best option if you are planning to take the next step as a musician to learn about sound engineering. It would make you save time; money and you’ll be employing a friend.


7 Steps to Making a Demo with Your Phone

The internet is full of songwriters asking the question; how good does my demo have to be? The answer is always, “it depends”. Demos generally have one purpose; to accurately display the lyrics and melody of a song. Yet, there are varying types of demos and demo requirements but for this blog’s purpose, that is our one purpose!

*(see the end of this blog for situations where you will want to have your song fully produced for pitching purposes)

If you are a

Demos for these purposes can be recorded on your phone. If you have recording software (otherwise known as a DAW: Digital Audio Workstation) you can use that too. The steps are the same. But for those who don’t have a recording set up and have no interest in diving into that world, your phone and a variety of phone apps make it super easy.

Figure out the tempo

The “beats per minute”, or BPM is a critical component to the momentum and energy of a song. Pretty much every novice singer/songwriter has a tendency to write their songs in various tempos. The verse starts off at a certain groove and then by the time the first chorus comes in, the tempo has gradually increased to a new bpm. Then it goes back down during the soft bridge, then back up to an even faster tempo at the end.

None of us were born with an internal metronome, so don’t beat yourself up about it. However, most mainstream music that we hear today is going to be in a set tempo for the majority of the song. There may be tempo changes, depending on what the song calls for but, generally speaking, most songs do not change tempo. You and your producer can decide if a song needs tempo changes or if it is the kind of song that should be played “freely”, with no metronome at all.

Start by playing your song, and imagine yourself walking to the beat of your song. Is it a brisk walk? Or a slow, sluggish walk? A brisk walk is 120 beats per minute. Pull up your metronome and pick a starting bpm, based on how brisk (or un-brisk) the imaginary walk feels. Set that tempo and then play along to it. If it’s feeling good, keep playing through until you’ve played every song section (verse, chorus, bridge) at that tempo. If it stopped feeling right at some point, adjust accordingly. Ideally, you’ll find that happy bpm that is perfect for the song.

Type up a lyric sheet: I have artists put these lyric sheets on Google Drive and share them with me so that we are always working off of the same lyric sheet as changes are made.

Mark tempo changes on the lyric sheet: mark specific tempo changes if there are any. Mark a ritard (ritard means to slow down) where they need to be as well. If there is going to be a ritard, it is usually in the outro.

Check the key: Do you accidentally change keys in different sections? Just like the case of tempo changes, beginner singer/songwriters, especially if they’ve written the lyrics and melody a cappella (without accompaniment) can easily change keys without knowing it. If you don’t play an instrument, that’s ok! Have a musician friend or teacher help you. Your producer can also help you with this, as long as that is included in the scope of their work. Ask beforehand. If you do know the key and have determined the chords, including those in your lyric sheet.

Can you sing it: Have you sung it full out with a voice teacher in the key you’ve written it in? Singing it quietly in your room in a way that won’t disturb your roommates might not be the way you want to sing it in the recording studio.

Record the song: Record the song with the metronome clicking out loud if you aren’t using an app (you may need two devices; one to play the metronome and one to record) There are apps available where you can record yourself while listening to the click track through earbuds, then when you listen back to the recording, you won’t hear the click track. The point is that you sang it in time. One app I’m aware of where you can do this is Cakewalk by Bandlab. There are many!

Share the file: Make sure you can share the audio recording in a file format they can play. MP3s are the most common compressed audio file that can easily be emailed but most of our phones don’t automatically turn our voice memos into mp3’s. As a matter of fact, some phones will squash an audio file into some weird file type that sounds like crap (I have a Samsung and it does this!)

The most important steps for creating a demo for the above-mentioned purposes are making sure you have fine-tuned lyrics, melody, and song structure in a (mostly) set tempo. Following all of these steps will make you a dream client for your producer!

*If you want to pitch a song for use in film or TV (licensing/sync) then it needs to be a fully produced song. Do NOT submit demos to music libraries or music supervisors. They need finished products.

If you want to pitch your song to a music publisher, who in turn will pitch your song to artists, they will want full production in most cases. The artist may have it entirely reproduced but you have to “sell” them the song. You want to shine it in the best light possible. A demo would be needed for the creative team (producer, studio musicians, etc.) who will create your produced version for pitching. 


Virtual Conference Video Pass Now Available

Educating and Inspiring the Next Generation in Audio
Two Days of Sessions in Post-Production, Live Sound, Recording Arts, Film & TV Sound, Broadcast and More.

Over 70 Video Sessions to watch on-demand forever.

$60 Purchase Here

Designing Cinematic Style Sound Effects with Gravity

Today I’m going to be discussing a virtual instrument called Gravity by the folks at Heavyocity. It’s loaded into and powered by Kontakt Engine by Native Instruments. While Gravity itself doesn’t have a free version available, Kontakt is available as both a free version and full version. Gravity is an incredible, extensively customizable virtual instrument designed predominantly for use in modern scoring. It’s comprised of 4 instrumentation sections: Hits, Pads, Risers, and Stings. Each of these 4 main sections breaks down further into complex blends of the loaded-in beautiful, high-quality samples within the category as well as the simplified individual samples for additional customization with the effects and other adjustable parameters.

With these instruments, Gravity allows you to do a whole lot musically for composers who would like to utilize it in developing a full score, but it also can be used for some truly awesome sound designing purposes. Especially when it comes to cinematic style accents, hits, and synthy ambiances, which, as a sound editor, is what I personally have found myself using Gravity for the majority of the time.

Gravity’s MAIN User Interface For Pad Instrument Section

Gravity’s MAIN User Interface For Pad Instrument Section

After having initially selected which instrumentation element you want, each category of instrument breaks down into further categories to narrow down which instrument feels right for the moment. The only section that doesn’t do this additional categorical organization is the Hits partition. At the bottom of Kontakt, just below the UI, it also displays an interactive keyboard you can use if you don’t have a MIDI board to connect to your system, which you can also play by mouse click or by utilizing your computer keyboard. It highlights which keys are loaded with samples for each instrument selected as well as breaking down similar groups separated by color-coding.

There is a powerful and extensive variety of effects available to include (if desired) to whatever degree the user prefers, which are also broken down into multiple pages that you can flip between by clicking on the name of each page along the bottom of the UI (just above the keyboard).

Gravity’s EQ/Filter

Gravity’s EQ/Filter

In the MAIN section, there is Reverb, Chorus, Delay, Distortion, and Volume Envelope with ADSR parameter controls (attack, delay, sustain, release), as well as a couple of Gravity specific effects. These include Punish – which is an effect combining compression and saturation adjusted by a single knob, and Twist – which manipulates, or…twists…the tone of the instrument which you can animate to give movement to the tone itself. There are also performance controls available like Velocity, to adjust the velocity of the notes, Glide, to glide between notes played, and Unison, which increases or decreases layers of detuned variations of the notes played to create a thicker, more complex sound.

Gravity’s Trigger FX

Gravity’s Trigger FX

There is also an EQ/FILTER page which of course provides a complex equalizer and variety of filtering parameters, a TFX (Trigger FX) page to temporarily alter sounds by MIDI trigger with Distortion, LoFi, Filter, Panning, and Delay. Under each trigger effect is an “Advanced” button where you can further customize the parameters of each trigger effect. Lastly, there is a MOTION page that has a modulation sequencer that adjusts volume, pan, and pitch of the sound triggered over time, and a randomize button that randomizes the variety of motion control and motion playback parameters. With this variety of motion controls, you can create patterns of motion to either utilize as an individual setting or to link a chain of motion patterns. To add to all of that, there’s an editing sequencer, and each pattern contains a sequence of volume, panning, and pitch parameters. This series of adjustable bars allows you to create a sequence of patterns. With all of these parameters to manipulate as little or as much as you’d like, thankfully, they have the option to save, load, and lock motion controls for easy recall when you find a really cool means of motion manipulation that you’d like to bring back (without taking the time to fine-tune all of those parameters all over again).

Gravity’s Sequencer

Gravity’s Sequencer

There is one instrument section that’s a little bit different from the rest and has an additional page of customization options that the others don’t. That’s when you go diving into the Hits. In the Hits section, there are multiple options of what they call Breakouts, which are an extensive array of preloaded multi-sample triggers that implement a whoosh or synth rising element that builds and builds until slamming into a powerful, concussive cinematic impact before trailing off. You can use these individually or blend some of them together for a quick means of generating complex, powerful cinematic accents, and sweeteners. These are also all broken down separately into the individual samples to trigger the impacts themselves with each MIDI keyboard note, the sub-elements for a nice touch of deep BOOM to rock the room, the tails to let the concussive hit play out in a variety of ways, and the airy/synth whooshes to rise up into the booming impact. Included in the four Breakout Hits instruments, there’s the additional page of customizable elements added to the UI that I mentioned at the start of this paragraph called DESIGNER. Because the Breakout Hits instruments each trigger a combination of this aforementioned mix of cinematic elements with each keyboard key note, inside the Designer tab, you’ll find that it allows you to modify each of those elements/samples to customize the combinations of triggers.

Hits Instrument Section

Hits Instrument Section

Now, after that extensive technical dive into everything that this AMAZING virtual instrument has to offer, I must say, Gravity itself is actually surprisingly easy and user-friendly to navigate and play with. It has definitely become my personal favorite tool to create a variety of cinematic style elements and accents. In being so user-friendly, once you’ve got it loaded up and either connected your MIDI keyboard or setup your computer keyboard to use in its place… simply select an instrument from the menu and you’re good to go! Have fun playing and exploring the expansive additional effects and features I’ve detailed above!

WRITTEN BY GREG RUBIN
SOUND EFFECTS EDITOR, BOOM BOX POST

Interview with Anna-Lee Craig, A2 for Hamilton on Broadway – Part 2!


Happy New Year, SoundGirls readers! I am so pleased to kick off my blogs this year with Part 2 of my interview with Anna-Lee Craig. ALC holds many impressive titles, even more, impressive when taken together. Among them are A2 for Hamilton on Broadway, inventor of the mic rig known as the “ALC Special,” and on top of all that, parent of twin toddlers!

If you missed it this fall, be sure to check out Part One of this blog, where we cover ALC’s beginnings in the industry, from getting interested in sound in college to breaking into the industry in NYC and making the connections that led her to her first union jobs and to working with Broadway sound designer Nevin Steinberg.

Responses have been lightly edited for length and clarity.

Want to learn more about ALC and the sound design of Hamilton? Check out the two episodes of the “Hamilcast” podcast in which she is featured! https://www.thehamilcast.com/anna-lee-craig/ She is also part of the team that was interviewed for the Hamilton episode of the podcast “Twenty Thousand Hertz”: https://www.20k.org/episodes/hamilton. You can find her on Instagram @frecklessly7 and on Twitter @craigalc.


Let’s talk about being an A2, and then about being the A2 for Hamilton. What is your favorite thing about being an A2?

Oh gosh. I really love my job, so it is hard to narrow it down. So, a list:

-I love when a catastrophe strikes and the mic swap or whatever goes so smoothly that the Mixer and audience doesn’t even know something went wrong.

-I love when an actor tries on a custom rig for the first time and says, “oh this is so comfortable, I don’t even feel it.”

-I love the rituals of a mic hand off and backstage dance choreography that no one else gets to see.

-I love all my elaborate Google Sheets.

Sidenote from Becca: I’m pretty sure this isn’t what ALC meant by “backstage dance choreography,” but here she is busting a move with Lin-Manuel Miranda while getting him into mic! https://twitter.com/i/status/726135286980313088

Can you talk a little about your process, and those elaborate Google Sheets? What kind of paperwork do you make for tracking, rigging, etc., and how early in the process do you get involved with the sound design team?

The A2 usually gets hired just before the shop build- so I’m integrally involved in the rack building, cable labeling, and system setup. I generate paperwork documenting actor/role mic rigs, frequency management, backstage cues, inventory, and anything backstage, related to the sound department, that impacts the daily maintenance of the show.

For Hamilton, how soon after the show opened did you learn the mix in addition to the A2 track?

I trained for the mix at The Public (which is when I joined the show), but it was only in case of an emergency. I was retrained for the Broadway version of the mix 6 weeks after we opened.

Can you give us a particularly crazy backstage “war story” about some of the crazy things that A2s sometimes have to do in the middle of a performance?

Sometimes A2s have to do address a mic problem that basically happens onstage- like behind an upstage piece of scenery. And then you’re just stuck there, hiding behind that door or whatever until the scene is dark again and you can exit without being seen.

How did the design for the ALC Special come about? 

The ALC Special has had multiple evolutions and honestly continues to evolve to this day. The original concept was a request from Nevin- an experiment- could I build a lightweight under the ear rig. It needed to be as far away as possible from the tricorn hat brims, but also look and sound great. Nevin is a fly fisherman, and he must have suggested I look into fly tying. Long story short, much of the technique used in the ALC Special comes from fly tying, including the super strong, super thing fluorocarbon tippet that we tie the mics with.


An up-close look at the ALC Special from the inventor herself! Photo courtesy of Anna-Lee Craig


Sidenote: You can watch Hamilton San Francisco A2 Adrianna Brannon build an ALC Special in the Hamilton-themed episode of “Adam Savage’s TESTED” here: https://www.youtube.com/watch?v=351DxQghbh0

How did/do you balance the demands of our work with having a life outside the theatre? What are your favorite non-theatre hobbies?

To be honest, before parenthood I didn’t balance it very well! I have a few lifelong friendships that I carved out time for and other than that most things were theatre-centric. I would go out with cast and crew friends on days off- my partner would often join in.

Finally, let’s talk parenthood. To my knowledge, you are the first person to be on the sound crew of a Broadway musical who is not only a parent, but who experienced pregnancy and gave birth. This is something I too aspire to do in my career, so it’s really inspiring to see you shatter this glass ceiling for all of us! What was the process for negotiating parental leave from the show? How has being a parent changed the way you think about this industry and the ways it does (or doesn’t) accommodate families?

I remember working a press event for Hamilton] and the A2 on the RF station was a woman very much in her third trimester being a total badass, managing tons of mics, and she completely inspired me. And I thought “F**k yeah. If I ever get pregnant, I’m going to be like her, doing what I love, and kicking ass.” And really at that moment, I’ll never forget feeling like I could do both for the first time. (I’ve been trying to track down her name, but it remains a mystery.

The process of parental leave was very sort of casual. I let everyone in management know I was pregnant and was congratulated and I asked the parental leave policy and they said just to let them know how long I’d be gone. I was paid through the NY PFL for 12 weeks and any extra leave after that was unpaid. Covid hit mid-March so immediately after my PFL was up I applied for unemployment. But originally, I was intending to come back after 5 months off. And that was just kind of it.

Sidenote from Becca: New York is one of only 9 states (plus Washington DC) that has Paid Family Leave written into its laws. Every time I work a job in NY and open my pay stub, I see that a tiny amount has been deducted to cover this program. At the federal level, 12 weeks of job-protected leave must be granted, but there is no requirement that it be paid. And even so, many Broadway shows run for short enough periods of time that they don’t have to offer leave. As recently as late 2019, I know of a male stagehand who was offered zero paid leave upon the birth of his son, and for financial reasons felt the most he could allow himself was one week home, again unpaid, to be with his wife and new baby. I know I am on my soapbox again here, but this too is a huge issue that is stopping folks from staying in the theatre industry and reinforcing the stereotype that Broadway stagehand work is the domain of cis-het white men only.

More on this from ALC.

Everyone knows that the entertainment industry is hard for families. And that continues to be true. Most of all the schedule is completely unforgiving. 8 shows a week? I go to the theater every day except Monday; when exactly am I supposed to recover and enjoy being with my family? But there are benefits to working a night job for now. My kids are young enough to be early risers and they aren’t in school yet. I sacrifice my sleep because I get home at 11:30 at night and get up with my kids at 7 am. My husband and I love the mornings before he locks himself in the office. We all have breakfast together and read books and cuddle. Then I take the kids to the park, and we spend all morning together. I try to nap when they nap but that only happens 40% of the time. And then a nanny comes from 2-6 pm to hang out with them while I make dinner and get ready for work. Then my husband takes over, I kiss the kids goodbye and head to work and he does bedtime and cleans the house.

I think the balance I’ve figured out could be impossible for most theatre families. Most parents don’t have a partner that works from home (and my husband turned down a promotion in order to keep working from home; not everyone can even afford to choose family flexibility over paycheck). And I don’t know if we’ll be able to maintain it when they are old enough to go to school. We’re gonna wait and see. And if the schedule ultimately makes me feel like I’m missing out on my real life (which I used to think my job was) then I’ll leave. Maybe permanently, or maybe just until my kids are a lot older. There will always be work to do. Maybe not the same work but I guess that’s been the biggest shift. I don’t define myself by my job anymore…

ALC with her partner and the twins!


More SoundGirls resources on balancing career with being a parent from SoundGirls blogger and badass mom April Tucker:

https://soundgirls.org/the-audio-girlfriends-guide-to-pregnancy/

https://soundgirls.org/mixing-with-a-newborn/

Thanks so much to Anna-Lee Craig for taking the time to share her story! Please follow her on social media, and feel free to reach out to me if you too want to do this career and be a parent, and if this blog made you feel inspired. Getting to write it sure inspired me!

Also, I am taking requests for what topics you’d like to see blogs about this year. Reach out to me via my website, beccastollsound.com, and happy new year!


Garam Anday and Pakistan’s Emerging Feminist Punk Scene 

If someone mentions Feminist Punk Rock, most music lovers would point you towards the Riot Grrrl movement. Starting in the early 1990s, the Riot Grrrl bands were brash, political, and popular. Founded in Olympia Washington in the United States, the Riot Grrrl movement merged the musical with the fight against misogyny to and fit what we deem the popularized Feminist Punk Rock movement of today. Feminist Punk focuses on the cross-cultural ideas of gender equality, and its political music movement has spread across the globe. Recently, the Feminist Punk Rock ideals have been gaining popularity within a new band of women, in the country of Pakistan.

Feminist rock has been a new type of protest that has emerged in Pakistan political movements. Garam Anday, Hot Eggs, is a feminist Rock band that has been gaining traction in the region for their feminist critiques of the government. Garam Anday works to critique the gender discrimination that occurs in Pakistan. Through the use of their lyrics and music videos, they are weaving a narrative of women who are fighting back against the gender bias in Pakistan.

Garam Anday gained a large portion of their fame through their song “Mas Behn Ka Danda”, which translates to Mother and Sister’s Sticks. In this song, the women sing about the reckoning that is coming from women and girls challenging the sexist and patriarchal systems that are set up in Pakistan. In the song, the women sing

“we are coming after you boy, with our burning eggs, Mothers and sisters bring our reckoning”.

In this line, the women are taking back their feminine descriptors and using them as a source of power. Often in songs, the female body is used as a sexual object. However, Garam Anday uses their distinctly feminine bodies as a source of power in their song. By taking the very distinct female anatomy of eggs, i.e. ovaries, and saying those ovaries are coming after the men, Garam Anday is citing the power that a woman has to push back against patriarchal systems of power. Politically, the song’s use of eggs is powerful because it is a direct allusion to the sexual violence that takes place in Pakistan. At the moment there is mass sexual violence towards women. In government spaces, men control and diminish women’s bodies. For example, in 2021, Prime Minister of Pakistan Khan responded to the rape crisis in Pakistan by saying that it was occurring because “if a woman is wearing very few clothes it will have an impact on the man unless they are robots” (Tariq). This is just one example of how gender and sexual violence is perceived in Pakistan, This is the violence that Garam Anday is working against in their music. By creating a song where ovaries are seen as the site of power, Guram Anday is creating political messages of female empowerment through their music.

Guram Anday has further politically organized through the locations at which they play their music. In 2019, Guram Anday “performed at the Aurat March where they escorted the pidarshhi ka janaza” (Khuldune Shahid). Performing at the Aurat March is important to note in terms of Guram Anday’s political popularity. The Aurat March is a political protest against the violence against women in Pakistan. By being invited to the march, Guram Anday secured public awareness and acceptance as a voice for change in women’s rights in Pakistan. Guram Anday is following the feminist Punk Rock ideas of music’s political organizing influence taking it to help use it to uplift their message of women’s empowerment and the message of the Aurat March.

While a Bikini Kill reunion is unlikely, the spirit of feminist punk rock is still alive and well. Guram Anday is just one example of how Feminist Punk Rock has crossed cultural boundaries to unite under the common cause of gender equity for all. Guram Anday shows us that feminist punk rock is for all, and is used by all. Guram Anday shows us that the fight for equity in music should not be a western focused approach.  Instead, it is an intersectional and global fight for ALL women.

Watch Garam Anday’s Music Video

X