Empowering the Next Generation of Women in Audio

Join Us

Pop Music Production as a Post Sound Edit 


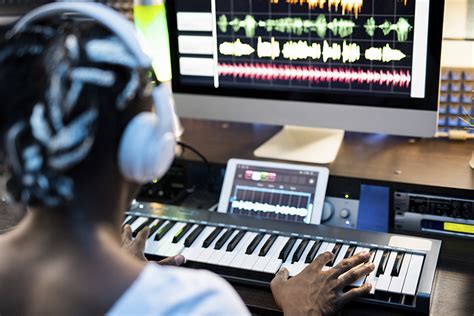
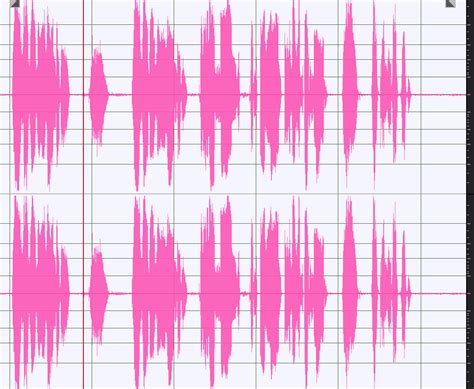
Since I’ve started to produce my own music again, I’ve been investigating ways to break out of some of my existing producer habits. As a visual learner, I tend to get lost in how MIDI events graphs look, and how different instrument regions or clips are placed next to each other and layered. I often end up with instrumental tracks that sound really flat and lack dynamic, movement, or any exciting moments.

While working at Boom Box Post, however, I’ve experienced the workflow of post-production sound edits that really contrasts with the workflow I’ve developed for music production. It’s an organized and serial process that is more efficient than the abstract and intuitive approach I take in producing. In looking to progress my production skills without falling back into the same habits, I thought it would be interesting to fabricate a method of producing music as a post-production sound edit. This could offer a more linear perspective on producing my songs since music in its most basic form is sound over time. This is how I would break it down.

In order to imagine my song as a post-production edit for a film or TV show, I need a story source that functions as the “picture” so I can spot it and reference my “editorial” against the narrative. For me, this material clearly comes from the lyrics which offer visual imagery and tell the story in each song. In fact, when I started approaching a new song in the works, I used markers in ProTools to spot lyrics that seemed particularly important and should be matched by a valuable moment in the sound.

One part of a sound edit that I’m very familiar with and that offers strong foundations is the background edit, which involves room tones for indoor spaces or wind and birds for outdoor spaces, for example. While backgrounds can be a very quick and painless part of the editing process, they offer valuable sonic information on the setting and location of a show. When I think about what would function as the “setting” of a song, the first element that comes to mind is the harmonic arrangement or chord structure. Harmonies in a Pop song support the melody and the emotional tensions of the lyrical story. One habit I have is loading my session up with multiple layers of synthesizer pads or comping instruments that provide similar harmonic information. However, when I look at these tracks through the lens of a background edit, I remember what happens to many background tracks during the mixing stage of a show: they get automated very low in the mix and often many layers get muted. In reality, there is so much going on in a mix that only essential backgrounds are needed, and the rest are just taking up space. I often find that when I get to the mixing stage of a song, the layers of harmonic information I have in the song will load up the mid-range and leave no space for the vocals that share the same frequency range.

The lesson I can learn from background edits as it translates to my producing is this: just take the essentials.

Since I’m thinking about what is essential to the song, I can’t ignore the vocals, which are the meat and cheese of most of my recordings. This post-production analogy is pretty straightforward, as dialogue holds a vital role in the sound edit. Dialogue and vocals drive the story and typically call for crystal clear recording and editing. It’s important in both cases that sound effects or other instrumentation is not overshadowing them. While this may seem obvious, one thing I noticed while spotting my song lyrics was the moments when the words said something that a certain instrument or sweetener couldn’t. This happens in visual media too, and sometimes the way that something is spoken or the choice of words hold strong on their own without support. The dialogue edit teaches me to stay aware of the most irreplaceable spoken or, in this case, sung, moments in a song.

To continue, in a post-production sound edit, Foley quite literally gives more information about the movement happening in an episode and offers a little bit of insight on the characters too. A large monster might have a heavy footstep while a small child would have a softer one, for example. While Foley is generally mixed at lower levels than dialogue and sound effects, there are moments in a show or film where the camera might change perspective to show foot movement, and then Foley has the chance to shine. I imagine the Foley of a song to be the sweeteners that drive a song from one part of the arrangement to the other. I tend to lack support from sweeteners in my production, yet I notice it constantly in current Pop songs that I reference. When I mapped out some of the lyrics and the arrangement in ProTools, I took notes of where a sweetener could come in to prepare the listener for the next part of the song and shift the perspective a little. In music, this could be a reverse cymbal or a massive bass drop that cuts into the rest of the instrumental track. These moments can provide a good chunk of the dynamic that I am missing in my production.

The last part of a sound edit I want to explore in music production is the sound effects edit. If dialogue is the meat and cheese of a show’s sound, then sound effects are the bread and butter. Impactful or detailed effects builds can give viewers clear insight into what is happening at each moment in a show. In Pop music especially, the rhythm, particularly the drum and bass parts are similarly the bread and butter of a song, providing detail and sonic experiences from moment to moment. Something I notice from my drum and bass creations which tend to be the most robotic and repetitive element of my production is that I am not considering what each part of the rhythm is doing at any specific point in time. I tend to see rhythm as MIDI notes along with a graph, which results in instrumentation that is sturdy but not taking care of the music or the song as it moves through time and space. I think that seeing each collection of drum parts and bass as its own “sound effects build” in each measure or group of measures would offer a more linear image and encourage patience as I’m making my tracks. The beat can loop at certain points, but how is it helping the song if two sets of four measures are expressing different emotions in the lyrics? If there were two explosions on screen, for example, and one was right next to the characters and destroyed buildings, it wouldn’t sound like the explosion off in the distance on a rural hill. Drum and bass deserve the same kind of awareness.

Ultimately now that I’ve mapped out this explorative connection between two departments of sound that I love, I’m excited to see how each one can influence the other. In this instance, I’m observing the development of a song in a new format that can yield the results I always want but struggle to achieve.


Pros and Cons of Formal Audio Education 

I remember seeing a tweet a couple of years ago from Grammy-winning producer Finneas O’Connell about going to school for music production. He believed that it wasn’t necessary to succeed in the music industry. While he proves his own theory, my first instinct when I read this was to defend my own education. At the time, I was studying audio engineering at Berklee College of Music, and I knew it was one of the most valuable programs for audio education in the country. Now that I’ve stepped out of academia and into the professional world of audio post-production, I thought about O’Connell’s tweet again, and how my perspective on his opinion has evolved.

I chose to study audio engineering and sound design at the undergraduate level for a number of reasons. First of all, it was my goal to earn my undergraduate degree, which isn’t particularly common for students where I went to school. Berklee’s latest statistics show a 67% graduation rate, and this is mainly because most students start working in the music industry before they even need to graduate. Nonetheless, I found an academic space to study music production and audio engineering to be really beneficial for my style of learning and for the previous experience I had. I started my first semester with no background or knowledge of audio technology, recording techniques, sound design, or music production. I only knew how to write songs and record in GarageBand. So going to classes to learn these fundamentals and having assignments and deadlines really served what I needed as a student. I also knew that I wanted to take the time to absorb all the information, so I didn’t feel rushed to enter the industry immediately.

Being a part of music production or audio education program provides step-by-step guidance and access to a huge amount of resources. I had the chance to connect with professors who specialized in my interests and to connect with other students who wanted to practice the concepts we tackled in classes together or plan out future networking opportunities. Having access to equipment and studio facilities meant that I didn’t have to buy my own until I graduated. Once I did purchase my own gear, I had some ideas of my own opinions on the gear I wanted like which equipment I liked the most or didn’t need. Furthermore, the variety of classes gave me insight into different fields, histories, and techniques, which led me into post-production sound editing, even though I started the program wanting to focus on producing my own music.

When I moved to Los Angeles, I submitted many job applications, received some interviews, and ultimately the job searching process was long and grueling. It made me think about how the process would have changed if I didn’t pursue a bachelor’s degree, and what kind of cons balance out the pros. The first and most considerable disadvantage of studying audio at the undergraduate level is the enormous financial decision it entails. Not everyone has the financial support to complete a degree, especially when audio engineering and music producing involves purchasing expensive gear such as software like DAWs, synthesizers, and plug-ins, an audio interface, headphones or monitors, a microphone for recording, and any make-shift room treatment to name some valuable home-recording equipment. Paying tuition or student loans on top of all of this equipment is really overwhelming, and most likely will impact your view of which expensive items or programs to prioritize. Also, for some producers or engineers, learning while working on the job can be a better method for learning than lectures, homework, projects and quizzes. Not all starting positions at recording studios require a college education, and starting out earlier in the music industry and in the right city where interests align is a great way to get started and build momentum. Even though I like to learn by viewing lectures and reading manuals, many people are stronger kinesthetic learners who will pick up on recording consoles and signal flow by working through the physical movements of setting up a recording at a studio. Furthermore, like any other field, improvement in music production or audio engineering comes with practice. However, in a college program, practice is assigned in the form of homework and projects. While it’s possible to cover concepts of interest in a syllabus, having the freedom to choose what you practice in your own home setup lets you focus on specific skills to achieve your own goals in the music production industry.

From what I’ve learned since graduating from college, it doesn’t really matter how you acquire your experience and abilities as an audio engineer or music producer. What does matter is that you choose the process that best suits your style of learning and your own goals, and that you can see improvements as you practice and continue to work on recordings or sound edits or MIDI programming. There is no pressure to follow anyone’s path to education but your own because the right method will serve your needs as you step into the industry. I don’t think Finneas O’Connell is wrong to say that formal audio education is unnecessary. However, I do think it’s too narrow of a belief for the diverse, creative minds that want to begin a career in music production.

Four Portfolio Reel Tips

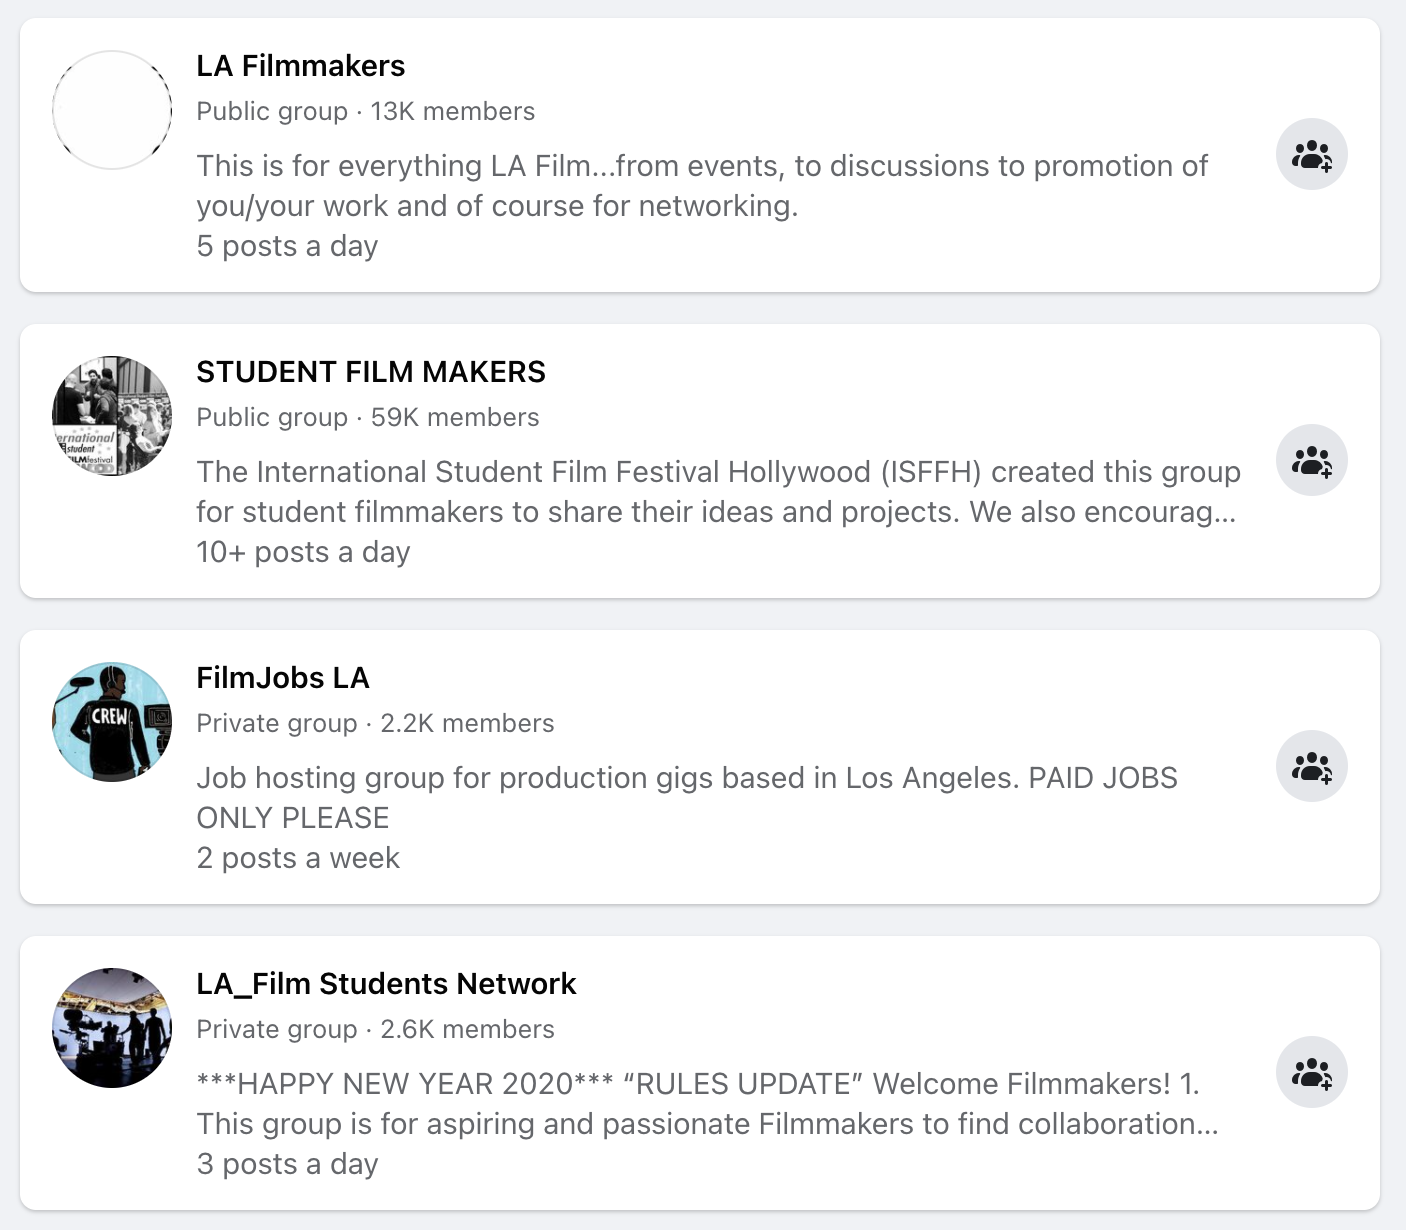
Some Facebook groups I found in the LA area.

I’d like to note that a reel typically consists of a compilation of clips of live-action or animated TV shows, films, or even video games where the sound is replaced with your own edit. The materials you choose can come from released media where you can use the existing sound as a guide for your edit. However, it’s also a great opportunity to collaborate with up-and-coming filmmakers in your creative community to put together the sound design from scratch. This was particularly common while I was in Boston where college students majoring in film and audio post-production could easily work together to fulfill a project. While it’s certainly not necessary for a great reel, I recommend using Facebook groups to connect with filmmakers, creatives, and more sound editors in your area.

KEEP IT SHORT

If you’ve been searching the internet for tips for your portfolio reel, this is probably the most common tip you’ve seen. While a “short” reel may be defined differently to various editors, it’s important to consider the attention span of the person viewing your reel and the variety in your reel. A good rule of thumb is to keep your reel between 2-4 minutes long. However, how you break down that 2-4 minutes can make a big difference, which leads me to my next point…

TAILOR TO YOUR DESIRED POSITION

Just like with any other resume, your portfolio reel should also be tweaked and adjusted based on the position you’re applying for. It’s important to get all the right information for the places where you want to work or for whose work interests you. For example, Boom Box Post specializes in post-production audio for animation, while Pinewood Studios focuses on live-action. A larger studio like Skywalker Sound spans across media, but many of their releases involve heavy live-action fighting sequences. Now, think about how to break down your reel based on the kinds of post-production studios you want to join. A portfolio reel for an animation-focused studio might include 3 1-minute clips involving different types of animation, while a portfolio reel for a large-scale live-action production studio could have 2 2-minute clips with long and dynamic fight sequences.

HAVE AN ORGANIZED DELIVERY METHOD

Your portfolio reel will most likely come in the form of a compiled video with a sharable link. Sometimes (however not as common) employers may ask to see the full ProTools session instead of or along with a link to a reel. If this is the case, they are evaluating your organization skills, so it’s essential to have all tracks labeled, clips organized, and a smooth signal flow in your session that makes it easy for them to see what’s happening and listen without any problems. We have a great blog on keeping your ProTools sessions organized, which you can read here. You can also check out this blog we have for solid file naming, which will give a great impression if you’re sending more than just a link to employers.

Example of Vimeo platform.
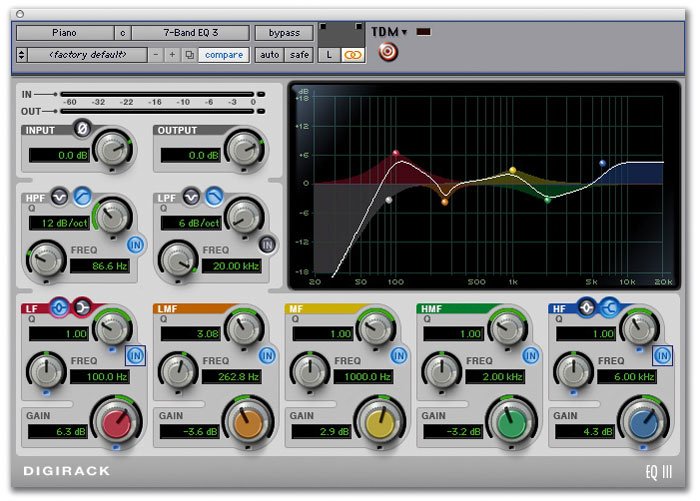
ProTools EQ-III.

If you’re sending a sharable link, there are a lot of great viewing options that are easy to use and easy for others to watch, including Vimeo, Youtube, and Squarespace. Once you’ve compiled your work together in a ProTools session and bounced a Quicktime video of your work, you can upload that video to any of these platforms and include text information to describe the work you did on each clip, breaking down dialogue, Foley, and sound effects.

CONSIDER EVERY ASPECT OF THE PROJECT

While you may be applying specifically to a sound editing position, you still have a chance to show off your understanding for the big picture. This can include recording your own sound effects, Foley, and dialogue, and putting together a basic mix for your reel. Adjusting levels and panning, and using stock ProTools plug-ins like EQ-III to balance out any unwanted frequencies is a great way to show your understanding of how your effects relate to each other.

Sometimes it is easier to record some of your own sounds instead of finding effects from libraries. While Soundly and Splice both offer a limited amount of free sound effects, other general library platforms like Pro Sound Effects can be very expensive. Recording your own Foley or vocal effects can offer more flexibility, and you can also put together your own sound effects libraries to show to employers, simply by collecting those sounds and creating playlists in SoundCloud.

Ultimately, your portfolio reel should have a concise demonstration of your skills as an editor, it should highlight the style or genre of the studios of your interest, and it should be easy to access and navigate through. Portfolio reels can come with a lot of opportunities to show off organization skills and resourcefulness, so be on the lookout for more ways to impress potential employers when you start building your reel.


The Psychoacoustics of Modulation

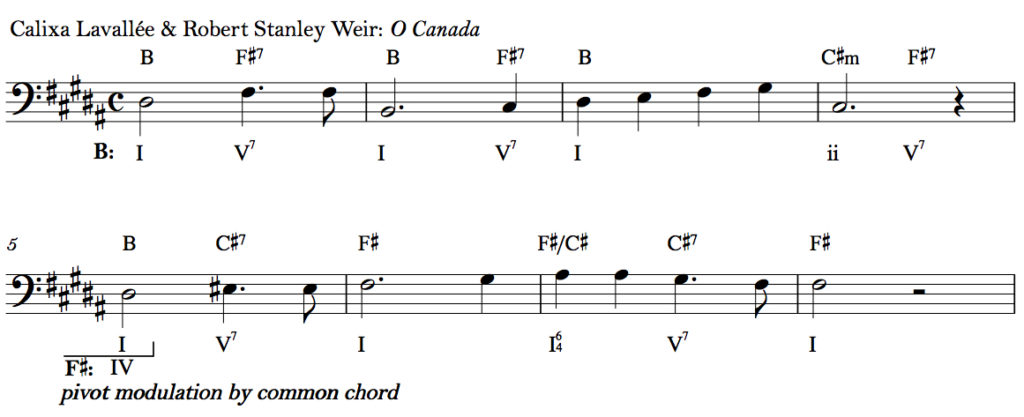
Modulation is still an impactful tool in Pop music, even though it has been around for centuries. There are a number of well-known key changes in many successful Pop songs of recent musical decades. Modulation like a lot of tonal harmonies involves tension and resolution: we take a few uneasy steps towards the new key and then we settle into it. I find that 21st-century modulation serves as more of a production technique than the compositional technique it served in early Western European art music (this is a conversation for another day…).

 Example of modulation where the same chord exists in both keys with different functions.


Nowadays, it often occurs at the start of the final chorus of a song to support a Fibonacci Sequence and mark a dynamic transformation in the story of the song. Although more recent key changes feel like a gimmick, they are still relatively effective and seem to work just fine. However, instead of exploring modern modulation from the perspective of music theory, I want to look into two specific concepts in psychoacoustics: critical bands and auditory scene analysis, and how they are working in two songs with memorable key changes: “Livin’ On A Prayer” by Bon Jovi and “Golden Lady” by Stevie Wonder.

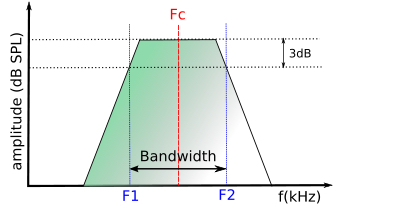
Consonant and dissonant relationships in music are represented mathematically as integer-ratios; however, we also experience consonance and dissonance as neurological sensations. To summarize, when a sound enters our inner ear, a mechanism called the basilar membrane response by oscillating at different locations along the membrane. This mapping process called tonotopicity is maintained in the auditory nerve bundle and essentially helps us identify frequency information. The frequency information devised by the inner ear is organized through auditory filtering that works as a series of band-pass filters, forming critical bands that distinguish the relationships between simultaneous frequencies. To review, two frequencies that are within the same critical band are experienced as “sensory dissonant,” while two frequencies in separate critical bands are experienced as “sensory consonant.” This is a very generalized version of this theory, but it essentially describes how frequencies in nearby harmonics like minor seconds and tritones are interfering with each other in the same critical band, causing frequency masking and roughness.


Depiction of two frequencies in the same critical bandwidth.


Let’s take a quick look at some important critical bands during the modulation in “Livin’ On A Prayer.” This song is in the key of G (392 Hz at G4) but changes at the final chorus to the key of Bb (466 Hz at Bb4). There are a few things to note in the lead sheet here. The key change is a difference of three semitones, and the tonic notes of both keys are in different critical bands, with G in band 4 (300-400 Hz) and Bb in band 5 (400-510 Hz). Additionally, the chord leading into the key change is D major (293 Hz at D4) with D4 in band 3 (200-300 Hz). Musically, D major’s strongest relationship to the key of Bb is that it is the dominant chord of G, the minor sixth in the key of Bb. Its placement makes sense because previously the chorus starts on the minor sixth in the key of G, which is E minor. Even though it has a weaker relationship to Bb major which kicks off the last chorus, D4 and Bb4 are in different critical bands and if played together would function as a major third and create sensory consonance. Other notes in those chords are in the same critical band: F4 is 349 Hz and F#4 is 370 Hz, placing both frequencies in band 4 and if played together would function as a minor second and cause sensory roughness. There are a lot of perceptual changes in this modulation, and while breaking down critical bands doesn’t necessarily reveal what makes this key change so memorable, it does provide an interesting perspective.

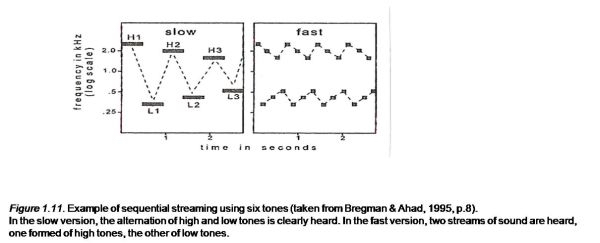
A key change is more than just consonant and dissonant relationships though, and the context provided around the modulation gives us a lot of information about what to expect. This relates to another psychoacoustics concept called auditory scene analysis which describes how we perceive auditory changes in our environment. There are a lot of different elements to auditory scene analysis including attention feedback, localization of sound sources, and grouping by frequency proximity, that all contribute to how we respond to and understand acoustical cues. I’m focusing on the grouping aspect because it offers information on how we follow harmonic changes over time. Many Gestalt principles like proximity and good continuation help us group frequencies that are similar in tone, near each other, or serve our expectations of what’s to come based on what has already happened. For example, when a stream of high notes and low notes is played at a fast tempo, their proximity to each other in time is prioritized, and we hear one stream of tones. However, as this stream slows down, the value in proximity shifts from the closeness in timing to the closeness in pitch, and two streams of different high pitches and low pitches are heard.

 Demonstration of “fission” of two streams of notes based on pitch and tempo.


Let’s look at these principles through the lens of “Golden Lady” which has a lot of modulation at the end of the song. As the song refrains about every eight measures, the key changes by a half-step or semitone upwards to the next adjacent key. This occurs quite a few times, and each time the last chord in each key before the modulation is the parallel major seventh of the upcoming minor key. While the modulation is moving upwards by half steps, however, the melody in the song is moving generally downwards by half steps, opposing the direction of the key changes. Even though there are a lot of changes and combating movements happening at this point in the song, we’re able to follow along because we have eight measures to settle into each new key. The grouping priority is on the frequency proximity occurring in the melody rather than the timing of the key changes, making it easier to follow. Furthermore, because there are multiple key changes, the principle of “good continuation” helps us anticipate the next modulation within the context of the song and the experience of the previous modulation. Again, auditory scene analysis doesn’t directly explain every reason for how modulation works in this song, but it gives us ulterior insight into how we’re absorbing the harmonic changes in the music.

Critical Listening with Spatial Audio

When I began studying music production five years ago, I spent a lot of my hours working through critical listening techniques for records I found or ones that were recommended to me. The goal of this practice was identifying elements of arrangement, recording, programming, and mixing that made these particular records unique. At the time I was studying, I was introduced to immersive audio and music mixes in Dolby Atmos, but there was a strong emphasis on the technology’s immobility – making these mixes was pretty impractical since the listener needed to stay in one place relative to the specific arrangement of the speakers. Now that technology companies like Apple have implemented spatial audio to support Dolby Atmos, listeners with access to these products can consider how spatialization impacts production choices. Let’s explore this by breaking down spatial audio with AirPods and seeing how this technology expands what we know about existing critical listening techniques.

Apple AirPods Pro with spatial audio and noise cancellation features

It’s important to address the distinctions of spatial audio, as the listening experience depends on if the track is stereo or mixed specifically for Dolby Atmos. The result of listening to a stereo track with spatial audio settings active is called “spatial stereo,” which mimics the events of spatial audio on stereo tracks. When using the “head-tracking” function while listening to a stereo track, moving your head will adjust the positioning of the mix in relation to the location of your listening device via sensors in the AirPods.

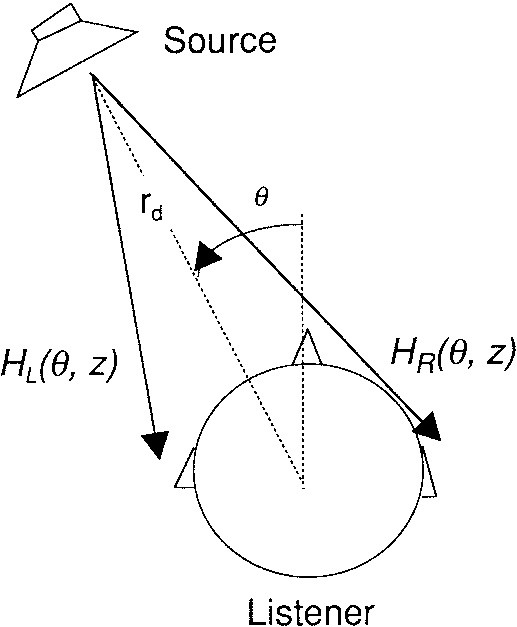
For a simplified summary of how this works, spatial audio and Dolby Atmos are both achieved with a model known as Head-Related Transfer Function (HRTF). This is a mathematical function that accounts for how we listen binaurally. It considers aspects of psychoacoustics by measuring localization cues such as interaural level and time differences, and properties of the outer ear and shape of the head. If you are interested in diving into these localization cues, you can learn more about them in my last blog.

A simplified layout of a head-related transfer function (HRTF)

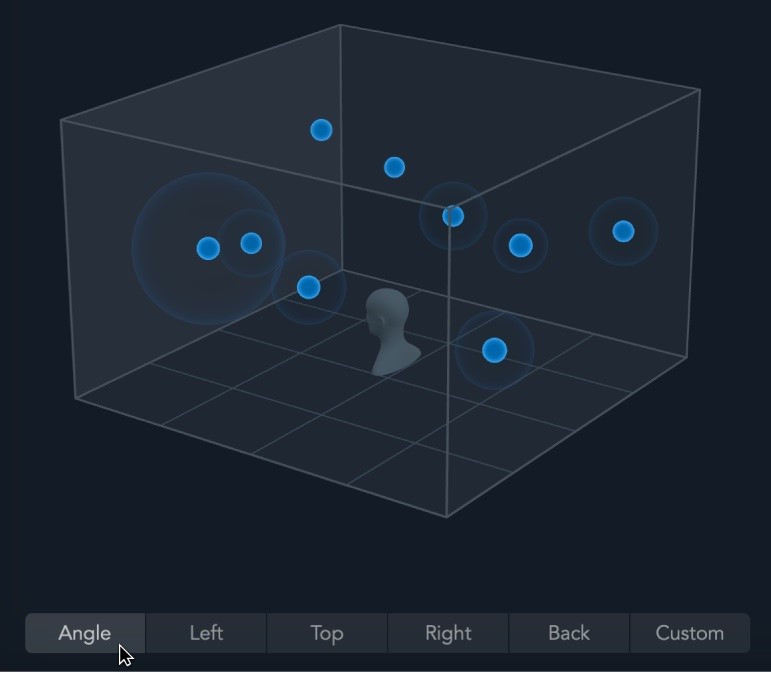
Ultimately, the listening experience of spatial stereo and Dolby Atmos mixes is different. For example, tracks that are mixed in Dolby Atmos involve different elements of the instrumentation that are placed as “objects” in a three-dimensional field and processed through a binaural renderer to create an immersive mix in headphones. Meanwhile, spatial stereo sounds like a combination of added ambience and filters and the AirPod’s sensors to form a make-shift “room” for the song. Using the head-tracking feature with spatial stereo can impact the listener’s relationship to the production of the song in a similar way to a Dolby Atmos mix, and while it doesn’t necessarily make the mix better, it does provide a lot of new information about how the record was created. I want to emphasize how we can listen differently to our favorite records in spatial audio, and not how this feature makes the mix better or worse.

An example of object-oriented mixing in Dolby Atmos for Logic Pro


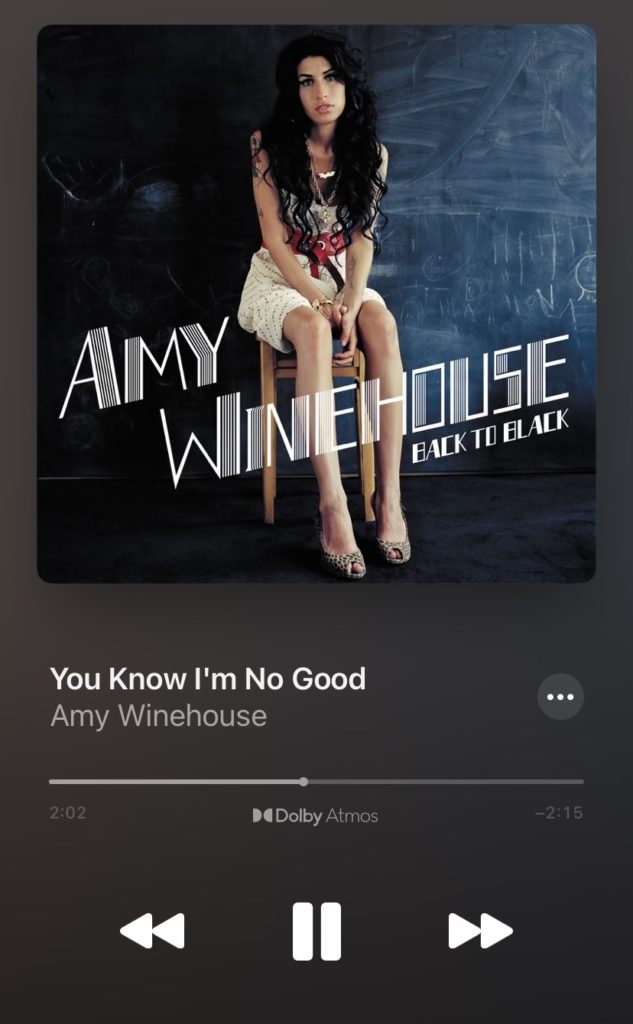
For this critical listening exercise, I listened to a song mixed in Atmos through Apple Music with production that I’m familiar with: “You Know I’m No Good,” performed by Amy Winehouse, produced by Mark Ronson, and recorded by members of The Dap Kings. It’s always a good idea when listening in a new environment, in this case, an immersive environment, to listen to a song that you’re familiar with. This track was also recorded in a rather unique way as the instruments were, for the most part, not isolated in the studio, and very few dynamic microphones were used in true Daptone Records fashion. The song already has a “roomier” production sound, which actually works with the ambient experience of spatial audio.

The first change I noticed with spatial audio head tracking turned on is that the low-end frequencies are lost. The low-end response in AirPods is already pretty fragile because the speaker drivers cannot accurately replicate longer waveforms, and our collection of harmonic relationships helps us rebuild the low-end. With spatial audio, much of the filtering makes this auditory perception more difficult, and in this particular song, impacts the electric bass, kick drum, and tenor saxophone. Because of this distinction, I realized that a lot of the power from the drums isn’t necessarily coming from the low end. This makes sense because Mark Ronson recorded the drums for this record with very few microphones, focusing mostly on the kit sound and overheads. They cut through the ambience in the song and provide the punchiness and grit that matches Winehouse’s vocal attitude.

Since a lot of the frequency information and arrangement in many modern records comes from the low end, I think this is a great opportunity to explore how mid-range timbres are interacting in the song, particularly with the vocal, which in this record is the most important instrument. When I move my head around, the vocal moves away from the center of the mix and interacts more with some of the instruments that are spread out, and I noticed that it blends the most with a very ambient electric guitar, the trombone, and the trumpet. However, since those three instruments have a lot of movement and fill up a lot of the space where the vocal isn’t performing, there is more of a call-and-response connection to these instruments. This is emphasized by the similarity in timbres that I didn’t hear as clearly in the stereo mix.

You know I’m No Good” in Apple Music with a Dolby Atmos label

Spatial audio makes a lot of the comping instruments in this song such as the piano more discernible, so I can allocate the feeling of forward movement and progression in the production to what is happening in these specific musical parts. In the stereo mix, the piano is doing the same job, but I’m able to separate it from other comping instruments in spatial audio because of how I moved my head. I turned my head to the right and centered my attention on my left ear, so I could feel the support from the piano. Furthermore, I recognized the value of time-based effects in this song as I compared the vocal reverb and ambient electric guitar in stereo and spatial audio. A lot of the reverb blended together, but the delay automation seemed to deviate from the reverb, so I could hear how the vocal delay in the chorus of the song was working more effectively on specific lyrics. I also heard variations in the depths of the reverbs, as the ambient electric guitar part was noticeably farther away from the rest of the instruments. In the stereo mix, I can distinguish the ambient guitar in the mix, but how far it is in perceptual depth is clearer in spatial audio.

Overall, I think that spatial audio is a useful tool for critical listening because it allows us to reconsider how every element of a record is working together. There is more space to explore how instrumentation and timbres are working together or not, and what their roles are. We can consider how nuances like compression and time-based effects are working to properly support the recording. Spatial audio doesn’t necessarily make every record sound better, but it’s still a tool we can learn from.

Using Localization Cues in Immersive Mixing

Whether you’re mixing for film in 5.1 surround or Dolby Atmos, it’s important to consider a key element of human auditory perception: localization. Localization is the process by which we identify the source of a sound. We may not realize it, but each time we sit down to watch a movie or TV show, our brains are keeping track of where the sound elements are coming from or headed towards, like spaceships flying overhead, or an army of horses charging in the distance. It is part of the mixer’s role to blend the auditory environment of a show so that listeners can accurately process the location of sounds without distraction or confusion. Here are some psycho-acoustical cues to consider when mixing spatial audio.

ILDs and ITDs, What’s The Difference?

Because we primarily listen binaurally or, with two ears, much of localization comes from interaural level and time differences. Interaural level differences depend on the variations in sound pressure from the source to each ear, while interaural time differences occur when a sound source does not arrive at each ear at the same time. These are subtle differences, but the size and shape of our heads impacts how these cues differ between high and low frequencies. Higher frequencies with shorter wavelengths can move around our heads to reach our ears, causing differences in sound pressure levels between each ear, and allowing us to determine the source’s location. However, lower frequencies with larger wavelengths are not impacted by our heads in the same way, so we depend on interaural time differences to locate low frequencies instead. Although levels and panning are great tools for replicating our perception of high frequencies in space, mixers can take advantage of these cues with mixing low end too, which we usually experience as engulfing the space around us. A simple adjustment to a low-end element with a short 15-40 millisecond delay can make a subtle change to that element’s location, and offer more space for simultaneous elements like dialogue.

Here is a visualization of how high and low frequencies are impacted by the head.

Here is a visualization of how high and low frequencies are impacted by the head.

Flying High

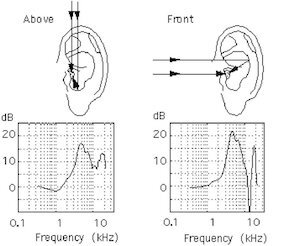
While a lot of auditory perception occurs inside the ear and brain, the outer ear has its own way of affecting our ability to locate sounds. For humans and many animals, the pinna defines the ridges of the human ear that are visible to the eye. Although pinnae are shaped differently for each individual, the function remains the same: it acts as a high-pass filter that tells the listener how high a sound is above them. When mixing sound elements in an immersive environment to seem like they are above the head, emphasizing any frequencies above 8000 Hz with an EQ or high-shelf can more accurately emulate how we experience elevation in the real world. Making these adjustments along with panning the elevation can make a bird really feel like it’s chirping above us in a scene.

See how the pinna acts as a “filter” for high frequencies arriving laterally versus elevated.

See how the pinna acts as a “filter” for high frequencies arriving laterally versus elevated.

The Cone of Confusion

A psycho-acoustical limitation to avoid occurs at the “cone of confusion,” an imaginary cone causing two sound sources that are equidistant to both ears to become more difficult to locate. In a mix, it is important to consider this when two sounds might be coming from different locations at the same time and distance. While it’s an easy mistake to make, there are a handful of steps to overcome the cone of confusion and designate one sound element as being farther away, including a simple change in level, using a low-pass filter to dull more present frequencies in one sound, or adjusting the pre-delay to differ between the two sounds.

This demonstrates where problems can occur when locating two equidistant sound sources.

This demonstrates where problems can occur when locating two equidistant sound sources.

With these considerations, mixers can maintain the integrity of our auditory perception and make a film’s sound feel even more immersive.

Written by Zanne Hanna
Office Manager, Boom Box Post

This blog originally was published on Boom Box Post

X