Empowering the Next Generation of Women in Audio

Join Us

A Walk Through of My Soldering Station

When working on electronics it is important to keep a tidy, and safe workspace.  I thought I would show what my bench looks like as an example for others who are just starting out on their tinkering journey.

Desk & Chair

I recommend a desk that is at a comfortable working height, that is clean and resistant to static & fire/heat.  An adjustable padded chair, such as an office chair, that can keep your knees at 90 degrees and help maintain good posture is key for avoiding long-term injuries.

Soldering Iron

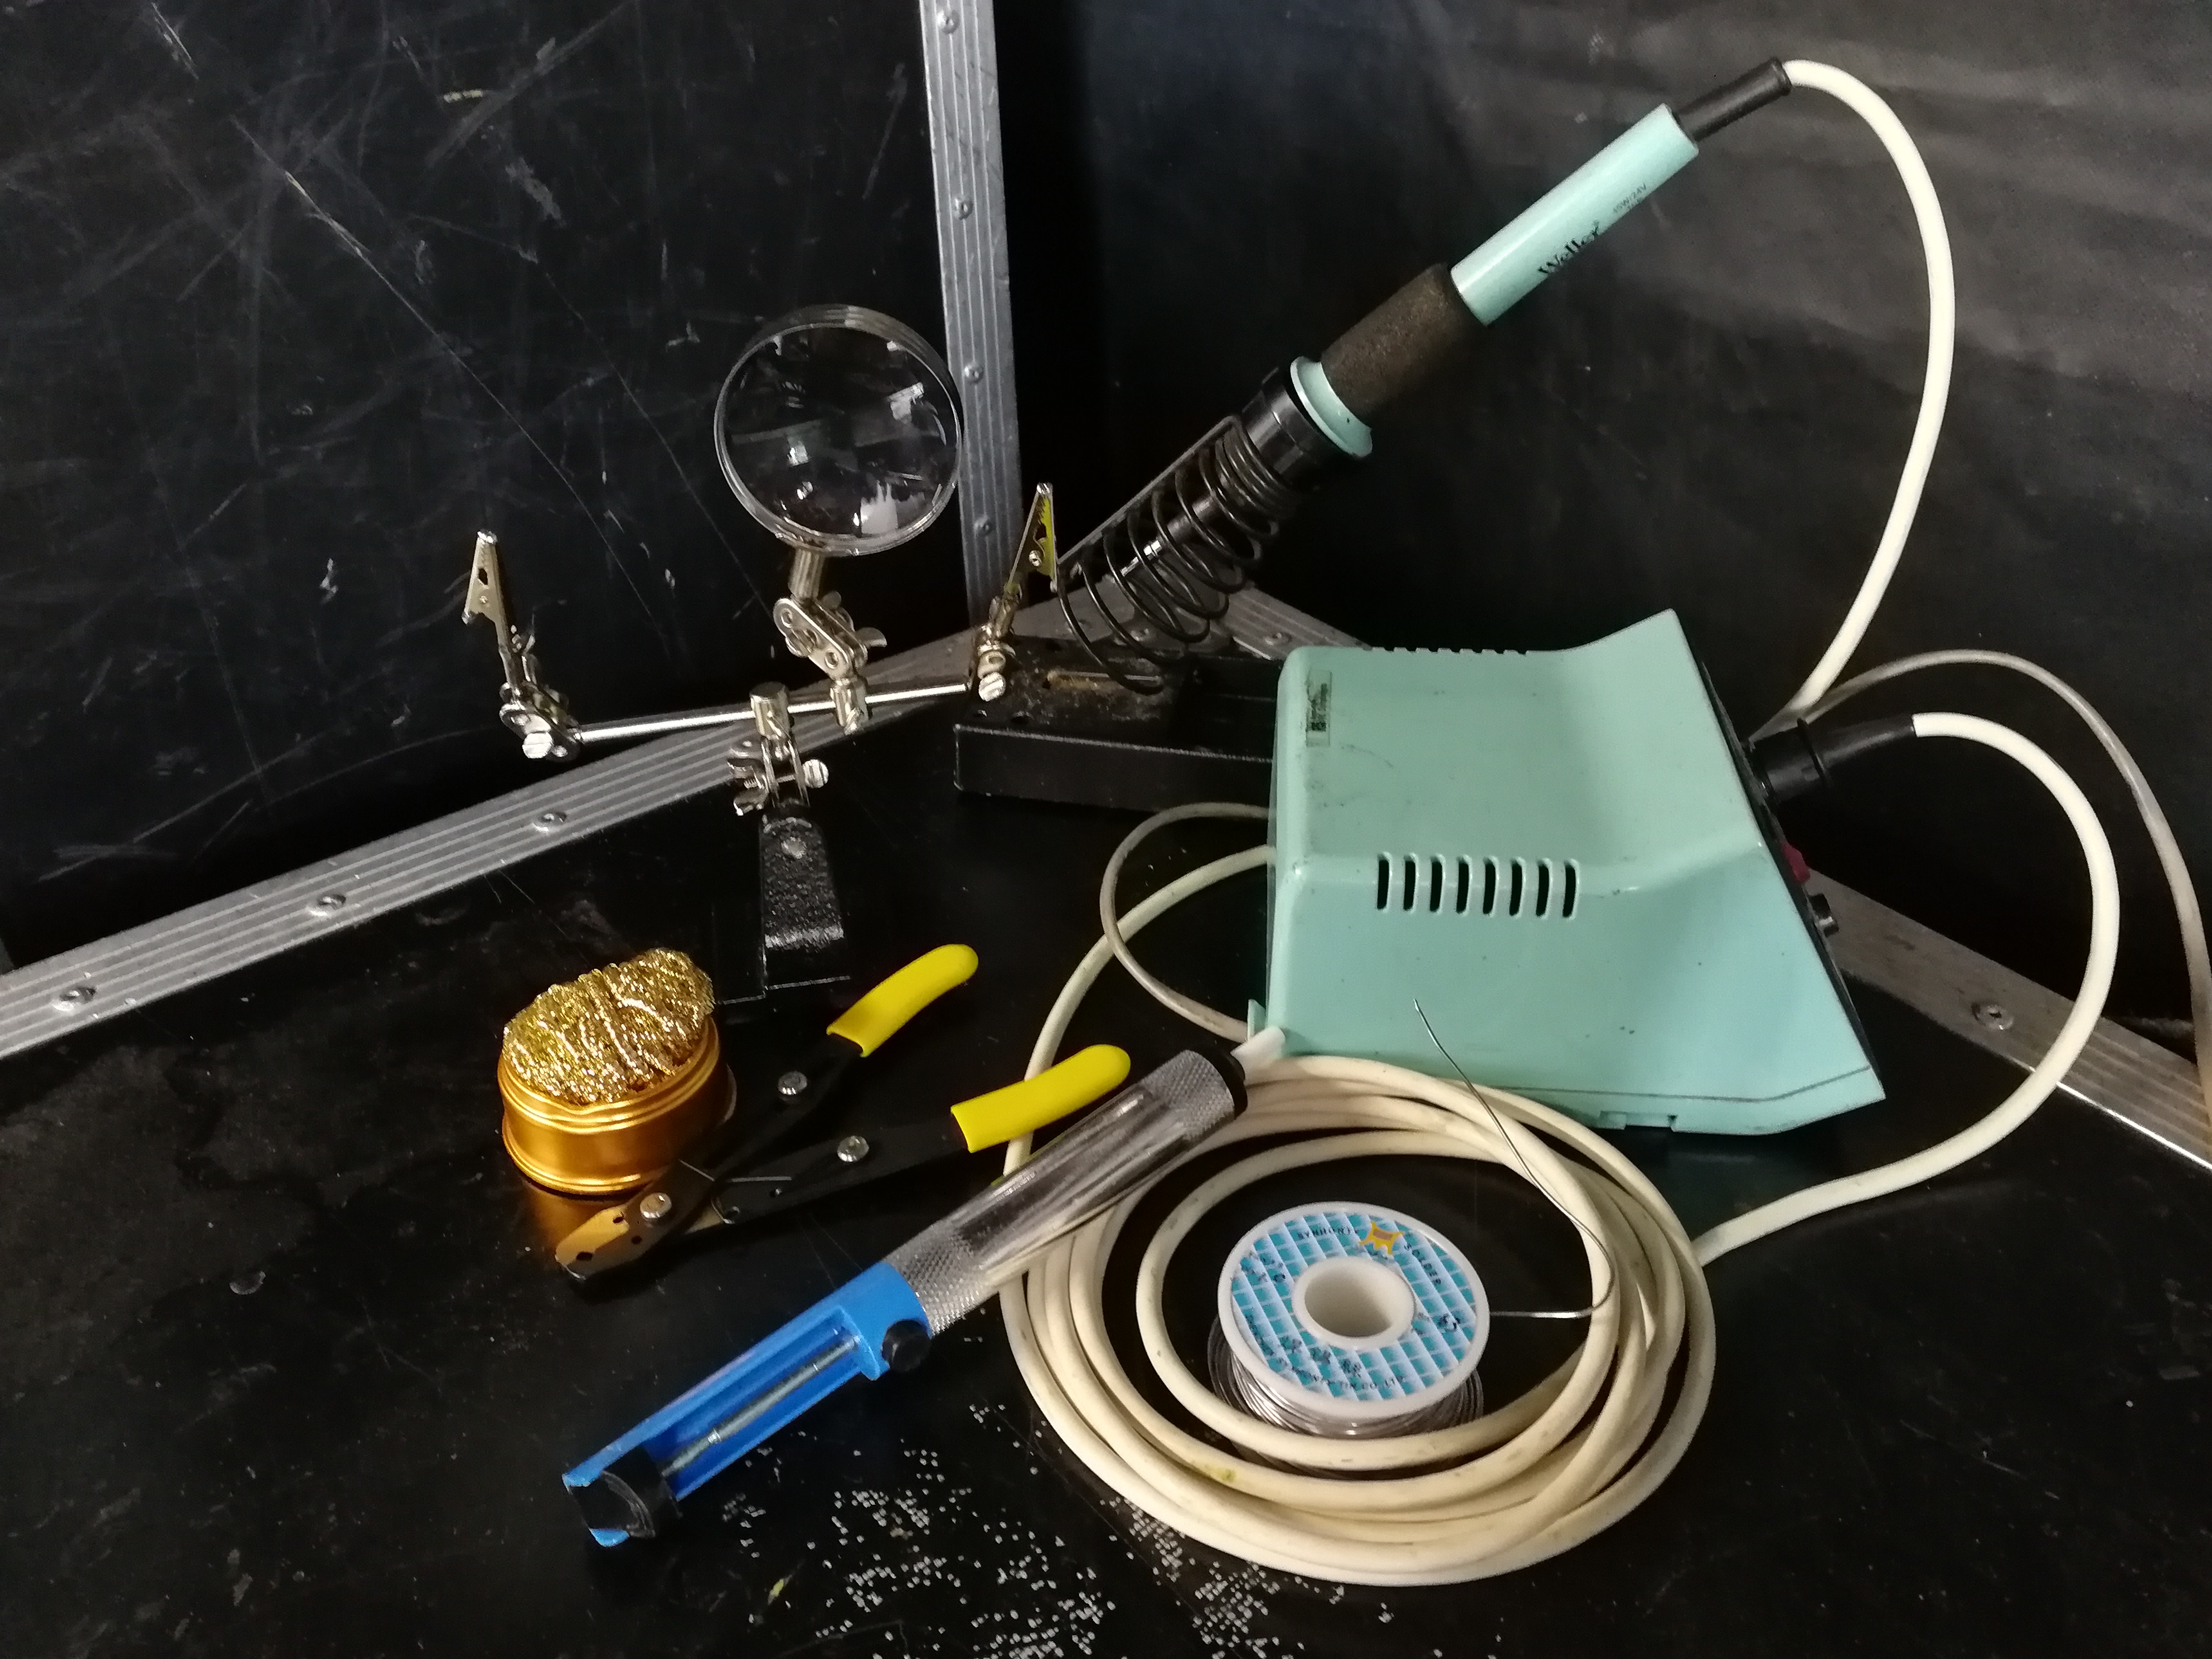
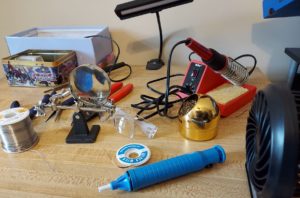
I have both a cheap RadioShack soldering iron and a decent Weller adjustable temperature iron (WLC100 Soldering Station).  It is okay to start with the cheap one until you can upgrade.  The basic requirements are an iron that is at least 25 watts.  Most come with a conical tip (useful for small joints), but wedge tips are better for maintaining heat, which is better for good soldering joints.

Solder & Flux

Even though Leaded solder is toxic and not used in commercial products, it is still the go-to for electronics hobbyists in the United States due to its low melting point and ease of creating good soldering joints.  Lead-free is available and recommended from a safety standpoint.  Solder with 60% tin (often called 60/40) is seen as the best solder, due to its lower melting point.  Flux-core solder, as the name suggests, contains flux, often rosin/resin, which aids in creating good solder joints.
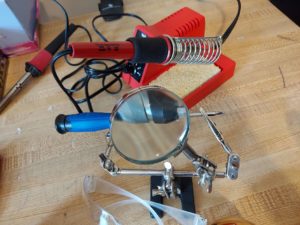
Helping Hands

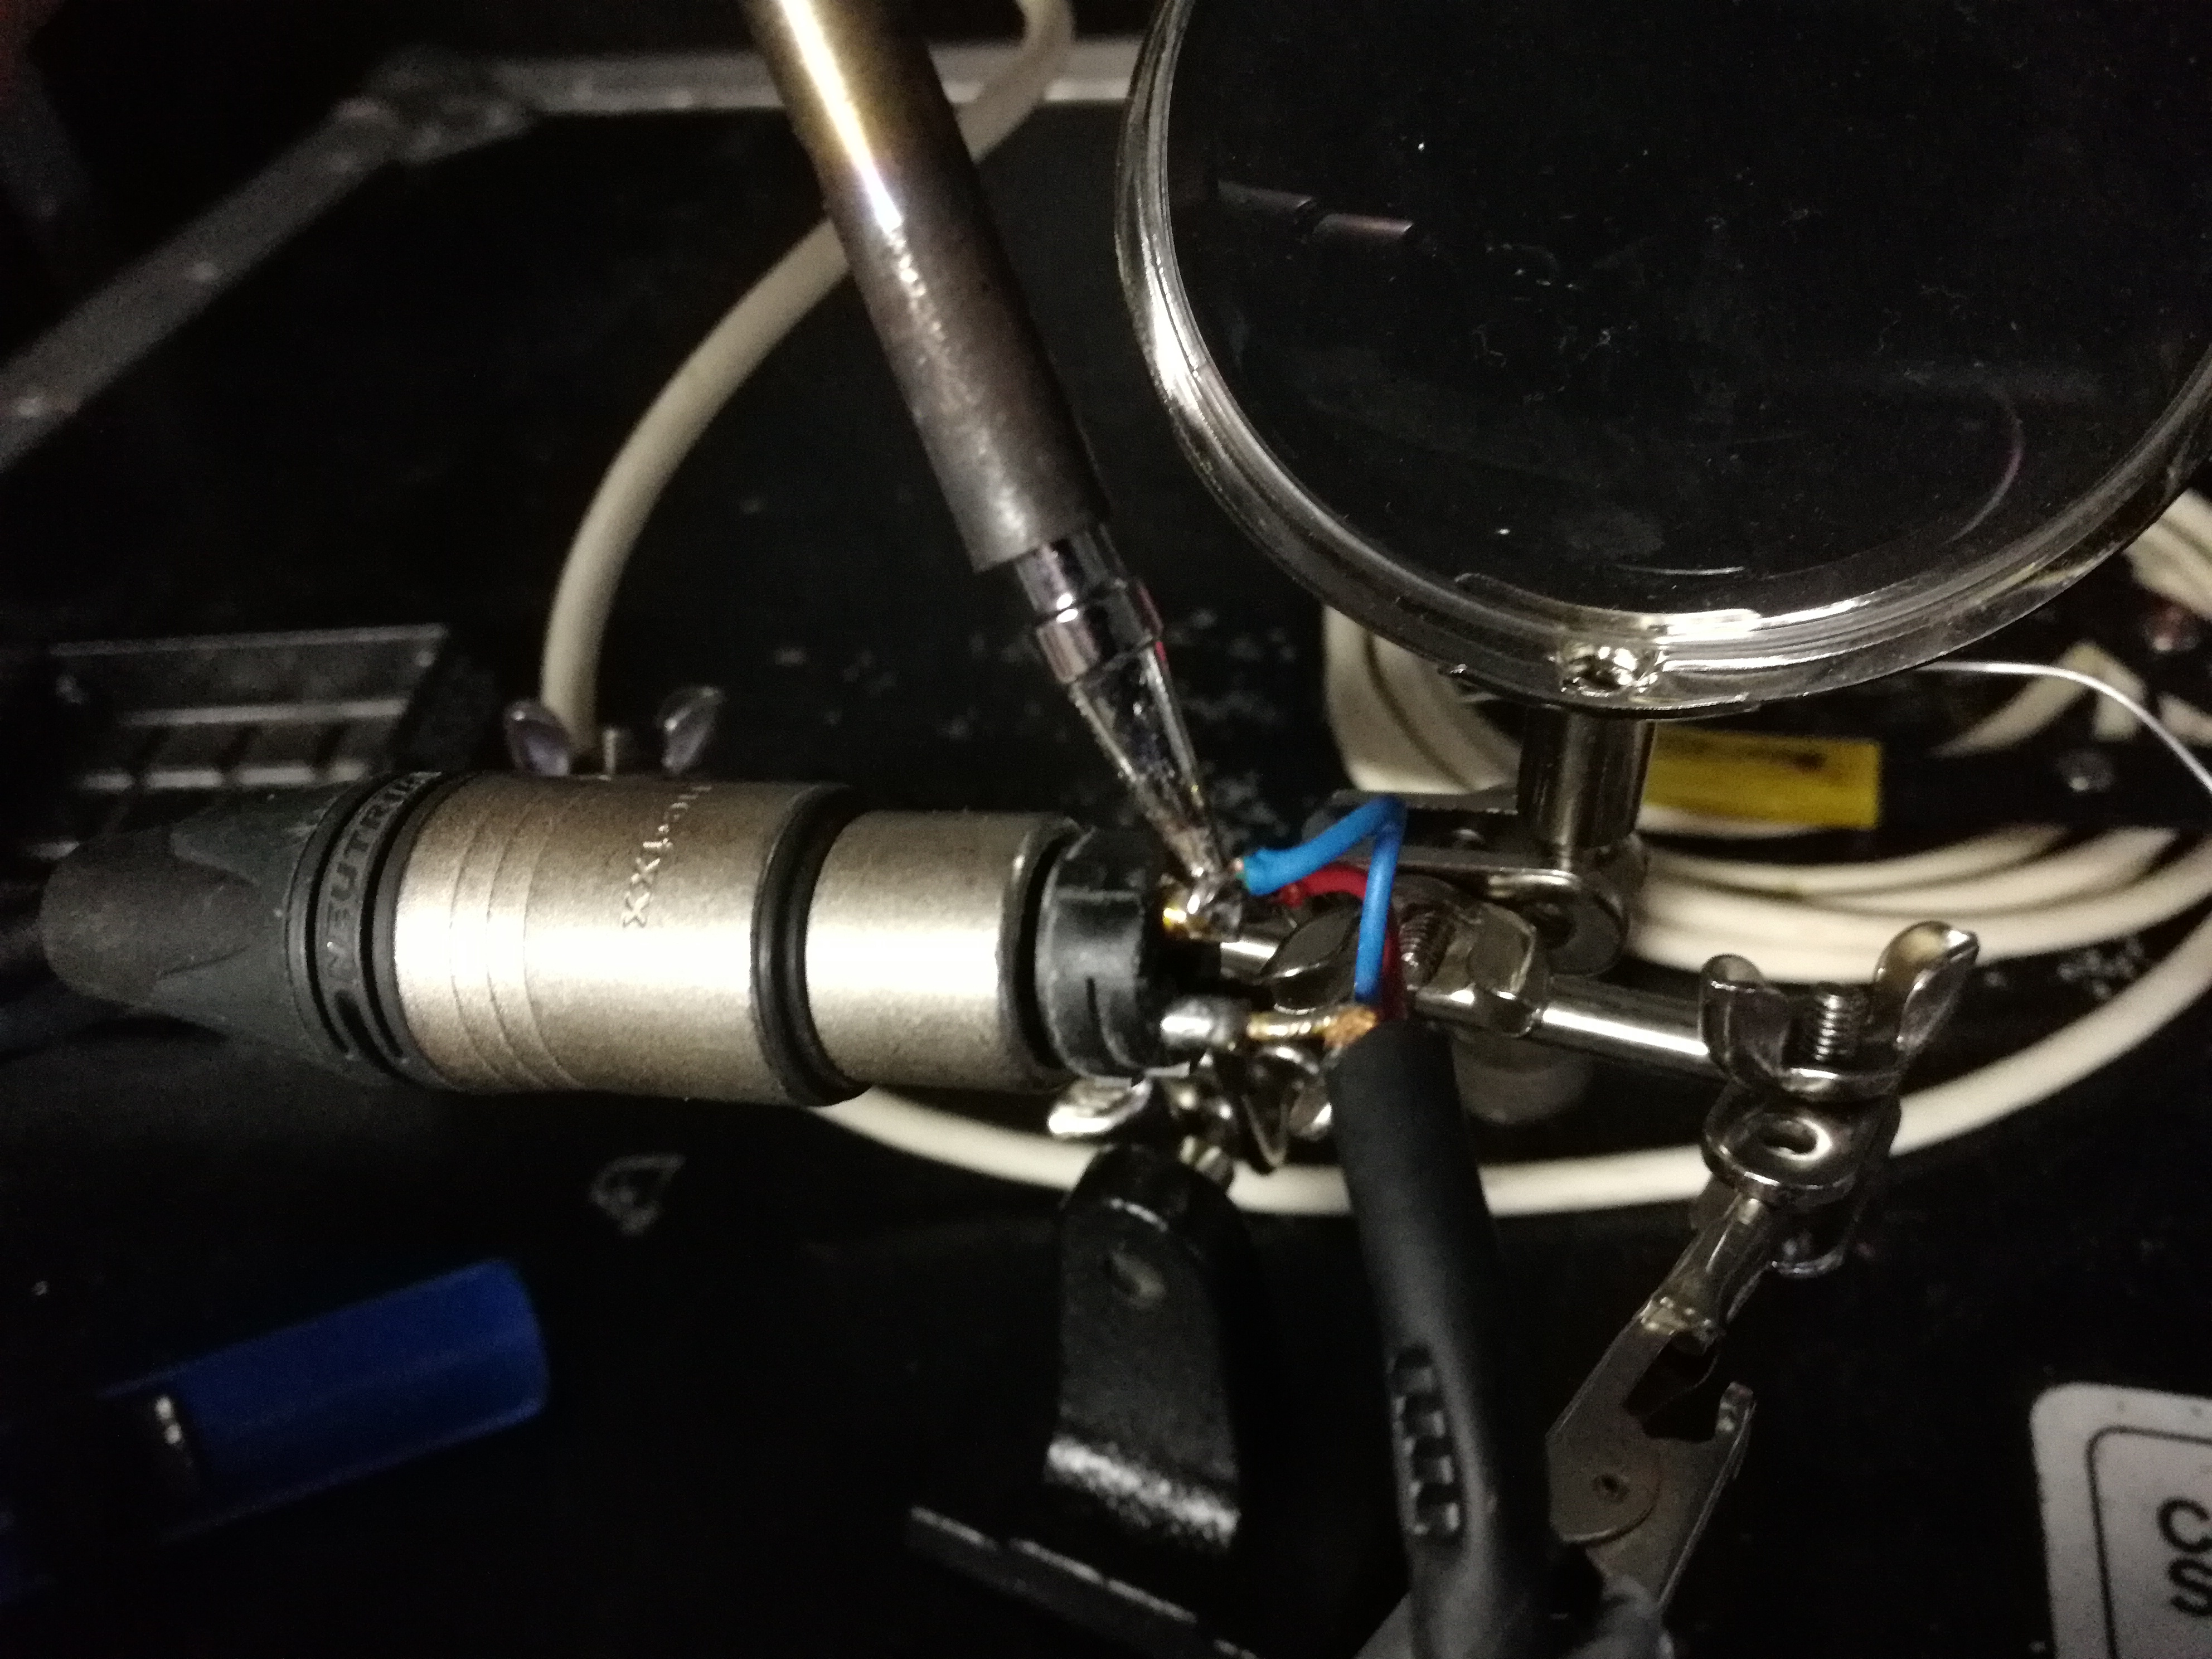
Circuits and components get hot when soldering, so helping hands are a must.  There are several styles depending on your needs and budget.  I recommend one with alligator clips and a magnifying glass as a bare minimum.  Upgrades include a mirror with a light, a fan attachment, and different style clips.  There is even a silicone connector holder called a Hot Holder that is a must-purchase for anyone creating a variety of custom cables.

Fan & Airflow

A fan is a necessity in order to avoid inhaling fumes from the heated solder.  Airflow must be directed away from the working area, which means there must be at least one open window/door in addition to the fan if you are working indoors.

Light

I recommend an adjustable desk lamp for any soldering project.  I inevitably find myself in rooms with insufficient light and a desk lamp is key for inspecting tiny soldering joints.

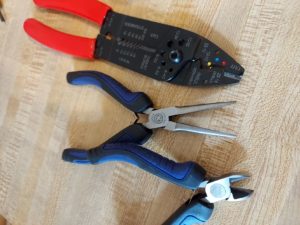
Wirecutters & Strippers

Generic wire cutters are so important, that one might even have multiples, like angled wire cutters for circuits in a small housing.  While some use pocket knives for wire strippers (to trim the plastic coating off wires), I prefer having a multi-gauge wire stripper.

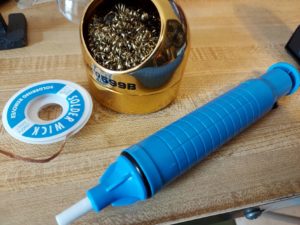
Sponges, solder suckers, scrapers, wicks

Over the course of soldering, the solder coating the tip of the soldering pen will discolor and become ineffective.  To clean the old solder one can use a small wet sponge, it often comes with the soldering kit, or a brass wool solder scraper.  I use both.  Solder suckers and solder wicks are useful when one accidentally uses too much solder on a joint and bridges two wires together.  Solder wicks are copper braids that soak the excess solder, while solder suckers are retractable pen that sucks a small chunk of solder.

Other Helpful Tools

With tiny components, fingers are often too clumsy or too large, that is why I have tweezers and needle nose pliers in my kit.  I also keep cotton swabs and isopropyl alcohol to clean up my finished board.  Multimeters are useful to double-check connections within the circuit.  If there are any accidental shorts or missed joints, the multimeter should find them.

Safety notes

Wear safety glasses to protect your eyes from flying wire fragments and hot solder.  Use a bubble wand to find out if the airflow of your work area is directed away from your face.  If the bubbles are floating towards the open window, you are all set.  When the bubbles just hang in the air, it is time to add another fan or open another window/door.  Take regular breaks from the soldering and take a short walk.  It is not good for your overall health to work in a fume-filled and cramped position (even when trying to maintain good posture).  If you have a drink in your work area, make sure that it is covered (to prevent contamination), and wash your hands before handling any food or drink after soldering.  Overall it is good practice to wash your hands after soldering.

Learning New Skills


So I learnt a new skill. Or rather, I improved a skill I haven’t used since university. I learnt it from a man called John and he was, in my opinion, the best tutor we had. He had a PhD and taught us about the avant-garde world of music and presented us with new ideas. “Will a tree make a sound if it falls in the forest if no one is there to hear it?” and other fundamentals of sound and sonic art. If you want to learn more there’s a book John swore by called The Digital Musician by Andrew Hugill.

KUDAC, Kingston University Digital Arts Collective, was a place where both students and teachers participated in creating textures and sounds. There John taught us how to circuit bend PCB boards and manipulate them in audio programming software like Pure Data and Max MSP. To expand what we thought of as music and sound and perform with it. He was my mentor so when he left to teach at Brown University in my second year I felt lost. All the sonic art and circuit bending seemed like I had tried to impress my mentor rather than learning some useful skills. However, today I believe that his work got me thinking of sound in such a different way, that it ended up changing my music and my work as a sound engineer. To think outside the box and try things out, no matter how crazy it may seem.

The practical skill I’m talking about is soldering. It is a fundamental skill for any sound engineer, and very useful. A skill I have been lacking in. This is why I recently took SoundGirls online workshop and now have a whole pile of fixed cables at home. It was so much fun to be taught by someone else, who also is a woman. A great deal of my own education was done by men and all my engineering colleagues are men too. She was understanding and encouraging throughout the session and not only taught me the basics but also shared her own tricks. My cables have been screaming for some serious TLC and I am so grateful to now be able to fix them myself.

Soldering has been the one skill I have envied in my male colleague’s skill set, and it’s always set us apart. Thanks to the SoundGirls workshop I have now taken another step towards confidence and equality. To show that I can do everything he can.

Confidence may not be something one can teach, it’s something that needs time to grow and requires a willingness to evolve. So I commend SoundGirls for equipping women all over the world with skills that will foster confidence in an environment that feels safe. At a young age, I was told that no question is too stupid to ask. I took it to heart and it has set me apart from my colleagues and classmates that were too proud to ask for help. So, whatever questions you may have, know that we are always here to answer them, no matter how small, stupid or silly you may think it is, we don’t think so.


Soldering for Beginners

Soldering is one of the most useful skills a sound technician can have. It can seem daunting at first, but it is surprisingly easy once you know how. It can help you understand your equipment and signal flow better, save you money, and there’s nothing quite like whipping out a soldering iron and saving a gig to silence the doubters. Entire books have been written on the subject, and it takes practice to perfect it, but I’m going to outline the very basics you need to get started.

A note on safety!

Soldering irons, unsurprisingly, get very hot! Keep your work area clear and well ventilated, only hold it by the handle, always put it back in its holder and don’t leave it unattended until it has cooled down. Remember that the things you are soldering will also get hot. Be careful not to melt the glue keeping a PCB in place, for example. I also need to point out you shouldn’t solder something in situ above you while lying on your back. Thanks, Tim…

Equipment

You will need:

A soldering iron!: Buy the best you can afford because it will last you for years. There are a few different types, each with their own advantages. Mains-powered irons can either be standalone or come with a station, which can control the temperature and give you a readout of it. Stations also include holders and sponges, so you have a neat setup. Battery or gas-powered irons are a lot more portable, and you don’t need to rely on a mains supply to use them. Non-temperature controlled irons might struggle to solder bigger items because they absorb the iron’s heat until it drops too low to be effective.

Tips: There is a whole world of iron tips out there. For sound work, you’re most likely to need an iron-plated conical tip. They need to be replaced periodically, so keep a few and clean them regularly.

Solder: Many people swear lead solder makes the best joints and is the easiest to work with, but it is also poisonous and bad for the environment. Lead solder has been outlawed, in the EU at least, for use in plumbing and consumer electronics due to its hazardous properties. It is still available for private use. There are a variety of lead-free solders on the market, but they still emit some toxic fumes, have a higher melting point, and the resulting joins may be more brittle than traditional lead ones. Whichever you opt for, pay attention to the percentages of each metal present in your solder: different combinations will have different melting points and strengths. 60% tin, 40% lead is the standard alloy traditionally used for electronics. Most solder comes with a flux core, which is a resin (rosin in the US) that helps bind and strengthen your joints and keep them clean. You can buy your solder and flux separately if you really want to, but that tends to be used for advanced repairs and is unnecessary for beginners.

Sponge and metal wool: Back when all solder contained lead, cleaning your tip on a damp sponge was fine. However, lead-free solder works at a higher temperature and the water from the sponge can cause the iron to dip below your optimum operating point, so repeated cleanings can cause the solder to crack and penetrate the tip. Using brass wool avoids this problem.

Solder sucker/desoldering wick: These help clean old solder away before you work your new join. Don’t just melt and reuse the solder that’s already there!

Helping hand iron touching

Soldering board/helping hand:  You can make a soldering board out of some wood and old cable connectors, so you just plug the cable you’re soldering into its corresponding socket on the board to keep it still. You can also draw wiring diagrams above each one to refer to as you go along. For some applications a “helping hand” might be more useful: it consists of a magnifying glass and two alligator clips on a heavy bass, so you can hold cables in place and get a better view while working.

Wire strippers and cutters: You can get by with just a knife, but a good set of wire strippers will save you time and the frustration of accidentally cutting through the entire wire you were trying to strip.

Method

Let’s take resoldering a broken leg on an XLR as an example.

XLR Short Earth

If you’re using a new iron tip, you can “tin the tip”: heat the iron up and melt a thin layer of solder evenly over the tip, so it’s shiny. This improves heat transfer, protects the tip from oxides and makes it easier to clean. Regularly cleaning and re-tinning the tip will improve the quality of your joins and help the tip last much longer.

Once everything is in place, you first need to remove the casing around the wires. Make a note of which wire goes where (if you ever get confused, just refer to a diagram or open another cable on the same end and compare it to the one you’re fixing). If there isn’t much wire left to work with, don’t be tempted to make a tight fix. It will take too much strain when the cable is moved and will break again soon after (The one exception to this is that some people purposefully make the earth leg shorter, like in the photo, as it is stronger and can take the strain instead of the other pins. This can be tricky to do, and subsequently repair, so is more of an advanced technique). Desolder the other legs of the cable, trim them to the same length and strip the wires back until you have just enough to work with. If you strip too far back, the metal from different legs can touch and cause all sorts of signal problems. If the broken leg is still long enough, just remove the old solder from its join and leave the other two legs attached.

Take the iron in one hand, and hold out a length of solder in the other. Then the important bit: heat the wire, not the solder! You need to heat the wire and its connector, so they melt the solder. If you heat the solder directly and try to drop it onto the join, it will just cling to your iron. While holding the iron on one side of the area, you want to join, touch the solder onto the other side. It should melt and flow around the wire and connector, binding them together. Avoid breathing in the fumes! Keep going until the whole area is covered, removing the iron as soon as you can to minimise the amount of extra solder you’ll need to clean off it. It should only take a few seconds to heat the wire; if nothing happens when you touch the solder to the join, or it only melts when you’ve held the iron in place for a long time, your iron isn’t hot enough. The solder on the join should look clean, shiny and smooth. If it is dull or uneven, it is a sign of a bad join and is liable to break again. You can just desolder and do it again until it’s right!

Finally, put the components back together and test your XLR with a cable tester. Never put an untested cable back into use after soldering it. Turn your iron off, put it somewhere safe until it’s cooled down, and enjoy your new skill!

Additional Resources

Illustrated easy guide to soldering (electronics-focused)

Once you are more comfortable soldering, you might want to make your own phantom power checker


X