Ah recording, that bedrock of this thing we do, the capturing of the evanescent moment of vibrations shimmering in the air in both mellifluent and cacophonous fashion (knock it off with the big words, you damn English major). Whatever we do afterward, with our editing and our mixing and our mastering, and whatever we do before, with our writing and preproduction and planning, it all comes down to the fancy room with the red light. And the principal thing to remember about recording is that it costs money. Sometimes a lot of money. Even the cheaper studios will run you hundreds, and any decent-sized session is going to go into the thousands. With budgets being as stretched as they are, it’s important, then, to make the most out of the small amount of time you have to get things down and get them right. As producers and engineers, it is our job to respect our artist’s wallets. As artists, it’s our job to make sure we get the most for our dollar. Thus, we get to my producer’s perspective of what is probably the most consequential of parts of the whole recording process: the pre-production!
Pre-production is the term we use for everything leading up to a recording session
For me, this starts with that first coffee date where we get to know each other and talk grandiose plans for achieving our musical and artistic dreams. While the final results tend to come out completely different, it still provides a starting point for the direction the rest of the project ultimate heads. Which records inspire you? What’s the vibe you’re after? How many musicians and songs? What do you want out of life? What’s your budget range? The answer to all these questions will help point us in the direction that we need to head, in order to make the most out of the session. The inspirational records will tell us how to set up and mic and get tones for the instruments. The vibe will affect how we conduct the session. Is the record light and fun? Then we need a light and fun recording session. Is it heavy and brooding? Then we need to craft an environment that is conducive to that kind of introspection. And, of course, there’s a budget. The budget will tell us not only where we’re able to record, but how much time we’re able to spend on the recording. Do we need to power through 3-4 songs a day? Or can we take our time and overdub everyone’s part and add in as much nuance and ear candy as we please? I get a sense for all of this during that first meeting, before we even decide whether or not to work together. Getting a rough understanding of how the record will come together, how it will sound, helps me not only prepare for the session from the get-go but gives me a stronger pitch for the artists. After all, if I’m able to immediately give them a technical breakdown and creative approach, doesn’t that prove that I know what I’m doing?
Explaining the process of making a record
Next up, either before you decide to work with each other or after, is probably the most overlooked yet important part of the process, especially when working with newer artists: explaining the process of making a record. It’s not as simple as going into the studio and pressing record. It’s a long process beginning with what we’re talking about right now, then going on to recording, doing multiple takes (more than you expect), editing the takes you do (both comping and performance fixing), overdubbing multiple parts, mixing, and mastering. If the artist hasn’t made a record like this before, they’re not going to necessarily know everything that goes into it when done at a professional level. I had an artist once reach out to me wanting to make an LP. He wanted to do a pop/indie rock record, full-band instrumentation, recording every part himself, and expected to be finished with it all in 1-2 days. This is not possible. When I told him what to expect when it comes to making a record, he ghosted, which is fine. He now knows what goes into making a record and we didn’t spend too much time talking things out only for it all to fall apart when everything slowly was revealed to him. On the flip side, I’ve laid everything out for an artist and not only did I land the gig, but the thoroughness of the process energized them and helped them jump in with the attitude of making something incredible. Educating your artist on how to make the record is beneficial to everyone. You’re all on the same page when it comes to what to expect, weed out those who aren’t ready for this level of commitment and get those that are ready to dive in.
Equally important to explaining the technical steps is to explain the emotional and creative ones
I made the mistake of neglecting this, thinking that since the artist had released an EP before that they’d be familiar with the ins and outs of making a record. While I did make sure to explain things from a functional and cost basis, I neglected to explain things from a personal and creative basis. This led to us dragging out the completion of the record, unable to settle on a sound, with everything sounding worse as the process continued. This is why the recommendation for everything is to work quickly. When you get stuck in the weeds of second-guessing and fine-tuning, you lose perspective, and suddenly everything sounds wrong. When that happens, it’s time to step back and not listen to the record for a while. A day? A week? A year? I don’t know. Long enough that you come back with fresh ears. This is partially why I try and keep my mix numbers to three. The first one I do, the second one after artist notes, the third one after another round of notes. Now, I allow the artists to keep making adjustments, but I make sure to tell them that that process is what’s to be expected. It puts in their minds that we’re supposed to get things done in that span of time, that my skills as a mixer are at the level of completing things that quickly (so they better trust my results), and keeps them from falling into that trap of endless revisions. Look at us talking about mixing before we even get to actual pre-production sessions.
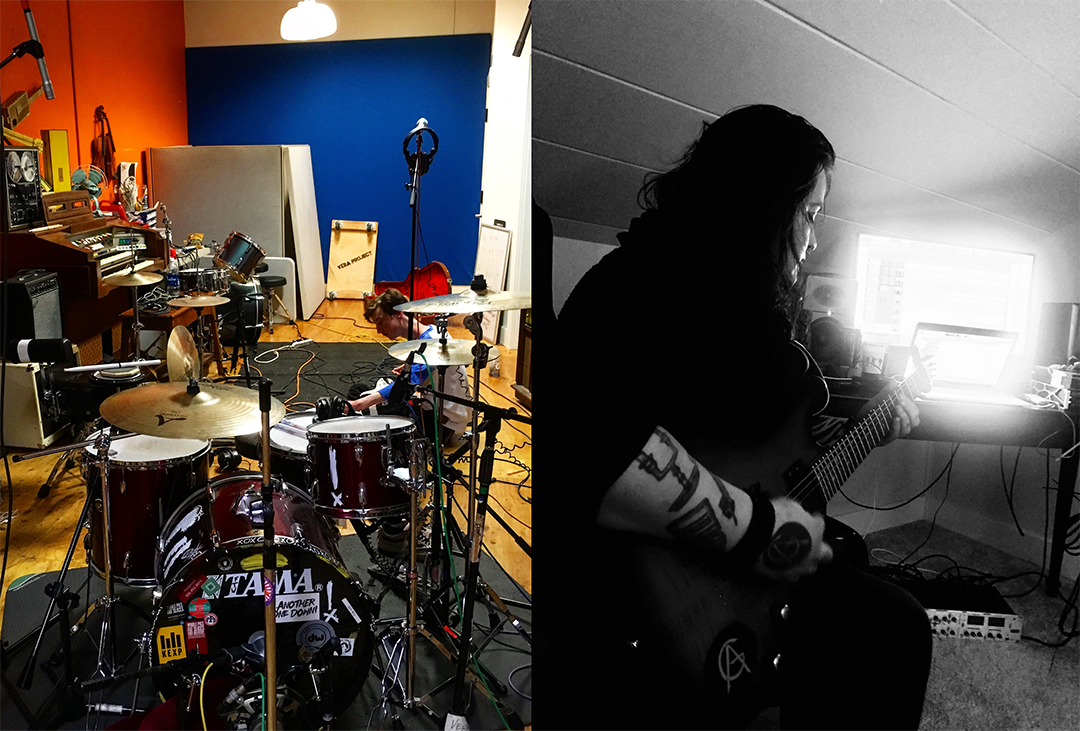
When it comes to recording, newer artists will go into the studio expecting to knock out each song in 1-2 takes and have it all done and ready to release. While we’ve gone over the post-production with them, we do need to talk about what the actual recording session is going to be like. I find it best to just go in order. Artists used to live shows will assume that the setup is as quick as that. A few mics, plus a quick soundcheck, and then ready to go! A lack of understanding of the actual time that goes into setting up can really hurt their confidence in you as an engineer, so conveying exactly why it takes as long as it does is important. Depending on the length of time we have, I’ll take upwards of a day to get things set up, instruments fine-tuned, tones dialed in, headphones made exactly perfect, session template put together, and whatever else I can think of. All that time is worth the effort, of course. Unlike with live audio, we don’t have the sound coming from the stage to help augment what we’re micing, so we really need to go a bit overboard to get the coverage we need. Plus, we have fancier gear, so we’d better use it! When the artist knows that this time commitment is standard, and most importantly why it takes so long, that boosts their confidence in you, rather than hindering it. You go from someone who is struggling to get things going to someone who knows and cares enough to make them sound their very best. All with a little education.
So that’s what I do with new artists, and what you should do with them too. If you are working with more experienced artists, it’s good to do a little refresher anyway, just so they can understand any idiosyncrasies of your process and cover any gaps they may still have in their experience. Maybe they’ve only worked with engineers who put up four drum mics and call it good (this is not enough drum mics). Maybe they’ve always done one instrument at a time and are new to whole band recording. Regardless, make sure everyone is on the same page as to what to expect before moving forward with the project.
Preproduction: getting everything ready for the recording session
Now that we’ve talked about everything that goes into making a record, we can finally get to what we actually think of when we think of preproduction: getting everything ready for the recording session. I start with the songs. In a perfect world, the artist would present me with demos for twice as many songs as they want to record. Why twice as many? Well, you never know which song is going to be your breakout hit. Is it song 2? Is it song 17? Is it song 154? Maybe 154 is going overboard. I like 20ish songs for an LP because it allows us to choose the best half of the songs an artist writes, but also gives us enough material to craft a balanced and cohesive record. Not every song that gets cut is a bad song. Sometimes the songs don’t fit the style of the artist, sometimes they don’t fit the style of the record. Anecdote time! I was working on a record with an artist who, like a lot of artists, came to me with exactly as many songs as he wanted to have on the record, no more or less. While I have my double song rule, it’s a soft rule. I’m not going to push the artist for more songs if they’re set on what they want. The problem with this record is that there was one song that stood out, and not in a good way. It was funky, while the rest of the songs were indie rock. The vocal performance was falsetto when the rest of the songs were head voice. It simply didn’t fit, and its inclusion would have made the record worse. So, after some pushing, I was able to convince him to cut the song and write a new one. The new one he wrote was not only in the style of the rest of the record but also ended up being one of the best songs on the record. Turns out song 15 was great, despite the record only having 13 tracks. Write more songs.
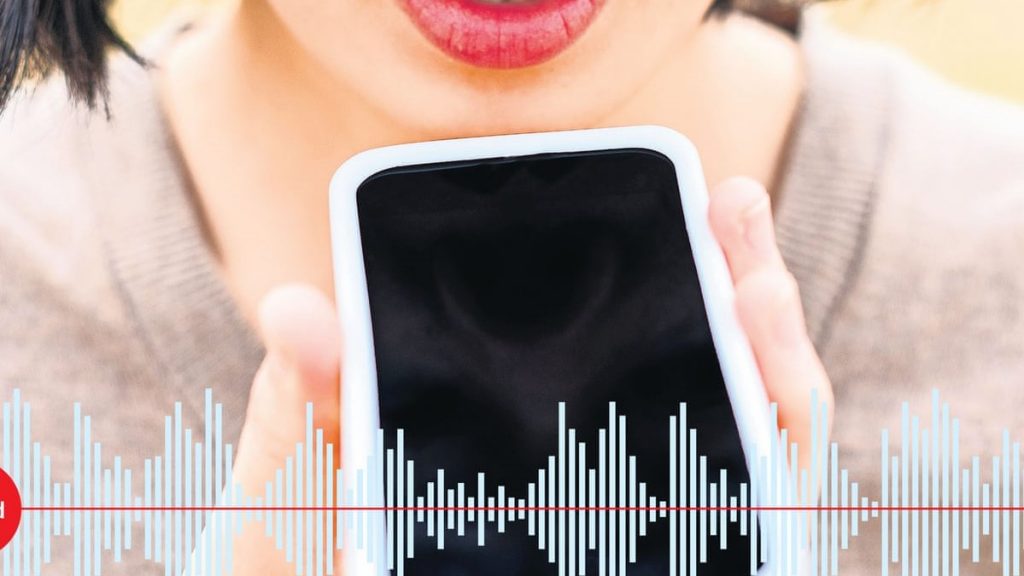
After you have too many songs it’s time to demo them. Demos can range from single-take live recordings in a proper studio to something recorded on your phone. As long as you can hear the chords, melody, and lyrics you’re set. The idea is to get a sense of the songs and to be able to refer back to them as you go through your song preproduction. That’s why you record demos instead of just listening to the artists play live. Plus, with the way audio technology is becoming available to everyone, you can easily make something that sounds quite good with a single microphone and some clever placement (if you want to record live) or doing one part at a time.
Once you have your demos recorded it’s time to send them off to everyone. If you have the budget, you’re going to professionally produce every track you’ve written and then decide which ones go on the record. If you don’t have the budget, now is the time to choose the songs, and your chance to experiment. Put things in order, get a feel for the flow of the record, and figure out your single candidates. Once you have your collection of songs, you can get a sense of which ones sound radio-worthy, which ones are going to be latched onto by the fans. The ones with the catchy choruses and the lyrics that speak to basic human truths. The ones that stay with you and want you to go back for more. For an LP, I try and find four of these, and then build the rest of the record around them. When it comes to album flow, like everything in music it’s about contrast. You want to build up your listeners over the course of the record, but also don’t want to fatigue them with everything being high energy. I like starting with something fun and engaging, kicking it up for song two, bringing it down for song three, pushing it up again for song four, and really feeling it out to avoid lulls and too much energy. Do this and, while the order can and likely should change as you get closer to completion, you’ll have not only a collection of songs but a sense for the record as a whole.
Now that you have your songs, it’s time to workshop
Workshopping is the term we use in the creative arts for going through and revising the work we have, specifically in a group or collaborative setting. What we do for a record is we go through every song that we’re going to record and make notes about what we like and what we don’t like. Always make sure there’s a balance between the two. Focusing on what we don’t like will help us improve the songs. Focusing on what we do like will help inform how we improve the songs and makes the artists feel good. Always make your artists feel good. I was working on a song, and it was a good song, a radio-worthy song, but it also was too long. Too long for radio, and too long for listening. The problem was the chorus. There’s a reason most pop songs have two choruses at the end. It’s to etch that hook in your brain, but also leave you wanting more. Put too many of them in (like this song had) and you leave feeling satisfied, but also not interested in going back and listening to the song again. We ended up cutting the extraneous choruses and the song came out incredible. And balanced feeling. And fit for radio. In addition to structure, you need to look at the lyrics. I have the artists give me typed-out lyrics so I can make notes and read back while listening to the songs. I’m looking for multiple things when workshopping lyrics. I want to see if I can understand what the artist is going for. I want to see if the lyrics are singable and the chorus is catchy. I want to make sure there are no instances where the rhythm feels lopsided and like the words are crammed in. Like smoothing out the structure (and melody, and rhythm, and chord progression) I want to smooth out the lyrics. As a producer, my role is to add an alternative perspective, one coming from experience and one that’s outside the artist’s creative process. Unless I’m writing with them, the artist has the final say. That doesn’t mean I won’t push if I have to, but in the end, it’s up to me to convince them of what I think, and up to them to make the final decision.
Once the songs are workshopped it’s time to decide how you’re going to record. This involves whether or not you’re going to do live takes or layer the individual parts one by one. If you’re going to record with a click or not. Whether or not you’re going to tune the drums to be in the key of the song (snare and kick are fine if they sound good, but for the love of Apollo tune your toms!). How many layers do you think you’ll need. What extra instruments do you want? While this may seem like it takes away spontaneity and creativity from the actual session, it doesn’t. It gives you a starting point, a road map, something to do when you can’t think of what else to do. It gives you a chance to be creative without concern for budget and time. Instead of deciding whether or not you want a shaker on a track while recording, you can already have that shaker track done and can always cut it later. Got a fun technique you want to try? Write it down so you won’t forget later. Or worse, know you wanted something but forget how to do it. And if you are going to record to a click, please please please figure out your tempo now and practice to one. I had a record not even be released because the performances were so shaky because the band wanted to record to a click but didn’t practice to one. Should I have canceled the session as soon as I heard they weren’t ready? Yes. But preparation, ultimately, is on the artist.
You also use this time to really finalize the vibe. Listen to the reference mixes and reverse engineer how to make your record sound like them. Artists can figure out how to play and prepare their instruments, engineers can figure out how to record, and producers can figure out how to layer and arrange. Take notes. Even if they are brief. Even if they get thrown out the window when you get to actually doing the thing. Don’t assume you’ll remember everything you talk about. And taking notes gives the artist more confidence in you like you care and take things seriously. After all, sometimes giving their best comes from an artist trusting you completely.
Now, engineering preparation
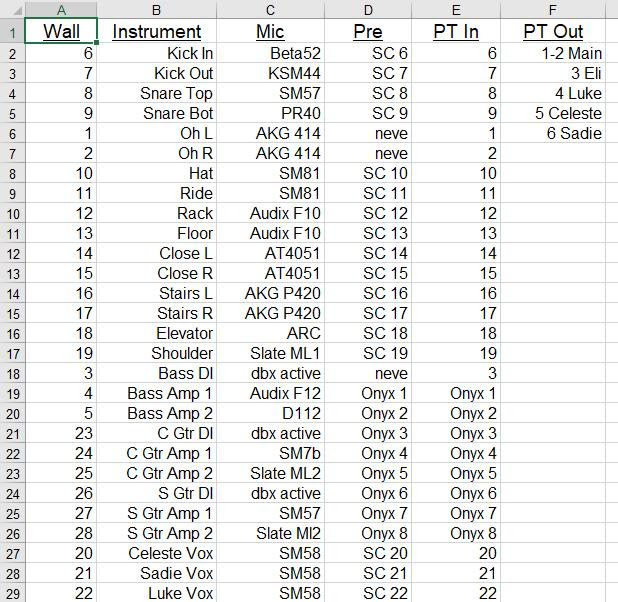
I do a lot of this. I want to know sometimes days beforehand what I’m going to do when I get into the studio. I’ll look up a studio’s mic list and create an input list based on the type of approach I want to take for recording, and the equipment I have available. I do this so that I don’t waste time in the session trying to decide how I’m going to record (remember, respect your artist’s money), but also so I have the chance to imagine how something is going to come out. With enough experience, you know what different mics sound like on different sources, and how they interact with each other. I choose my mics based on both and do what I view as mixing with microphones. I’m micing with the final mix in mind, not simply with what sounds the coolest on any one source (though I also take that into account). This also means that I can print out several copies of my input list to make sure that not only do the assistants have their own copy but that I can leave ones lying around in case anyone (usually me) misplaces their copy. I’ll have a copy on the mixing desk, a copy by the microphones, a copy by the drums, and a copy in the guitar room, really anywhere where I might end up wanting to know what goes where. I can’t do this if I’m making things up on the day. Granted, there is the issue of having to change what I’m doing, and adjusting my input lists, but that disadvantage is minor compared to what I gain from making sure I come in prepared. And it shows the artists that I’m taking things seriously.
After all that, we’re ready for our recording session! The artists know exactly what goes into making a record, we’ve picked out the best songs and made them even better, we’ve made sure we have an idea as to what we want the record to sound like and how we’re going to get there, we have a plan in place to tackle our recording session, and we’ve all prepared in our own way (seriously, artists, practice) to make the most out of what we’re about to do! The more preparation we do, the easier the session goes. The less time (and money) we have to spend fixing things and getting unsatisfying results, and the more time we have for creativity and for fun. Because that’s what we’re all after, creative expression and fun. And preproduction is fun too! It’s fun to talk about music and to play around and experiment and get excited as you imagine and dream about what the actual recording process is going to be like. The more you do, the better your record is going to be, as is the experience of making it.
(Oh, and make sure you get a good night’s sleep and eat a healthy breakfast and drink lots of water and take your vitamins (especially B12) and remember to be compassionate with each other and listen to your producer and that we’re all here to have fun.)