Empowering the Next Generation of Women in Audio

Join Us

Lunch and Learn: Recreating a Musical Tune as a Sound Effect

On occasion, a sound editor’s musical skills are put to the test when they are asked to recreate a tune or song for a specific sound effect. For example, in the second episode of Yuki 7, the alarm clock that goes off matches the theme song of the show, which you can listen to starting at 1:11 in the video below. For sound editors with no musical training, this task can be particularly challenging. So for this blog, I’m going to teach you how to recreate a melody to use with any sound effect just by listening to it!


Just kidding. For that to happen, we’d need to review a lot of music theory and ear training, which takes more than a blog post to get the hang of. Identifying a tune in order to recreate it involves understanding what musical key it comes from, the pitches and rhythms of the notes, and sometimes, harmonic analysis of the song. Even though I come from a musical background, I want to offer methods to replicate a song for a sound effect efficiently, and while we’ll scratch the surface of music theory, a music degree isn’t necessary.


Example of melodic contour in “Twinkle Twinkle Little Star.”


There are some simple concepts in music theory that can help to build confidence when listening back to a song you need to decipher. The first idea I want to introduce to the non-musician editors out there is melodic contour. This just describes the shape and sequence of notes in a melody. There are actually a number of studies in which infants were able to discriminate basic changes in melodic sequences, so it’s likely that you already have years of practice learning this concept!

Let’s take a look at “Twinkle Twinkle Little Star” as an example. If you were to draw a line on a whiteboard that follows the melodic contour of this song, it would look like a weird set of stairs. The melody makes the largest leap between “twinkle” and “twinkle,” and descends after the second syllable in “little,” eventually returning to the same note we started on. Even if we don’t know the exact notes or the key of the song, we can start to visualize the melody of the song by looking at its shape.

Depiction of the rhythm of “Twinkle Twinkle Little Star” with lyrics and line measurements.


The same can be said for rhythm. As pattern-seeking animals, melodic contour and rhythm come rather naturally to most humans. Motor areas in the brain help us perceive consistent rhythms so we can follow the beat of a song. Early thirteenth-century rhythmic notation called mensural notation generally divided up the pulse or beat of the music into long and short patterns, and present-day notation still does pretty much the same job because it’s the best way that we can understand a song’s rhythm.

So let’s look again at “Twinkle Twinkle Little Star” to identify long and short notes. As you sing along to this song, tap along to each syllable with your finger, and notice how you hold your finger longer at “star” and “are.” These notes are twice as long as all the other notes in this passage, but what is important is that you start to pick up the difference between a long note and a short note, rather than the specific division of the beat. These two simple ear training exercises of drawing melodic contour and tapping along to short and long beats will get you comfortable with the basic structure of the songs you need to replicate. We can even utilize these exercises by mapping out songs with MIDI.


A look at the User Interface for audio to MIDI conversion with ProTools 2020.11


A valuable tool we can use for this replication task is MIDI because we can draw in notes without needing to learn how to play or read music. Plus, MIDI lets us use software synthesizers that we can manipulate into any sort of musical-based sound effect such as an alarm, car horn, or bells. I will note that many DAWs including Pro Tools version 2020.11 have an Audio-To-MIDI feature where you can take an audio clip and drag it into a MIDI instrument track that automatically converts the melody into MIDI. Here is a simple tutorial on how this works in Pro Tools. Nonetheless, not everyone has access to this version of Pro Tools which includes Melodyne Essential as a means to “convert” audio pitch and rhythmic information into MIDI, so let’s learn how to manually map out our song.


Image of Xpand!2 settings for bell sound effect.


I like looking at this sort of musical replication through the lens of a MIDI editor because it’s numerical, and you can match melodic contour and rhythm in the editor just by drawing it in. In Pro Tools, I opened up a blank session and created a mono instrument track. Then, I inserted a really simple software synthesizer called Xpand!2 which was included in my Pro Tools bundle when I purchased it. I played around with some of the presets in Xpand!2 just to get a musical sound effect going, and I blended together some chimes, a digital glockenspiel sound, and a detuned telephone dial for an old ballerina jewelry box sound.

In the View drop-down menu in Pro Tools under Rulers, I unselected Time Code and chose Bars|Beats and Tempo to represent my edit window measurements. Setting your grid up like this will make the rhythmic replication of the song much easier. To find the tempo or beats per minute, listen to the song you want to replicate and tap along to the tempo yourself. Make sure you have the MIDI controls transport window open, and the Conductor Track icon unselected. Then, highlight the tempo in the window above, and tap along to the song by clicking T on your keyboard. Give yourself some time to let your internal groove settle into the rhythm of the song, and you’ll be able to get near or on top of the BPM of the song. Click return to lock-in that tempo onto your edit window grid.

With the Bar|Beats grid set up in Pro Tools, measures are much easier to read in the grid-like time code is, so you don’t need to fully digest the unit of a measure since Pro Tools does it for you. For the measures in “Twinkle Twinkle Little Star,” we can identify this by how the phrase is broken up. The lyrics “twinkle twinkle little star” and “how I wonder what you are” have the same number of syllables and they rhyme, two indicators that each of these phrases take up an even number of measures. It is likely that in your replication, you will be dealing with a tune that is either two measures or four measures long. In my instrument track, I just highlighted the first two bars following the Bars|Beats grid, and I held Option-Shift-3 to make a blank clip. Then, I double-clicked on the clip to open the MIDI editor.

Depiction of “Twinkle Twinkle Little Star” in Pro Tools MIDI editor.


The piano to the left of the MIDI editor has spaced out numbers that represent each octave, a set of twelve values that start at the note C. So, where the four is along the piano marks the octave that begins at C4. The editor is set up this way because each note translates to a MIDI number value from 21 to 127, so C4 represents the MIDI value 60 (most MIDI values range from 0-127). There is a super handy chart here that translates frequencies to notes to MIDI values for reference. For “Twinkle Twinkle Little Star” I’m starting at C4 by placing my first note using the grabber tool and clicking next to the little 4 along with the piano. If it started at G4, I can look at the chart and see that the difference between G4 and C4’s MIDI values is seven, so I would count up the grid seven steps from the little four on the piano, and start on that grid line.

With the first note placed, I can map out the rhythm with the trim tool. Following the grid and using my short vs. long identification exercise, I know that the first six notes of the song are shorter than the seventh note, and they are equal in length too. So I copied and pasted my first note five times, and then once I got to the last beat of each phrase (“star” and “are”), I made the note twice as long in the editor. Even if you don’t get the rhythm perfect the first time, you can still get close to the rhythm by following the grid, listening back to the rhythm, and making adjustments with your trim and grabber tools. You’re approaching the MIDI notes like clips in a track that you’re editing.

Once I’ve mapped out my rhythm, it’s time to shape the melody. “Twinkle Twinkle Little Star” is an easier example because it has many notes that repeat, so I grouped each pair of short notes together throughout the passage. To make my melodic contour, I highlighted the pairs of notes, and moved them up and down the grid along the piano, holding the rhythm in place. Once I got the contour to look like what I drew in my melodic contour exercise, I could reference each note of the song by listening and dragging the notes around the grid until the pitches match. Having the contour set up already helped me get close to the original melody, so I only had to make a few adjustments. The nice thing about the MIDI editor is that you can hear each pitch as you drag the MIDI note clips, so it’s just a matter of matching the notes in your song.

Now that I’ve got my song put together and created a sound I liked, here is my result. Since I started this process in MIDI, I can change the voices on my synthesizer to a different sound or I can use a different synthesizer like Massive and design a sound from scratch with any waveform and synthesis technique. While this process is limited to the DAW and software synthesizers to which you have access as well as the kind of information you can get about the song you’re replicating, I think utilizing the tools you have as the talented editor and listener that you are in Pro Tools and MIDI can help you achieve your goal without diving into unfamiliar music theory concepts. That being said, you might read this and think, “I’d rather take the time to learn music because it seems fun!” And you’re right, it is!

This Blog Originally Appeared on Boom Box Post – You can listen to Zanne’s Finished Song Here


Objective-Based Mixing

Guide the Viewer’s Attention

This is my guiding objective in every stage of the mix process and is arguably the most basic and important creative goal in the sound mix.  By manipulating the levels of the dialogue, sound effects, and music of each moment you can highlight or bury the most important things happening on screen.

Here’s an example:  Imagine two characters are having a conversation on screen.  They are standing in a ruined city block after a big battle or disaster.  The characters are positioned in the foreground of the shot, and in the background maybe there’s a fire burning and a couple of other people digging through some rubble.

In order to guide the viewer, we want to place the character dialogue in the foreground of the mix.  It should be one of the loudest elements, so the viewer can focus on it without distraction. The fire crackling or sounds of people walking through the rubble in the background can be played very low or left out if needed.

If we mix the scene so that we can hear every sound element equally, the viewer may become distracted or confused. The footsteps, rubble, and fire sound effects of the background will compete with the dialogue of the on-screen characters delivering the exposition. By keeping the dialogue clear and present we are telling the audience “this is an important piece of the story, pay attention to this.”


Depiction of a conversation in a distracting scene.

You can achieve the same guidance with sound effects and music if they are delivering important story information to the audience. Perhaps you need to showcase the rattling wheeze of an airplane engine as it begins to stall, causing the heroes to panic. Or maybe a wide sweeping shot of an ancient city needs the somber melody on the violin to help the audience understand that the city isn’t the vibrant, thriving place it once was.

Get the Mix in Spec

This is not a very exciting or fun goal for most, but it may be the most important one on this list.  Every network or streaming service has a document of specifications they require for deliverables, and as a mixer, it is very important that you understand and conduct your mix to achieve these specs.  If you breach these requirements, you will likely have to correct your mix and redeliver, not ideal.

The important requirements I like to keep in mind during the creative mixing process are the loudness specs.  These can vary depending on the distribution, but usually, they explain an overall LUFS measurement and a true peak limit, and in most cases, you will have about 4 dB of range you can land in (-22 to -26 for example).

Depiction of LUFS measurement.

The key is to set yourself up for success from the start. I always start my mix by getting my dialogue levels set and overall reverbs applied. For a show that requires a mix in the -24db +/-2 range, I usually try to land my overall dialogue level around -25.  The dialogue is the anchor of the mix.  If I land the dialogue safely in the spec, in most cases the rest of the mix will slot in nice and clean, and my final loudness measurements will be right in the pocket.

I also try to keep in mind my peak limit, especially when mixing sound effects. In action-heavy scenes, it’s easy to crank up the sound elements you want to highlight, but if you aren’t careful you can run up against your limiters and in some cases breach the true peak limit requirement.

When In Doubt, Make it Sound Cool

It may seem like this goes without saying, but if I ever question how to approach a decision or process during my mix, I like to remember this mantra: “Make it sound cool!”  Sometimes this means adding that extra bit of reverb on the villainous laugh, or kicking the music up a bit louder than usual for a montage.  Other times it means digging in and spending that extra few minutes to really make a scene shine.

One “coolness” opportunity I run into often when mixing is a scene where music and sound effects both have impactful sounds happening. One straightforward way to enhance the coolness is to adjust the sync of the sound effects so they hit right on the beat of the music.  It may seem like a subtle change to knock each sound effect out of sync by a few frames, but when the moment hits just right the result makes the whole product feel so much more cohesive and cool.

Another fun opportunity is what I think of as “trippy freak-out scenes.”  Examples are a character having a nightmare where they are surrounded by floating, laughing heads, or a scene where a character takes powerful drugs which kick in and alter their reality.  It’s always worth it to go the extra mile in these moments to really pull the audience into the characters’ wacky world.  My favorite tricks in these times are reverse reverbs and lower octave doubles.

Depiction of ReVibe II plug-in set up for inverted reverb.

I could write a list with many, many items I consider as objectives when mixing.  There are so many competing goals and ideas bouncing around in each episode, but I always come back to these three.  Working with objectives in my mixing allows me to stay focused on the big picture rather than get sucked into the monotony of following a step-by-step process.  For me, it is the key to being creative on demand and ensuring that each mix has a personal touch.

This blog was originally featured on Boom Box Post

Collaborating With Another Editor

Here are a few things to take into account when you work with another editor on the same project:

Communication Is Key

I know this sounds obvious, but for a successful partnership, there has to be communication. And with sound, it’s essential as well. Usually, you’ll split sections to be covered by each editor, and often, there are elements or builds that are going to overlap or repeat in both sections. Before starting to edit, it’s always good to establish who is covering what and what strength each person has to offer for the project. Without communicating, you can end up doing double the work, or going in totally different directions with the sound palette for the show.

Sharing Your Builds

When you share your sound builds with another editor, it is important to take into account the flexibility of your build. Sometimes the exact same build is not going to work every single time it gets repeated throughout an episode, or throughout the show in general. Therefore, it’s important to have the sections of the build separated when you’re sharing it with another editor, printed down to one track. That way, the other editor will have the flexibility to manipulate the build to adjust for differences in timing or creative changes when repeated.

Here is an example of a shared SFX build.

Here is an example of a shared SFX build

Be Clear In Your Labeling

When sharing your builds and established sound effects, you need to make sure you are being as clear as possible. Proper labeling is key. Those you are collaborating with should be able to reference your sound design builds and effects easily, without having to waste time figuring out which sound matches each element in the picture. Often times we will export a session for a specific build, tracked out, and labeled for easy reference. This makes it easy for me to import the session data whenever the recurring material shows up in my work and is easily shared with other editors for the same purpose. In these sessions, I like to use either markers or empty clip groups above the build, labeling them to indicate their use. It also helps to build these sessions with both the full sound build together, followed by another iteration where the different parts are separated out, so whoever goes into editing the show can easily recognize how the build works and plays.

An example of this would be a laser gun power sequence. This could be a sequence where we hear the gun power-up, shooting, and then impacting the target. I’ll include the original build and timing, followed by individual chunks of design for each action (the power-up, the shots, the impacts) spaced out and labeled for clarity on their use.

Sharing Ambiences And Backgrounds

Established sounds for locations need to stay consistent. It’s very important to keep them the same throughout the episode unless a change is called for by the story. You should talk beforehand with your fellow editor to determine who will cover specific ambiences that may repeat between your work. As you work, if you feel you need to change something or think it’s necessary to add or subtract an element from the ambience, always communicate with all editors on the project.

These are some important examples to take into account when working with another editor to ensure a smooth collaboration and create the best possible soundscape for the project.


New Editors: How To Find Your SFX Editorial Process?

It can be both an exciting and terrifying feeling being a new editor. On one hand, you are thrilled to start editing on a project! On the other hand, you don’t know where to begin. I interviewed a few editors on our team who know exactly how you’re feeling and can give you some insight into their editorial approach.

I thought it would be easiest for our readers to visually see a reference clip, so I had our editors answer a few questions with this fun short! I think I want a pet camel after watching this…Check it out below:

If you were editing this what would your editorial approach be/what would you tackle first?

Brad– First, I’d do all of the BG’s and ambiences. They’d give me a good base layer to go off of and help set the vibe for the rest of my edit. Once finished, I’d also have a visual aid of any new locations and potential scene changes just by looking at my background tracks.

Second, I’d go through the clip and see if there is anything I might need to record or design. For example, perhaps the camel or any other vocal elements. Maybe the cell phone/remote control beeping.
Third, once I have a good base layer of BGs, and my recording and design files ready to incorporate, I’m going to go ahead and start my edit. I don’t have any particular order of things or passes that I do since I break up my work by time, rather than category.

Tess– Whenever I start a new project I always watch the whole thing down first and then set up my time management. Since I’ll go more into detail about that in your second question, I’ll just skip those steps and get right into editorial. I usually like to work chronologically, but there are some exceptions. I find it difficult to keep animal/creature vocals sounding like they come from the same character unless I cut them all in one pass, so for this clip, I’d probably just start with the Camel vocals. After that, I’d probably design the beeps from the remote. I like to make every sound I cut completely unique to the project I’m working on (if possible) and these beeps are an easy and fun one to design. I like to use a lot of different synths on my iPad when designing beeps or sci-fi elements, so I’d likely start there. Once I design a library of beeps that sound like they could all come from the same remote, I’ll cut them in. Footsteps are another element that I’d cut all in one pass, but we’re pretty lucky here at Boom Box that Carol does an amazing job of cutting all of our foley. Once those sounds are edited in, I’d just cut chronologically. A big part of this clip is all of the stone movement, so I’d probably plan my days so that I’d cut all of that in one day, but I can go more into that in your second question.

Jacob–  If I were responsible for covering all sound effects for this clip, I would start with creating some background layers. This particular short would be very fast because they are in one location the whole time!  I often like to do this at the beginning of my day or edit, because it helps me get a sense of where the cuts are, and it helps the dry sound effects feel a bit more natural when I start adding them later. Next, I would tackle all the Foley elements, starting with footsteps and hand grabs, and rubs.  This would also be pretty quick. Then I would move on to covering all the rest of the sound effects in one pass, dividing up the length of the short by the hours I have to complete it, and setting benchmarks. I use this when editing as a way to make sure I am working at a good pace to be able to complete the editorial and have time to review it, clean things up, and do some pre-mixing afterward. In certain cases, where there is a huge amount of original design, like an episode where there are whacky unusual vehicles or space ships flying around, I might set aside an hour or two at the start to create a library of the effects I need.

Katie– I personally like to work chronologically, so naturally, I would start with the very first thing I see. If there were a recurring, design-heavy element like a spaceship or time machine, I would work on that from start to finish to save time, rather than chronologically. It would be time-consuming to design little parts of something that may evolve later in the episode. But for this short, I would start with the very first action.

Assuming this was longer and given more than a day to do, how would you go about the editorial time management wise?

Brad– I’d figure out the total run time and divide by the number of days I have to get the project done. The resulting number is how much I need to get done per day. I edit linearly so I’d start at the beginning and edit to the according to time code I need to get done for the day. I do, however, edit linearly by scene. Admittedly, since my attention span isn’t long enough to digest one large clip, and to invoke a sense of accomplishment, I will edit from beginning to end a single scene. Once that scene is done, I’ll move on to the next. This also creates neat stopping points at the end of the day. Just make sure to go back and watch the entire thing to make sure the scenes flow together well.

Tess– I always start my projects by breaking them down by day. Usually, I just divide the length of the project by the number of days I have to work on it, minus one day, to determine how much content I need to get done per day. For instance, if this clip were a 22-minute episode and I have 7 days to cut it, I would divide 22 by 6 and determine I need to complete a little over 3 and half minutes per day. If I follow that schedule perfectly then I have a full extra day to accomplish notes or rewatch my work to see if there is anything I could sweeten or clean up.

After I determine how much content I need to complete each day, I divide up the project/clip into groups of that size. I like to color-code them as well. I usually just group them chronologically, however, if there is a specific element that happens multiple times throughout the project (like the stone movement in this clip) I’ll try to divide the project so that I cut all of those similar elements on the same day. This picture is an example of what a clip looks like when I get started. Each color would be a single day’s worth of work.


Screen Shot 2020-07-08 at 5.23.03 PM.png

Jacob– For a longer piece, my strategy would be largely the same, except that I might split the foley and backgrounds over both days, doing some at the start of each day.  I stand by the strategy of chunking out the episode into days or hours, as this allows you to get a clear picture of your progress, and prevents panic moments when a deadline looms and you discover you have only cut ⅓ of the episode instead of ¾!  So for a two-day edit, I would divide the episode into 2, maybe with the second day having slightly less time. If you like to be extra precise, you can further divide each day up into chunks of what you need to complete each hour.  I always leave an extra hour or two at the end of my last day for a watch down, so I can make balance adjustments, recheck client notes, and catch any missing elements or mistakes.

Katie– I like to estimate approximately how many minutes I need to cut per day to finish on my given deadline, and make large blank clips above that space and color them differently for each day. As I go, I turn the clips green to indicate that section is done. It’s an easy visual representation of how much is done, and an easy indicator if I am falling behind. If it’s a several-day edit, I like to give myself at least a couple of hours or even a day to comb through the episode and polish it. It’s very easy to miss obvious elements when you’re working frame by frame. I watch it back several times to make sure everything is covered. I also like to watch it back with any notes I was given to make sure they are all addressed.

What would be your advice to new sfx editors figuring out an editorial process that works for them?

Brad– Watch other editors edit. It’s how I learned what works for me and how most people learn to edit via school or internships/etc. There’s more than one way to do practically everything, and if you watch enough people do their thing the way they do it, you can pick and choose what you like from different peoples’ workflows. You create your own repertoire of tricks and methods and expand it over time.

Tess– The best advice I can give someone is to find a time management tactic that works for them. The worst thing you can do in the professional world is not complete your work thoughtfully and on time. If you aren’t sure what will work for you, try my tactic of grouping by day, or ask other professionals how they manage their time and try it their way. There are so many ways to manage your time, so just keep an open mind and find the method that works for you. Also, don’t get intimidated if 3.5 min/day seems like a lot to you at this stage in your editing career. You might have to hustle at first, but the more you edit and know your library, the faster you’ll become. On that same note, don’t be afraid to try new things in order to speed up your editing skills. When I first started at Boom Box, Jeff suggested I map my mouse buttons to the different tools in Pro Tools. At first, I was a little clumsy in getting used to switching my tools with my mouse, but in the long run, it made me so much faster.

Jacob– For newer editors, I would say it is important to figure out how fast you can really work, and allow yourself extra time. I was definitely much slower when I first started, and when I started scheduling my time and realized how much I could realistically get done, it became much easier to complete my work on time. It’s also important to understand what time of day you tend to work best and fastest. I tend to be most creative and efficient in the early morning and evening, slowing down in the middle of the day when communications can distract me and my brain needs breaks. If you can learn how you work best, you can plan to do your design work or complicated cutting when you are fresh and most likely to produce the best most interesting work.

Katie– Give yourself plenty of time when scheduling out what you’re going to need to cut each day. Don’t treat a three-minute action scene the same as a three-minute dialogue scene in the time that you give yourself. Cut just a little bit more than you need every day so at the very end you can comb through and add extra details or spend more time in areas that could use it.

As you can see, there’s no right or wrong way to approach sound effects editorial! You need to find what works best for you and you WILL figure it out as you continue to edit more and more.

If you liked this blog, you should check out these other posts that are helpful for new editors:
HOW TO CRUSH YOUR FIRST GIG AS A SOUND EDITOR
LUNCH AND LEARN: MAC KEYBOARD SHORTCUTS EVERY SOUND EDITOR SHOULD KNOW
BACKGROUNDS, AMBIENCES OR SOUND EFFECTS?
THREE BASIC SKILLS EVERY SOUND EDITOR MUST MASTER
STAY ON TRACK! FIVE TIPS FOR IMPROVING CREATIVE PRODUCTIVITY


A COLLABORATIVE POST WRITTEN BY BOOM BOX POST


Answering Your Questions: Glossary of Sound Effects

In the original post, we get a ton of questions asking what keywords should be used when trying to find very specific sounds. While a quick peruse through parts 1,2, and 3 of this series would help, I decided to relay a few of these questions to our editorial team. I’m very curious what buzzwords they will recommend. Continue reading to see if your question was answered!

Let’s start off easy

What do I write when someone quickly grabs someone’s arm?

Brad: face slap

Tess: pat

Katie: body hug, impact body, skin, smack, slap

What should I search for if I want a sound effect for grabbing a bag of chips?

Brad: cellophane

Tess: crinkle, plastic bag drop/impact

Katie: mylar, crinkle plastic, foil, crumple, junk bag

What sound would you use when someone starts to walk?

Sometimes it is easy to overthink search terms when trying to find the perfect sound effect. A lot of the time there isn’t a fancy word for the sound you’re looking for. For example, a footstep would do just fine for this request.

Brad: For this, you’d need to know the surface, but I’d start with a quick scuff or foot drag if you’re trying to highlight the sound

Tess: scuff, skid, lino squeak, basketball squeak

Katie: scuffle, scrape, dirt slide, a cement slide, gravel

What sfx do I use for quickly grabbing an elevator door to stop it from closing?

Brad: metal hollow, metal ring, metal lock, metal latch

Tess: metal hit/impact

Katie: metal duct, container hit

I need a sound for someone sitting on a bed except for the word “creak”.

Sometimes you need to get creative with the words you use when searching for a specific sound. If you are looking up “bed” and not finding anything, think of works associated with a bed or a similar material.

Brad: couch sit, couch plop, cloth hit, cloth impact, cloth movement

Tess: hinge

Katie: springs, pillow hit, cloth drop, laundry, couch

What sound would a bouncing grenade make?

Tip: Doing a quick search on youtube for a reference clip can really help spark inspiration. Listen to examples of the sound you are trying to replicate and try to deconstruct what you hear. A lot of the time there is no one specific sound and what you’re looking for requires a build of multiple sfx’s. Don’t limit yourself!

Brad: metal drop, gun drop, metal hit

Tess: tink

Katie: shell drop, bullet case, metal debris, shiny, solid

What sound would you use when someone grabs your hand and it startles you?

How do you translate emotion into sound? Sometimes trial and error is the only way to find the perfect sound effect. Let’s see what our editors came up with…

Brad: horn, violin pluck

Tess: In my head, this needs to be a build of sounds, maybe a BONK plus a TWANG, and a COWBELL. Other options are POINK, DOINK, or PLUCK

Katie: gasp, surprise, shock, emote, fear, anxiety, curiosity, inhale short

What sound does sushi make?

Context is everything. This type of sound could go in multiple directions; realistic, toony, surreal.

Brad: goop, goo, slime

Tess: splat

Katie: rice cake, squish, wet, slimy

What would I write for an angelic noise?

Brad: angel chorus

Tess: choir, ethereal

Katie: heaven, drone, symphony, gliss, harp, ascend


Sounds Like Spring

Granted, being located in SoCal really stunts all seasonal variety. But trust me! Once you’ve lived in sunny LA for a year or two, anything below 50 degrees begins to feel like the arctic. I know, it’s a bit dramatic. I myself am embarrassed to agree, especially having grown up on the east coast.

In fact, because I’m from New England—where every season is highlighted—spring holds a lot of memories for me. I can easily recall the smell of Spring and if I close my eyes I can hear a light breeze fluttering through my childhood bedroom window.

With the uneasiness of the current global climate and orders to remain at home indoors, it is easy to feel in some ways that Spring is being robbed from us. That is why this year as Spring begins to settle in and the world outside changes as I watch from my couch, I find myself reminiscing about Springs past. Memories of long sunny days filled with laughter help to remind me why it is important we social distance at this time, so that hopefully one day soon we can all reconnect in the Spring daylight. Until then, I’m enjoying the joys of Spring through my memories.

Growing up with the extremes of all four seasons, allowed me to appreciate their differences. One thing that stands out the most for me between the seasons, besides their obvious climate differences, are the sounds I associate with each one.

As an assistant sound editor at Boom Box Post, one of my duties is to handle backgrounds on the shows I assist. The other day as I was cutting BG’s for a fall-themed episode, I noted that some of the established background sound effects, such as birds and winds, had been switched out with effects of a more seasonal specific aesthetic. Yes, backgrounds are particularly notorious for being inaudible in the mix, but as they say, the devil is in the detail.

This got me thinking, what are some sounds associated with springtime?

I decided to reach out to our editors and compile a list. I thought it could make for a helpful blog post, especially since I always come across one tip in particular for aspiring editors and audio students: to start building up a personal SFX library.

So here are 10 Spring-inspired sounds, that if you have access to, you should go out and record this refreshing time of year!

Sounds like spring

Jump Rope-Pavement Chalk-Pogo Stick-Spring Birds-Bicycles-Spring Storm-Puddle Jumps-Spring Breeze-Playground Ambience-Wind Chimes

Don’t have access to the sounds listed above? That’s ok! It just means it is time to get creative. A lot of these sounds can be easily duped. Here are some tips and tricks I came up with! Some might be more successful than others, but that’s the fun of trial and error.

sidewalk-chalk-3367719_1920.jpg

Tips and Tricks:

Jump Rope: Don’t have a “real” jump rope? No problem! You can use any old rope you have lying around. If you have a long rope, try tying one end to a pole or tree for bigger more rhythmic circles.

Pogo Stick: Wait, so you’re telling me you don’t have a pogo stick lying around the house? That’s ok! What if you plucked the inside spring of a stapler? Or one of those springy door stoppers? After layering up a couple of sounds you can create yourself a custom pogo stick!

Spring Birds: With streets being quieter than ever, now is the perfect time to get outside and record the birds! Even just opening a window in my apartment to let fresh air in fills the room with their singing.

Puddles: If you aren’t blessed with any rain you might miss out on the fun of actually jumping into a puddle this spring. However, you can still recreate this sound at home. This one is pretty simple, just fill up your sink or bathtub and start splashing around. Maybe try out some different-sized bowls and cups.

Playground Ambience: Ok, so now might not be the best time to record children walla—with the world social distancing and all—but that doesn’t mean you can’t take yourself on a nice little walk to the local park. Why not reconnect with your childhood self and take flight on the swing set? You’re never too old!

Wind Chimes: Have you ever dropped or hit an aluminum water bottle by accident? I think layering up that ringing—which almost has a Tibetan bowl quality to it—could make a really cool wind chime. Sometimes I gently tap mine against the table on purpose because I find the sound soothing. I recommend playing around with different amounts of water in the bottle to change the timbre of the ring.


Guerrilla Recording: Be Your Own Foley Team at Home

The art of foley is an amazing magic trick that can really bring a production to life. If your project has the budget for custom foley, I would highly recommend taking advantage of skilled professionals to help bring this element of your soundtrack to life. That said, not everyone has the money and access to a professional foley team. Never fear! You can be your own foley team with incredible results. All from the comfort of your home, at little to no cost.

Why custom recordings?

There was a time of course, where everything for a soundtrack was recorded. Nowadays, sound libraries are an amazing tool at our disposal. However vast, libraries can’t necessarily fill the exact needs of every project. Or maybe you find the perfect sound but are only given one or two options to work with. Shameless plug… this is a situation we remedy by including lots of options in our own original sound libraries at boomboxlibrary.com.

Additionally, keep in mind that anything you record is entirely unique to you and your project. That’s great sound design! Of course use libraries for the nuts and bolts of any project, but pick out a few special elements to record on your own, giving yourself a completely original palette to design from.

What are some examples of props easily recorded at home?

We are humans, surrounded by junk we have collected. Put it to good use! Look around your home with your sound editor brain and start to think of things in a new way. Get creative. I find that small props (like writing with a pencil, bubble wrap, cardboard handling) are all best served with custom recordings. This allows you to control the performance, tailoring to your exact needs. After all, handling a cloth pass entirely with a library is a tedious task that could be accomplished in a fraction of the time with a live recording.

Of course, don’t limit yourself to props. Remember that small recordings can become BIG builds. With pitching and processing, the right source materials can really let your creative brain fly.

As a jumping off point, here are some great examples of what you can record at home:
– Source vocals for monsters, robots, aliens
– Stressed materials like creaking wood, rubber stretching
– Foliage movement like leaves shaking and brush movement
– Body interactions like head or beard scratching
– Specific toy props

When I worked on a series that needed mutant mushroom movement, I scoured the house for “squeaky” sounding items. Ultimately, I found that if I rubbed together layers of my wetsuit (acquired for surfing… this is Southern California after all), I got this super strange and unique sound! I was able to “perform” the wet suit to produce all kinds of different pitches.

The Low-Cost Lowdown

Here’s the thing. You can get amazing recordings these days on a smartphone. Trust me, I’ve already blogged about it. And since writing that post over three years ago (we’ve been at this a while), the tech has only gotten better. But ok, if you really want to go Pro-Am with your home recordings, you can purchase a portable recorder. That’s a tool you’ll not only have for home recording but one you can keep in your day bag to have on hand any time the sound design muse comes calling. A worthy investment.

We could do an entire post on portable recorders (and probably will). For now, however, I polled our team (all very experienced guerrilla recordists) and they suggested the following listed in price from highest to lowest:

The Setup

You’ve got your phone or your recorder, now it’s time to set up your recording space. Of course, the quieter the better so try and avoid recording near shared walls, doors or windows. To keep your recordings free from room reflections (the sound bouncing off the walls) you want to record in as “dead” a space as possible. In fancy studios, this is achieved with dampening measures; padded walls, high-end sound diffusers and traps. So what space does the average home have that is isolated and pre-treated to be dead sounding? The answer is in your closet. All of the hanging clothes in a typical closet provide tons of free sound absorption, and the doors provide isolation. If your closet doesn’t have a light, or the light is noisy, get yourself a headlamp. Trust me on this, I’ve done it. A lot. And in some very small closets. Realistically all you need room for is yourself (cramped if necessary, as we suffer for our art), your recorder, your props, and if necessary a playback screen. Which brings me to my next point…

Picture Playback and Recording

If you want to record in sync with picture playback, I’ve got a hack for that as well. Save your video file somewhere you can access it on your phone or tablet; I like google drive. Voila, instant playback device. Mute the sound, and start playing back with ample lead time. Start the recorder and then verbally count down by the second along with the timecode prior to your performance. This will give future you a reference point for syncing up your recordings in Pro Tools later on. A few seconds worth should be enough to lock it in. Before you wrap up, always remember to record a few seconds of room tone so you have it for potential de-noising later on.

Final Tips

Guerrilla home records aren’t perfect, but they can come pretty close. With the ability to custom record as close by as your nearest closet, you have the ability to unleash your creativity at virtually no cost.


WRITTEN BY JEFF SHIFFMAN, CO-OWNER OF BOOM BOX POST


Christa Giammattei – Bridging Audio and Apparel with CMD+S


“Each celestial body, in fact each and every atom, produces a particular sound on account of its movement, its rhythm or vibration. All these sounds and vibrations form a universal harmony in which each element while having its own function and character, contributes to the whole.”

— PYTHAGORAS


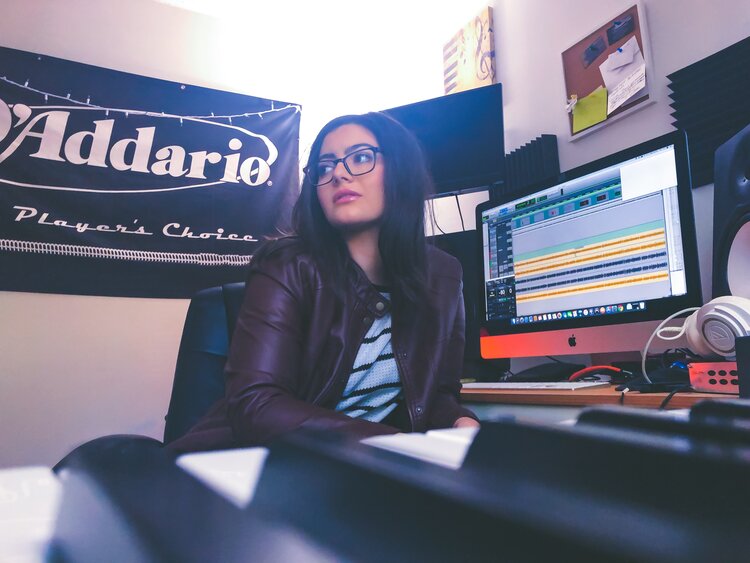
Christa Giammattei is an audio engineer, sound designer, and musician. She provides both mixing and editing post-production sound services including dialog editing, cleanup, sound mixing, sound design, music editing, and music composition.

While completing several internships, Christa was able to create and mix sound for many top TV shows, documentaries, and advertisements. Now, she freelances those services across the nation while based out of the triangle area of North Carolina. She draws inspiration from her favorite video games and TV shows, which are what originally pushed her to seek out music and sound as a career. Her mission is to create the same sense of wonder and imagination in others that she felt when she first experienced those stories through sound.

She recently created Command + S Apparel was created with one goal in mind: design interesting, wearable clothing for audio engineers and musicians that isn’t just a black tee and “SOUND GUY” written in block print white letters.

How did you first become interested in audio?

Growing up, I was always fascinated by the sound in movies and video games. I would watch scenes over and over, just listening and appreciating how sound impacted the story. One Christmas, my mom bought me a beginner Yamaha keyboard, and I started to play along with songs I loved and wanted to learn more about. That was sort of the foundation of my interest in audio and music.

What music were you first attracted to as a kid? 

This sounds kind of crazy, but I was brought up in a house that very much appreciated some 80’s rock and roll. So, for many years I went through a Journey/Def Leppard phase. Also, of course, lots and lots of video game music. I played tons of Final Fantasy and other rpgs [role playing games], which have a definite classical sound to them. It was a balance in polar opposites.

When did you first think about audio as a career? 

I was an avid musician throughout middle and high school (classical percussion and marching band for the win!), but audio engineering never truly clicked in my brain as something I wanted to do until a couple of years into college. I was planning to get a degree in business, but when I stepped away from music after high school, I realized something was missing. I started to Google ‘jobs in music that weren’t teaching or performance.’ Eventually, I stumbled onto music production. I literally had no idea audio engineering was even an option: no one had told me this was a career path that I could take. Once I read about it, there was like this weird inner light bulb that went off; I knew I had found the thing I needed to do. From that moment on, my path was audio engineering, and nothing else.

You work a lot in TV and games; how does sound work specifically in these genres? 

I always tell people how awesome it is to work in audio post, because you’re helping to tell a story, and that’s really true! When doing sound for TV or a game, it’s all about furthering that overall narrative. In music, there are a lot of different genres: rap, rock and roll, classical, etc. Similarly, in TV and games, there’s a bunch of distinct styles and ways to do things. The sound can make it mysterious, or playful, or upbeat, or gloomy. There are a million possible options, with plenty of room for creativity.

You attended Appalachian State University. How do you feel this program prepared you for your field? 

I was incredibly lucky. Not everyone can say that their college experience was worth the money, time, and effort. But mine absolutely was. I had a great professor who pushed everybody to work hard and learn from their mistakes (Shout Out to Scott Wynne at App State!). We had access to multiple recording studios 24/7 and could head in anytime it wasn’t booked to work on our own sessions, class projects, or just fiddle with the equipment. I spent hours sitting at the various desks and preamps and synthesizers just figuring them out. We were also required to pass an audition on the musical instrument we were most proficient on. Having that musical background supporting audio education was enormously advantageous.

The community of musicians and audio engineers I met there was invaluable as well. App State is like the hidden audio gem; alumni have gone on to work on shows like Outlander or at gaming companies like Epic Games. So, there’s a great network of us that can ask for advice or help when we need it.

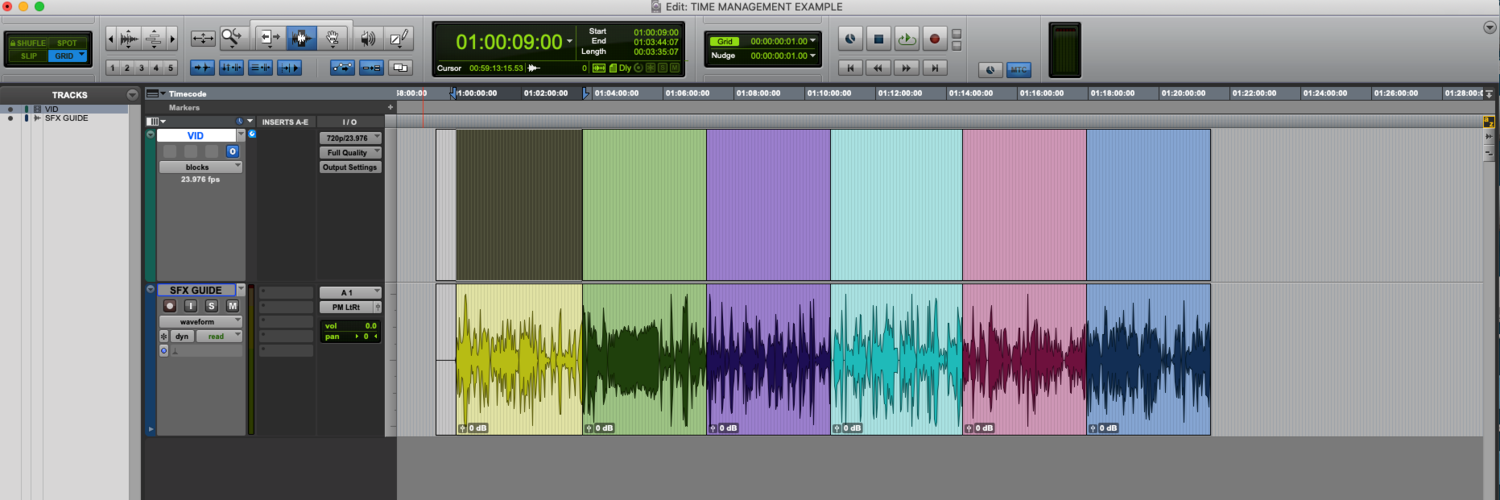
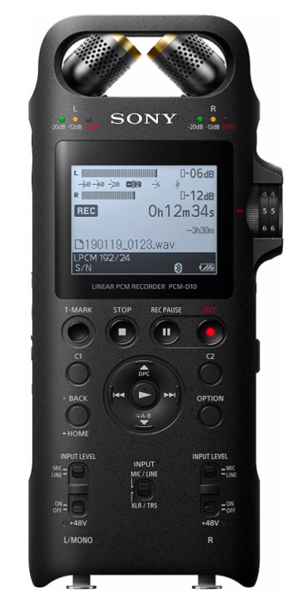
What gear do you currently use? Any favorite pieces?

Most of my gear is “in the box,” since I work in post. Izotope RX7 advanced is my saving grace and the best $800 I have ever spent. I use it on every single session I work on, without fail. Dialog Isolate, De-Rustle, and De-Reverb have saved many a zoom recording this year for me, and I honestly don’t think my workflow would be complete without it. Recently I have been loving Oeksound’s Soothe 2, and also the API-2500. I have this really specific Yamaha piano that I adore called the P-115 as well.

Have you ever experienced any sexism as a woman in the industry? 

Oh, absolutely. I could probably write an entire saga of instances where I’ve experienced sexism in the industry. “Where’s the sound guy?” is my personal favorite (haha). Over time, I’ve learned who to work with and who to avoid, so it’s definitely gotten better. I think women have to create a harder shell for comments to bounce off of in the audio field, and a stronger technical foundation to stand on. The worst experiences involving sexism for me were the more subtle ones- situations where I noticed I was being treated very differently in the workplace by people I thought I respected. It took a long time for me to understand that certain behaviors were not acceptable and to stick up for myself. But I’ve made it part of my personal goal to make it known that women are here in this field, we are growing, and we’re damn good at audio.

Your apparel CMD + S seeks to redefine apparel in the audio field that usually depicts stereotypical gendered images on it. As you say on your website: the aim of CMD +S is “[…] to design interesting, wearable clothing for audio engineers and musicians that isn’t just a black tee and ‘SOUND GUY’ written in block print white letters.” What inspired you to manifest your feelings about such apparel into your own clothing line? How has the journey been?

I wanted to buy myself an audio shirt one day and searched sound engineering t-shirts online. I browsed for hours, trying to find any clothing that an audio engineer would want to wear. There was this growing sense of disbelief as I saw there were maybe 20 versions of very similar tees, and most of them had some iteration of sound guy or sound dude or something like that. I was like “Is there not one single shirt that a woman could wear?!” And not only that, even the sound guy shirts were so generic and non-inclusive. It was embarrassing. And just another small example of how womxn are so often excluded in this industry. I realized there was a market here that was missing- there are millions of people out there who love sound and music, either for their career or just a hobby or casual interest. The more I thought about apparel for audio engineers, I realized I had ideas for designs that could be worn by anyone in the industry, regardless of gender, and inclusive for everyone.

It’s been a learning experience for sure, so far. Having to figure out websites, shipping, pricing, wholesale, social media, and everything else has been a challenge. But every person who buys a shirt is one more person that I know feels like I do. Even though I just started Command +S Apparel this year, it already means so much to me. It’s helped me network with people I never would have otherwise, and I can’t wait to keep going.

I love the myth and was elated to see her hair have cables. Her story is often misunderstood, I think, in that she was punished for a sexual assault and turned into a monster whose eyes could turn man to stone, with snakes as hair. Perseus beheaded her, popular with the Perseus movies lately. To reclaim this image in a field that is dominated by men was just incredible to see; I bought a shirt right away. How did you pick Medusa for the icon on one of your CMD + S shirts? 

THANK YOU. Yes, I totally agree. Parallel to what you said, I was reading an article about how the story of Medusa is misunderstood; that she wasn’t a monster and was instead punished for being a powerful woman. The story stuck in my brain, and as the idea for Command +S started to form, the snakes in her hair turned to cables in my mind. I decided we needed some more powerful women on shirts, and knew that I needed to include her, but in all her audio glory.

What’s the difference between working in sound for music and working in sound for TV?

In music, the audio production is (obviously) the core focus, but in post, sound is more of a supporting act. That’s really the key difference. I’ve heard a lot of people in post-production say that if the audience doesn’t notice the sound then you did a good job. What they mean is that if the audience leaves that experience remembering the story and the characters and the emotion behind it, and not like “Oh, that one song,” or “Yeah that explosion was something,” then you did what you set out to do. You supported the narrative, whatever that was, and that’s what it’s all about.

Do you approach sound for TV and film documentaries differently? 

I think I approach sound for documentaries as a whole pretty differently than say, a commercial or something based on fiction. Docs tend to be more reflective and linear, mostly because you are telling a very real story of someone’s life. It’s important to them, and so I try to honor the vision that is presented to me and uplift it the best I can. I don’t use quite as many unconventional effects, and I focus more on the dialog to make it as upfront as possible.

If you could talk to yourself from ten years ago, what one piece of advice would you tell yourself?  

Don’t be afraid to experiment and jump outside of your comfort zone. That’s how you’re going to find your own unique sound, and that’s what’s going to make you stand out. Stay true to yourself, remain humble and willing to learn. Arrogance doesn’t get you super far in audio, and people will eventually recognize the individuals who work hard, support their friends, and love the industry.

Thank you for your time!

Thank you so much for having me!

Follow Christa/CMD+S Apparel

Instagram @cgiammatteisound @command_s_apparel

Facebook @commandsapparel

Twitter @izzy_marizee

Lunch and Learn: Phasing

The latest gear and hottest plugins are regularly trendy topics of discussion in the sound community. But for this week’s blog post, I’m going old-school and throwing it all the way back to good ol’ PHASING! (Hold for applause)

Now, I bet you are thinking to yourself, “What is phasing exactly?” or perhaps “How does it apply in the real world?”, and most importantly “Do I even need to know this?!” Well, you’re about to find out…

WHAT IS PHASING?

Phasing is timing differences when combining identical audio signals and is usually the result of delay between multiple signals. Phasing can have a noticeable effect on the sound quality of your audio, and it comes up in all kinds of productions like recording, sampling, and live shows. Phasing has the potential to leave your tracks sounding thin and “not quite right”. However, you can also use phasing to your advantage, and you can utilize it in a handful of interesting ways!

WHEN IS PHASING BAD?

The most common scenario where phasing can be a nuisance is when it comes to phase cancellation. In the real world, we hardly ever hear pure sine waves, but to make understanding phase cancellation easy, I am going to use sine waves as an example.

The basic description of phase cancellation is when you have the waves of two or more signals out of phase with each other. When the wave on one signal is at its peak, the other is simultaneously in a trough. Because the peaks and troughs are out of sync, they work against each other rather than supporting each other. The frequencies are cancelled out and, acoustically, it causes a weak sound.

In Phase

In Phase

Out of Phase

Out of Phase

The place you’ll most likely to run into the nuisance of phasing is in a recording environment, especially one with multiple microphones. For the sake of example, I’m going to focus our attention on recording a drum kit. Consider even a single snare drum, miced from both above and below. Since the top and bottom heads of the drum are usually moving in opposing motions, the two mics can record signals that are directly out of phase. Now factor in a mic on the bass drum, hi-hat, and multiple overheads, and you have a set up ripe for phase issues.

When recording with multiple mics, a quick and easy solution is the 3:1 Rule of Mic Placement. When using two microphones to record a source, try placing the second mic three times the distance from the first mic, as the first mic is from the source. So if the first mic is one foot from a source, the second mic should be placed three feet from the second mic. Using this simple 3:1 rule can minimize phase problems created by the time delay between mics.

Sometimes, the problem doesn’t show itself until you’re mixing. In that case, you can usually pull the tracks up in your DAW, zoom in close on their waveforms, and slightly nudge one track just a bit. You’d be amazed what a difference just moving a track by one or two milliseconds can make. Check out this detailed video tutorial to learn how to align waveforms in Protools:


There are also some very effective phase alignment plug-ins on the market that can clean things up. You can check out ones that I find helpful below:

Waves InPhase captures audio enabling users to time-align clips quickly with a phase correlation meter making it easier to use. InPhase does exactly what it says it does, but some skill is required to get the most out of it as the controls are comprehensive.

Eventide Precision Time Align can be used with mono and stereo formats and includes phase invert and control over volume. There is also a neat distance control, meaning users can enter actual measurements in feet or meters.

You can also try inverting phase using Protools built-in invert. This plugin’s only purpose is to invert audio waveforms. You can find it built into your Protools Audio Suite.

You can see in the examples below a before and after of the waveforms. The first picture the waveforms are in phase. In the second image, the bottom track’s waveforms have been inverted:

Screen Shot 2020-11-03 at 11.39.10 AM.png
Screen Shot 2020-11-03 at 11.39.38 AM.png

WHEN CAN PHASING BE USED TO YOUR ADVANTAGE?

Aside from fixing phase issues, you can occasionally use phasing to your advantage! There are a handful of fun audio tricks out there to try, but here are two that, although simple, I think are pretty neat!

The “Out Of Speaker” Trick
This trick is incredibly simple — All you need to do is invert the phase of either the left or right channel of a stereo file! On speakers, the sound will appear to come from somewhere outside the speakers and envelop the listener. However, there are a couple of downsides to this trick. First, it only works on speakers and is most pronounced only when the listener is centered in the speaker’s “sweet spot”. You will not have the same effect if wearing headphones. The second downside is that if your stereo track is summed to mono, it will completely disappear due to the left and right channel cancelling each other out……which is the perfect segway to my next phasing trick!

Phase Cancellation Tricks
The first example is if you have a film or television mix and you want to create an M&E only track. If you have the isolated dialogue track, you can invert it and play it against your full mix. The inverted dialogue track will cancel out the dialogue in the full mix, and you will be left with a mix that includes only your music and effects. The second example is similar but with a music mix. If you ever want to make an instrumental track from a full mix, you can take the isolated vocals and invert. When played against the full mix, you’ll be left with an instrumental track!


WRITTEN BY BRAD MEYER

SUPERVISING SOUND EDITOR, BOOM BOX POST

If you liked this blog you should also check out:
LUNCH AND LEARN: HOVER VEHICLE DESIGN
CREATING ALIEN VOCALS
FAULT BY UNFILTERED AUDIO: USING A SPECTRAL SHIFTER FOR SOUND DESIGN


X