Empowering the Next Generation of Women in Audio

Join Us

Four Portfolio Reel Tips

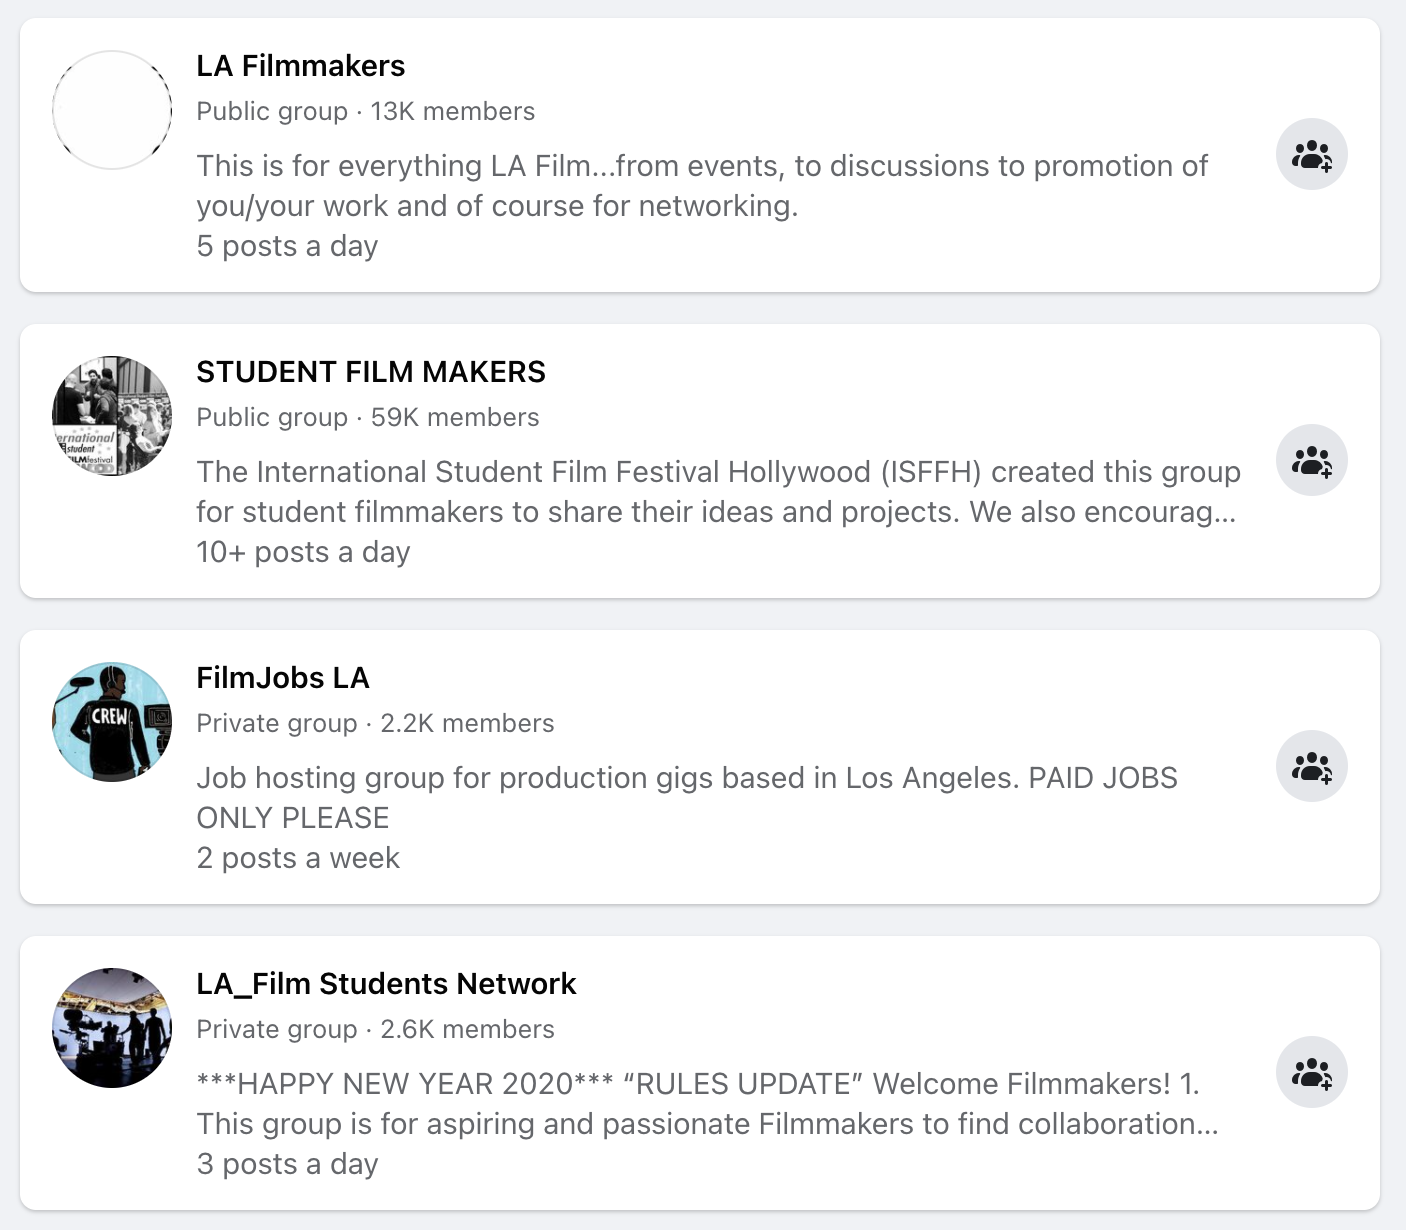
Some Facebook groups I found in the LA area.

I’d like to note that a reel typically consists of a compilation of clips of live-action or animated TV shows, films, or even video games where the sound is replaced with your own edit. The materials you choose can come from released media where you can use the existing sound as a guide for your edit. However, it’s also a great opportunity to collaborate with up-and-coming filmmakers in your creative community to put together the sound design from scratch. This was particularly common while I was in Boston where college students majoring in film and audio post-production could easily work together to fulfill a project. While it’s certainly not necessary for a great reel, I recommend using Facebook groups to connect with filmmakers, creatives, and more sound editors in your area.

KEEP IT SHORT

If you’ve been searching the internet for tips for your portfolio reel, this is probably the most common tip you’ve seen. While a “short” reel may be defined differently to various editors, it’s important to consider the attention span of the person viewing your reel and the variety in your reel. A good rule of thumb is to keep your reel between 2-4 minutes long. However, how you break down that 2-4 minutes can make a big difference, which leads me to my next point…

TAILOR TO YOUR DESIRED POSITION

Just like with any other resume, your portfolio reel should also be tweaked and adjusted based on the position you’re applying for. It’s important to get all the right information for the places where you want to work or for whose work interests you. For example, Boom Box Post specializes in post-production audio for animation, while Pinewood Studios focuses on live-action. A larger studio like Skywalker Sound spans across media, but many of their releases involve heavy live-action fighting sequences. Now, think about how to break down your reel based on the kinds of post-production studios you want to join. A portfolio reel for an animation-focused studio might include 3 1-minute clips involving different types of animation, while a portfolio reel for a large-scale live-action production studio could have 2 2-minute clips with long and dynamic fight sequences.

HAVE AN ORGANIZED DELIVERY METHOD

Your portfolio reel will most likely come in the form of a compiled video with a sharable link. Sometimes (however not as common) employers may ask to see the full ProTools session instead of or along with a link to a reel. If this is the case, they are evaluating your organization skills, so it’s essential to have all tracks labeled, clips organized, and a smooth signal flow in your session that makes it easy for them to see what’s happening and listen without any problems. We have a great blog on keeping your ProTools sessions organized, which you can read here. You can also check out this blog we have for solid file naming, which will give a great impression if you’re sending more than just a link to employers.

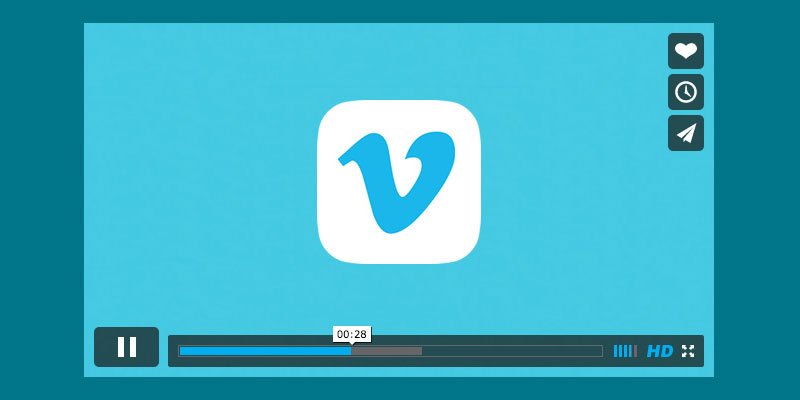
Example of Vimeo platform.
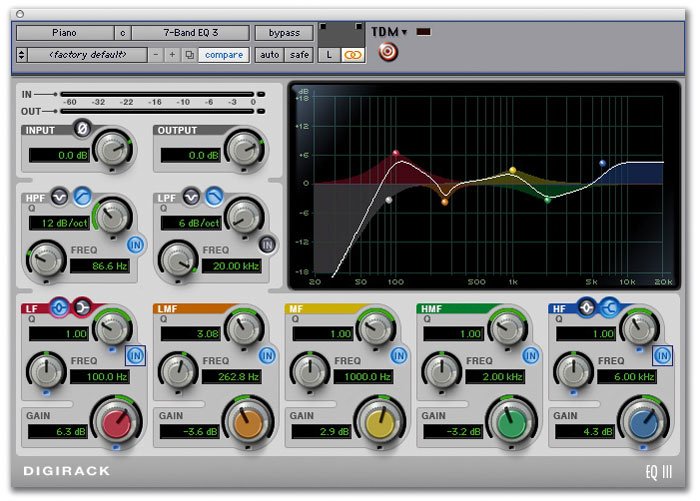
ProTools EQ-III.

If you’re sending a sharable link, there are a lot of great viewing options that are easy to use and easy for others to watch, including Vimeo, Youtube, and Squarespace. Once you’ve compiled your work together in a ProTools session and bounced a Quicktime video of your work, you can upload that video to any of these platforms and include text information to describe the work you did on each clip, breaking down dialogue, Foley, and sound effects.

CONSIDER EVERY ASPECT OF THE PROJECT

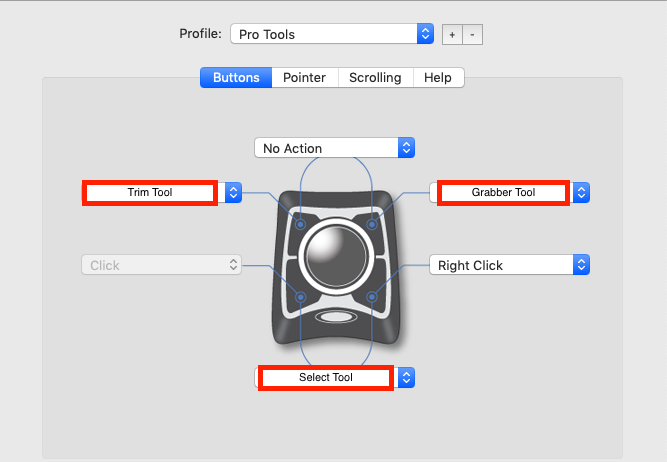
While you may be applying specifically to a sound editing position, you still have a chance to show off your understanding for the big picture. This can include recording your own sound effects, Foley, and dialogue, and putting together a basic mix for your reel. Adjusting levels and panning, and using stock ProTools plug-ins like EQ-III to balance out any unwanted frequencies is a great way to show your understanding of how your effects relate to each other.

Sometimes it is easier to record some of your own sounds instead of finding effects from libraries. While Soundly and Splice both offer a limited amount of free sound effects, other general library platforms like Pro Sound Effects can be very expensive. Recording your own Foley or vocal effects can offer more flexibility, and you can also put together your own sound effects libraries to show to employers, simply by collecting those sounds and creating playlists in SoundCloud.

Ultimately, your portfolio reel should have a concise demonstration of your skills as an editor, it should highlight the style or genre of the studios of your interest, and it should be easy to access and navigate through. Portfolio reels can come with a lot of opportunities to show off organization skills and resourcefulness, so be on the lookout for more ways to impress potential employers when you start building your reel.


Collaborating With Another Editor

Here are a few things to take into account when you work with another editor on the same project:

Communication Is Key

I know this sounds obvious, but for a successful partnership, there has to be communication. And with sound, it’s essential as well. Usually, you’ll split sections to be covered by each editor, and often, there are elements or builds that are going to overlap or repeat in both sections. Before starting to edit, it’s always good to establish who is covering what and what strength each person has to offer for the project. Without communicating, you can end up doing double the work, or going in totally different directions with the sound palette for the show.

Sharing Your Builds

When you share your sound builds with another editor, it is important to take into account the flexibility of your build. Sometimes the exact same build is not going to work every single time it gets repeated throughout an episode, or throughout the show in general. Therefore, it’s important to have the sections of the build separated when you’re sharing it with another editor, printed down to one track. That way, the other editor will have the flexibility to manipulate the build to adjust for differences in timing or creative changes when repeated.

Here is an example of a shared SFX build.

Here is an example of a shared SFX build

Be Clear In Your Labeling

When sharing your builds and established sound effects, you need to make sure you are being as clear as possible. Proper labeling is key. Those you are collaborating with should be able to reference your sound design builds and effects easily, without having to waste time figuring out which sound matches each element in the picture. Often times we will export a session for a specific build, tracked out, and labeled for easy reference. This makes it easy for me to import the session data whenever the recurring material shows up in my work and is easily shared with other editors for the same purpose. In these sessions, I like to use either markers or empty clip groups above the build, labeling them to indicate their use. It also helps to build these sessions with both the full sound build together, followed by another iteration where the different parts are separated out, so whoever goes into editing the show can easily recognize how the build works and plays.

An example of this would be a laser gun power sequence. This could be a sequence where we hear the gun power-up, shooting, and then impacting the target. I’ll include the original build and timing, followed by individual chunks of design for each action (the power-up, the shots, the impacts) spaced out and labeled for clarity on their use.

Sharing Ambiences And Backgrounds

Established sounds for locations need to stay consistent. It’s very important to keep them the same throughout the episode unless a change is called for by the story. You should talk beforehand with your fellow editor to determine who will cover specific ambiences that may repeat between your work. As you work, if you feel you need to change something or think it’s necessary to add or subtract an element from the ambience, always communicate with all editors on the project.

These are some important examples to take into account when working with another editor to ensure a smooth collaboration and create the best possible soundscape for the project.


Sound Editing with Music in Mind

Before audio post-production was even a possibility, composers would incorporate the emotion and the action of what they saw on the screen into their musical scores. They played the role of sound effects editor and composer, with a technique referred to as “Mickey-Mousing” where the composer would exaggerate a character’s movements with specific orchestration and musical motifs. Now that sound FX editors have taken this role in post-production, Mickey-Mousing is less common, so it’s key for sound effects editors to make cuts that work with the music in the overall mix for a film or tv show. Here are some considerations and tips that our team shared on their approach to sound editing with music in mind.

Consider the musicality of chosen sound elements for a build

“When designing sound effects of a musical nature, it’s very important to steer clear of anything with a defined pitch. It’s especially important to avoid any chords, whether arpeggiated (like an upward harp gliss) or played together (like a synth chord used as a steady for a magic beam). There is very little chance that you will happen to choose the same key and chord as the score, so most likely, these elements will need to be muted as soon as the music is added to the mix.
To avoid this, I always choose to use inharmonic instruments, such as chimes, cymbal, water-phone, etc., when I want to add a musical element. Their non-integer-multiple harmonics keep them from sounding like any particular pitch, which in turn keeps them from interfering with the tonality of the music. If you absolutely need to use a musical element, always be sure that you have a non-tonal backup element in place. That way, if your star element is muted in the mix, there will be something left to cover the action.”
– Kate Finan, MPSE


Here is a depiction of how harmonics work in periodic waveforms heard in music and tonal sound FX.

Here is a depiction of how harmonics work in periodic waveforms heard in music and tonal sound FX.

Think about the role that the score will play in the final mix

“Oftentimes, if the guide track provided to us for our sound effects edit includes music, it’s an indication that it’s an important musical moment in the show. This could be a montage or a song sequence. Knowing that music will take center stage helps us think about the sequence in terms of how sound effects will support the music. This may mean cutting less and focusing on what will cut through in the final mix. Or for a song, we may want to cheat some of our effects so they land on the beat and work seamlessly with the music.”
– Jeff Shiffman, MPSE

Be confident in bold builds when a scene shares heavy sound EFFECTS with the music

“It’s important to cut sound effects that are substantial enough that they’ll cut through in the mix once music is added. A lot of the time, music drives the emotion of the scene and therefore is fairly present in the mix, so if you cut a sound effect that is extremely subtle, it will very likely get lost. Make your choices clear and significant enough to not get buried.”
– Tess Fournier, MPSE

Focus on texture to support tonality

“Try to avoid using sound effects that have a musicality to them. You never know if something with a melody or tune will clash with what is going on in the score. This comes up a lot with things like magic effects, so I always try to go textural and nondescript, rather than musical or tonal.”
– Brad Meyer, MPSE

Notice how you’re using the full frequency spectrum

“During songs or music-driving scenes, make sound effect builds that are a bit more punchy and larger than normal scenes so it can cut through the score better if needed. That way your work won’t be lost in the mix!”
– Ian Howard, Re-Recording Mixer


This diagram illustrates the frequency spectrum as it relates to common musical instruments and the qualities that audio editors and mixers use to describe certain frequency ranges.

This diagram illustrates the frequency spectrum as it relates to common musical instruments and the qualities that audio editors and mixers use to describe certain frequency ranges.

Always benefit the progression of the story

“When mixing, remember that it is your job to help create harmony between the sound effects and music coverage.  In some cases, both parties will cover a moment or action in a similar way, and it’s essential to figure out whether music, sound effects, or a combination of the two will best serve the story.
Along the same lines, during songs or key musical moments, you can really enhance a scene by adjusting the sync of certain sound effects to hit on the beats of the music. This is especially powerful during title sequences and music video moments, where the music is driving the story.”
– Jacob Cook, Re-Recording Mixer

The bottom line is that there are multiple ways for sound effects to work with music in any given scene with considerations like atonality, sync, texture, and frequency spectrum. Keeping this in mind allows for a story to shine through action and emotion.

Two Simple Workflow Shortcuts To Help Save Time!

The best part about working with so many incredibly talented and smart individuals are the unique skills and knowledge each member brings to the team.

When I started working for Boom Box Post, I quickly realized how much there was that I didn’t know! Now over a year later, I am still learning something new every single day.

In hopes that we can all continue to learn and grow together, I would like to share with you a few super simple workflow “hacks” that had me questioning, “How did I not know this before!?”

Launching Applications With Keyboard Shortcuts

The first, and most recent tip, was brought to my attention by our wonderful sound editor Jessey Drake.

I’m sure we can all recall our first time learning/using Pro Tools shortcuts. For me, the most mind-blowing shortcut was Option+Control+Shift+3, which renders a 1kHz tone in any selected field/length. This shortcut has saved me a bunch of time, which is the whole point of shortcuts!

Many of the Pro Tools shortcuts are so ingrained in my brain that I find myself trying to use them outside of the application. Cue Jessey’s discovery!

Linked below is the step-by-step guide on how to set up keyboard shortcuts to launch any application in MacOS:

How to launch an app using keyboard shortcuts in macOS

This trick not only helps you save time launching assigned applications, but it also allows you to bring the assigned application forward when your screen is littered with multiple windows.

Although it serves such a minuscule task, I find that the simplest tips are usually the most useful!

Toggling Pro Tools Edit Tools With A Trackball

Our second workflow “hack” comes from a personal realization I had not too long ago when I noticed my editing speed was not up to par with the rest of our editors.

Other than level of experience, I was having a hard time identifying what I was doing that was slowing me down so much.

It wasn’t until our fantastic supervising sound editor Tess asked me, “Are you using the smart tool?”

“Of course I am,” I replied.

To my surprise, that was my first mistake. Which confused me, because wasn’t the whole point of the smart tool that it was smart? Apparently not!

Since the smart tool requires precise cursor placement to activate the correct editing tool, a lot of time can be wasted floating your cursor around the screen. To combat this issue, Tess showed me how to program my Kensington trackball so that I could quickly switch between the different editing tools whenever desired.

Screen Shot 2021-08-16 at 2.55.29 PM.png

The Kensington website has a video tutorial showing how to customize your mouse. Check it out below:

How To: Customize Your Kensington Mouse

It only took me an hour with the new mouse settings to get the hang of it. Now I don’t know how I ever relied on the smart tool!

If you don’t already own a Kensington Trackball (our favorite model here at Boom Box Post), this is your sign to purchase one!

L&L: Less is More: A Lesson in Avoiding Over-Cutting

Over-cutting in your SFX editorial is a really easy mistake to make, and one that can be a real headache for your mixer. Today we’ll go over a quick tip to help you avoid adding too much to your FX builds.

When searching your library for interesting layers to add to a build, it’s very tempting to add every sound you hear that you think is appropriate and cool. But this can lead to bloated builds that make mixing pretty tricky. This is especially true if this build continues in a scene for a while, or dare I mention needs to be cut to perspective.

If you find yourself doing this, try out this tip to help thin out your sound without taking away from the quality. Once you’ve cut in all of the elements you want for your build, mute each layer. Then, one by one, unmute a layer and listen through. If any of the sounds don’t add something significant to your build, get rid of it! If it’s not cutting through in your editorial session, it certainly won’t cut through the mix once dialogue and music are added.


Here’s an example of over-cutting leading to cluttered layers that are counterintuitive to mix.

Here’s an example of over-cutting leading to cluttered layers that are counterintuitive to mix.

Additionally, it helps to keep frequency and texture in mind when creating your builds. Try and choose layers that are distinct from one another and serve a purpose within those categories. For instance, if you’re building an explosion, you’ll want to fill out the frequency spectrum with an LFE element, a mid-range boom, and maybe something like a firework whistle to round out the high-end. Then for texture, maybe you’ll want some rock debris or a big wooden crack at the beginning. It doesn’t make sense to just add layer upon layer of mid-range booming explosions because you can get a similar sound by just raising the gain on one well-selected mid-range file. Thinking about frequency and texture in your builds will help avoid adding unnecessary layers and also make your editorial a bit more interesting.


Free Audio Resources We Stand By

Boom Box Post turned six at the end of August and over these six years, we have written a handful of blog posts. For both our new and OG readers, we thought it would be helpful to round up a list of posts that feature free resources. During this turbulent time of COVID-19, we definitely recommend taking advantage of these awesome tools!

Best Free Apps To Use For Audio

In this blog post, Office Manager / Assistant Sound Editor Sam Busekrus lists a number of free audio apps recommended by our Boom Box Post editors. Give it a read!

Found Audio On The Fly

In this post, Boom Box Post-co-owner Jeff Shiffman provides some tips on how to use your phone when recording audio on the fly!

“As sound people, sometimes we hear something so unique we just have to capture it. A lot of sound designers (myself included) carry around mini recorders for just such an occasion. But we can’t always be prepared. There are moments when you need to capture a sound in an instant. Like if a bird with a crazy call lands on an open window. We don’t always have professional recording gear at hand. Most of us however do have a cell phone nearby.”

Valhalla Freq Echo

Valhalla Freq Echo is a free plugin for both Mac and Windows made by Valhalla DSP. This plugin allows you to add delay emulation as well as target specific frequencies to modulate. Check out this awesome blog post written by editor Ian Howard to get a rundown of what this plugin can really do!

Chip Tone

In this next blog post, supervising sound editor Tess Fournier walks us through the free web-based sound design tool Chiptone. Check it out!

Soundgym

According to sound effects editor Katie Maynard, it’s easy to fall into the habit of working so often that you forget to practice and develop your skills on your own time. For anyone in the audio field, this might be ear training. In this blog post, Katie explores the online ear training program SoundGym. This is a fun one!

Chrome Extensions For Staying Organized

This next blog post is not audio-related but still super helpful! This post highlights 5 Google Chrome extensions we recommend to help you stay organized. Written by Studio Manager / Assistant Sound Editor Tim Vindigni, we recommend checking this one out for those looking to up their organization skills!

Top 10 Internet Resources For Sound Designers

Finally, in this blog post Boom Box Post-co-owner Kate Finan lists her absolute favorite online resources for sound designers. These resources span the breadth of online content from sound effects library downloads, technical support forums, mixing videos, and even mini-documentaries to keep you current on the latest movie sound design trends. Some of the free resources featured in this post include Designing Sound, Gear Space Pro Audio Forum, Soundworks, and Avid Video Blog Series. This is a good one!


New Editors: How To Find Your SFX Editorial Process?

It can be both an exciting and terrifying feeling being a new editor. On one hand, you are thrilled to start editing on a project! On the other hand, you don’t know where to begin. I interviewed a few editors on our team who know exactly how you’re feeling and can give you some insight into their editorial approach.

I thought it would be easiest for our readers to visually see a reference clip, so I had our editors answer a few questions with this fun short! I think I want a pet camel after watching this…Check it out below:

If you were editing this what would your editorial approach be/what would you tackle first?

Brad– First, I’d do all of the BG’s and ambiences. They’d give me a good base layer to go off of and help set the vibe for the rest of my edit. Once finished, I’d also have a visual aid of any new locations and potential scene changes just by looking at my background tracks.

Second, I’d go through the clip and see if there is anything I might need to record or design. For example, perhaps the camel or any other vocal elements. Maybe the cell phone/remote control beeping.
Third, once I have a good base layer of BGs, and my recording and design files ready to incorporate, I’m going to go ahead and start my edit. I don’t have any particular order of things or passes that I do since I break up my work by time, rather than category.

Tess– Whenever I start a new project I always watch the whole thing down first and then set up my time management. Since I’ll go more into detail about that in your second question, I’ll just skip those steps and get right into editorial. I usually like to work chronologically, but there are some exceptions. I find it difficult to keep animal/creature vocals sounding like they come from the same character unless I cut them all in one pass, so for this clip, I’d probably just start with the Camel vocals. After that, I’d probably design the beeps from the remote. I like to make every sound I cut completely unique to the project I’m working on (if possible) and these beeps are an easy and fun one to design. I like to use a lot of different synths on my iPad when designing beeps or sci-fi elements, so I’d likely start there. Once I design a library of beeps that sound like they could all come from the same remote, I’ll cut them in. Footsteps are another element that I’d cut all in one pass, but we’re pretty lucky here at Boom Box that Carol does an amazing job of cutting all of our foley. Once those sounds are edited in, I’d just cut chronologically. A big part of this clip is all of the stone movement, so I’d probably plan my days so that I’d cut all of that in one day, but I can go more into that in your second question.

Jacob–  If I were responsible for covering all sound effects for this clip, I would start with creating some background layers. This particular short would be very fast because they are in one location the whole time!  I often like to do this at the beginning of my day or edit, because it helps me get a sense of where the cuts are, and it helps the dry sound effects feel a bit more natural when I start adding them later. Next, I would tackle all the Foley elements, starting with footsteps and hand grabs, and rubs.  This would also be pretty quick. Then I would move on to covering all the rest of the sound effects in one pass, dividing up the length of the short by the hours I have to complete it, and setting benchmarks. I use this when editing as a way to make sure I am working at a good pace to be able to complete the editorial and have time to review it, clean things up, and do some pre-mixing afterward. In certain cases, where there is a huge amount of original design, like an episode where there are whacky unusual vehicles or space ships flying around, I might set aside an hour or two at the start to create a library of the effects I need.

Katie– I personally like to work chronologically, so naturally, I would start with the very first thing I see. If there were a recurring, design-heavy element like a spaceship or time machine, I would work on that from start to finish to save time, rather than chronologically. It would be time-consuming to design little parts of something that may evolve later in the episode. But for this short, I would start with the very first action.

Assuming this was longer and given more than a day to do, how would you go about the editorial time management wise?

Brad– I’d figure out the total run time and divide by the number of days I have to get the project done. The resulting number is how much I need to get done per day. I edit linearly so I’d start at the beginning and edit to the according to time code I need to get done for the day. I do, however, edit linearly by scene. Admittedly, since my attention span isn’t long enough to digest one large clip, and to invoke a sense of accomplishment, I will edit from beginning to end a single scene. Once that scene is done, I’ll move on to the next. This also creates neat stopping points at the end of the day. Just make sure to go back and watch the entire thing to make sure the scenes flow together well.

Tess– I always start my projects by breaking them down by day. Usually, I just divide the length of the project by the number of days I have to work on it, minus one day, to determine how much content I need to get done per day. For instance, if this clip were a 22-minute episode and I have 7 days to cut it, I would divide 22 by 6 and determine I need to complete a little over 3 and half minutes per day. If I follow that schedule perfectly then I have a full extra day to accomplish notes or rewatch my work to see if there is anything I could sweeten or clean up.

After I determine how much content I need to complete each day, I divide up the project/clip into groups of that size. I like to color-code them as well. I usually just group them chronologically, however, if there is a specific element that happens multiple times throughout the project (like the stone movement in this clip) I’ll try to divide the project so that I cut all of those similar elements on the same day. This picture is an example of what a clip looks like when I get started. Each color would be a single day’s worth of work.


Screen Shot 2020-07-08 at 5.23.03 PM.png

Jacob– For a longer piece, my strategy would be largely the same, except that I might split the foley and backgrounds over both days, doing some at the start of each day.  I stand by the strategy of chunking out the episode into days or hours, as this allows you to get a clear picture of your progress, and prevents panic moments when a deadline looms and you discover you have only cut ⅓ of the episode instead of ¾!  So for a two-day edit, I would divide the episode into 2, maybe with the second day having slightly less time. If you like to be extra precise, you can further divide each day up into chunks of what you need to complete each hour.  I always leave an extra hour or two at the end of my last day for a watch down, so I can make balance adjustments, recheck client notes, and catch any missing elements or mistakes.

Katie– I like to estimate approximately how many minutes I need to cut per day to finish on my given deadline, and make large blank clips above that space and color them differently for each day. As I go, I turn the clips green to indicate that section is done. It’s an easy visual representation of how much is done, and an easy indicator if I am falling behind. If it’s a several-day edit, I like to give myself at least a couple of hours or even a day to comb through the episode and polish it. It’s very easy to miss obvious elements when you’re working frame by frame. I watch it back several times to make sure everything is covered. I also like to watch it back with any notes I was given to make sure they are all addressed.

What would be your advice to new sfx editors figuring out an editorial process that works for them?

Brad– Watch other editors edit. It’s how I learned what works for me and how most people learn to edit via school or internships/etc. There’s more than one way to do practically everything, and if you watch enough people do their thing the way they do it, you can pick and choose what you like from different peoples’ workflows. You create your own repertoire of tricks and methods and expand it over time.

Tess– The best advice I can give someone is to find a time management tactic that works for them. The worst thing you can do in the professional world is not complete your work thoughtfully and on time. If you aren’t sure what will work for you, try my tactic of grouping by day, or ask other professionals how they manage their time and try it their way. There are so many ways to manage your time, so just keep an open mind and find the method that works for you. Also, don’t get intimidated if 3.5 min/day seems like a lot to you at this stage in your editing career. You might have to hustle at first, but the more you edit and know your library, the faster you’ll become. On that same note, don’t be afraid to try new things in order to speed up your editing skills. When I first started at Boom Box, Jeff suggested I map my mouse buttons to the different tools in Pro Tools. At first, I was a little clumsy in getting used to switching my tools with my mouse, but in the long run, it made me so much faster.

Jacob– For newer editors, I would say it is important to figure out how fast you can really work, and allow yourself extra time. I was definitely much slower when I first started, and when I started scheduling my time and realized how much I could realistically get done, it became much easier to complete my work on time. It’s also important to understand what time of day you tend to work best and fastest. I tend to be most creative and efficient in the early morning and evening, slowing down in the middle of the day when communications can distract me and my brain needs breaks. If you can learn how you work best, you can plan to do your design work or complicated cutting when you are fresh and most likely to produce the best most interesting work.

Katie– Give yourself plenty of time when scheduling out what you’re going to need to cut each day. Don’t treat a three-minute action scene the same as a three-minute dialogue scene in the time that you give yourself. Cut just a little bit more than you need every day so at the very end you can comb through and add extra details or spend more time in areas that could use it.

As you can see, there’s no right or wrong way to approach sound effects editorial! You need to find what works best for you and you WILL figure it out as you continue to edit more and more.

If you liked this blog, you should check out these other posts that are helpful for new editors:
HOW TO CRUSH YOUR FIRST GIG AS A SOUND EDITOR
LUNCH AND LEARN: MAC KEYBOARD SHORTCUTS EVERY SOUND EDITOR SHOULD KNOW
BACKGROUNDS, AMBIENCES OR SOUND EFFECTS?
THREE BASIC SKILLS EVERY SOUND EDITOR MUST MASTER
STAY ON TRACK! FIVE TIPS FOR IMPROVING CREATIVE PRODUCTIVITY


A COLLABORATIVE POST WRITTEN BY BOOM BOX POST


Answering Your Questions: Glossary of Sound Effects

In the original post, we get a ton of questions asking what keywords should be used when trying to find very specific sounds. While a quick peruse through parts 1,2, and 3 of this series would help, I decided to relay a few of these questions to our editorial team. I’m very curious what buzzwords they will recommend. Continue reading to see if your question was answered!

Let’s start off easy

What do I write when someone quickly grabs someone’s arm?

Brad: face slap

Tess: pat

Katie: body hug, impact body, skin, smack, slap

What should I search for if I want a sound effect for grabbing a bag of chips?

Brad: cellophane

Tess: crinkle, plastic bag drop/impact

Katie: mylar, crinkle plastic, foil, crumple, junk bag

What sound would you use when someone starts to walk?

Sometimes it is easy to overthink search terms when trying to find the perfect sound effect. A lot of the time there isn’t a fancy word for the sound you’re looking for. For example, a footstep would do just fine for this request.

Brad: For this, you’d need to know the surface, but I’d start with a quick scuff or foot drag if you’re trying to highlight the sound

Tess: scuff, skid, lino squeak, basketball squeak

Katie: scuffle, scrape, dirt slide, a cement slide, gravel

What sfx do I use for quickly grabbing an elevator door to stop it from closing?

Brad: metal hollow, metal ring, metal lock, metal latch

Tess: metal hit/impact

Katie: metal duct, container hit

I need a sound for someone sitting on a bed except for the word “creak”.

Sometimes you need to get creative with the words you use when searching for a specific sound. If you are looking up “bed” and not finding anything, think of works associated with a bed or a similar material.

Brad: couch sit, couch plop, cloth hit, cloth impact, cloth movement

Tess: hinge

Katie: springs, pillow hit, cloth drop, laundry, couch

What sound would a bouncing grenade make?

Tip: Doing a quick search on youtube for a reference clip can really help spark inspiration. Listen to examples of the sound you are trying to replicate and try to deconstruct what you hear. A lot of the time there is no one specific sound and what you’re looking for requires a build of multiple sfx’s. Don’t limit yourself!

Brad: metal drop, gun drop, metal hit

Tess: tink

Katie: shell drop, bullet case, metal debris, shiny, solid

What sound would you use when someone grabs your hand and it startles you?

How do you translate emotion into sound? Sometimes trial and error is the only way to find the perfect sound effect. Let’s see what our editors came up with…

Brad: horn, violin pluck

Tess: In my head, this needs to be a build of sounds, maybe a BONK plus a TWANG, and a COWBELL. Other options are POINK, DOINK, or PLUCK

Katie: gasp, surprise, shock, emote, fear, anxiety, curiosity, inhale short

What sound does sushi make?

Context is everything. This type of sound could go in multiple directions; realistic, toony, surreal.

Brad: goop, goo, slime

Tess: splat

Katie: rice cake, squish, wet, slimy

What would I write for an angelic noise?

Brad: angel chorus

Tess: choir, ethereal

Katie: heaven, drone, symphony, gliss, harp, ascend


Sounds Like Spring

Granted, being located in SoCal really stunts all seasonal variety. But trust me! Once you’ve lived in sunny LA for a year or two, anything below 50 degrees begins to feel like the arctic. I know, it’s a bit dramatic. I myself am embarrassed to agree, especially having grown up on the east coast.

In fact, because I’m from New England—where every season is highlighted—spring holds a lot of memories for me. I can easily recall the smell of Spring and if I close my eyes I can hear a light breeze fluttering through my childhood bedroom window.

With the uneasiness of the current global climate and orders to remain at home indoors, it is easy to feel in some ways that Spring is being robbed from us. That is why this year as Spring begins to settle in and the world outside changes as I watch from my couch, I find myself reminiscing about Springs past. Memories of long sunny days filled with laughter help to remind me why it is important we social distance at this time, so that hopefully one day soon we can all reconnect in the Spring daylight. Until then, I’m enjoying the joys of Spring through my memories.

Growing up with the extremes of all four seasons, allowed me to appreciate their differences. One thing that stands out the most for me between the seasons, besides their obvious climate differences, are the sounds I associate with each one.

As an assistant sound editor at Boom Box Post, one of my duties is to handle backgrounds on the shows I assist. The other day as I was cutting BG’s for a fall-themed episode, I noted that some of the established background sound effects, such as birds and winds, had been switched out with effects of a more seasonal specific aesthetic. Yes, backgrounds are particularly notorious for being inaudible in the mix, but as they say, the devil is in the detail.

This got me thinking, what are some sounds associated with springtime?

I decided to reach out to our editors and compile a list. I thought it could make for a helpful blog post, especially since I always come across one tip in particular for aspiring editors and audio students: to start building up a personal SFX library.

So here are 10 Spring-inspired sounds, that if you have access to, you should go out and record this refreshing time of year!

Sounds like spring

Jump Rope-Pavement Chalk-Pogo Stick-Spring Birds-Bicycles-Spring Storm-Puddle Jumps-Spring Breeze-Playground Ambience-Wind Chimes

Don’t have access to the sounds listed above? That’s ok! It just means it is time to get creative. A lot of these sounds can be easily duped. Here are some tips and tricks I came up with! Some might be more successful than others, but that’s the fun of trial and error.

sidewalk-chalk-3367719_1920.jpg

Tips and Tricks:

Jump Rope: Don’t have a “real” jump rope? No problem! You can use any old rope you have lying around. If you have a long rope, try tying one end to a pole or tree for bigger more rhythmic circles.

Pogo Stick: Wait, so you’re telling me you don’t have a pogo stick lying around the house? That’s ok! What if you plucked the inside spring of a stapler? Or one of those springy door stoppers? After layering up a couple of sounds you can create yourself a custom pogo stick!

Spring Birds: With streets being quieter than ever, now is the perfect time to get outside and record the birds! Even just opening a window in my apartment to let fresh air in fills the room with their singing.

Puddles: If you aren’t blessed with any rain you might miss out on the fun of actually jumping into a puddle this spring. However, you can still recreate this sound at home. This one is pretty simple, just fill up your sink or bathtub and start splashing around. Maybe try out some different-sized bowls and cups.

Playground Ambience: Ok, so now might not be the best time to record children walla—with the world social distancing and all—but that doesn’t mean you can’t take yourself on a nice little walk to the local park. Why not reconnect with your childhood self and take flight on the swing set? You’re never too old!

Wind Chimes: Have you ever dropped or hit an aluminum water bottle by accident? I think layering up that ringing—which almost has a Tibetan bowl quality to it—could make a really cool wind chime. Sometimes I gently tap mine against the table on purpose because I find the sound soothing. I recommend playing around with different amounts of water in the bottle to change the timbre of the ring.


X