Empowering the Next Generation of Women in Audio

Join Us

Shout-Out to our Lighting Friends

I know we are all audio friends here, but I have to take a moment to talk about one of our counterparts, a counterpart who is always involved in live shows. The setup can be very simple or incredibly detailed, but they are often considered competitive or our frenemy in the field. Many times we are on the same timetable, with a lot to do and in a small space, working on top of each other to accomplish a show.

As part of opening a new building, I have had to face this counterpart head on. My least favorite activity to do in tech: lighting. I mean, seriously, I’m good with just hearing the show and not seeing it!

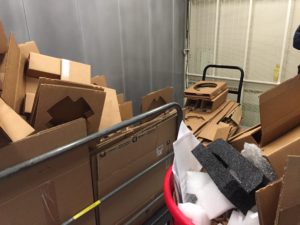
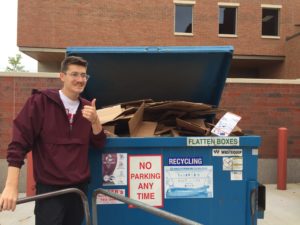
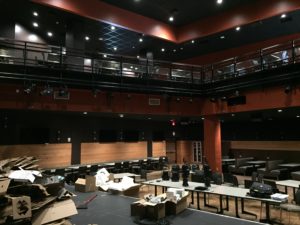
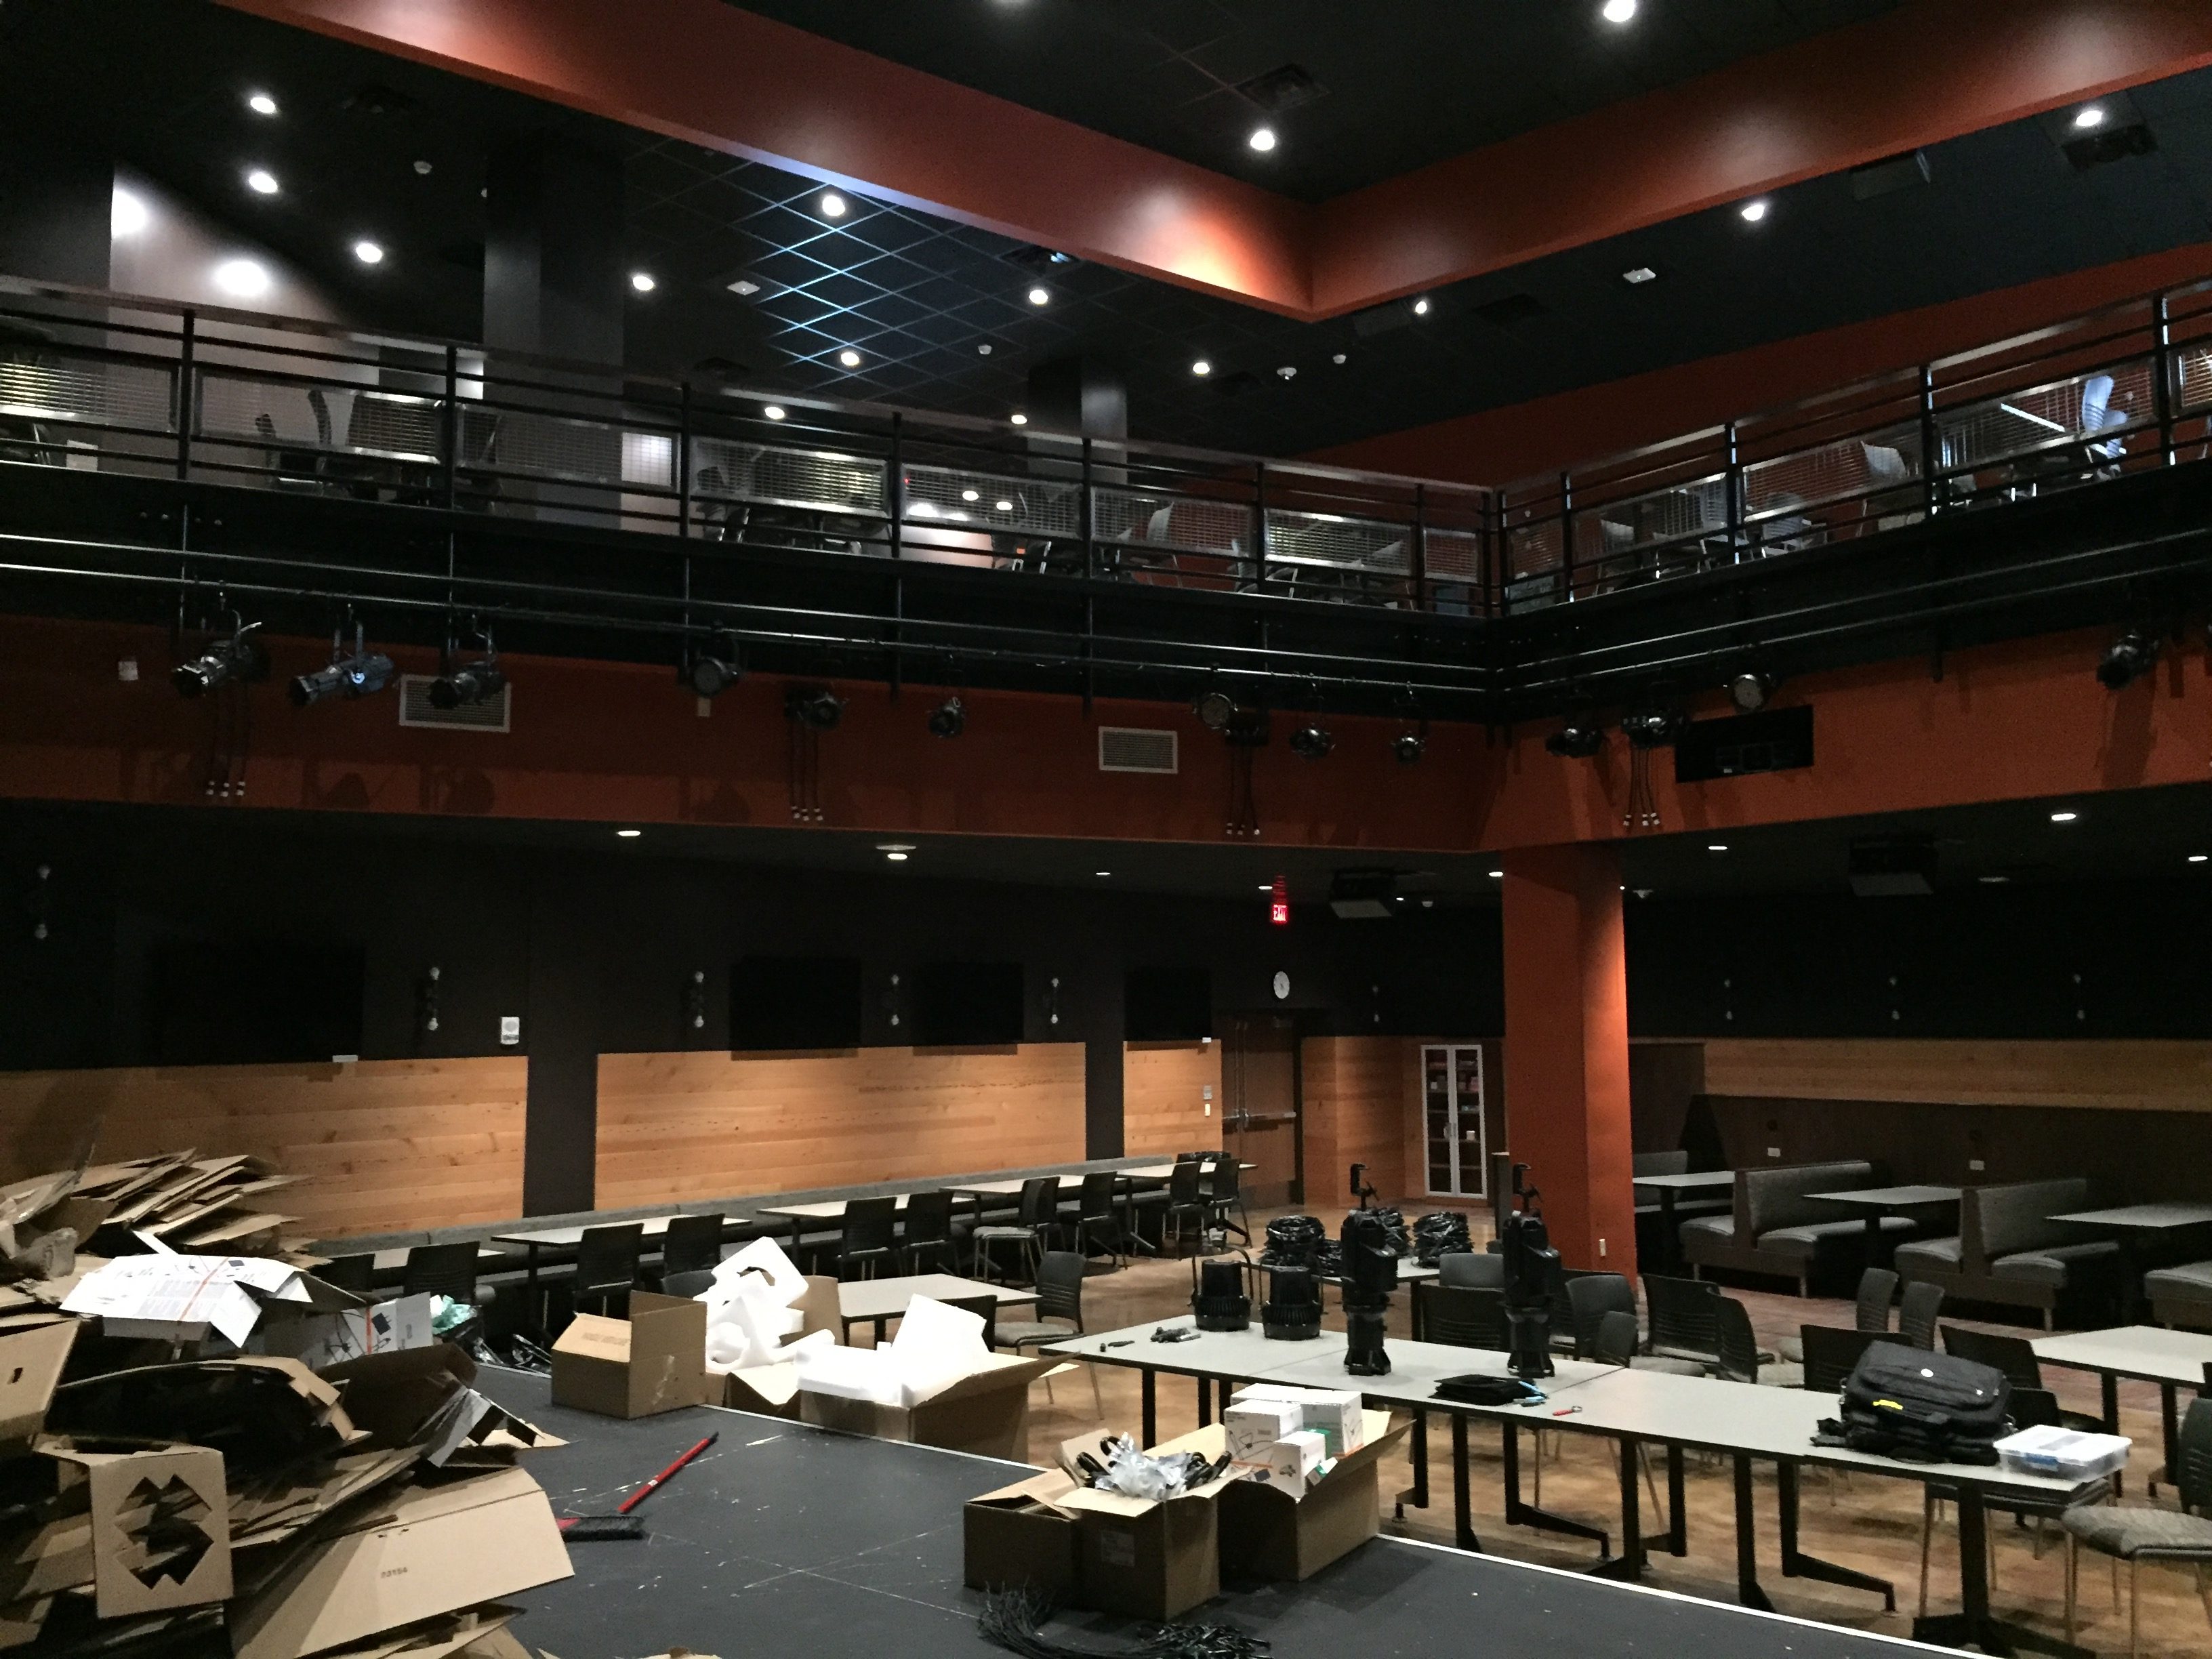
From recent firsthand experience, I can tell you lighting is a lot of work! For the first time, I had to work through spec-ing, ordering and, now, installing a full lighting system for two venues. To give you an idea of how much work this is, it took three loads just to get all that trash out!

In all seriousness though, I learned that our counterparts in lighting work just as hard to master their craft as we do. The diversity in lighting tasks resembles the variety in audio – except, instead of mic variations, different styles of speakers and tuning, it’s lamp differences, hundreds of fixture options and focusing.

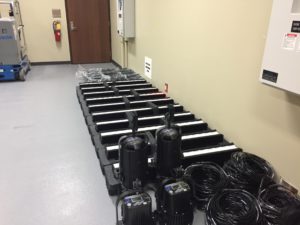
As I have been working on this install, I have realized that I can’t imagine what it would be like to set it all up, wire, address, and program a rig like this every day on a large-scale tour. Let alone troubleshooting, with so many fail points and everything at least 20 ft. over my head, once it’s up. Just like audio, the details matter. There are endless options on how to do it, what it looks like, and how to please the audience. I’m happy to dead-hang some lights, make sure they work, and then let my students go to town.

Now that the products have begun arriving, it’s expected to take two weeks to complete the install, followed by spending time learning the new lighting board (which could take months to master). Major props to our counterparts, the lighting folk! I’m glad someone likes to do it.

P.S. I really did work with some lights – not just with a bunch of boxes.

Denmark – Sound System Optimization Training Seminar

Sound System Optimization Training

Come learn best practices for tuning sound systems with measurement and operational concepts through a FFT-based (dual-channel) acoustical analysis software platform. The seminar will be taught by

2016 Seminar

Theis Romme – Freelance engineer for several companies with Meyer Sound Inventory. Theis is a most appreciated member of the Meyer Sound family and is also considered an expert on SIM3 as well as Smaart V7 & V8.

Rasmus Rosenberg – Freelance sound engineer and a super user on Smaart, as well as beta tester for Smaart products before they hit the market.

We recommend participants to download ‘Smaart V8 User Guide’ and read before attending the training. Please bring PC/notebooks for both dates. Participants will learn  to measure and analyze the frequency content of audio signals, study timing and frequency response of electro-acoustic systems, and perform basic room acoustics analysis. Everybody regardless of experience are welcome to participate! This includes students and newcomer’s in the industry

The maximum number of attendees will be 20. Be sure to sign up early as our events tend to sell out. If you require financial aid please contact us at soundgirls@soundgirls.org

  Register Here

How to get to the venue:

Airport: Take the metro to ‘Lergravsparken’, walk 100 meters south of Østrigsgade, take a right turn on Øresundsgade. The venue will come up on your left hand side after 500 metres.

Centrale station: Use the exit to Tivoli. Take bus no. 5A towards Sundbyvester Plads/Airport. Get off after 9 stops at Øresundsvej. Continue 50 metres. on Amagerbrogade. Take a left turn at the intersection and Amager Bio will come up after 50 metres.

Accommodation:

For any practical questions on logistic or accommodation, please send an email to either mallekaas@gmail.com or aiste.baltraityte@gmail.com

This is an exclusive offer to members of SoundGirls. If you are not already a member, please visit our website to sign up.


Radio Mics and Foley – UK SoundGirls Workshops with the ASD

On a warm day at the end of June, the UK chapter of SoundGirls had our first shared events with the Association of Sound Designers, in the form of two workshops about very different and equally fascinating sound skills.

First up “Pin the Radio Mic on the Actor,” given by sound engineer and expert “mic hider” Zoe Milton. A vital skill for anyone wanting to work in theatre sound, fitting radio mics is also important for film and TV location sound and in any situation where you want to conceal a body mic on a performer.

Zoe started by taking us through a brief history of the use of radio mics in the theatre. Back in the late 1990s and early 2000s, bandwidth restrictions limited the number of RF channels which meant that even large West End shows had far fewer transmitter packs than cast members. Les Miserable shared sixteen packs between their cast, which resulted in upwards of 100 pack swaps per night!

Fortunately, advancements in radio mic technology and a reduction in the costs of RF licensing in the UK means this doesn’t happen as much these days. Of course, Sound No. 2 and No. 3’s are still expected to be able to swap mic packs within a matter of minutes if necessary, especially on large shows.

Next, we had a closer look at some of the various mic techniques used to accommodate different hair lengths – including no hair – and performance types. Zoe reminded us that that fitting a radio mic is as much about teamwork and communication as it is about technique. You work in very close proximity with the performer, and you have to make both the experience and the position of the mic and pack comfortable for them. You also have to make final decisions on the mic position that will provide the best and most consistent sound for your Sound No. 1 or sound operator. There can be a big difference in the sound of a mic fitted at someone’s hairline, and one fitted over an ear.

As well as the performer and the Sound No. 1/sound op, radio mic fitters also have to take potential costumes, hairstyles, wigs, and hats into consideration. Zoe emphasized the importance of speaking with costume and wig designers as early in the production process as possible so that you know where you might be able to hide a mic and mic pack. We looked in detail at positioning mics within hats and discussed solutions for performers with no hair (creating an ear “hanger” works well). Zoe also talked us through how to hide mics and mic packs under wigs. I was particularly impressed with one solution that Zoe and a colleague devised for an opera singer who shed his clothing after his entrance, which meant it wasn’t possible to put his mic pack in his costume. Instead, they had a half-wig created to blend in with his natural hair and give them enough volume to hide his mic pack on his head, within his hairstyle.

After giving us a rundown of the best accessories to use, including the benefits of using wig clips over the tape and how to effectively colour a mic cable, we had the chance to get up close and personal with fitting a mic ourselves.

I came away from the workshop with a much clearer idea of the solutions available when fitting radio mics, as well as feeling slightly guilty about how much I rely on tape (more wig clips, I promise, Zoe!).

In the afternoon, Tom Espiner introduced us to the fascinating world of Foley sound creation. Tom is an actor, puppeteer, theatre practitioner, and Foley artist, who has provided Foley for film and TV as well as live opera and theatre.

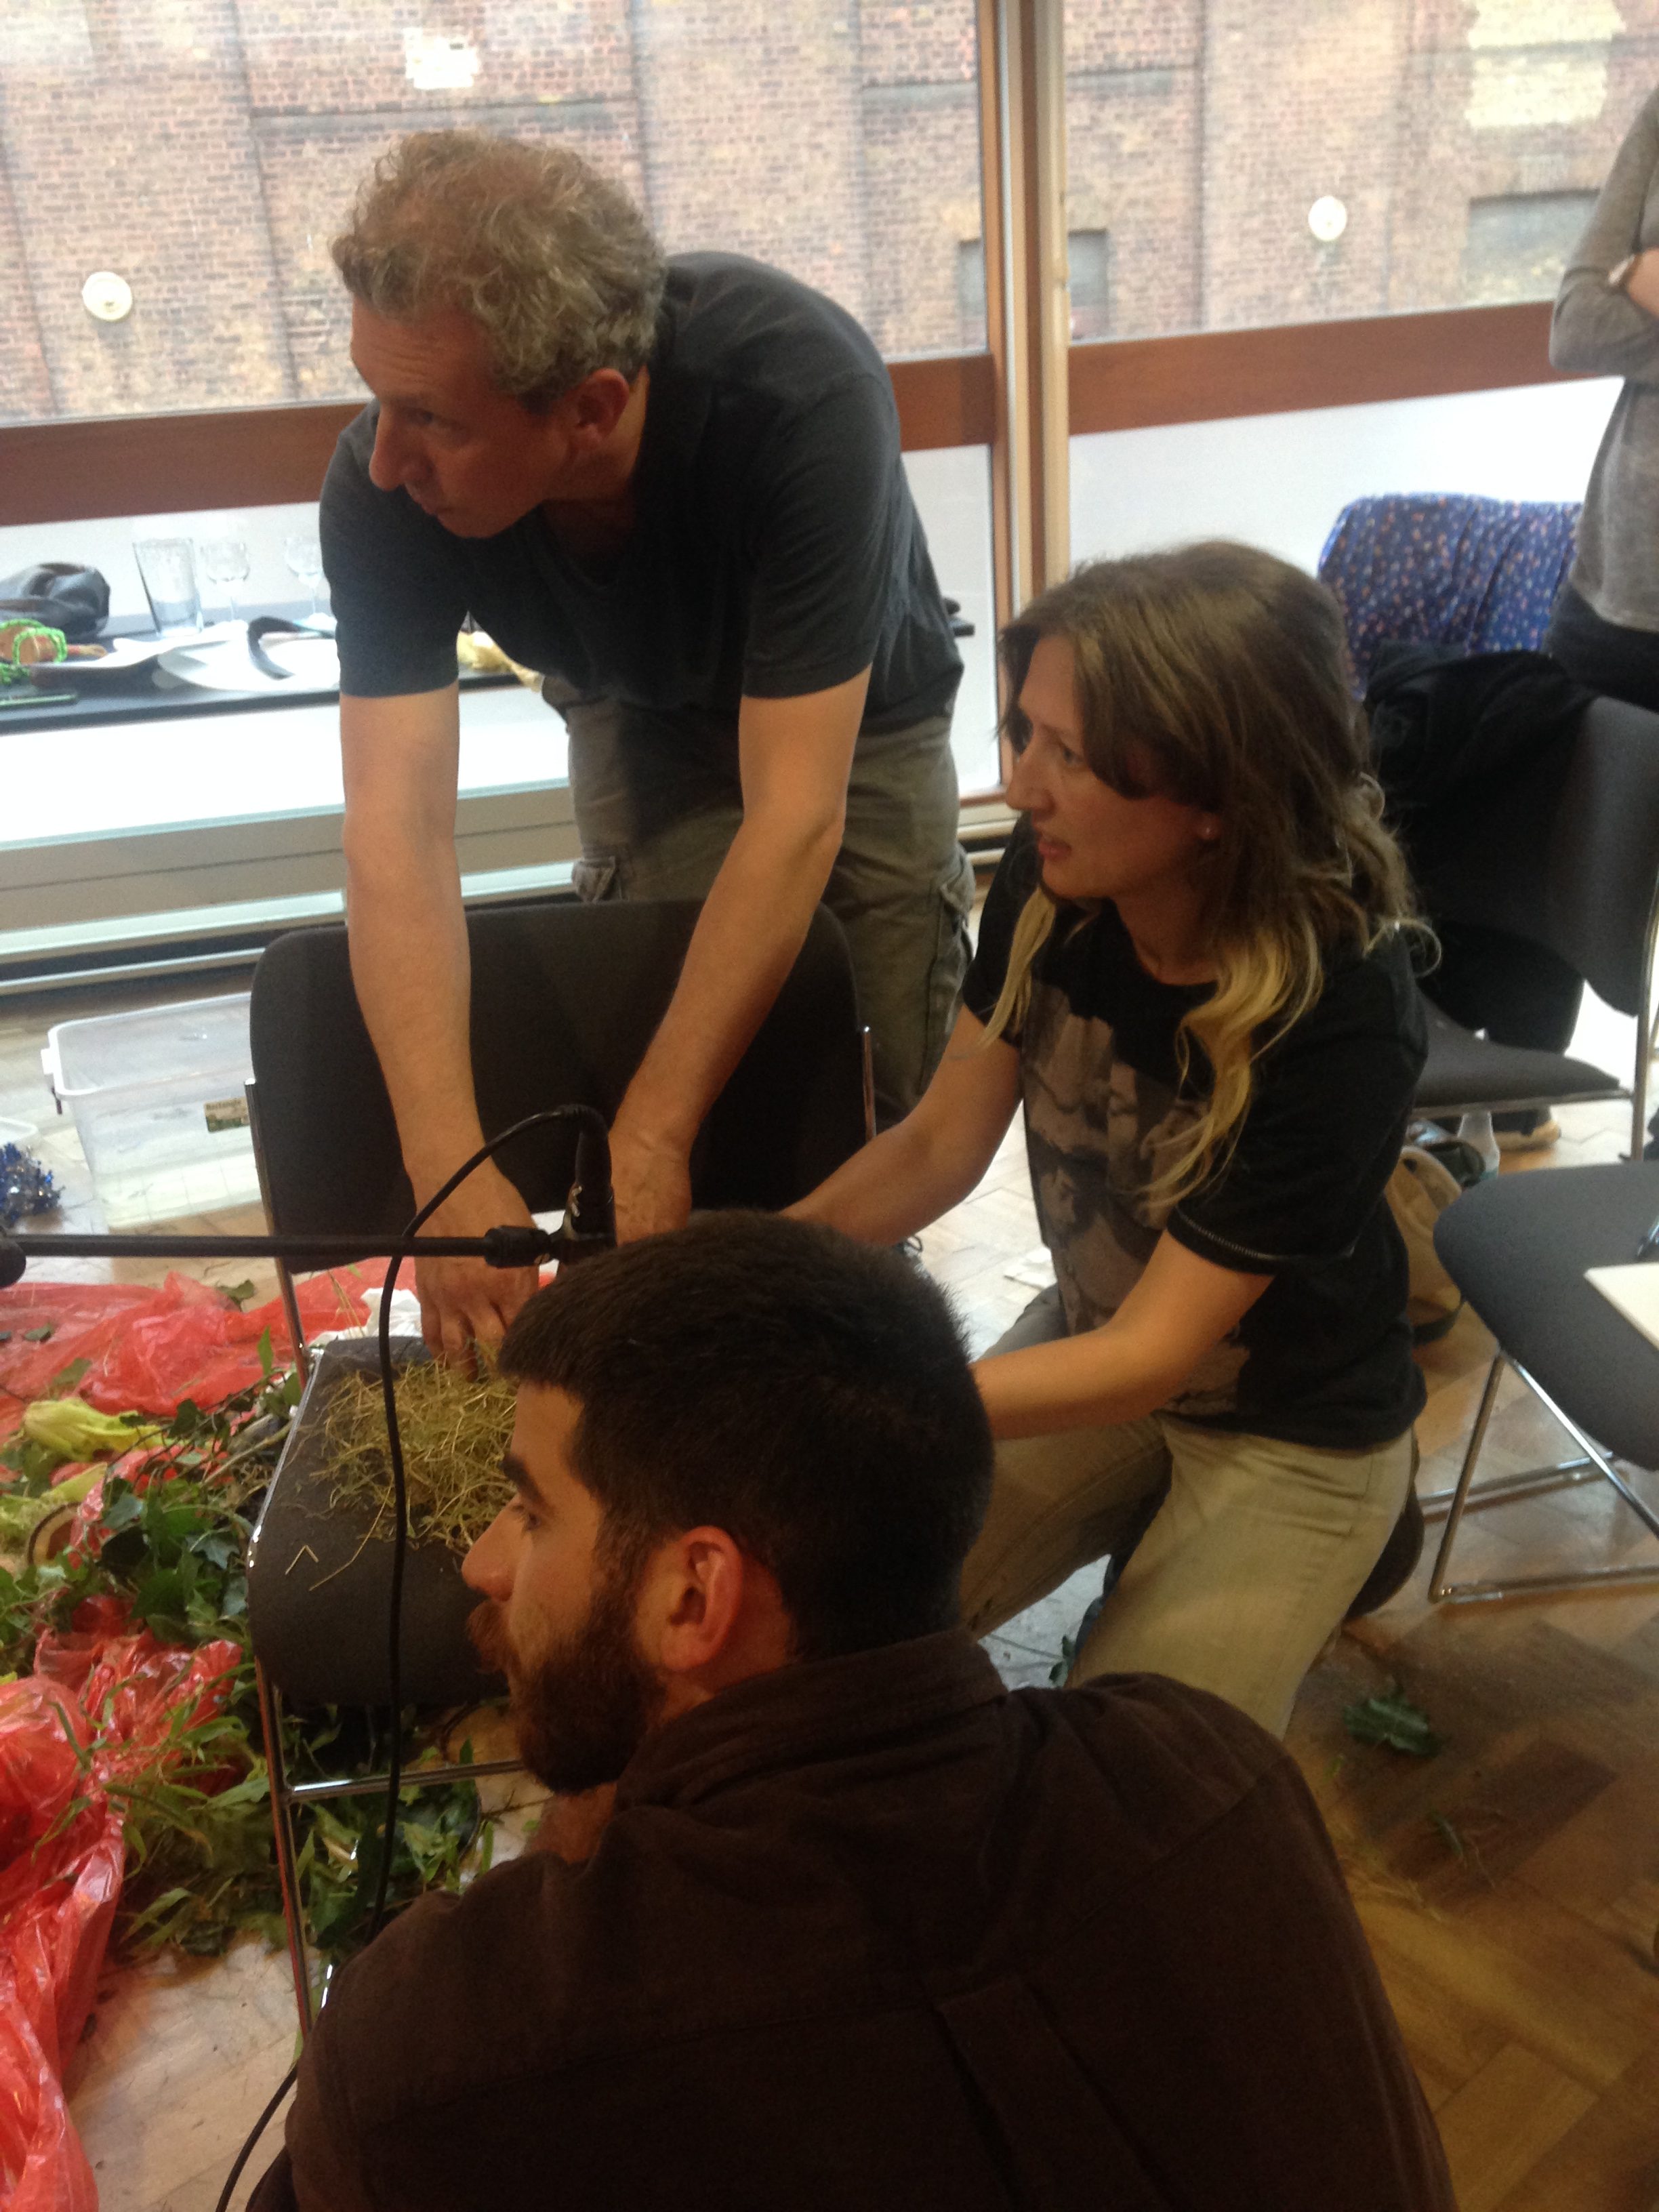
With the technical assistance of Gareth Fry, Tom demonstrated the process of recording Foley, using various objects and textures to build up multiple layers of created sound effects. It was fascinating to see Tom take everyday objects such as twine and rubber bands and turn them into snakes sliding across rocks and flicking their tongues.

After we’d seen the expert do it, it was time for us to have a go. We had a lot of fun adding horse hooves (a classic) and saddle noises to a scene from The Revenant and learning what might have gone into making the sound of a dinosaur hatching from Jurassic Park.

Later on in the workshop, we looked at adding live Foley to stage plays, and I learned how difficult it is to keep one hand making the sound of a babbling brook while the other creates splashes in sync with another actor, as they mime washing their hands. In one of the most enjoyable exercises of the day, all of us contributed to creating a Foley soundscape to illustrate a particularly descriptive piece of text, creating the sounds of a deep underground lake in a mysterious land.

As well as being very informative, both workshops reminded me how important it is to get out from behind your computer or console, try something new and get your hands wet literally, as it happens. I think all attendees left inspired to try new techniques and find new ways to make sound.

Many thanks to the Association of Sound Designers for offering the opportunity to our members.


The Songwriter’s Secret: The Circle of Fifths

The skills involved in producing and engineering music are different to the ones required to write and play it, but that does not say there is no overlap.  Even the simplest recording job requires you to be able to capture the feel of the music, and the vision of the musicians, on record.  All of the technical know-how in the world won’t matter if you have a tin-ear for the music, and so it’s helpful to make sure your knowledge of producing and engineering is backed up by an understanding of musical theory.

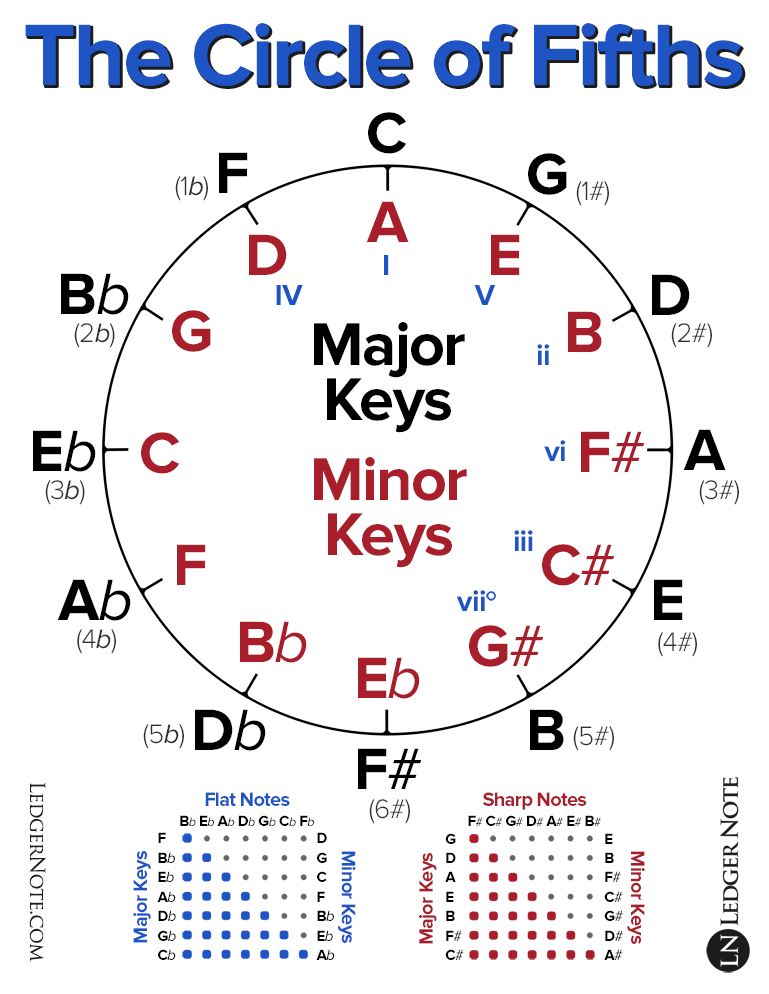
One of the most common examples of musical theory that is crucial to the creation of music is the circle of fifths.  You may have read, or heard, someone say of a song: ‘It uses the classic I-IV-V-I progression.’ Unless you are already familiar with intermediate musical theory, this may well have baffled you; after all, you know that the scale runs from ‘A’ to ‘G’, and you know that between the notes are ‘sharps’ and ‘flats’, but that’s it.  The answer to this is that ‘I-IV-V-I’ is a progression, not from one specific note or chord to another, but a pattern that repeats in terms of spacing, whatever the ‘root’ note or chord of the sequence. This progression can be explained by the concept of the circle of fifths, and in a recording situation, this could be vital knowledge.  The reason is that music is written to evoke or elicit certain feelings and emotions, and there are methods for doing so, compositionally speaking; an engineer’s job is to ensure that the recording matches the vision, and an understanding of how the music works makes that job easier.

I-IV-V-I

Music is basically maths- that’s the first thing to remember.  Notes sound pleasant, or consonant, together because of the mathematical ratios between them.  A ‘fifth’ is the term for a specific interval between notes.  To stay with the example of ‘I-IV-V-I’- mainly because it is the most common progression in popular western music, with literally thousands of songs based up in it- imagine that the starting chord of your song is a C-major; that is ‘I,’ your ‘root’ chord.  ‘IV,’ your next chord, is F-major and ‘V’ is G-major.  If however, the key of ‘C’ is not right for your voice, be it either too low or too high for you to sing comfortably, the ‘I-IV-V-I’ pattern can be easily transposed.  If you want to sing in the key of E-major (I), then the next chord will be A-major (IV), followed by B-major (V).  The progression will sound the same, only in a higher or lower key; this is because the intervals between the notes are the same.  The same goes for other common progressions, such as I-V-VI-IV; if it is denoted by Roman numerals, then it is all about the intervals and can be transposed into any key.


The circle of fifths is so called because the nature of the musical scale, running from A to G, means that you can start on one note and run through a sequence of ‘perfect fifths’ which will take you through each note and back to the beginning, in a circular motion, without experiencing any dissonance.  It is also because this relationship can place, visually, on a circle; this diagram makes it easy to locate both the relative minor chords as well as the ‘IV’ and ‘V’ of any root note or chord. A simple trick to remember is that, on the circle of fifths diagram, the ‘IV’ of any root note is one step anti-clockwise, and the ‘V’ is one step clockwise.

There’s a great deal more theory behind this, and it becomes increasingly complex and esoteric, but if you want to understand how songs have been put together,- an important part of the recording process- then a basic understanding of the circle of fifths will be beneficial.  The diagram, in particular, will show you consonant choices about chord progression, whilst also showing you the relative minor chord, which is always a favorite option for a middle-8 or B-section.  As you better understand how the music works, your abilities to successfully capture its spirit will also increase.


By Sally Perkins

Ableton Show Control

For a show not so long ago in RADA (Scuttlers, written by Rona Munro), it was my intention to use Ableton Live for the playback of a variety of songs, beats, and rhythms which the cast would create and interact with throughout the show.

As I have mentioned in my blog Choosing Software, I had decided to use Ableton Live in shows because it allows me the diversity to create my own sound palettes, add in effects, and take them away again easily. Crucially, I can control all of this via MIDI in Qlab, which adds important stability for the show, but still, retains a wide dynamic range of filters and features that can be blended and mixed.

*I’m using a Mac for all of the following features, coupled with Ableton Live 9 Suite, and Qlab 3 with a Pro Audio licence.

First things first, you’ll need to go into your computer’s Audio MIDI Setup, you’ll want to go to Window in the Finder bar, and select Show MIDI Studio.
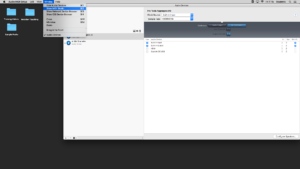
Show MIDI Studio in the Audio MIDI Setup Window in the Mac Mini


Qlab Live will pop up as an IAC Driver, and you’ll need to double-click the Qlab Driver to show the Qlab Live Properties.
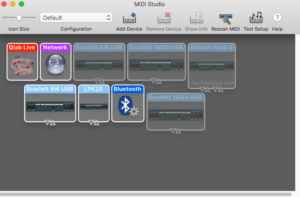
Qlab IAC Driver in the MIDI Studio


In this new window, you’ll need to add a second Port such as below:
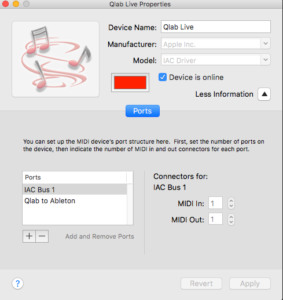
Creating a second bus under the Ports pane


These buses will be used to trigger Ableton from Qlab, and Ableton to trigger itself internally.

This then brings us to setting up Ableton MIDI. You’ll need to open a new Ableton file and open up the Preferences pane, from here you’ll need to set up the internal MIDI ports to transmit and receive MIDI via the buses to Qlab that we previously set up in the Mac Mini’s own Audio MIDI Setup. It should look something like below:
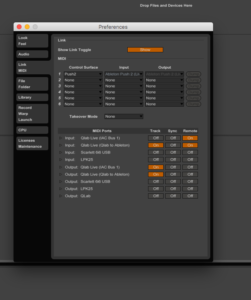
Ableton’s MIDI Preferences

You can then open up Qlab and check the MIDI Port Routing in the MIDI preferences and ensure that MIDI is being sent to Ableton via one of the ports like so:
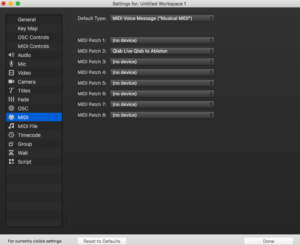
You’re probably going to want to leave at least one MIDI port before the Ableton bus free for a MIDI send to your sound desk, or even to Lighting or Video.

Once you’ve set up these initial steps, this is when it gets slightly more complicated. You’ll need to keep a strict record of the MIDI triggers that you’re sending, and indeed all of the values and channel numbers. These will eventually each do different commands so getting one value crossed with another could end up with not only a lot of confusion, but you could end up triggering cues before they’re supposed to Go!

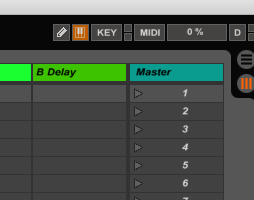
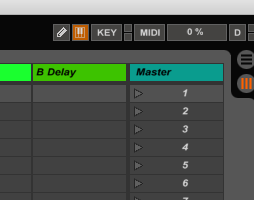
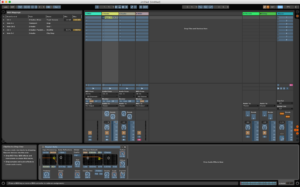
In your Ableton session, look to the top right-hand corner, and you will see a small MIDI toggle button. This is your MIDI view button, and when clicked you’ll also be able to track your MIDI across your session and throughout the show. It will be generic Ableton colour until you click it, when it will become pale blue:


A portion of the rest of your Ableton session will also be highlighted in blue, and the highlighted sections are all of the features available for MIDI control. This can range from volume control on Ableton channels, changing the tempo, fading in/out effects, and starting ‘scenes’ on the Master channel bank.

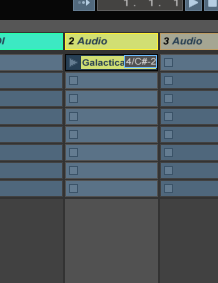
So I’m now dragging in a sample to the first Audio channel in Ableton
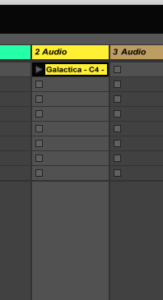
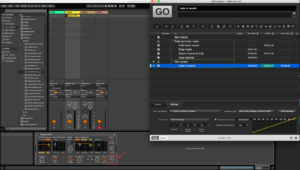
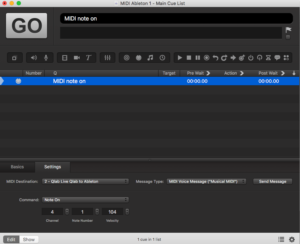
This is the first Audio track that I’d like to MIDI, so I set up a new MIDI cue in Qlab, and make sure that it’s a simple Note On MIDI command – Qlab will always default to Channel 1, Note Number 60, Velocity 64, but this can be changed depending on how you plan on tracking your commands. I’ll set this to Channel 4 (leaving the first 3 Channels free for desk MIDI, LX and maybe Video or spare in case something needs re-working during tech). I’ve then set it to Note 1, with a Velocity of 104 (104 is a key number here, this roughly works out at 0db within Ableton, so is handy to remember if MIDI’ing any level changes). Because all I’ve done here is send a simple ‘Go’ command to the Audio track, however, the Velocity number is sort of irrelevant – because the track is at 0db anyway, it will simply play at 0db.
I’ll then ensure that MIDI output is enabled in Qlab, and open the MIDI window in Ableton, again, from the top right-hand corner, and select my track with my mouse (this might not necessarily be highlighted any more, but it will be selected). I’ll then jump back to Qlab, and fire off the MIDI cue. Ableton will recognise this, and not only will the programmed MIDI show up in the MIDI Mappings side of the session, but it will show up directly on top of the Audio cue, like thus:

So now that we have an audio track playing and the action is happening on stage, you might have even fired through several other generic Qlab cues, but you want to stop the music and start the scene. There is no escape in Qlab for Ableton, so Ableton is going to keep going until we programme some more MIDI cues; So I’m simply going to programme a fade down of the music, and then a stop.
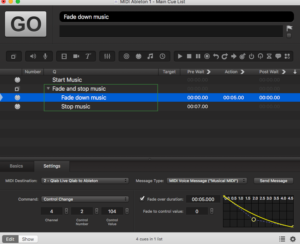
What I’ve done it programme a MIDI fade, which as you can see in the picture, it starts at the 0db value of 104, and then fades down over 5 seconds to 0, or infinity. You can also control the curve shape of the fade as usual in Qlab, and of course, the fade time is completely adjustable.

Once I’ve programmed the fade and added in the stop, my MIDI window looks a bit like this:
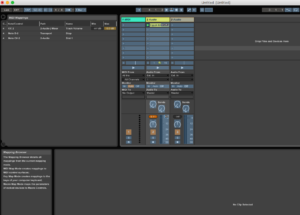
Ableton has accepted what ‘notes,’ or for Qlab, what values I’ve added in that complete different commands, and also given me a description of what these are doing. Something to note here is that the value to change the volume, whether you’re adding in fades up or down, will always be the same – it is the volume value in Qlab that will see the change.

So now that I’ve stopped the music, I might want to start it again in a separate scene if it was a motif for a character, for example. This programming can be part of the same cue:
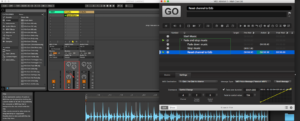
Again, you’ll notice that the Ableton fader is resetting back to 0db. Of course, this is just one channel, and just one track within Ableton, and the more you add, the more complicated the programming can get. I’ve also added in a channel stop to make sure that should we want to play something off a separate scene in Ableton; nothing else gets fired off with it (just in case).
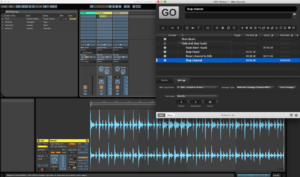
In terms of MIDI’ing within Ableton, when in your MIDI pane, as a general rule, anything that shows up in blue is viable to receive and be altered by MIDI. This means that you can add in reverbs over a certain amount of time, take them away again, and alter any of the highlighted parameters completely to taste. You’ll then just need to go back and make sure that any fade ins have outs again and a reset.

This is a brief intro to having more control over Ableton during a show within Qlab, and of course the more effects and cues might get added, the more complicated the MIDI mapping becomes.

The great thing about using Ableton in a show is that there are certain parameters (also with MIDI control) that can be changed such as how long after receiving a stop should the track last (one bar, or half a bar, or a beat for example) to always ensure that music ends on beat and makes sense to the listeners. For me, Ableton allows you enough control over what it does, but enough flexibility.

A SoundGirls Guide to the Middle East

In recent years a number of new performance venues have opened across the Middle East. This is paving the way for productions across the world to bring their performances to new audiences. Some of the top venues in the region include iconic Dubai Opera, the New York University Abu Dhabi Arts Centre, the Sheikh Jaber Al Ahmad Cultural Centre in Kuwait, the King Abdulaziz Centre for World Culture in Saudi Arabia, and of course our Royal Opera House in Muscat, Oman.

Each venue attracts a variety of different productions, including a rich mixture of Western ballet, opera, and concerts, and more traditional and modern Arabic music. Interestingly, staff are also often an eclectic mixture of talent from around the world.

With this rapid expansion, production companies are starting to include these venues more and more on international touring circuits. Recently, discussions on the SoundGirls social media platforms have included members asking for advice on their upcoming tour dates. My advice is as follows!

Passports and visas

Most countries in the GCC will require at least six months on your passport when you enter the country. You are also likely to need a visa. This might be a work visa or a tourist visa for short term work. Depending on the country this will be organised when arrive. You may need to hand your documents over to a PRO (Public Relations Officer) for a few days. This is totally normal here as the process can be rather complicated.

Dress code

Contrary to popular belief in the West this does not just apply to women. Think modest! Shorts and vest tops are not acceptable work dress for anyone (male or female). Long sleeve t-shirts (not tight or low cut) are comfy, but a shirt is more appropriate for most situations. Smart jeans (not skinny fit) are OK, but a smart pair of chinos is better. Aircon is normally at a steady 21 degrees Celsius so if you indoors bring a cardi! Venues will advise you on any particular rules.

If you are working outside, the heat can be rather overwhelming. It sounds like common sense, but you will need lots of changes of clothes- including socks. A hat, sunglasses, sunscreen, and copious amounts of water and all essential. Excellent rehydration drinks are available in supermarkets and chemists. It’s worth having a few sachets in your tool case.

Remember that during Ramadan drinking and eating in public is prohibited. There is often a room put aside for those not fasting so again… please do not panic! Be respectful to those around you who are fasting and try not to announce what you’ve got for lunch!

Culture

Respect is the keyword here. A friendly face speaks a thousand words when language barriers get in the way. It is useful to learn a few phrases to greet your hosts. ‘As-Salamu Alaykum’ means ‘peace be upon you and is used to say hello. This always gets things off to a good start. Even if you can’t speak any other Arabic, this will be greatly appreciated.

Raising your voice is not taken well in any circumstance, even if you are feeling extremely put out. Stay calm and if you keep talking you will often find a way to compromise.

Many of the discussions on SoundGirls platforms talk about safety for women. Generally speaking, the region is very safe. Obviously, take normal precautions as you would at home. Women may get ‘starred at’ whilst doing physical work. This is because it is unusual to see women in these roles. Do not take offence. Understanding different cultures is a two-way learning curve. Men may try and take heavy cases away from women. Firmly, politely and confidently say that you are fine. Don’t let go and SMILE! After a few attempts, the person will give up and leave you to it.

Food and drink

Fast food is extremely popular here. You will find most of the chains that you would at home. Of course, it is always fun to try the local delicacies. Try a Shwarma or Shuwa for a local-style lunch. Lemon and mint juice is also an absolute must-try! Increasingly more outlets are catering for vegetarian and gluten-free options.

Alcohol (in countries that are not totally dry) is available in some hotels or bars. It is more complicated to buy off the shelf unless you have a licence so if you are only passing through it is much easier to buy duty-free at the airport.

I hope that this clears up some of the misconceptions that make the rounds on social media. Sometimes it is better to take the risk and see for yourself. There are some incredible places to visit in the Middle East, and if someone is paying you for the privilege, it is an opportunity not to be missed.

I AM THAT GIRL Seeks Volunteer Sound Engineers for Los Angeles Event July 17 – 19

I AM THAT GIRL, is a 501(c)3 organization helping girls to transform self-doubt in to self-love by providing a safe space to connect and have honest conversations about things that matter. Every day, girls are bombarded with messages that attack what she is NOT and we work every day to help her love who SHE IS; to see that in herself and inspire that in others. They are shifting girl culture.

Raising the standards for how girls treat themselves, each other, and the world. By building a community for girls to be seen, be heard, and belong, we are giving them something bigger than themselves to stand for and creating a healthier, more powerful world.

The Los Angeles Chapter is holding a three day leadership summit on July 17 – 19th at Loyola Marymount University. They are seeking volunteers to run sound for three different portions of their event.

Musical performance (Rachel Platten) on 7/17 from 6:00pm – 9:00pm

Live Podcast recording (That’s So Retrograde) on 7/18 from 2:30pm – 4:30pm

Musical performance (The Sledge Grits) on 7/18 from 6:00pm – 9:00pm

If you are interested in volunteering please email soundgirls@soundgirls.org a cover letter and resume and indicate which portions you are able to assist.

Intern at MidWay Music Festival – Sept. 9

SoundGirls is proud to sponsor the MidWay Music Festival –

SoundGirls Members Can Volunteer to Intern. This is a great opportunity to earn work experience and be part of a great community.

MidWay Music Festival celebrates & connects female-identifying musicians and artists. Local and state-wide female-fronted acts come together in Bloomington, Indiana for one entire day to celebrate their achievements and inspire other female musicians to pursue their goals.

If you are interested in volunteering email soundgirls@soundgirls.org the following information.

Building Business Relationships

Building relationships within our industry are important. Networking is vital to finding support among our peers that can help with problem-solving tips, career progression, and, sometimes, just venting about various situations. However, building business relationships in our field is vitally important, such as the relationship between a vendor and a customer. We buy our gear from someone, and we sell our skills to someone else; we are regularly both vendors and customers. With that lens, it is important for us to remember strong relationships are vital to our success, as well as our reputations.

In a customer-vendor relationship, it is important to have clear and transparent communication. For the customer, it is important to be able to communicate their expectations and wants in an understandable way that allows the vendor to meet their needs. At a minimum, the customer must be able to communicate a starting point for the project or event that includes the theme of the event, along with a general idea of the budget, priorities, and a timeline. It is important for the vendor to help the customer understand what can be provided, as well as what not to expect. The vendor should be careful not to overwhelm the customer with excessive jargon, which can cause disconnects, as well as to not take advantage of a customer who is new to the business. They should keep in mind that the customer may have difficulty articulating what they want and shouldn’t expect or use terms that may be used among employees.

One of the key tools for facilitating this communication is for the vendor to keep their bids easy to read and make sure they are supplying enough information so the customer knows what to expect, while not offering excessive information that a customer couldn’t care less about. This is an important communication step that places both parties on the same page. The bid can often be the best tool in developing the customer’s ability to understand their event in more detail. What it takes to meet their expectations (both in equipment and costs), and discuss the ability to meet the customer’s needs within the restrictions of the customer’s resources – everyone wants the Rolex for the price of a Timex. In a customer-vendor relationship, it is important to work together and be transparent; it doesn’t help anyone to play games. Clear information can make a transaction between the two so much simpler.

It is also important in a customer-vendor relationship for both parties to remain timely, as well as working towards limiting any surprises. These two items also stem from providing clear information and communication. As projects, such as installs, move forward, it is important for both parties to communicate timelines and changes. Another example is an event load-in: If the space is contracted to be ready for setup at 8 am, make sure it truly is ready at 8 am. If the rental delivery time is 8:30 am, be there at 8:30 am.

In addition to maintaining a timeline, we need to be prepared for that situation we all know when everything doesn’t go according to plan and often times is due to some sort of surprise. So, as a customer, if you learn information that may affect the vendor, let them know; such as unplanned construction in front of the loading dock, or resource availability changes like a broken equipment lift. The same goes for a vendor; if the customer has asked for a specific monitor model and two nights ago someone cleaned it with beer, let them know and provide information about the replacement that will be provided.  Communicating in advance those things that many of us can’t control, but have happened, can help everyone to begin troubleshooting as soon as possible and adjust accordingly.

Another aspect of the customer-vendor relationship is to maintain integrity, as well as to remain grateful for the services each role offers the other. Both parties need to follow through on the commitments that have been made; complete projects well, provide an environment where the projects can be completed to meet expectations, provide invoices on time, as well as paying invoices in a timely manner, etc. Also, ‘thanks you’s, and ‘good job’ statements go a long way. If a vendor does a remarkable job, let them know. If a customer offers the vendor great hospitality, let them know. That way both parties know they have upheld their end of the bargain and can maintain that in the future. It’s a win-win for everyone involved and will continue to be as the business relationship continues.

Don’t get too comfortable in the customer-vendor relationship. This partnership is for business, not best friends hanging around the bonfire. Becoming laissez-faire about this relationship could end up in costly mistakes, lost profits, lost customers, and loss of business. Both parties need to continue to communicate, set clear expectations, hold up their end of the bargain, and follow-through. Shared experiences involving good communication, transparency, and satisfying outcomes are what establish trust and demonstrate integrity, honesty, and reliability. All are critical elements to a great customer-vendor relationship.

X