Recording Hygiene for The Vocal Booth (Part 2)
In my last blog I talked about the importance of dialing in the “hygiene” of the recording process, starting with the technical recording mistakes (on the producer / engineer side).
This time I’ll be covering the performance mistakes—aka the vocal recording (singer) hygiene—that should be considered as you prepare for your next studio session.
Performance Mistakes
- Warm Up – I hate to sound like a broken record (no pun intended), but warming up is crucial to achieving a solid vocal performance. If you skip this step, everything after it will be harder, and ultimately risk your final recording. I usually think about warming up in three components: physical, vocal, and mental.
- Physical – I like to warm up physically as my first step—this can usually be covered by doing things like a brisk walk, 10–15 minutes of yoga, or jumping jacks and some of your favorite stretches. It doesn’t have to be long—the idea is that you’re warming up like an athlete might before an important event; it should be enough that you don’t feel tired but rather energized and loose. It’s also really nice to do this before your vocal warmups, as it often will help open up your range and relieve underlying body tension.
- Vocal – It’s a good idea to do your typical vocal warmup before you even arrive at the studio/start to record. You’ll want to focus on exercises you’re pretty comfortable with that don’t strain your voice—this is not the time to try new things.
- Trills and bubble exercises are great for covering your whole range, and you should particularly ensure you’re “touching” every part of your voice needed for the song. That might mean choosing exercises that enable you to connect with your diaphragm for good support on your mix or chest voice, or working on the clarity you need for head voice in your upper range.
- It can also be helpful to stretch out your jaw or roll your shoulders and neck to release tension before singing.
- Mental – The mental side is just as important. The more mentally prepared you are, the easier it will be to lock into performance mode—but overthinking can also get in the way. I like to prepare as much as I can, then intentionally let some of that go once I’m in front of the mic so I can trust my instincts and let emotional expression lead the way.
Taking a moment to connect with the emotion or meaning of the song can help you get into the right mindset for the performance.
It’s also important to minimize outside distractions. If you’re coming into a session after a stressful day, give yourself a bit of time to decompress so you can fully focus. Ideally, try to avoid scheduling other intense commitments before or after your session so you can stay present and focused in the studio.
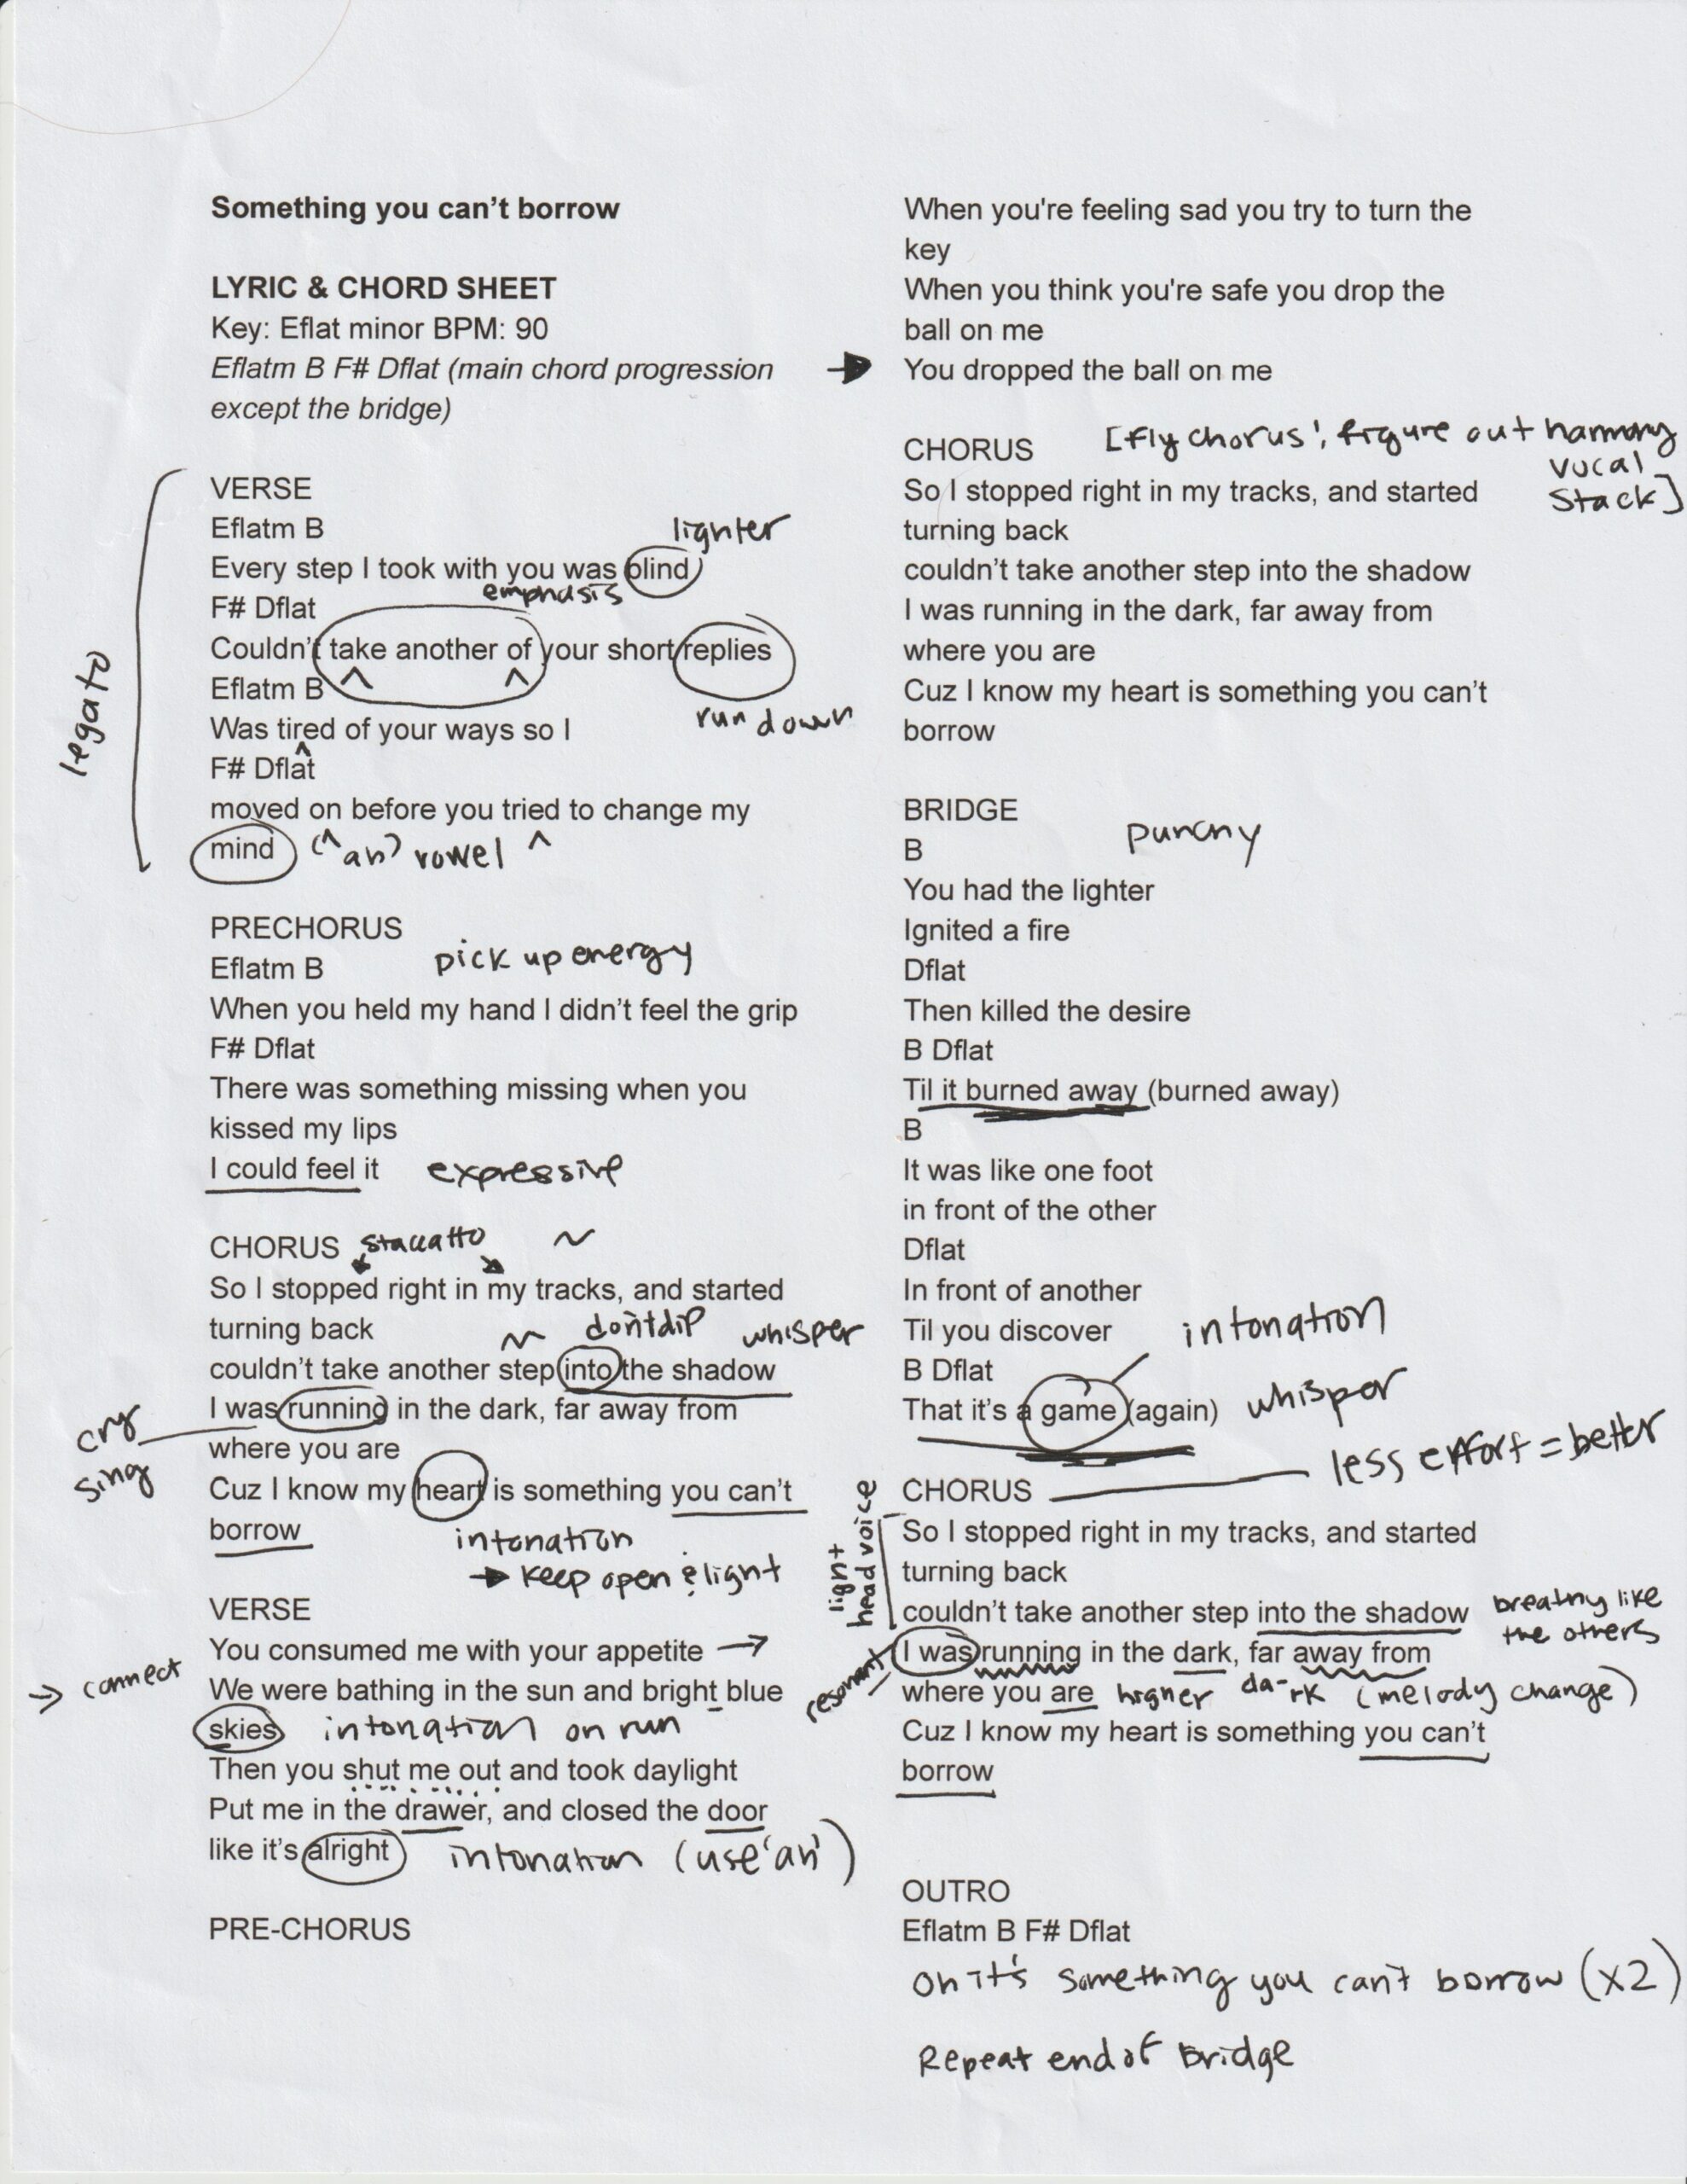
Lock Vocal Arrangement
It’s really helpful to have your vocal arrangement ready to go before your vocal session. This includes working out how you’ll specifically perform your lead vocals as well as other vocal parts for the song (doubles, triples, harmonies, background vocals, ad libs, etc.). I love having a list of these parts and checking them off as I go along.
- Lead Vocal — this is the main vocal performance
- Doubles / Triples — these add power and thickness, and are especially important for your choruses
- Harmonies — these can be used creatively to add interest and emphasize certain words or phrases
- Background vocals / textures — these create additional depth and atmosphere; they’re things like “oohs, ahhs,” vocals used to create a pad or instrument-like sound, or something like a response vocal to the lead
- Ad Libs — these are often phrases / layers added to the track that feel spontaneous in nature; they might be a repeated main lyric, an artist dropping their name at the start of the track, or another expressive word or phrase on the final chorus
Pace Yourself
(and Your Voice) – It’s important to pace yourself during the session.
- It can be tempting to go 100% in on the chorus section, but if you burn yourself out on that first, you might be too tired to sing other sections. I like to start with the softer parts first (often verse, pre, bridge) and then record the chorus/the most energetic parts.
- Make sure you take breaks if needed, and don’t be afraid to take a few moments in between vocal takes so you can properly reset.
- Pro tip: It can be nice to have water, tea, and a snack on hand so you can keep yourself fueled and hydrated. It’s also really amazing to keep a nebulizer around for continued hydration during the session; this can really help you retain a smooth sounding tone and save you from pushing your voice too much.
Record Lead Vocals (First!)
It may sound obvious to focus on lead vocals first, but I also know it can be tempting to jump around and want to sing other layers. Ideally, you will get your leads done in the same session, on the same day (unless something happens and you simply can’t do it).
There are 2 main reasons for this:
- First, the placement, timbre, and general quality of your voice can sound drastically different on different days or different takes. It can sometimes be obvious when certain clips are not recorded in the same moment, and the more you can capture the same vibe without heavy editing, the better.
- Second, the lead vocal is what everything else is built around; all the other vocal parts “follow” it. The lead sets the tone, phrasing, and emotional delivery for the song, and once your lead is established, it becomes much easier to record doubles, harmonies, and background parts to match and support it.
- Pro Tip: If you can, comp the lead vocal as you go. Once you sing through a session and have a few takes, it can be really beneficial to comp right away while that section is still fresh. Then you can do the other sections, and at the end go back for a final listen to each section and make final adjustments to the comp as needed.
Focus on Mic Technique
Recording on a mic is surprisingly tricky for live performance, but even more so in recording environments that pick up every detail as you sing. The best way to get better at your technique is to have a good setup at home that you can practice on all the time when you work on demos.
- Placement – It’s ideal to sing about 6–8 inches away from the microphone, which for most people is about the width of your hand stretched out if you hold it perpendicular to the mic and your mouth. Since the microphone is very sensitive, even the smallest changes in distance will immensely affect tone and volume.
- Intentional movement – You can also use the mic dynamically as part of your performance, for creative effect. This takes a lot of practice, but it’s worth playing with a little bit—for example, you might want to lean in for soft/emotional sections, but lean back a bit for a bigger belt.
- Pro Tip: Do several volume and placement checks with your producer to ensure you’re not clipping or having excessive plosives while you sing.
As you may have seen, preparing for a vocal performance—even one in a studio—is a bit of a marathon! It’s best to really consider each step of the way and ensure a lot of care is taken so that you can truly sound your best.
I hope these tips were helpful, and happy singing!
Dani