Empowering the Next Generation of Women in Audio

Join Us

Objective-Based Mixing

Guide the Viewer’s Attention

This is my guiding objective in every stage of the mix process and is arguably the most basic and important creative goal in the sound mix.  By manipulating the levels of the dialogue, sound effects, and music of each moment you can highlight or bury the most important things happening on screen.

Here’s an example:  Imagine two characters are having a conversation on screen.  They are standing in a ruined city block after a big battle or disaster.  The characters are positioned in the foreground of the shot, and in the background maybe there’s a fire burning and a couple of other people digging through some rubble.

In order to guide the viewer, we want to place the character dialogue in the foreground of the mix.  It should be one of the loudest elements, so the viewer can focus on it without distraction. The fire crackling or sounds of people walking through the rubble in the background can be played very low or left out if needed.

If we mix the scene so that we can hear every sound element equally, the viewer may become distracted or confused. The footsteps, rubble, and fire sound effects of the background will compete with the dialogue of the on-screen characters delivering the exposition. By keeping the dialogue clear and present we are telling the audience “this is an important piece of the story, pay attention to this.”


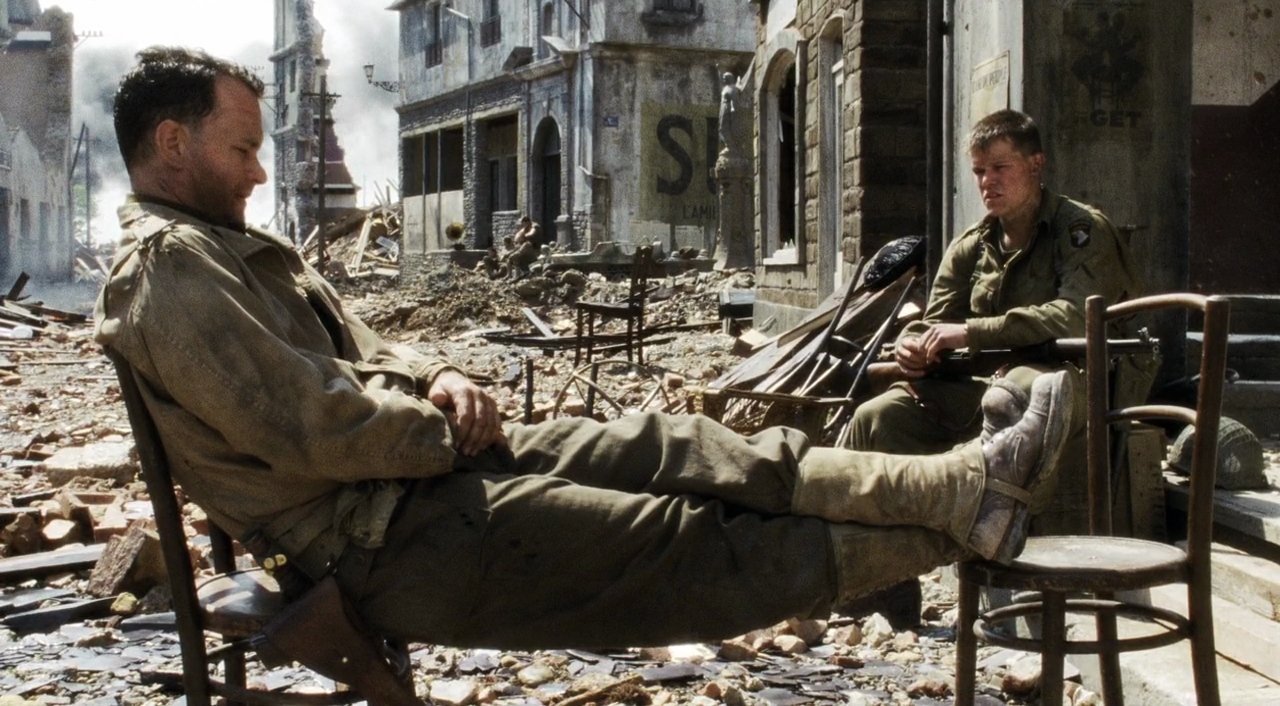
Depiction of a conversation in a distracting scene.

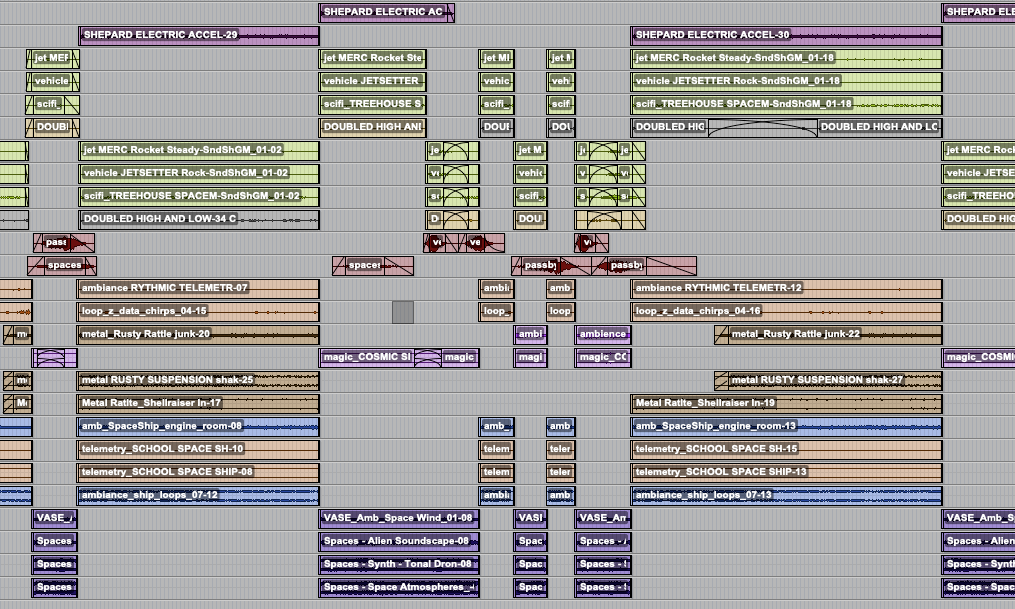
You can achieve the same guidance with sound effects and music if they are delivering important story information to the audience. Perhaps you need to showcase the rattling wheeze of an airplane engine as it begins to stall, causing the heroes to panic. Or maybe a wide sweeping shot of an ancient city needs the somber melody on the violin to help the audience understand that the city isn’t the vibrant, thriving place it once was.

Get the Mix in Spec

This is not a very exciting or fun goal for most, but it may be the most important one on this list.  Every network or streaming service has a document of specifications they require for deliverables, and as a mixer, it is very important that you understand and conduct your mix to achieve these specs.  If you breach these requirements, you will likely have to correct your mix and redeliver, not ideal.

The important requirements I like to keep in mind during the creative mixing process are the loudness specs.  These can vary depending on the distribution, but usually, they explain an overall LUFS measurement and a true peak limit, and in most cases, you will have about 4 dB of range you can land in (-22 to -26 for example).

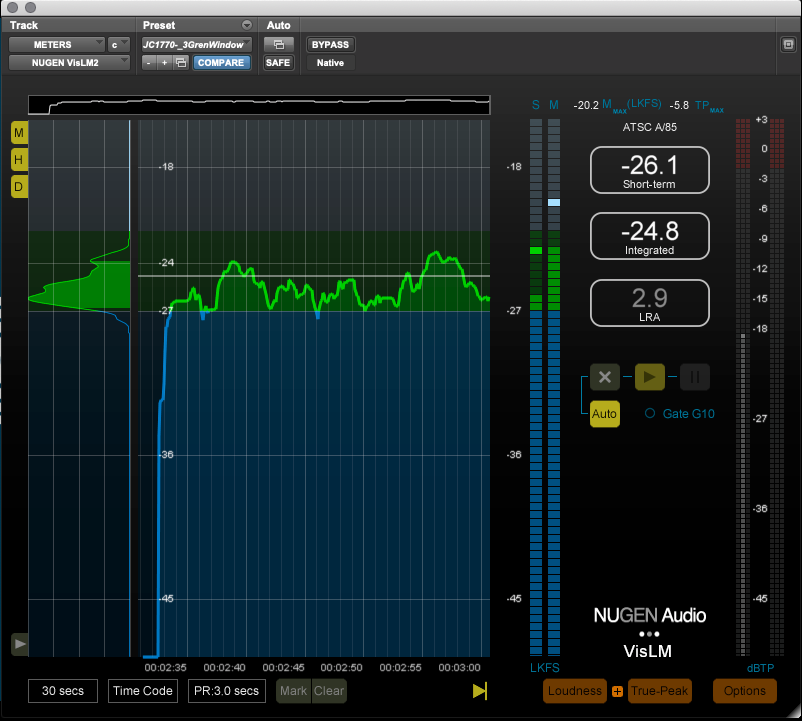
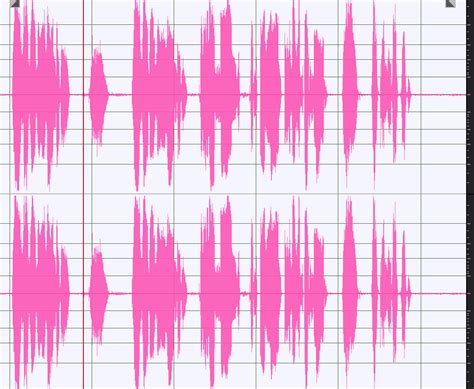
Depiction of LUFS measurement.

The key is to set yourself up for success from the start. I always start my mix by getting my dialogue levels set and overall reverbs applied. For a show that requires a mix in the -24db +/-2 range, I usually try to land my overall dialogue level around -25.  The dialogue is the anchor of the mix.  If I land the dialogue safely in the spec, in most cases the rest of the mix will slot in nice and clean, and my final loudness measurements will be right in the pocket.

I also try to keep in mind my peak limit, especially when mixing sound effects. In action-heavy scenes, it’s easy to crank up the sound elements you want to highlight, but if you aren’t careful you can run up against your limiters and in some cases breach the true peak limit requirement.

When In Doubt, Make it Sound Cool

It may seem like this goes without saying, but if I ever question how to approach a decision or process during my mix, I like to remember this mantra: “Make it sound cool!”  Sometimes this means adding that extra bit of reverb on the villainous laugh, or kicking the music up a bit louder than usual for a montage.  Other times it means digging in and spending that extra few minutes to really make a scene shine.

One “coolness” opportunity I run into often when mixing is a scene where music and sound effects both have impactful sounds happening. One straightforward way to enhance the coolness is to adjust the sync of the sound effects so they hit right on the beat of the music.  It may seem like a subtle change to knock each sound effect out of sync by a few frames, but when the moment hits just right the result makes the whole product feel so much more cohesive and cool.

Another fun opportunity is what I think of as “trippy freak-out scenes.”  Examples are a character having a nightmare where they are surrounded by floating, laughing heads, or a scene where a character takes powerful drugs which kick in and alter their reality.  It’s always worth it to go the extra mile in these moments to really pull the audience into the characters’ wacky world.  My favorite tricks in these times are reverse reverbs and lower octave doubles.

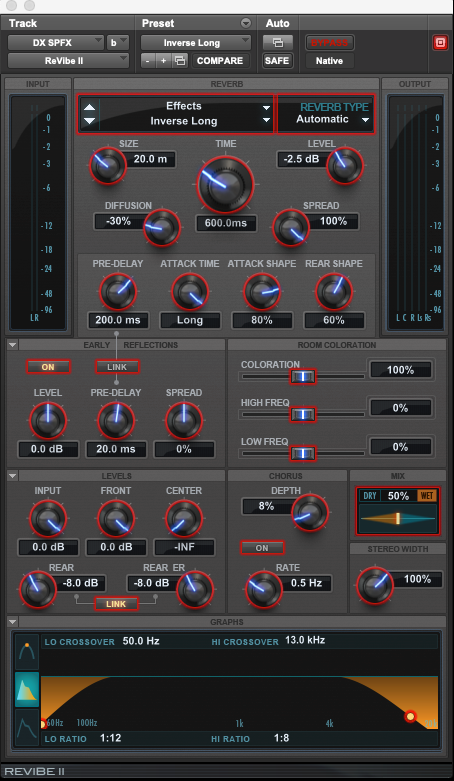
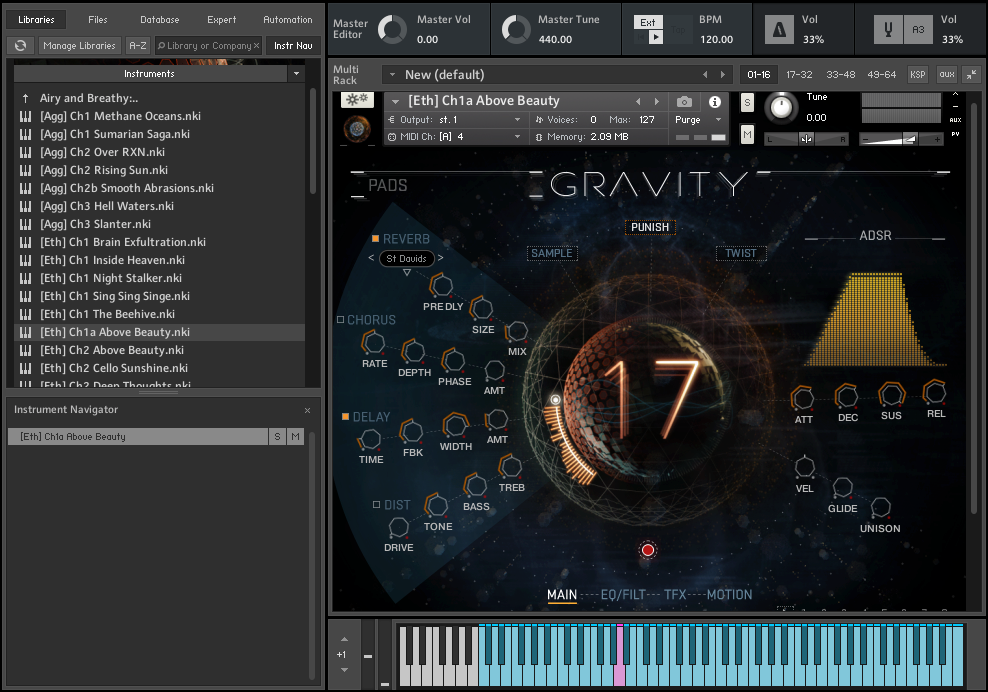
Depiction of ReVibe II plug-in set up for inverted reverb.

I could write a list with many, many items I consider as objectives when mixing.  There are so many competing goals and ideas bouncing around in each episode, but I always come back to these three.  Working with objectives in my mixing allows me to stay focused on the big picture rather than get sucked into the monotony of following a step-by-step process.  For me, it is the key to being creative on demand and ensuring that each mix has a personal touch.

This blog was originally featured on Boom Box Post

Four Portfolio Reel Tips

Some Facebook groups I found in the LA area.

I’d like to note that a reel typically consists of a compilation of clips of live-action or animated TV shows, films, or even video games where the sound is replaced with your own edit. The materials you choose can come from released media where you can use the existing sound as a guide for your edit. However, it’s also a great opportunity to collaborate with up-and-coming filmmakers in your creative community to put together the sound design from scratch. This was particularly common while I was in Boston where college students majoring in film and audio post-production could easily work together to fulfill a project. While it’s certainly not necessary for a great reel, I recommend using Facebook groups to connect with filmmakers, creatives, and more sound editors in your area.

KEEP IT SHORT

If you’ve been searching the internet for tips for your portfolio reel, this is probably the most common tip you’ve seen. While a “short” reel may be defined differently to various editors, it’s important to consider the attention span of the person viewing your reel and the variety in your reel. A good rule of thumb is to keep your reel between 2-4 minutes long. However, how you break down that 2-4 minutes can make a big difference, which leads me to my next point…

TAILOR TO YOUR DESIRED POSITION

Just like with any other resume, your portfolio reel should also be tweaked and adjusted based on the position you’re applying for. It’s important to get all the right information for the places where you want to work or for whose work interests you. For example, Boom Box Post specializes in post-production audio for animation, while Pinewood Studios focuses on live-action. A larger studio like Skywalker Sound spans across media, but many of their releases involve heavy live-action fighting sequences. Now, think about how to break down your reel based on the kinds of post-production studios you want to join. A portfolio reel for an animation-focused studio might include 3 1-minute clips involving different types of animation, while a portfolio reel for a large-scale live-action production studio could have 2 2-minute clips with long and dynamic fight sequences.

HAVE AN ORGANIZED DELIVERY METHOD

Your portfolio reel will most likely come in the form of a compiled video with a sharable link. Sometimes (however not as common) employers may ask to see the full ProTools session instead of or along with a link to a reel. If this is the case, they are evaluating your organization skills, so it’s essential to have all tracks labeled, clips organized, and a smooth signal flow in your session that makes it easy for them to see what’s happening and listen without any problems. We have a great blog on keeping your ProTools sessions organized, which you can read here. You can also check out this blog we have for solid file naming, which will give a great impression if you’re sending more than just a link to employers.

Example of Vimeo platform.

ProTools EQ-III.

If you’re sending a sharable link, there are a lot of great viewing options that are easy to use and easy for others to watch, including Vimeo, Youtube, and Squarespace. Once you’ve compiled your work together in a ProTools session and bounced a Quicktime video of your work, you can upload that video to any of these platforms and include text information to describe the work you did on each clip, breaking down dialogue, Foley, and sound effects.

CONSIDER EVERY ASPECT OF THE PROJECT

While you may be applying specifically to a sound editing position, you still have a chance to show off your understanding for the big picture. This can include recording your own sound effects, Foley, and dialogue, and putting together a basic mix for your reel. Adjusting levels and panning, and using stock ProTools plug-ins like EQ-III to balance out any unwanted frequencies is a great way to show your understanding of how your effects relate to each other.

Sometimes it is easier to record some of your own sounds instead of finding effects from libraries. While Soundly and Splice both offer a limited amount of free sound effects, other general library platforms like Pro Sound Effects can be very expensive. Recording your own Foley or vocal effects can offer more flexibility, and you can also put together your own sound effects libraries to show to employers, simply by collecting those sounds and creating playlists in SoundCloud.

Ultimately, your portfolio reel should have a concise demonstration of your skills as an editor, it should highlight the style or genre of the studios of your interest, and it should be easy to access and navigate through. Portfolio reels can come with a lot of opportunities to show off organization skills and resourcefulness, so be on the lookout for more ways to impress potential employers when you start building your reel.


Designing Cinematic Style Sound Effects with Gravity

Today I’m going to be discussing a virtual instrument called Gravity by the folks at Heavyocity. It’s loaded into and powered by Kontakt Engine by Native Instruments. While Gravity itself doesn’t have a free version available, Kontakt is available as both a free version and full version. Gravity is an incredible, extensively customizable virtual instrument designed predominantly for use in modern scoring. It’s comprised of 4 instrumentation sections: Hits, Pads, Risers, and Stings. Each of these 4 main sections breaks down further into complex blends of the loaded-in beautiful, high-quality samples within the category as well as the simplified individual samples for additional customization with the effects and other adjustable parameters.

With these instruments, Gravity allows you to do a whole lot musically for composers who would like to utilize it in developing a full score, but it also can be used for some truly awesome sound designing purposes. Especially when it comes to cinematic style accents, hits, and synthy ambiances, which, as a sound editor, is what I personally have found myself using Gravity for the majority of the time.

Gravity’s MAIN User Interface For Pad Instrument Section

Gravity’s MAIN User Interface For Pad Instrument Section

After having initially selected which instrumentation element you want, each category of instrument breaks down into further categories to narrow down which instrument feels right for the moment. The only section that doesn’t do this additional categorical organization is the Hits partition. At the bottom of Kontakt, just below the UI, it also displays an interactive keyboard you can use if you don’t have a MIDI board to connect to your system, which you can also play by mouse click or by utilizing your computer keyboard. It highlights which keys are loaded with samples for each instrument selected as well as breaking down similar groups separated by color-coding.

There is a powerful and extensive variety of effects available to include (if desired) to whatever degree the user prefers, which are also broken down into multiple pages that you can flip between by clicking on the name of each page along the bottom of the UI (just above the keyboard).

Gravity’s EQ/Filter

Gravity’s EQ/Filter

In the MAIN section, there is Reverb, Chorus, Delay, Distortion, and Volume Envelope with ADSR parameter controls (attack, delay, sustain, release), as well as a couple of Gravity specific effects. These include Punish – which is an effect combining compression and saturation adjusted by a single knob, and Twist – which manipulates, or…twists…the tone of the instrument which you can animate to give movement to the tone itself. There are also performance controls available like Velocity, to adjust the velocity of the notes, Glide, to glide between notes played, and Unison, which increases or decreases layers of detuned variations of the notes played to create a thicker, more complex sound.

Gravity’s Trigger FX

Gravity’s Trigger FX

There is also an EQ/FILTER page which of course provides a complex equalizer and variety of filtering parameters, a TFX (Trigger FX) page to temporarily alter sounds by MIDI trigger with Distortion, LoFi, Filter, Panning, and Delay. Under each trigger effect is an “Advanced” button where you can further customize the parameters of each trigger effect. Lastly, there is a MOTION page that has a modulation sequencer that adjusts volume, pan, and pitch of the sound triggered over time, and a randomize button that randomizes the variety of motion control and motion playback parameters. With this variety of motion controls, you can create patterns of motion to either utilize as an individual setting or to link a chain of motion patterns. To add to all of that, there’s an editing sequencer, and each pattern contains a sequence of volume, panning, and pitch parameters. This series of adjustable bars allows you to create a sequence of patterns. With all of these parameters to manipulate as little or as much as you’d like, thankfully, they have the option to save, load, and lock motion controls for easy recall when you find a really cool means of motion manipulation that you’d like to bring back (without taking the time to fine-tune all of those parameters all over again).

Gravity’s Sequencer

Gravity’s Sequencer

There is one instrument section that’s a little bit different from the rest and has an additional page of customization options that the others don’t. That’s when you go diving into the Hits. In the Hits section, there are multiple options of what they call Breakouts, which are an extensive array of preloaded multi-sample triggers that implement a whoosh or synth rising element that builds and builds until slamming into a powerful, concussive cinematic impact before trailing off. You can use these individually or blend some of them together for a quick means of generating complex, powerful cinematic accents, and sweeteners. These are also all broken down separately into the individual samples to trigger the impacts themselves with each MIDI keyboard note, the sub-elements for a nice touch of deep BOOM to rock the room, the tails to let the concussive hit play out in a variety of ways, and the airy/synth whooshes to rise up into the booming impact. Included in the four Breakout Hits instruments, there’s the additional page of customizable elements added to the UI that I mentioned at the start of this paragraph called DESIGNER. Because the Breakout Hits instruments each trigger a combination of this aforementioned mix of cinematic elements with each keyboard key note, inside the Designer tab, you’ll find that it allows you to modify each of those elements/samples to customize the combinations of triggers.

Hits Instrument Section

Hits Instrument Section

Now, after that extensive technical dive into everything that this AMAZING virtual instrument has to offer, I must say, Gravity itself is actually surprisingly easy and user-friendly to navigate and play with. It has definitely become my personal favorite tool to create a variety of cinematic style elements and accents. In being so user-friendly, once you’ve got it loaded up and either connected your MIDI keyboard or setup your computer keyboard to use in its place… simply select an instrument from the menu and you’re good to go! Have fun playing and exploring the expansive additional effects and features I’ve detailed above!

WRITTEN BY GREG RUBIN
SOUND EFFECTS EDITOR, BOOM BOX POST

Collaborating With Another Editor

Here are a few things to take into account when you work with another editor on the same project:

Communication Is Key

I know this sounds obvious, but for a successful partnership, there has to be communication. And with sound, it’s essential as well. Usually, you’ll split sections to be covered by each editor, and often, there are elements or builds that are going to overlap or repeat in both sections. Before starting to edit, it’s always good to establish who is covering what and what strength each person has to offer for the project. Without communicating, you can end up doing double the work, or going in totally different directions with the sound palette for the show.

Sharing Your Builds

When you share your sound builds with another editor, it is important to take into account the flexibility of your build. Sometimes the exact same build is not going to work every single time it gets repeated throughout an episode, or throughout the show in general. Therefore, it’s important to have the sections of the build separated when you’re sharing it with another editor, printed down to one track. That way, the other editor will have the flexibility to manipulate the build to adjust for differences in timing or creative changes when repeated.

Here is an example of a shared SFX build.

Here is an example of a shared SFX build

Be Clear In Your Labeling

When sharing your builds and established sound effects, you need to make sure you are being as clear as possible. Proper labeling is key. Those you are collaborating with should be able to reference your sound design builds and effects easily, without having to waste time figuring out which sound matches each element in the picture. Often times we will export a session for a specific build, tracked out, and labeled for easy reference. This makes it easy for me to import the session data whenever the recurring material shows up in my work and is easily shared with other editors for the same purpose. In these sessions, I like to use either markers or empty clip groups above the build, labeling them to indicate their use. It also helps to build these sessions with both the full sound build together, followed by another iteration where the different parts are separated out, so whoever goes into editing the show can easily recognize how the build works and plays.

An example of this would be a laser gun power sequence. This could be a sequence where we hear the gun power-up, shooting, and then impacting the target. I’ll include the original build and timing, followed by individual chunks of design for each action (the power-up, the shots, the impacts) spaced out and labeled for clarity on their use.

Sharing Ambiences And Backgrounds

Established sounds for locations need to stay consistent. It’s very important to keep them the same throughout the episode unless a change is called for by the story. You should talk beforehand with your fellow editor to determine who will cover specific ambiences that may repeat between your work. As you work, if you feel you need to change something or think it’s necessary to add or subtract an element from the ambience, always communicate with all editors on the project.

These are some important examples to take into account when working with another editor to ensure a smooth collaboration and create the best possible soundscape for the project.


Using Localization Cues in Immersive Mixing

Whether you’re mixing for film in 5.1 surround or Dolby Atmos, it’s important to consider a key element of human auditory perception: localization. Localization is the process by which we identify the source of a sound. We may not realize it, but each time we sit down to watch a movie or TV show, our brains are keeping track of where the sound elements are coming from or headed towards, like spaceships flying overhead, or an army of horses charging in the distance. It is part of the mixer’s role to blend the auditory environment of a show so that listeners can accurately process the location of sounds without distraction or confusion. Here are some psycho-acoustical cues to consider when mixing spatial audio.

ILDs and ITDs, What’s The Difference?

Because we primarily listen binaurally or, with two ears, much of localization comes from interaural level and time differences. Interaural level differences depend on the variations in sound pressure from the source to each ear, while interaural time differences occur when a sound source does not arrive at each ear at the same time. These are subtle differences, but the size and shape of our heads impacts how these cues differ between high and low frequencies. Higher frequencies with shorter wavelengths can move around our heads to reach our ears, causing differences in sound pressure levels between each ear, and allowing us to determine the source’s location. However, lower frequencies with larger wavelengths are not impacted by our heads in the same way, so we depend on interaural time differences to locate low frequencies instead. Although levels and panning are great tools for replicating our perception of high frequencies in space, mixers can take advantage of these cues with mixing low end too, which we usually experience as engulfing the space around us. A simple adjustment to a low-end element with a short 15-40 millisecond delay can make a subtle change to that element’s location, and offer more space for simultaneous elements like dialogue.

Here is a visualization of how high and low frequencies are impacted by the head.

Here is a visualization of how high and low frequencies are impacted by the head.

Flying High

While a lot of auditory perception occurs inside the ear and brain, the outer ear has its own way of affecting our ability to locate sounds. For humans and many animals, the pinna defines the ridges of the human ear that are visible to the eye. Although pinnae are shaped differently for each individual, the function remains the same: it acts as a high-pass filter that tells the listener how high a sound is above them. When mixing sound elements in an immersive environment to seem like they are above the head, emphasizing any frequencies above 8000 Hz with an EQ or high-shelf can more accurately emulate how we experience elevation in the real world. Making these adjustments along with panning the elevation can make a bird really feel like it’s chirping above us in a scene.

See how the pinna acts as a “filter” for high frequencies arriving laterally versus elevated.

See how the pinna acts as a “filter” for high frequencies arriving laterally versus elevated.

The Cone of Confusion

A psycho-acoustical limitation to avoid occurs at the “cone of confusion,” an imaginary cone causing two sound sources that are equidistant to both ears to become more difficult to locate. In a mix, it is important to consider this when two sounds might be coming from different locations at the same time and distance. While it’s an easy mistake to make, there are a handful of steps to overcome the cone of confusion and designate one sound element as being farther away, including a simple change in level, using a low-pass filter to dull more present frequencies in one sound, or adjusting the pre-delay to differ between the two sounds.

This demonstrates where problems can occur when locating two equidistant sound sources.

This demonstrates where problems can occur when locating two equidistant sound sources.

With these considerations, mixers can maintain the integrity of our auditory perception and make a film’s sound feel even more immersive.

Written by Zanne Hanna
Office Manager, Boom Box Post

This blog originally was published on Boom Box Post

Sound Editing with Music in Mind

Before audio post-production was even a possibility, composers would incorporate the emotion and the action of what they saw on the screen into their musical scores. They played the role of sound effects editor and composer, with a technique referred to as “Mickey-Mousing” where the composer would exaggerate a character’s movements with specific orchestration and musical motifs. Now that sound FX editors have taken this role in post-production, Mickey-Mousing is less common, so it’s key for sound effects editors to make cuts that work with the music in the overall mix for a film or tv show. Here are some considerations and tips that our team shared on their approach to sound editing with music in mind.

Consider the musicality of chosen sound elements for a build

“When designing sound effects of a musical nature, it’s very important to steer clear of anything with a defined pitch. It’s especially important to avoid any chords, whether arpeggiated (like an upward harp gliss) or played together (like a synth chord used as a steady for a magic beam). There is very little chance that you will happen to choose the same key and chord as the score, so most likely, these elements will need to be muted as soon as the music is added to the mix.
To avoid this, I always choose to use inharmonic instruments, such as chimes, cymbal, water-phone, etc., when I want to add a musical element. Their non-integer-multiple harmonics keep them from sounding like any particular pitch, which in turn keeps them from interfering with the tonality of the music. If you absolutely need to use a musical element, always be sure that you have a non-tonal backup element in place. That way, if your star element is muted in the mix, there will be something left to cover the action.”
– Kate Finan, MPSE


Here is a depiction of how harmonics work in periodic waveforms heard in music and tonal sound FX.

Here is a depiction of how harmonics work in periodic waveforms heard in music and tonal sound FX.

Think about the role that the score will play in the final mix

“Oftentimes, if the guide track provided to us for our sound effects edit includes music, it’s an indication that it’s an important musical moment in the show. This could be a montage or a song sequence. Knowing that music will take center stage helps us think about the sequence in terms of how sound effects will support the music. This may mean cutting less and focusing on what will cut through in the final mix. Or for a song, we may want to cheat some of our effects so they land on the beat and work seamlessly with the music.”
– Jeff Shiffman, MPSE

Be confident in bold builds when a scene shares heavy sound EFFECTS with the music

“It’s important to cut sound effects that are substantial enough that they’ll cut through in the mix once music is added. A lot of the time, music drives the emotion of the scene and therefore is fairly present in the mix, so if you cut a sound effect that is extremely subtle, it will very likely get lost. Make your choices clear and significant enough to not get buried.”
– Tess Fournier, MPSE

Focus on texture to support tonality

“Try to avoid using sound effects that have a musicality to them. You never know if something with a melody or tune will clash with what is going on in the score. This comes up a lot with things like magic effects, so I always try to go textural and nondescript, rather than musical or tonal.”
– Brad Meyer, MPSE

Notice how you’re using the full frequency spectrum

“During songs or music-driving scenes, make sound effect builds that are a bit more punchy and larger than normal scenes so it can cut through the score better if needed. That way your work won’t be lost in the mix!”
– Ian Howard, Re-Recording Mixer


This diagram illustrates the frequency spectrum as it relates to common musical instruments and the qualities that audio editors and mixers use to describe certain frequency ranges.

This diagram illustrates the frequency spectrum as it relates to common musical instruments and the qualities that audio editors and mixers use to describe certain frequency ranges.

Always benefit the progression of the story

“When mixing, remember that it is your job to help create harmony between the sound effects and music coverage.  In some cases, both parties will cover a moment or action in a similar way, and it’s essential to figure out whether music, sound effects, or a combination of the two will best serve the story.
Along the same lines, during songs or key musical moments, you can really enhance a scene by adjusting the sync of certain sound effects to hit on the beats of the music. This is especially powerful during title sequences and music video moments, where the music is driving the story.”
– Jacob Cook, Re-Recording Mixer

The bottom line is that there are multiple ways for sound effects to work with music in any given scene with considerations like atonality, sync, texture, and frequency spectrum. Keeping this in mind allows for a story to shine through action and emotion.

Two Simple Workflow Shortcuts To Help Save Time!

The best part about working with so many incredibly talented and smart individuals are the unique skills and knowledge each member brings to the team.

When I started working for Boom Box Post, I quickly realized how much there was that I didn’t know! Now over a year later, I am still learning something new every single day.

In hopes that we can all continue to learn and grow together, I would like to share with you a few super simple workflow “hacks” that had me questioning, “How did I not know this before!?”

Launching Applications With Keyboard Shortcuts

The first, and most recent tip, was brought to my attention by our wonderful sound editor Jessey Drake.

I’m sure we can all recall our first time learning/using Pro Tools shortcuts. For me, the most mind-blowing shortcut was Option+Control+Shift+3, which renders a 1kHz tone in any selected field/length. This shortcut has saved me a bunch of time, which is the whole point of shortcuts!

Many of the Pro Tools shortcuts are so ingrained in my brain that I find myself trying to use them outside of the application. Cue Jessey’s discovery!

Linked below is the step-by-step guide on how to set up keyboard shortcuts to launch any application in MacOS:

How to launch an app using keyboard shortcuts in macOS

This trick not only helps you save time launching assigned applications, but it also allows you to bring the assigned application forward when your screen is littered with multiple windows.

Although it serves such a minuscule task, I find that the simplest tips are usually the most useful!

Toggling Pro Tools Edit Tools With A Trackball

Our second workflow “hack” comes from a personal realization I had not too long ago when I noticed my editing speed was not up to par with the rest of our editors.

Other than level of experience, I was having a hard time identifying what I was doing that was slowing me down so much.

It wasn’t until our fantastic supervising sound editor Tess asked me, “Are you using the smart tool?”

“Of course I am,” I replied.

To my surprise, that was my first mistake. Which confused me, because wasn’t the whole point of the smart tool that it was smart? Apparently not!

Since the smart tool requires precise cursor placement to activate the correct editing tool, a lot of time can be wasted floating your cursor around the screen. To combat this issue, Tess showed me how to program my Kensington trackball so that I could quickly switch between the different editing tools whenever desired.

Screen Shot 2021-08-16 at 2.55.29 PM.png

The Kensington website has a video tutorial showing how to customize your mouse. Check it out below:

How To: Customize Your Kensington Mouse

It only took me an hour with the new mouse settings to get the hang of it. Now I don’t know how I ever relied on the smart tool!

If you don’t already own a Kensington Trackball (our favorite model here at Boom Box Post), this is your sign to purchase one!

L&L: Less is More: A Lesson in Avoiding Over-Cutting

Over-cutting in your SFX editorial is a really easy mistake to make, and one that can be a real headache for your mixer. Today we’ll go over a quick tip to help you avoid adding too much to your FX builds.

When searching your library for interesting layers to add to a build, it’s very tempting to add every sound you hear that you think is appropriate and cool. But this can lead to bloated builds that make mixing pretty tricky. This is especially true if this build continues in a scene for a while, or dare I mention needs to be cut to perspective.

If you find yourself doing this, try out this tip to help thin out your sound without taking away from the quality. Once you’ve cut in all of the elements you want for your build, mute each layer. Then, one by one, unmute a layer and listen through. If any of the sounds don’t add something significant to your build, get rid of it! If it’s not cutting through in your editorial session, it certainly won’t cut through the mix once dialogue and music are added.


Here’s an example of over-cutting leading to cluttered layers that are counterintuitive to mix.

Here’s an example of over-cutting leading to cluttered layers that are counterintuitive to mix.

Additionally, it helps to keep frequency and texture in mind when creating your builds. Try and choose layers that are distinct from one another and serve a purpose within those categories. For instance, if you’re building an explosion, you’ll want to fill out the frequency spectrum with an LFE element, a mid-range boom, and maybe something like a firework whistle to round out the high-end. Then for texture, maybe you’ll want some rock debris or a big wooden crack at the beginning. It doesn’t make sense to just add layer upon layer of mid-range booming explosions because you can get a similar sound by just raising the gain on one well-selected mid-range file. Thinking about frequency and texture in your builds will help avoid adding unnecessary layers and also make your editorial a bit more interesting.


Free Audio Resources We Stand By

Boom Box Post turned six at the end of August and over these six years, we have written a handful of blog posts. For both our new and OG readers, we thought it would be helpful to round up a list of posts that feature free resources. During this turbulent time of COVID-19, we definitely recommend taking advantage of these awesome tools!

Best Free Apps To Use For Audio

In this blog post, Office Manager / Assistant Sound Editor Sam Busekrus lists a number of free audio apps recommended by our Boom Box Post editors. Give it a read!

Found Audio On The Fly

In this post, Boom Box Post-co-owner Jeff Shiffman provides some tips on how to use your phone when recording audio on the fly!

“As sound people, sometimes we hear something so unique we just have to capture it. A lot of sound designers (myself included) carry around mini recorders for just such an occasion. But we can’t always be prepared. There are moments when you need to capture a sound in an instant. Like if a bird with a crazy call lands on an open window. We don’t always have professional recording gear at hand. Most of us however do have a cell phone nearby.”

Valhalla Freq Echo

Valhalla Freq Echo is a free plugin for both Mac and Windows made by Valhalla DSP. This plugin allows you to add delay emulation as well as target specific frequencies to modulate. Check out this awesome blog post written by editor Ian Howard to get a rundown of what this plugin can really do!

Chip Tone

In this next blog post, supervising sound editor Tess Fournier walks us through the free web-based sound design tool Chiptone. Check it out!

Soundgym

According to sound effects editor Katie Maynard, it’s easy to fall into the habit of working so often that you forget to practice and develop your skills on your own time. For anyone in the audio field, this might be ear training. In this blog post, Katie explores the online ear training program SoundGym. This is a fun one!

Chrome Extensions For Staying Organized

This next blog post is not audio-related but still super helpful! This post highlights 5 Google Chrome extensions we recommend to help you stay organized. Written by Studio Manager / Assistant Sound Editor Tim Vindigni, we recommend checking this one out for those looking to up their organization skills!

Top 10 Internet Resources For Sound Designers

Finally, in this blog post Boom Box Post-co-owner Kate Finan lists her absolute favorite online resources for sound designers. These resources span the breadth of online content from sound effects library downloads, technical support forums, mixing videos, and even mini-documentaries to keep you current on the latest movie sound design trends. Some of the free resources featured in this post include Designing Sound, Gear Space Pro Audio Forum, Soundworks, and Avid Video Blog Series. This is a good one!


X