Theatrical Sound Designers and Composers Association TSDCA
All Events are EDT.
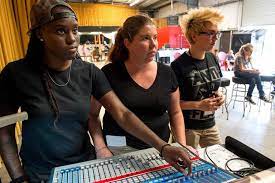
Wednesday, May 19th, 3:00 pm – Session #1 – “TSDCA Salon #26” – Jazz composer/bandleader Jihye Lee and composer/vocalist/sound artist Ken Ueno will present and discuss their new musical works, hosted by Melanie Chen Cole. Sign up here!
Thursday, May 20th, 2:00 pm – Session #3 – “Empowering and Advocating For Yourself and Others: Part 1 – Contract Language and Negotiation” – Lucas Blackadar, Director of Legal Services for Arts & Business Council of Greater Boston, Inc. and Monica Llorente, Senior Lecturer for the Pritzker School of Law at Northwestern University, discuss strategies and materials used in creating more equitable contracts for designers and technicians, hosted by Sam Kusnetz, Brendan Doyle, and Arshan Gailus. Sign up here!
Friday, May 21st, 1:00 pm – Session #4 – “Score Design: the art of conceptualizing and producing complex scores for projects with sonically demanding needs” – Producer/composer Raz Mesinai will discuss his methods of creating extremely detailed and unique scores for different projects, hosted by Greg Mackender and Michael Roth. Sign up here!
8:00 pm – Session #5 – “Re-entering The Workforce In A Time Of Trauma” – Somatic trauma therapist Taryn Longo leads a discussion of dealing with anxiety as theatre workers return to their work environment, hosted by Lindsay Jones. Sign up here!
Saturday, May 22nd, 1:00 pm – Session #6 – “TSDCA Education Committee: New Directions in Teaching Sound & Composition” – Educators Amy Altadonna, Libby Meyer, Vincent Olivieri, and Christopher Plummer, will discuss new teaching techniques for music and sound design discovered during the pandemic, and how they can fit into future lesson planning. Sign up here!
8:00 pm – Session #7 – “IN C” – Join all of the members of TSDCA as they come together in a collaborative musical performance of “In C” by Terry Riley. Members of the public are also welcome to participate in the performance as well. Hosted by Michael Roth, Josh Samuels, and Leon Rothenberg. Sign up here!
Monday, May 24th, 1:00 pm – Session #8 – “A2 COVID Safety Protocols” – Health and safety expert Eddie Raymond will discuss best work practices for staying safe and maintaining audio gear in this time of heightened health awareness, hosted by Joanna Lynne Staub. Sign up here!
As a special members-only activity, TSDCA has commissioned celebrated playwrights Donja Love, Laurel Ollstein, and Frank Higgins to create “prose prompts” for the TSDCA Creative Challenge that takes place during the weeklong event. Members will use the inspiration of the prompts to create new audio works that will be presented on the final night at the now-legendary TSDCA Prom!
Please visit https://tsdca.org/tsdca-annual-meeting-2021-biographies/ to learn more about these panelists.
Theatre Art Life
- Designing Dreams – One on One with Brian Larsh
- Tuesday, 18 May 2021 7:00 PM EST
- FREE REGISTER HEREThe Value of Automation – One on One with Gareth Conner
- Wednesday, 19 May 2021 10:00 AM EST
- FREE REGISTER HEREMasterclass: Fundamentals of Theatrical Automation
- with Gareth Conner
- Tuesday, 25 May 2021 10:00 AM EST
- Webinar price: 20 USD REGISTER HERE
Music Expo
Getting off the ground starting your studio or label, Publishing? Run a studio? Returning to a live sound business? Manufacturing audio hardware or software? Broadcast? Post-Production? Join us for a discussion on moving through 2021 with (a LOT of) learnings from 2020… May 20 at 6 PM PDT https://www.musicexpo.co/event-info/getting-off-the-ground-starting-your-studio-or-label
Touring Professionals Alliance
We are bringing the TPA Kitchen to San Francisco & Nashville providing high-quality, chef-made take-home meals to those in the music industry. We wanted to take this moment to say that we know this time has been incredibly difficult, but hopefully, there is a load-in right around the corner. In the meantime, come join us for some incredible food by fantastic Chefs & Restaurateurs. To register, please visit: www.touringprofessionals.com
#NOBEL4ISS Equal Space Challenge – Filmmaking Webinar Series
Claremont High School’s Cinematic Arts Program (CCAP) has teamed up with the Entertainment Industry Professionals Mentoring Alliance (EIPMA) and Space Games Federation® (SGF), and the Vaughan International Film Festival to host a series of biweekly webinars (March 24-July 14) to meant to inform and educate aspiring filmmakers through the production process from industry professionals in conjunction with the #NOBEL4ISS Equal Space Challenge open to students, young professionals and others interested in careers in media and entertainment from around the world.
Webinar topics include copyright law, producing, writing, editing, directing, cinematography, sound, special effects, mixed media, and more.
Visit the websites below to learn more about the #NOBEL4ISS Equal Space Challenge
https://filmfreeway.com/Nobel4ISS
https://eipma.org
#Nobel4ISS
May 19, 2021 04:00 PM
Jun 2, 2021 04:00 PM
Jun 16, 2021 04:00 PM
Jun 30, 2021 04:00 PM
Jul 14, 2021 04:00 PM
AES Spring Show
May 25 – 28 Register Now and Make Plans to Join Us for the AES Show 150th International Convention – https://aesshow.com
Femme House
Are your drums sounding dull? In this workshop, learn how to give your drums more life through effects processing. May 28 at 12 PM PDT https://www.eventbrite.com/e/may-femme-house-session-drums-processing-tickets-153856606251
SIGN UP for Live Event Career Exploration Day with Rock Lititz
|
Join us this May 2021 one of a kind Live Event Career Exploration with Rock Lititz to learn more. We will be providing virtual content to high schoolers during the week of May 10. Including TWO HOURS of flexible content and associated informational worksheets. There will also be a LIVE Q+A session offered to connect with real industry professionals.
Teachers are encouraged to sign up for full classes, or any driven individual students are welcome to sign up independently.
https://www.surveymonkey.com/r/LiveEventDayVirtual21?fbclid=IwAR0UViw6swpGOqF4cAe1QCamBgvDBjScokZUtjoMGPaf-25XKZKgVIMRzPI
Allen & Heath Launches Mini Masterclass Series
Wednesdays, 9:00 a.m. PST
Make sure to check out the free ‘Mini Masterclass’ sessions offered by Allen & Heath. Two tracks are currently running. Feel free to pick and choose any or all of the sessions that grab your interest. Installation Inspiration features veteran engineer and design consultant Samantha Potter. Monitor Mix Mastery is presented by go-to monitor engineer and production manager Mike Bangs. See you in class! https://americanmusicandsound.com/allen-heath-mini-masterclasses
Insights in Sound
Fridays
Join host Daniel Liston Keller for a series of in-depth and irreverent conversations with people behind the scenes, behind the technology, and behind the music. From musicians and producers to touring pros, sound designers, inventors, and more. Previous episodes, including Pablo Wheeler, Jeri Palumbo, Harmoni Kelley, and Michael Beinhorn here: https://youtube.com/playlist?list=PLELP8j3P2xz8tzRSqycOMtxrUWMvNzvvA
Nobody Likes Networking
For anyone who is looking for new work during these challenging times, Mike Dias — the Executive Director of IEMITO, the In-Ear Monitor Trade Organization — has a new monthly column in Pro Sound News focusing on networking skills. Now more than ever we need to be able to lean on second and third-tier relationships for opportunities. And if that sentence makes you uncomfortable — you’re not alone. No one likes making small talk and asking for favors. No one is a natural born networker. But it is a skill that anyone can learn. If you want more concrete steps than what’s available in the Pro Sound News article, Mike has published many of his past networking talks and notes from his upcoming book at his Nobody Likes Networking site for free.
DiGiCo
Exclusive online DiGiCo Workshops: YOU choose the subject! We are running several online Clinic Workshops where you get to decide what we talk about! Each session is a private one-on-one workshop with a member of the DiGiCo team. So, book now and tell us what you want to know!
Book here: http://bit.ly/digicoclinics
Mixing Music Live
Concert Sound Engineer and SoundGirls Co-Founder Michelle Sabolchick-Pettinato shares her knowledge and experience from 30 years in the industry. Offering two online courses: Mixing Music Live and intro to live sound and mixing and LISTEN! a guide to EQ and Critical Listening. A discount is available to members of SoundGirls. Both courses include great info and lessons via her blog and newsletter. https://www.mixingmusiclive.com
HARMAN Live Workshop Series
HARMAN is thrilled to invite leading Front of House Engineers, Lighting Designers, Technicians and other knowledge experts in the industry to share workshops of their secret methods, tips and tricks.
https://pro.harman.com/lp/learning-sessions
SSL Live Sound Training Program
For the ultimate immersive learning experience, SSL offers its Live Certified training — a six hour intensive on-line video course led by Live Product Specialist and live sound veteran Fernando Guzeman. Currently, SSL is offering certified training courses in both English and Spanish during June.
https://www.solidstatelogic.com/ssllivetraining
The Production Academy
Hosts weekly webinars The Pandemic Sessions.
https://www.theproductionacademy.com/pandemic-sessions
Post-New York Alliance – Post Break
You can watch past episodes here A weekly series produced by the PNYA Education Committee explores post-production in New York State. Each week, a different topic will be discussed with a variety of professionals. https://www.postnewyork.org/blogpost/1859636/Post-Break
Color of Music Collective
Hosts free virtual panels on a weekly basis that amplify People of Color and LGBTQ voices in the music industry. You can sign up for their newsletter to see when the next panel is.: https://www.colorofmusiccollective.com
Omni Sound Project
Dedicated to being the most accessible point of entry to the music and audio industries. We strive to provide affordable opportunities for learning to under-represented communities as well as spotlight the talents of female and non-gender-conforming audio professionals. All genders are invited to attend our online educational events. Find all events and to register at https://www.omnisoundproject.com/
Part of the Main
Has launched a series of affordable theatre training workshops from QLab and Lighting Programming into Theatre Marketing and PR. They are offering 20 funded bursary spaces to Black artists. Learn more bit.ly/partofthegrid
Intro to SoundGrid Studio: Online Webinars
Join us for personal small-group webinars about the new Waves SoundGrid Studio for real-time audio processing in the studio. Get a personal overview of how SoundGrid Studio can benefit you for:
- Real-time recording and monitoring with plugins
- DSP offload for more processing power while mixing
- Collaborating with other musicians and producers in the studio
- Expanding your studio setup when needed
These are limited-availability sessions with Waves Studio Specialist Ryan Monette, who will provide answers to any questions you might have.
https://www.waves.com/events/soundgrid-studio-online-2020?utm_source
Andrew Scheps Talks To Awesome People
There are a lot of awesome people in the world, and they all have amazing stories to tell. Getting them to tell their stories on camera is not only fun and educational for all of us, but it helps document some of the absolutely incredible things that have happened in the brief history of recorded music. Join Andrew and his guests for a deep dive into what makes them, and the people around them, tick..
Every Monday 2:30 PM EST, 6:30 PM GMT.
https://www.puremix.net/live/andrew-talks-to-awesome-people.html
I’m with The Crew
A very personal look at human nature and the adaptability required to get through this unprecedented time. Shining a light on the importance of understanding and managing the holistic-self in order to find the strength to take action.
Hosted by Misty Roberts & Jim Digby, Produced by Shelby Carol Cude, guided by mental health professionals Taryn Longo and Dave Sherman with weekly special guests, this live-webinar provides an opportunity to gain greater insight and control over how we respond to these times and manifest the resilience to survive and start again when that time comes.
The webinar takes place at 11:00 a.m. PDT every Friday.
https://showmakersymposium.com/im-with-the-crew
Robert Scovill – The Lab
An online, interactive session focused on pro audio called “The Lab”. This 90-minute session is a completely open forum with much of the topic matter being driven by attendees. Robert has a complete console, recorders and small networked PA system set up in an attempt to address and investigate most challenges. Admittedly the focus is geared more toward console, processing and mixing out of practicality as much as anything. Attendees are encouraged to share their screen and their challenges regardless of console type.
First three Mondays of every month. 1:30 p.m.
It is first come first served with a room limit of 300.
Sign up at https://www.robertscovill.com/ under News and Events.
Pooch & Rabold on YouTube
Pooch and Rabold have over 50 years of experience between them as Front of House live sound engineers. They work for artists like Bruno Mars, Justin Bieber, Kenny Chesney, Iron Maiden, Jay-Z, Alicia Keys, Linkin Park, Motley Crue, Guns N Roses, Widespread Panic, and many others. They have traveled the earth looking for the best steakhouses in all but a handful of countries. Rabold and Pooch share all of their knowledge in this very informal series of videos where you get to be a “fly on the wall,” while two of the most respected live sound engineers talk freely about audio.
https://www.youtube.com/channel/UCjx5xSFzwXd43XL4cZDeCag
Robert Scovill – The Back Lounge
An online social group called “The Back Lounge”. Here industry people of all types; production people, i.e. road managers, production managers, backline, audio and lighting pros, company owners and personnel, HOW staff etc. all gather to discuss the state and future of the industry and share guidance and resources on financial assistance strategies and any other topic that suits the discussion.
First three Fridays of every month. 4:20 p.m. PDT
This is first come first served with a room limit of 300.
https://www.robertscovill.com/
Sennheiser Academy Online Webinars
Sennheiser is pleased to announce a series of webinars for our customers and partners. Join us online in the coming weeks to learn about a wide range of topics, from RF and microphone basics to roundtable discussions with sound engineers, as well as a chance to put your questions to our application engineering team.
https://en-us.sennheiser.com/webinars
Updates & Resources
For COVID-19 updates and resources, check out the NAMM. In addition, NAMM is offering a variety of webinars and sessions to help understand alternatives and tips to coping with this new dynamic.
https://www.namm.org/covid-19
Club Cubase
Join Club Cubase Google livestreams every Tuesday and Friday, as Greg Ondo answers all of your questions.
https://www.facebook.com/47279836044/posts/10157291784976045/?d=n
Show Makers Symposium
The Show Makers Symposium is a place for us to gather, learn and give back. During these uncertain times, we will shine as much light as possible toward the end of the tunnel and provide as many resources as available for growth and mental resilience.
https://showmakersymposium.com/#missionstatement
Event Safety Alliance
The Event Safety Alliance® (ESA) is dedicated to promoting “life safety first” throughout all phases of event production and execution. We strive to eliminate the knowledge barrier that often contributes to unsafe conditions and behaviors through the promotion and teaching of good practices and the development of training and planning resources.
https://www.eventsafetyalliance.org/
Learn with Dave Rat
Learn new tips for pro audio engineers and sound techs on Dave Rat’s YouTube Channel. Dave mixed FOH sound for Red Hot Chili Peppers for 27 years, Rage Against the Machine, Blink 182, Soundgarden, Foo Fighters, The Offspring, and more. When he was 18 years old, he co-founded Rat Sound Systems which is the primary sound vendor for Coachella and provides world-class audio sound systems for numerous touring artists including Pearl Jam, Jack Johnson, Pixies, Alt J.. In addition to being president of Rat Sound, Dave has designed speaker systems including the EAW MicroWedge series and Rat SuperSub. The SoundTools.com division of Rat Sound is actively manufacturing and distributing his product designs.
https://www.youtube.com/user/www73171/featured
Wireless Side Chats
Lectrosonics has produced the new video series Wireless Side Chats, hosted by VP of Sales and Marketing Karl Winkler. Episode 1 explores the history of early wireless, episode 2 shows how to solve the seven most common wireless mic problems, episode 3 is an in-depth clinic about Lectrosonic wireless designer software, and episode 4 further explores best practices when using wireless.
https://www.youtube.com/playlist?list=PLwnOnolFSN5K2-2QZOwzVq-0ZFYgoPXDH
eMotion LV1 WEBINARS
Join Waves on our special eMotion LV1 Online Webinars series with one of Waves’ top live sound specialists as your guide. The seminars will be conducted as intimate sessions for small groups, involving an overview of eMotion LV1 mixer with a chance for you to ask questions after being given an overview of the layout and main functions and advantages of this product. Check the website for upcoming dates.
https://www.waves.com/events/lv1-online-webinars
Richard Furch – #mixtipwednesday
Now in the third year, #mixtipwednesday aims to offer quick tips to get you out of the creative ruts and keep you inspired making records and improving your craft. Also, an Instagram Live event, every Wednesday at 6:00 p.m. PDT, mixer Richard Furch (@richardfurchmix) answers your questions and engages the listeners with insights into the craft and business of record mixing.
QSC@Home
QSC@Home is a comprehensive online launch point dedicated to users’ success across a vast range of solutions and applications. Through its “Connect, Learn and Experience” architecture, QSC@Home visitors are treated to unique collection of online training, tutorials, certification, webinars, entertainment and live online support from company experts, all of which is constantly curated and updated. QSC@Home is a valuable tool for everyone from systems contractors, integrators, A/V IT technicians, A/V consultants, musicians, artists, djs, live sound engineers, recording pros, HOW musical directors, cinema technicians, cinema dealers and end-users at all levels of expertise
https://www.qsc.com/qsc-at-home/
Conversations with Sound Artists
The Dolby Institute and the SoundWorks Collection Podcast, now in its 6th season, is putting the spotlight on episodic content, featuring in-depth conversations with the sound artists behind some of the best broadcast and streaming shows. Join the talented artists behind the shows The Mandalorian, Westworld, Mindhunter, Ozark, Locke & Key, and Unorthodox for in-depth discussions about the creative sound choices for these shows.
Learn more: https://dolbylabs.co/33NNrgw
Wrong End of the Snake
Tuesdays at 2:00 PM EST
Front of House Live Sound Engineer Ken “Pooch” Van Druten, and Monitor Live Sound Engineer Kevin “Tater” McCarthy, team up to host a webinar exploring the sometimes irrational, always spirited relationships between the music industry tribe. Join us each week as Pooch and Tater reflect on decades of highs and lows, professional tips and tricks, and a special industry guest.
https://us02web.zoom.us/webinar/register/WN_R2_ZRFobS3Og41Ax9JeQqQ?
ADAM Academy
An informative video series on the company’s YouTube channel which provides all viewers from entry-level audio students to skilled working professionals with valuable information, tips and tools that they can use to get the best performance from their loudspeaker monitor systems. Recent video topics include: How to Calibrate a Subwoofer; Studio Monitor Placement; Proper Monitor Maintenance & Cleaning; Mixing Rap and Hip Hop Master Class by Brooklyn-based hip hop producer and engineer Paul Womack; Audio Post; How to Mix Acoustic Sessions; How to Mix Live Sessions for Video featuring engineer Eric Bastinelli; How to Tune Drums; How to Mic Drums; Drum Editing in Pro Tools; Tips for Becoming a Successful Freelance Musician presented by Grammy-nominated bassist Jonathan Maron.
https://www.youtube.com/playlist?list=PLGSZx_3dmWXqXo1-k5GqJtEmU9Uy4Sfye
New Lurssen Mastering YouTube Channel
On this channel with weekly updates, Lurssen Mastering engineers, Gavin Lurssen and Reuben Cohen get you closer to their audio engineering world and share useful tips and insights into the art of mastering.
Lurssen Mastering is a world-renowned multi-Grammy award-winning mastering studio. They have mastered many gold and platinum records and have received several industry awards. In addition to the Grammys earned and proudly displayed by Lurssen Mastering, numerous songs worked on by the team have been nominated for Oscars over the years and several have won this prestigious award.
https://www.youtube.com/channel/UCuSlopV23zOqLzuKpeLKSIQ


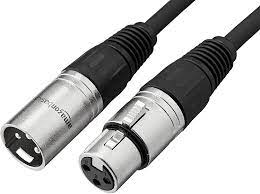
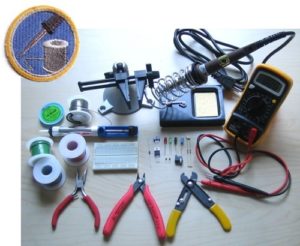 Soldering is one of the most useful skills a sound technician can have. It can seem daunting at first, but it is surprisingly easy once you know how. It can help you understand your equipment and signal flow better, save you money, and there’s nothing quite like whipping out a soldering iron and saving a gig to silence the doubters.