Empowering the Next Generation of Women in Audio

Join Us

Starting a Podcast on a Budget

DIY from one novice to another!

Passion is something that needs to be shared. Well, at least in my experience. And two things I am passionate about, are mental health and music. I also love exploring ideas, having conversations, and getting curious about anything I can get my hands on. I felt so blessed when I got my audio engineering qualification – because it set the ball rolling for me to start my podcast around a topic that ties in with my primary work (mental health and eating disorder/addiction coaching).

Now, for those of you who are seasoned podcasters and engineers, you may read this or listen to my podcast and be able to quickly highlight all the errors I have made along the way, but I am totally okay with that, as I am happy to admit I am still learning!

The purpose of this blog post, however, is to inspire those who might feel as if they don’t have “all the necessary skills/tools” to follow their passion. I am here to say: Start where you are at, and only growth will follow!

So, I will take you through the way I approached starting my podcast called “Curious About Recovery – Diving into Eating Disorders” available on Spotify and Anchor.fm and hopefully it will help you wherever you’re at on your podcast journey.

Finding a theme

This was relatively easy for me as I am already a recovery coach with lived experience of having an eating disorder, so it’s pretty much the topic I know the most about. What I had to decide was how to structure the podcast. I decided to make it three-fold in format.

  1. Interviewing professionals in the mental health and eating disorder community. (Expert episodes)
  2. Sharing my lived experience/insights into my eating disorder recovery. (Solo episodes)
  3. Interviewing people who have their own lived experience in recovery from disordered eating (People episodes)

This way I can learn and expand my reach through others as well as share messages that I might never have thought to share, worldwide! The trick here is to be confident and ask whoever you can, even if you think they might say no – you have nothing to lose!

Recording equipment and software

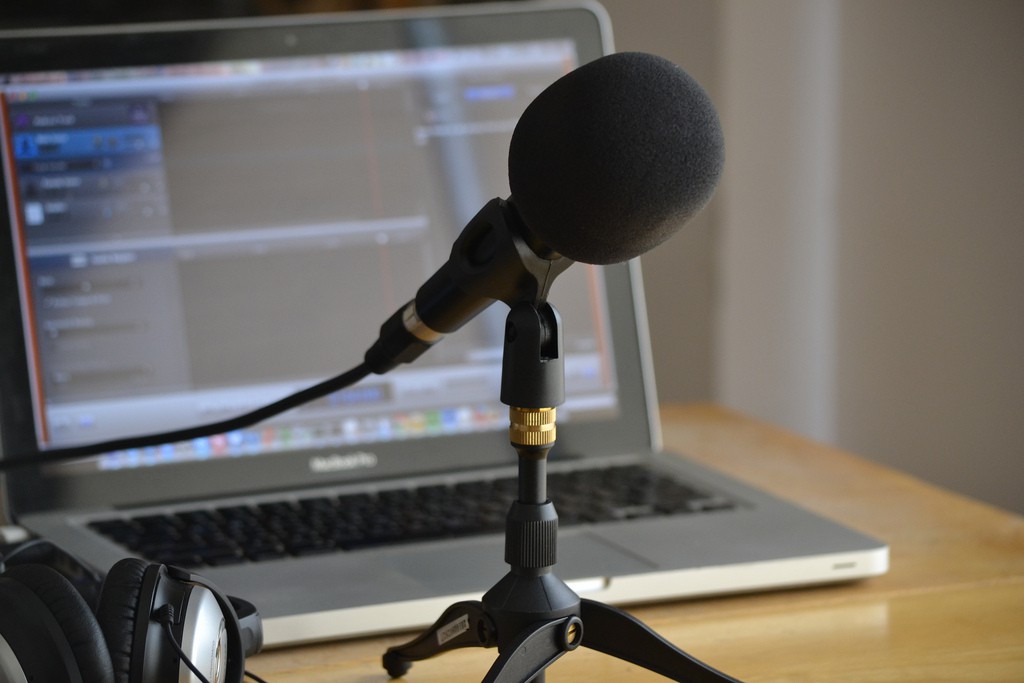
Audio Interface: Behringer UMC404HD

This nifty little 4 channel audio interface is all I needed! Compatible with the M1 which was super important for me! You will want to work with an AI to get a better quality recording than what is available in your PC/laptop.

Mic: Shure SM58

Okay, condensers are the preferred type of microphone for podcast recording, but hey it does the trick! You want to try to use ANYTHING but your laptop mic or your headphone mic – unless you have a super fancy headset of course. I coupled this mic with a small mobile vocal booth and pop filter just to remove some of the room’s sound (I do everything in my bedroom).

Headphones: Sennheiser HD280 Pro

These are SUCH good closed-back cans for those who are wanting quality audio and are working on a budget. I got mine for around R2200 at the time (about $130). A good set of headphones is important so that you don’t get any sound coming in from your speakers and then back into your mic. It allows for a clean feed from each podcast guest and keeps your audio in check. It also picks up little nuances from the guest’s side so that you can ask them to make any changes before you record.

PC: Mac Mini M1

I just put this here because I got it as a birthday gift from my sister and it makes me tingly all over with joy. But any good laptop will do. (Thanks Louise!)

Where To Record: ZENCASTR

I use Zencastr for recordings. Why? Because of a few things:

  1. It records each user’s audio as a separate track.
  2. It records directly from the source (so it doesn’t matter if your WIFI acts sketchy, you will still get their clean feed.
  3. It’s super easy to use and you can host up to 10 guests for FREE!
  4. There are options to record video and to produce your episode on the site (some costs are involved) but that is if you don’t have any audio editing software.
  5. The audio quality is 10 x better than using something like Zoom.

Software: Rx Audio Editor Advanced, iZotope Elements, Da Vinci Resolve / Logic:

I am fortunate enough to have the incredible RX9 Advanced Audio Editor (previous versions are not compatible with M1 yet – I think). This does wonders in my ability to clean up my guest’s poorly recorded feed as well as help match EQ, remove reverb and noise, and all the fun things RX allows for. I am a HUGE fan of all my iZotope plugins as well which help me along this process. I use Da Vinci Fairlight (SUPER powerful and FREE) for basic audio and video editing and other times I’ll switch to logic for a more refined approach.

Getting it onto a streaming platform (without a budget):

Now, the first thing I realized when starting my podcast was that to stream it on any platform, you first must upload your show onto a host site (missions, right?). I searched all over for a host site that was affordable for me and was disappointed at every turn. Then I stumbled upon Anchor.fm and man was I impressed.

On this site, you can upload your episode for free (yes, free) and it acts as the host site for automatic streaming onto Spotify. With one or two clicks, your show is live! What a blessing! You also have the option of converting your episode into a blog post directly onto WordPress! The only thing here is that I am not profiting from these episodes YET, which doesn’t mean it’s not possible to do so on this site. I think once the show gains traction I might venture into that avenue, but for now, I am happy with my show simply being a way of spreading the message I am passionate about (again, purpose first, right!)

Here your show will be available on Spotify and Anchor.fm itself. It does not stream to other platforms, so if you are okay with this then no problem!

Challenges and how to overcome them:

Having to keep track of time zones with guests abroad. I use Timanddate.com to make sure all my bookings are accurate.

Setting deadlines is important. Make sure you know how many shows you want to release per month and work consistently over time to make it happen. Communicate with your guests as to when their interview will be, and prep them beforehand with a welcome letter, preparation questions, and a time and date of their episode release so that they can coordinate with their marketing team. Time management is key!

Legalities!!! Believe it or not, there are laws about podcasting. You will need to do some research here but the most important one I have found so far is to get your guests to sign a release form, telling them exactly how you intend to use their recording, what compensation plan you have (if any), and ownership rights. Very important!

Getting your podcast “out there”. If you are doing this solo, it means you will need to make the time and effort to get it out to your audience. Start by creating an Instagram page dedicated solely to the show – look at creating cover art, images, branding that aligns with your personal or professional brand, and your brand voice. Then post to other platforms such as Facebook, Twitter, LinkedIn or wherever you have people following you. Also, ask friends and family to go give your show a listen and a rating. The more the merrier!

Biggest takeaways:

Remember what the purpose of your podcast is. Are you wanting to make money or share your passion? Whichever it is, you will need to approach it differently. For me, right now it’s about sharing a message, so I have been happy to put in the time and not profit from it yet.

Be consistent. Plan ahead of time. Make sure you always have at least 5 episodes ready to edit/release at any given time, so that you never feel as if you are falling behind on those weeks you decide to take time off or are involved in a time-consuming project.

Have fun! Don’t get too serious about this. The more you strain yourself about getting things perfect, the less enjoyable this process will be. If you have something worth sharing, I promise you the process will feel fluid and free. Keep looking to others for additional support and advice should you need it.

So, there you have it! My novice experience with starting a podcast. I have had SUCH fun and am loving this phase of my life. If you feel like taking a listen, head on over to Spotify by following this link:

https://open.spotify.com/show/1TwaZ2ID4FRQthckqfjR0h

And my Instagram page: @curiousaboutrecovery

If you know anyone struggling with disordered eating or if anyone wants to pick my brain about my podcasting experience thus far (still in the infancy stage), then feel free to reach out to me!

Designing With Lead Vocals

Until recently, I didn’t consider myself an Ableton Live user, since I was primarily using Pro Tools for vocal production. Since I mostly produce Electronic-Pop music, I made the switch to Ableton earlier this year. Before then, I was faced with the complexity of designing new vocal parts for a project using Pro Tools and stand-alone plug-ins with loads of parameters, and I craved an outlet for a more intuitive process.

After recording the vocals for my original song called “Beach Blood” in Pro Tools, I transferred the files over to Ableton to build a track that really reflected my style. One thing that made this such an easy change is the many learning resources. On top of the website’s Knowledge Base, the DAW has both an “Info View” and a “Help View” that makes understanding parameters and navigating through the manual very simple. This information isn’t revolutionary, but I emphasize this because I didn’t feel like I had the same kind of resources for learning other DAWs or even other audio software.

As I dove into producing my song, one resource I used that I highly recommend is the YouTube videos of fellow Berklee alumni Claire Lim, known as dolltr!ck. Getting started using Ableton’s built-in vocoder was super easy with this tutorial. My song is extremely vocal-heavy, so adding a vocoder was the obvious next step for incorporating dynamic texture. Following this tutorial, I created “carrier” and “modulator” tracks in my session, with the “modulator” track as my lead vocal recording I made in Pro Tools. Since the vocoder is supporting layers of organic background vocals, I mostly listened for how this new part blended into those existing vocals. This let me release my grip on the technical aspect of the plug-in. Here you can see how basic I kept the modulator, and I’ve included one audio clip without the vocoder and one with it to hear the difference.


I also used the vocoder plug-in to transform a lyric into a sort of “lead” synthesizer instead of supporting the vocals with harmonies. I played around with a preset called “basic peak lead” which uses FM synthesis in Ableton’s Wavetable synthesizer, perfect to satisfy my affinity for harsh FM sounds. In my other Wavetable examples, you’ll see I mostly utilized various LFO speeds and depths to manipulate the position of the oscillators in the modulation matrix. I followed my gut with these decisions and found it really natural to incorporate my choices into the song. The image below shows what that looks like, and here is how that sounds.

Returning to Wavetable, I used two instances of this synthesizer as bright pads to contrast the heavy bass material in the song. While the option to really dive into this instrument is available, I also found it easy to get a sound I wanted without exploring too deeply into the complexity of wavetable synthesis. I just dragged my lead vocal sample into the visualizer window for the first oscillator and used a pre-existing detuned saw for the second oscillator. I also set the octave on my MIDI keyboard higher so the pads didn’t mask the vocals. Similar to the lead vocoder track above, I made some slight adjustments to the modulation matrix with my main focus on the oscillator positions, and in one instance, I added an arpeggiator MIDI effect. Even though it’s not immediately obvious that this sound came from my voice, it has a similar essence and keeps the sonic footprint of all these different parts within the same space.

The last design element I want to point out from this project is a rhythmic vocal sample I made using the Simpler instrument. I used the lead vocal as the sample and cut a random short clip, and I adjusted the envelope to give it a short decay. Then, I played around with the loop, warp, and filter options, and added the overdrive audio effect for some color. Once I got a staccato sound with a mixture of tonal and atonal qualities, I listened through my lead vocal to find a lyric I wanted to emphasize when the loop played all the way through. I felt like this last step highlighted the story in the lyrics which is always the most valuable and detailed part of my music.


Most of these techniques are straightforward in Ableton Live, which makes following my producer’s intuition a painless process. I have reiterated in many of my recent blogs (since focusing on producing my own music) how important it is to get out of your head, trust your gut, and free up the space in your mind that clutches to technical excellence. I still value a highly technical design or mix, but I’m leaning more into my instincts to balance out years of servicing my engineering self. For now, I am more attracted to the process of music making that puts creativity at the forefront of my projects.

L’ARTE DEI RUMORI


Don’t let the title fool you! Rumori is not rumors, but noises, and that is what this blog is about.  All will be revealed as you read on…

Over the last few days, being in isolation as I recover from a bout of Covid, not serious but neither do I want to pass it around, I decided that I needed to re-master my piece that I had hurriedly loaded onto Bandcamp.  I decided to make a few changes: extracts of dialogue that seemed ‘out of place or unnecessary, move a few sounds around the stereo image, add a clip that I had forgotten to include, and found a group of three clips that had been coordinated into the second movement but were ‘empty’ by which I mean I had to find and link the .wav files.  Also, I had to decide what to do with the bits of dialogue that are central to the piece.

On the 1st of April 2019, I had an operation on my throat which affected my vocal chords.  For six weeks after that, I could do no more than squeak and rely on writing messages to communicate.  When my voice finally returned, it was raucous and very low in volume; and of course, I could no longer sing. Though I can go into a higher soprano register, the range is limited to just about seven tones from high to low; as a result, it breaks if it tries to go into the lower register so, I don’t sing.  My speaking voice is rather like my hair; I never know what it will be like from one day to the next. And since I am no longer with someone, I can go days without speaking, which makes it worse – catch me at about six, early evening, and it’s comfortable.  I’d only been in Italy a year at the time of the operation and all the friends I have made since, recognize me with this voice; it’s me, Frà.

The reason I wanted to make this clear is that I overcame my ‘shame’ about my voice and learned to love it.  This is important since I use it in several of my pieces.  And here is the point of this preamble: Felicia Atkinson, French composer, and sound artist uses her spoken voice but in a rather special way: her dialogues are almost always softly spoken and often submerged into the ambience of the sound so sometimes not heard clearly, while at other times they come through quite clearly.  For example, in ‘Pieces of Sylvia’ from her latest album, ‘Image Langage’, the voices are barely discernible, which creates a mood around the piece and maybe encourages one to listen much more closely than might normally be the case.  The voices become a dialogue panned hard left and right and gradually become clearer towards the end.   You can listen to this track (once) via this Bandcamp link:

https://feliciaatkinson.bandcamp.com/track/pieces-of-sylvia

‘Shirley to Shirley’ on her 2019 album, ‘The Flower and the Vessel’ use a heavily processed dialogue that creates a sense of intimacy between the speaker and the listener but can more easily be heard. Other pieces on this album vary in how the voice is presented but it is always an integral part of the music and always spoken.  You can listen to this track (once) via this Bandcamp link:

https://feliciaatkinson.bandcamp.com/track/shirley-to-shirley

So, one of the reasons for the remastering was my unhappiness with the dialogue.  I had originally thought to have it ‘submerged’ in the texture of the drones and other accompaniments.  However, this piece is quite dense in places, so the voice struggles to come through.  I took a decision, therefore, to bring the voice forward and in so doing created a new problem for myself, noise.  A problem which I shall clarify and explain how I dealt with it in a while, but first a few considerations.

In last month’s blog, I spoke about being a sound artist due to an absence of typical musical features.  In effect, my music (sic.) is noise.  As early as 1913, Luigi Russolo, wrote a ‘Futurist’ manifesto L’arte dei Rumori. (The art of Noises).  In his manifesto, he posited that the human ear was becoming accustomed to the speed, energy, and noise of industrialization and of urban living.  He and his fellow ‘futurists’ even created a ‘noise orchestra’ in their Milan studio and categorized sounds into six families of noise:

  1. Roars, Thunderings, Explosions, Hissing roars, Bangs, Booms
  2. Whistling, Hissing, Puffing
  3. Whispers, Murmurs, Mumbling, Muttering, Gurgling
  4. Screeching, Creaking, Rustling, Buzzing,[7] Crackling, Scraping [7]
  5. Noises obtained by beating on metals, wood, skins, stones, pottery, etc.
  6. Voices of animals and people, Shouts, Screams, Shrieks, Wails, Hoots, Howls, Death rattles, Sobs

Indeed, much of this is also my potential musical palette. The point is that since ‘noise’ is the main material of my Sound art, although I have used traditional musical elements as well, there are no real criteria for any elements of my work,  I work at the sounds and how I put them together as would a painter and, on any particular morning, as I review my piece at stages of completion, like the painter, I decide that it is finished as I want it and it conforms to my vision of the work based on my interior narrative.

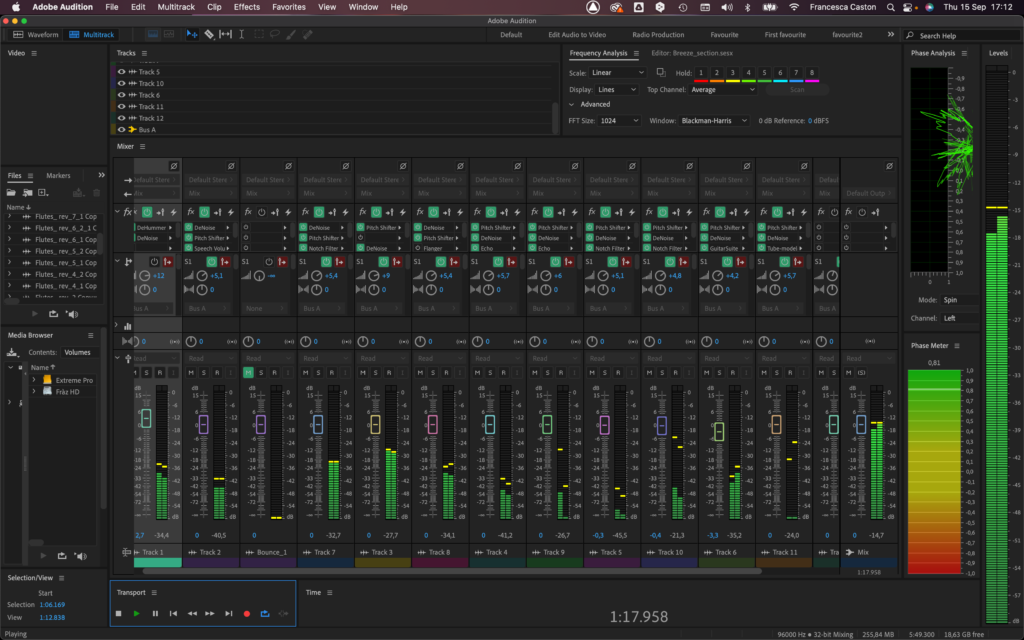
So, there are three main passages of spoken dialogue.  The first is angst-ridden in a context of confusion as much as noise, mainly granular sounds, drones, and harsh metallic sounds. In this context, the sound quality of the vocal clips is less important than the emotional impact of the rawness of some of the dialogue.  There are two distinct lines here but abstracted and deliberately misplaced.  The suicide extracts from Sylvia Plath’s The Bell Jar were recorded at home so fairly clean apart from a slight bloom in the upper partials of the reverb which sits well in the aggressively noisy ambience of the second movement.  My field recorded vocals were mono from my iPhone while walking and remain in mono through the mix but panned left and right by automation in the clips. The only treatment I gave them was the DeNoise – Adobe Audition has a lot of Noise reduction/restoration tools, some of them process based requiring you to capture the sound you want to treat/eliminate before processing, at which point there are many controls allowing one to fine-tune the treatment.

In this particular case, figure 1, I’m looking at the selected mono clip which has some background noise (medium frequency hiss). Now, this is noticeable when the clip finishes and the play head runs onto the empty track; I can hear this clearly as I solo the track.  In the context of the second movement, it would not be noticeable but as good practice, I try to work with the best quality clip I can get.  Incidentally, although both the SP monologue and the iPhone recording were complete recordings, I cut them up for the reasons I mentioned earlier, and this gives me more flexibility in the composition process.

As you can see from fig 1 below, I am using the DeNoise effect on the clip.  I am using the ‘all frequency’ processing focus and, at the top of the gain fader, the tick box allows you to listen to just the noise that is being taken out.  This is useful since I can hear if anything is being taken out of the voice itself and I can adjust this with the ‘amount’ fader. If I want to test, check and alter, I can make a time selection and adjust the fader until I get what I want, I can also on /off the effect with the green button at bottom left.  If I make an adjustment that might be applicable in other circumstances, I can save it as a pre-set.

Fig 1


Fig 2

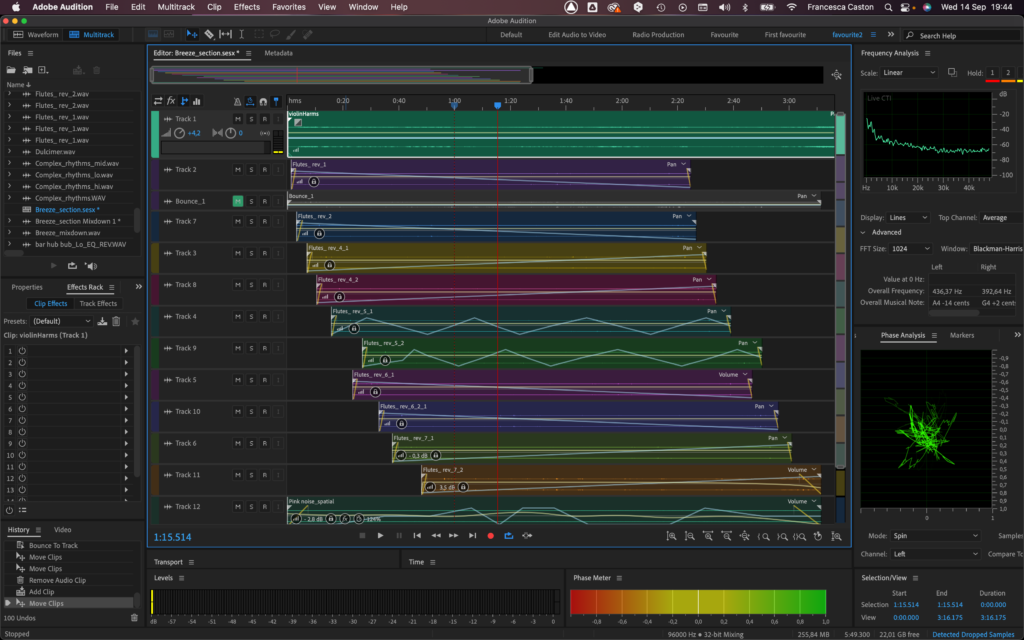
In figure 2, you can see that for this noisy passage I also ‘cut out’ quiet windows to allow the text to be heard more easily (there are more above off-screen) which, to my mind, also creates an interesting effect of being transported elsewhere for the narrative line.

You can listen to this section via this Bandcamp link:

https://frcaston.bandcamp.com/track/the-haunting

The third mood gradually calms down and the texture becomes thinner and quieter and so, it was not necessary to create quiet windows in the texture.  However, this is the central movement and is a conversation about the genesis of the piece, both unscripted and personal.  That being so, I was not expecting to put it in the foreground so much.  However, on repeated listening, I felt it needed to have a bit more presence.  So, for each clip, I applied parametric EQ using a pre-set ‘vocal enhancer’ and just tweaking some of the points to reflect the natural spread of frequencies.  In figure 3 I have applied the EQ to the clip.  I also raised the volume of the clip a couple of dB

And later applied the DeNoise since the EQ introduced some noise.  In other words, the aim was to disguise the transition from clip to empty track.  This was a problem with working with tape; leader tape is silent and everything else contains noise and the more you do and rerecord, the noise becomes accumulative, which is why we often used Dolby ‘A’ units, even if, for electroacoustic music, they robbed the sound of some of its edge – so there were always decisions to be made.

Getting back to this third mood, the voice is now more forward, and I managed this also by the use of the automation lines in each clip where I could raise or reduce the volume of individual words to improve the feel of the conversation, yet it does not overly draw attention to itself; the purpose was to make this ‘meta-commentary’ sound and feel natural, conversational rather than uniformly even in volume.

You can listen to this via this Bandcamp link:

https://frcaston.bandcamp.com/track/la-conversaci-n

Fig 3

The parametric equaliser is one of my favourite compositional tools since I can really excite upper partials with it; for this, I created my own pre-set ‘snap crackle and pop’ (thank you Kellogs) and was used to make the Swiss alpine cow bells sound like heavy chains in the second mood, at the words, ‘…and she was gassed!’  It also created a spectacular effect from a recording of rain falling on an umbrella which I used in the first mood.

The fourth mood is the quietest and yet it was difficult to balance the reading of the poem with the chamber organ melody beating against the lower drones.  Again, I had the problem of noise on the clips which was noticeable as the clip ended and a portion of empty track came under the play head.  Again, each clip had parametric EQ applied to give presence to the voice and then DeNoise as with the other clips.  Fig 4 shows the treatment of the last voice clip which gives the piece its title: ‘her blacks crackle and drag’.   I’m quite happy with my reading of this last line but my voice was too uneven for the close of the poem, so I raised the volume of, ‘her blacks…’ and cut, ‘crackle and drag…’ a little.  The clip is panned hard left with a fade at the end.

Fig 4

Finally, I’d like to share this link to some tutorials on the Noise reduction/restoration tools in Audition:

https://helpx.adobe.com/audition/using/noise-reduction-restoration-effects.html

If you look at the tutorials and at the individual tools, they claim that noises of various types are removed without affecting the signal; I have found, even with my limited experience of these tools, that the more you use them, the more you understand which routines of which tools serve your purpose.

Most of this work is done in the ‘Waveform editor’ and although I’ve only scratched the surface of these tools (I probably don’t need too many, but their availability gives me another approach to processing my field recordings) and I can already see the potential for processing my clips before taking them into the multitrack editor when I put the composition together; in fact, many of the process treatments can only be done in the ‘waveform editor.

I think I have said this before about Audition, and why I like it so much is that it is a compositional tool as well as improving clips.  The spectral frequency display plays a major part in my composition since I use it to select frequency bands to create novel sounds. For example, if I take a full frequency sound with loop potential to become a drone, I can hollow it out by selecting the lowest frequencies, saving that, and then selecting the highest frequencies, sometimes barely audible, and bounce them together to form a drone with no middle frequencies.  So then I can play with this and perhaps blend in some movement in middle frequencies from a different source to create a drone that has ‘life’.   On the repair side,  should you have clicks in the quiet sections, for example, you can quickly use the ‘spot healing brush to paint the clicks out on the spectral frequency display (if you have ever used Photoshop, you’ll find this tool familiar).

Thinking back to Russolo’s classification of noises, I actually work with this material; my approach to the DAW and what it can do are specific to my compositional process.  And Audition is still my favorite: I can use MAX MSP with Audition by using the Plugin Soundflower which converts the midi into .wav.   But, please, please Adobe, add a Midi input and editor so that I can use some of the other instrumental samples available.

I’ve started learning Mexican Spanish for my planned trip to Mexico at the beginning of March; I’ll probably stay forever, I haven’t decided yet, but I’m aiming to be in Morelia because of the Centro Mexicano para la Música y las Artes Sonoras, Mexico, in Michoacán, which is 4 hours by train from Ciudad de Mexico where I gather, there are Soundgirls. Yay!  And I know where I’ll be and with whom on the 8th of March

Hermanas vos quiero a todas


Does It Matter Which DAW You Use?

A few years ago, when I was fresh out of college and looking for jobs, I remember reading an article that explained why Pro Tools is the industry standard and why every audio professional needs to make it their DAW of choice, whether they work in music, film/TV, game audio or podcast production.

In addition to this, I found that a lot of radio and podcast job adverts were very specific about the software they required people to know how to use (usually Pro Tools, Logic, or Reaper, but mainly Pro Tools).

It got me thinking about how many of us use a particular DAW simply because we’ve been told it’s the best one, rather than choosing one that suits our individual needs. Obviously, it makes sense to have an understanding of different ones (if nothing else, you’ll learn what you like/don’t like working with), but is it fair to reject a job candidate on the basis that they have a preference for one DAW over another? I don’t think it is.

I’m a big fan of Adobe Audition. It’s what I use in my day-to-day freelance work, what I used in my last full-time job, and what I used during my studies. Before that, I learned how to use Pro Tools and have also experimented with other DAWs in the past. But I don’t mind admitting that Audition is the one I feel most comfortable with. It wouldn’t be the best choice for music production, for example, but for radio and podcasting, it’s perfect. It’s widely used for this purpose, yet most production companies still require those they hire to have Pro Tools expertise.

This is not in any way a criticism of Pro Tools. It’s a fantastic and versatile DAW that undoubtedly works for a lot of people. I also understand that companies will have a particular setup and employees obviously need to know how everything works. But if someone is experienced in their field — enough to actually be hired — should it really matter if they’ve used a different DAW up to now? I’m not saying it’s easy to just jump into a piece of software that you’ve never used before, but it is entirely possible to learn (quickly) on the job. I’ve had colleagues in the past who had only used Pro Tools and had to learn Adobe Audition on the fly. But they still got hired in the first place because they were good at their jobs, not because of the DAW they used. I feel the same thing should happen with those who may not have much (or any) experience with Pro Tools.

If you’re a freelancer who chooses their own clients and projects, the DAW you use should be even less relevant to the people you’re working with. I haven’t yet had a client question my setup (unless there’s a situation that requires us to collaborate on an edit or share sessions, but those have been few and far between) but if they did, I would want to know if there was a good reason for needing to use a different DAW. I’ve never been in a situation where Audition didn’t meet my needs or allow me to deliver a project successfully.

To sum up, I think we can easily get bogged down by the term ‘industry standard’. What matters most is a person’s own skills and qualities and what they can bring to the table. The software they use is secondary.


Stock and Purchased Plug-Ins

With many plugins come great opportunities. Plugins, for those unaware, are akin to cooking spices. Each one has a different flavor to add to your dish. Say you got this basic track going, drums – bass – vocal – maybe a keyboard – and guitar, cool? Adding a plugin depends on which one can change the track dramatically or subtly based on your choice.

“Stock” plugins are built-in with the price of admission to use your DAW.  Thinking back to my cooking example, these plugins are your basic salt and pepper.  Here is a really good article you can check out if you want to learn more about your DAW’s plugin format from Renegade Producer. The link will be at the bottom of this post.  Some of the best examples I can give for what a stock plugin looks like in Logic X Pro match Equalizers and Multiband, they are easy to use and effective.

Besides stock, you can always go out and purchase plugins.  Not all, but many of these are clones of outboard gear, tapes, preamps, or amps like the Suhr PT100 for example. They offer a way to work with iconic equipment in the box for a smaller price than the original hardware. These purchased plugins can bring even more flavors to the table – bring out that hot sauce baby!

The names that often get thrown around are Fabfilter, Soundtoys, Waves, and UAD,  I would advise that the larger the price tag is doesn’t necessarily mean the best quality is guaranteed.  If you are just starting out or are a student producer and have some spare cash I’d recommend the following.

CLA-2A Compressor/Limiter from Waves 

Antares Auto-Tune Realtime from UAD 

C-Suite Reduction from UAD 

Little Plate from Soundtoys 

Now unless you got the cash or catch a really good sale you’re looking at spending a lot. While I would highly recommend learning the basics on when to best implement reverb on those pipes of yours ( or friends ) on stock, I can’t say to go on a shopping spree and end up not understanding how they work and burning that hole in your wallet at the same time.  As best as I could explain or a youtube guide could show its best with trial and error, cultivating your preferences and that unique flow that only you can.

*End note* if you really want to shell out for premium plugins I’ll let you on a secret… If you got that student ID on you can save massive amounts!! Acustica, Avid, Native, Soundtoys, Waves, FL, Fabfilter, and Ableton all have student discounts. Remember that Antares Auto-Tune I mentioned? You can get it close to 50% off with this academic link- https://identit-e.com/antaresaudiotech


BandLab Mastering: A Review

I’d heard about BandLab Mastering a while ago, and was very curious to experiment with such an interesting bit of kit – a free, web-based tool that will quickly master tracks through the use of algorithms created by industry experts. What’s not intriguing about that? So, I sat down for an afternoon of mastering and re-mastering fun, to see what BandLab Mastering has to offer.

What is BandLab Mastering?

BandLab Mastering is a free online audio mastering service that all works via a web page or mobile app. BandLab Mastering lets you upload music unlimited tracks of under 15 minutes in length, and then experiment with the four preset mastering settings it offers. The software was made with world-class artists and engineers and designed with GRAMMY-winning multiplatinum collaborators such as Mandy Parnell, Mike Tucci, Maria Elisa Ayerbe, Justus West, and Will Quinnell.

The first thing I found was the ease of use of the BandLab Mastering website. I signed up to create an account via the homepage and was uploading my first track about a minute later. There is an ‘upload’ or a ‘drag and drop function, and the whole process with my particular internet speed, took around another minute to upload a 4-minute track and begin listening with the mastering options applied.

The four settings to choose from are clearly labelled with an explanation, as well as some suggested genres that work best with them:

Universal: Natural dynamic and tonal balancing – Rock, Pop, Electronic, Alternative

Fire: Punchy lows and midrange clarity – Trap, Hip-Hop, Experimental, Reggaeton

Clarity: Pristine highs with light dynamic expansion – Acoustic, Classical, RnB, Singer-songwriter

Tape: Warm saturation with analog dynamics – Jazz, Alternative, Indie, Rock

There are samples on the BandLab page to hear what each option sounds like, but I wanted to hear for myself how they all compared playing the same piece of music, and also where the strengths and weaknesses of each setting would lie.

Universal

The Universal setting was most pleasing on tracks that had lots of instrument parts and vocals, and it really ensured that the lead vocal sat prominently in the mix. The balance was perfectly nice for this preset and it felt like everything was boosted equally, while still being positioned in its right place. The Universal option would make a great default setting, and had the same feeling of equal boosts across the spectrum on all the tracks I used, ranging from solo instruments to larger band and electronic setups. Overall, it sounded pretty impressive with all of the styles I experimented with. Universal has a modern yet classic and inoffensive sound, and I’m sure many users could get by just fine using this setting alone.

Fire

The Fire setting sounded great on a retro-sounding band piece I had. This setting not only boosted the drums and bass in a very agreeable way, in keeping with the genre and my expectations but also added clarity and prominence to a piano that was in the middle of the mix. Synths and a lead vocal kept their place upfront and weren’t overpowered by the low-end, but the difference was significant. Overall, this setting fit perfectly for a track of this style, and I suspect any traditional band setup would sound quite nicely mastered with Fire. As I experimented with pieces of more variety, I kept coming back to Fire for tracks that needed that extra punch in the low-end, whether electronic or band based. While this preset wasn’t created to optimise softer pieces, the impact on bigger and more aggressive tracks across genres was highly rousing and effective.

Clarity

Clarity didn’t disappoint and was perhaps the unsuspecting hero of the group. It was my favourite setting to use for guitar pieces and really brought them to life. The high-end was pronounced, but without losing the warmth or depth of the low-end or mids, which is always a concern of mine with the guitar. It kept the feel open and balanced; the full range of the instrument was present, and it never sounded small or twangy. It also worked very nicely with piano pieces, as well as ambient electronic tracks. The revelation for me with Clarity was experimenting with rockier band tracks. Surprisingly, this didn’t lose any punch and still felt meaty, even though the airier high-end was quite prominently boosted in this master. For this reason, I felt Clarity was the most inclusive all-around setting, as it could cope with almost anything.

Tape

Tape was similar to the Fire setting in places, such as boosting the low-end, and working really well on more aggressive tracks. I felt like Tape also evened out any jumps or discrepancies in volume and compression between sections much more smoothly than the other options. This was a huge bonus for this setting, and pretty much every track of every genre that I played with Tape sounded warm, full, and pleasing. My only criticism of Tape would be that the ‘tape noise’ on extremely quiet parts is too noticeable and distracting. For example, on a live guitar or vocal recording where there is a natural break or diminuendo, the fuzziness of Tape detracts from the silence too much. Other than that, my love for the sound of analog days-gone-by would see me use this regularly myself.

The verdict

I was genuinely surprised by how far the BandLab Mastering effects exceeded my expectations. After much playing around with all kinds of tracks from classical, to electronic, to rock, I was not expecting the four preset options to all be so well-rounded and effective. None of the settings sounded ‘bad’, even when pushing the limits and trying music that wasn’t intended for that choice. To me, that’s a good sign about the quality of each default and makes it a very useable piece of kit, highly accessible to lots of different people. It’s worth remembering that the mastering function can’t solve problems in the mix – if a track has issues with balance, clipping, or bad recordings, this isn’t a magic remedy. If, however, you’re looking for loudness, clarity, a nice EQ spread, and a particular vibe, then BandLab Mastering has some pretty great options.

Victoria Butash -Monitor Engineer for Jason Isbell and Sylvan Esso

Victoria has worked in Live Sound for over eleven years and is currently on tour as a monitor engineer with  Jason Isbell & the 400 Unit and works with Sylvan Esso as a monitor engineer. In addition, she works for Big House Sound, Inc. and Sound Image.

Victoria grew up surrounded by music, as her dad was a musician as well as his friends, and at age ten began exploring songwriting. She was part of the choir and band at school and can play a variety of instruments. She attended Capital University, in Columbus, Ohio with the notion of becoming a studio engineer, but realized quickly that her love was in live music and the dream of touring. She would graduate with a Bachelor of Music in Music Technology.


Career Start

How did you get your start?

I honestly didn’t know what exactly I wanted to do when I started college. I didn’t even know if I wanted to be in college at all. At first, I thought that I wanted to pursue being a studio engineer, and I realize now that that was a result of my program being so studio-focused. As soon as I got a taste of the live sound environment, I was sold. My first paid gigs were in small clubs. My friend recommended me to cover a few shows, and soon I was being scheduled regularly and was being offered shifts at other clubs that were similar in size. I was bartending to keep a steady income, but eventually, I realized how much those two tracks conflict and decided to pursue other audio opportunities.

What did you learn interning or on your early gigs?

One of the biggest lessons I learned early on was that there is more than one way to efficiently and correctly accomplish something and that you can learn so much from simply observing. I learned and practiced the nuance of asking the right questions at the right times. The other big one was that you absolutely do not have to yell or be a bully to get things done in an effective way. I watched a lot of others try that tactic, and it exclusively garnered resentment amongst the people that you want on your team. There’s a time and a place for being stern (safety), but you absolutely do not have to use it as your primary tactic.


Sylvan Esso Crew

Career Now

What is a typical day like?

Wake up at least an hour and a half before walk and chalk, and check Google Maps to see where we are and if there are good coffee spots within walking distance.

Even though I’m not flying anything currently, I still go to walk and chalk to determine my footprint on SL and make sure that I’m being left enough room to operate and make adjustments if not.

Load In

Build MON world and take a look at the air space with RF Explorer and Touchstone Pro

My RF products are all Shure, so I use Touchstone Pro to visualize, and then import data into Wireless Workbench to analyze and deploy my frequencies and pair receivers/transmitters.

Open the previous show file, review my notes, and update snapshots accordingly

Once the backline is built, I run my looms to stage boxes and power drops and help patch the stage

Find some time for lunch and another coffee, and if there’s enough time I’ll call a loved one

Line check with backline pals

Soundcheck

Organize stage/prep changeover if there’s an opener

Dinner

Show

Load Out


How do you stay organized and focused?

The most important thing is taking care of your mind and body – if you’re not drinking enough water or eating consistently, your mind will not be at its best.

Outside of health, I find that having a step-by-step routine for getting your day started and setting up is helpful. If you continue to practice the same routine every day, you’ll be able to troubleshoot faster and be considerate of your team’s schedules. For instance – I wouldn’t ever run stage looms first thing because the backline has rolling risers that need to be built and placed. I really don’t like when I hear others use the phrase “work smarter not harder” condescendingly, but I can attest that running out a hefty sine loom is much easier if you don’t have to move it because it’s in the way.

What do you enjoy the most about your job?

I love being a part of the interpersonal relationships within the tour team and talent. I think that being a monitor engineer means that your crew is instilling a lot of trust in you. It’s your job to create a sonic space that honors the musician as well as the backline techs that work tirelessly to preserve tone. It’s an amazing feeling to experience the energy on stage as it morphs from song to song.

What do you like least?

When things go wrong, it’s hard not to take it personally. Even if you’re fully prepared and have done the work to secure spare lines, spare frequencies, etc., the equipment can still fail in a way that isn’t immediately fixable. That aspect can be anxiety fuel.

Luckily, I work with incredibly understanding folks who keep their frustrations in check and trust that I am doing my best to make the issue go away. It’s been great to know that if something comes up, we can have a civil conversation about it later.

If you tour what do you like best?

I have always (kind of) joked about how my number one passion in life is food and touring is my gateway to experiencing all of the world’s best food. Seeing the world is such an amazing perk.

I also love that I get to partake in so many fantastic friendships.

What do you like least?

I think that living out of a suitcase surrounded by up to 11 people in a small space as well as being away from your loved ones gets tiring during a long tour. It certainly forces you to choose what items are most important to your every day. I think even the most social people need a break with privacy sometimes, and it can be hard to come by.

What is your favorite day off activity? 

I have two priorities: Find the best coffee. Find at least one good meal.

Outside of that, I usually bring my rollerskates on the road, so I’ll find somewhere to skate and listen to music. I also genuinely love hanging out with my crews, so I like planning fun group activities – especially if they can be outside. I also always make time to phone my loved ones.

What are your long-term goals?

I just want to continue staying on top of the newest technologies and seeing the world (and eating all of the food that the world has to offer!). Eventually, I’d love to dive into more Production Management. I also want to continue exclusively working for and with good humans.

What if any obstacles or barriers have you faced?

My biggest obstacles have always been my own anxieties: whether I deserved to be where I was, whether I could handle challenging situations, and being worried that I’m not communicating well enough with my team. The industry’s volatile nature has left a lot of my friends and coworkers with these same anxieties, which means that many of us can share in them and help each other deplete them. You can only control what you can control.

I would be remiss if I didn’t note that I’ve experienced a fair bit of sexism and sexual harassment. I’ve worked in spaces that didn’t feel safe, and I’ve been brushed off for asking for help.

I’ve noticed that – for me at least – it hasn’t been as up-front as it once was. Post-COVID lockdown, there’s been a level of accountability that didn’t quite exist before. That’s not to discount anyone else’s experiences, but I’m glad to feel somewhat safer in my work environment.

How have you dealt with them?

Letting go of the things you can’t control is a powerful thing. I see a therapist once every two weeks, which really helps with the struggles of having anxiety and being on the road full-time. I really, really encourage everyone who tours to seek telehealth therapy options. Many cities have programs that can help with financial support for mental health services. If you live in the Austin area, please reach out to SIMS for mental health support.

I’ve had to get better at advocating for myself and my safety, as well as the safety of those around me. I do my best to work hard and foster an environment where everyone feels welcomed and appreciated.

Advice you have for other women who wish to enter the field?

Never stop learning. Remember that no single person knows everything; it’s okay to look something up on Google if you’re second-guessing. Do your best to stay focused through the beginnings of your career: it’s gonna be tough, but you can push through. Meet everyone and try to remember their names – that goes a long way and helps with networking. Make sure that you’re ALWAYS taking breaks to drink water and eat – even on the busiest days. If you only have the budget to purchase one nice tool to start out with, grab a multi-tool like a Leatherman. You will more than likely encounter some form of sexism/discrimination, but do not let that stop you…and always reach out to a Production/Stage Manager, Tour Manager, or Venue Manager if you need help. You should not be expected to work in an unsafe environment, and safety includes sexual harassment or sexism. Advocate for your health, your pay, and your safety. And as you move into positions with more authority, despite what you may see others do, you can accomplish things with kindness and comradery instead of fear.

Must have skills?

I think the biggest skill to being on any team is work ethic and the ability to see everything and everyone from the “same team” point of view. We’re all here to do the same job, even if we work in different departments. People on your team will also notice when you care about your work, and that is a valuable trait.

Be communicative and open. Take responsibility if you mess up and put fail-safes in place to avoid the issue in the future. At the same time, also know when to let a bad night go.

Do your best to stay calm and collected when troubleshooting. Something will definitely go wrong at some point, so be prepared with the knowledge and tools to track it down and fix it.

Last but not least: do your best to be pleasant while respecting your boundaries and your teammates’ boundaries. We all have to work together through long, sometimes arduous days and then we have to get onto our tiny house on wheels and live together, which is a lot. I’d say that getting along with your team goes further than technical know-how.

Favorite gear?

My Leatherman, JH Roxannes and UE 18+ PROs, my RF Explorer, soldering irons, my SoundTools Rat Sniffer, label maker (with cool glitter tapes), anything from the Neve 500 series in a rack, and honestly…zip ties. Haha.

I just want to pay homage to those who helped me get to where I am. In no particular order: my dad Jeff and my mom Cindy, Rick Rhoads, who introduced me to recording and opened the door to a plethora of incredible music, Dr. Mark Lochstampfor, Greg Harbert, Joey Pasternak, Andie Cascioli, Melanie Renecker, Kip Montgomery, Zach Anderson, Nate Peterson, Alicia Blake, Karrie Keyes, and Jeremiah Karni.

Essentials & Creativity of Location Sound

Sound designers for films and podcasts have access to many amazing tools to match and enhance the audio recorded in the field. There are multitudes of audio repair options, as well as EQs, reverbs, preamp simulators, saturation plugins, stereo field wideners, as well a ton of sound libraries. Yet, the technology available to us can still only do so much. We can make our projects sing by recording more quality options on location. This is a guide on how to capture audio in the field and why it matters for post-production. Although I use film terminology throughout this article, these recommendations can apply to any medium.

Gear Recommendations

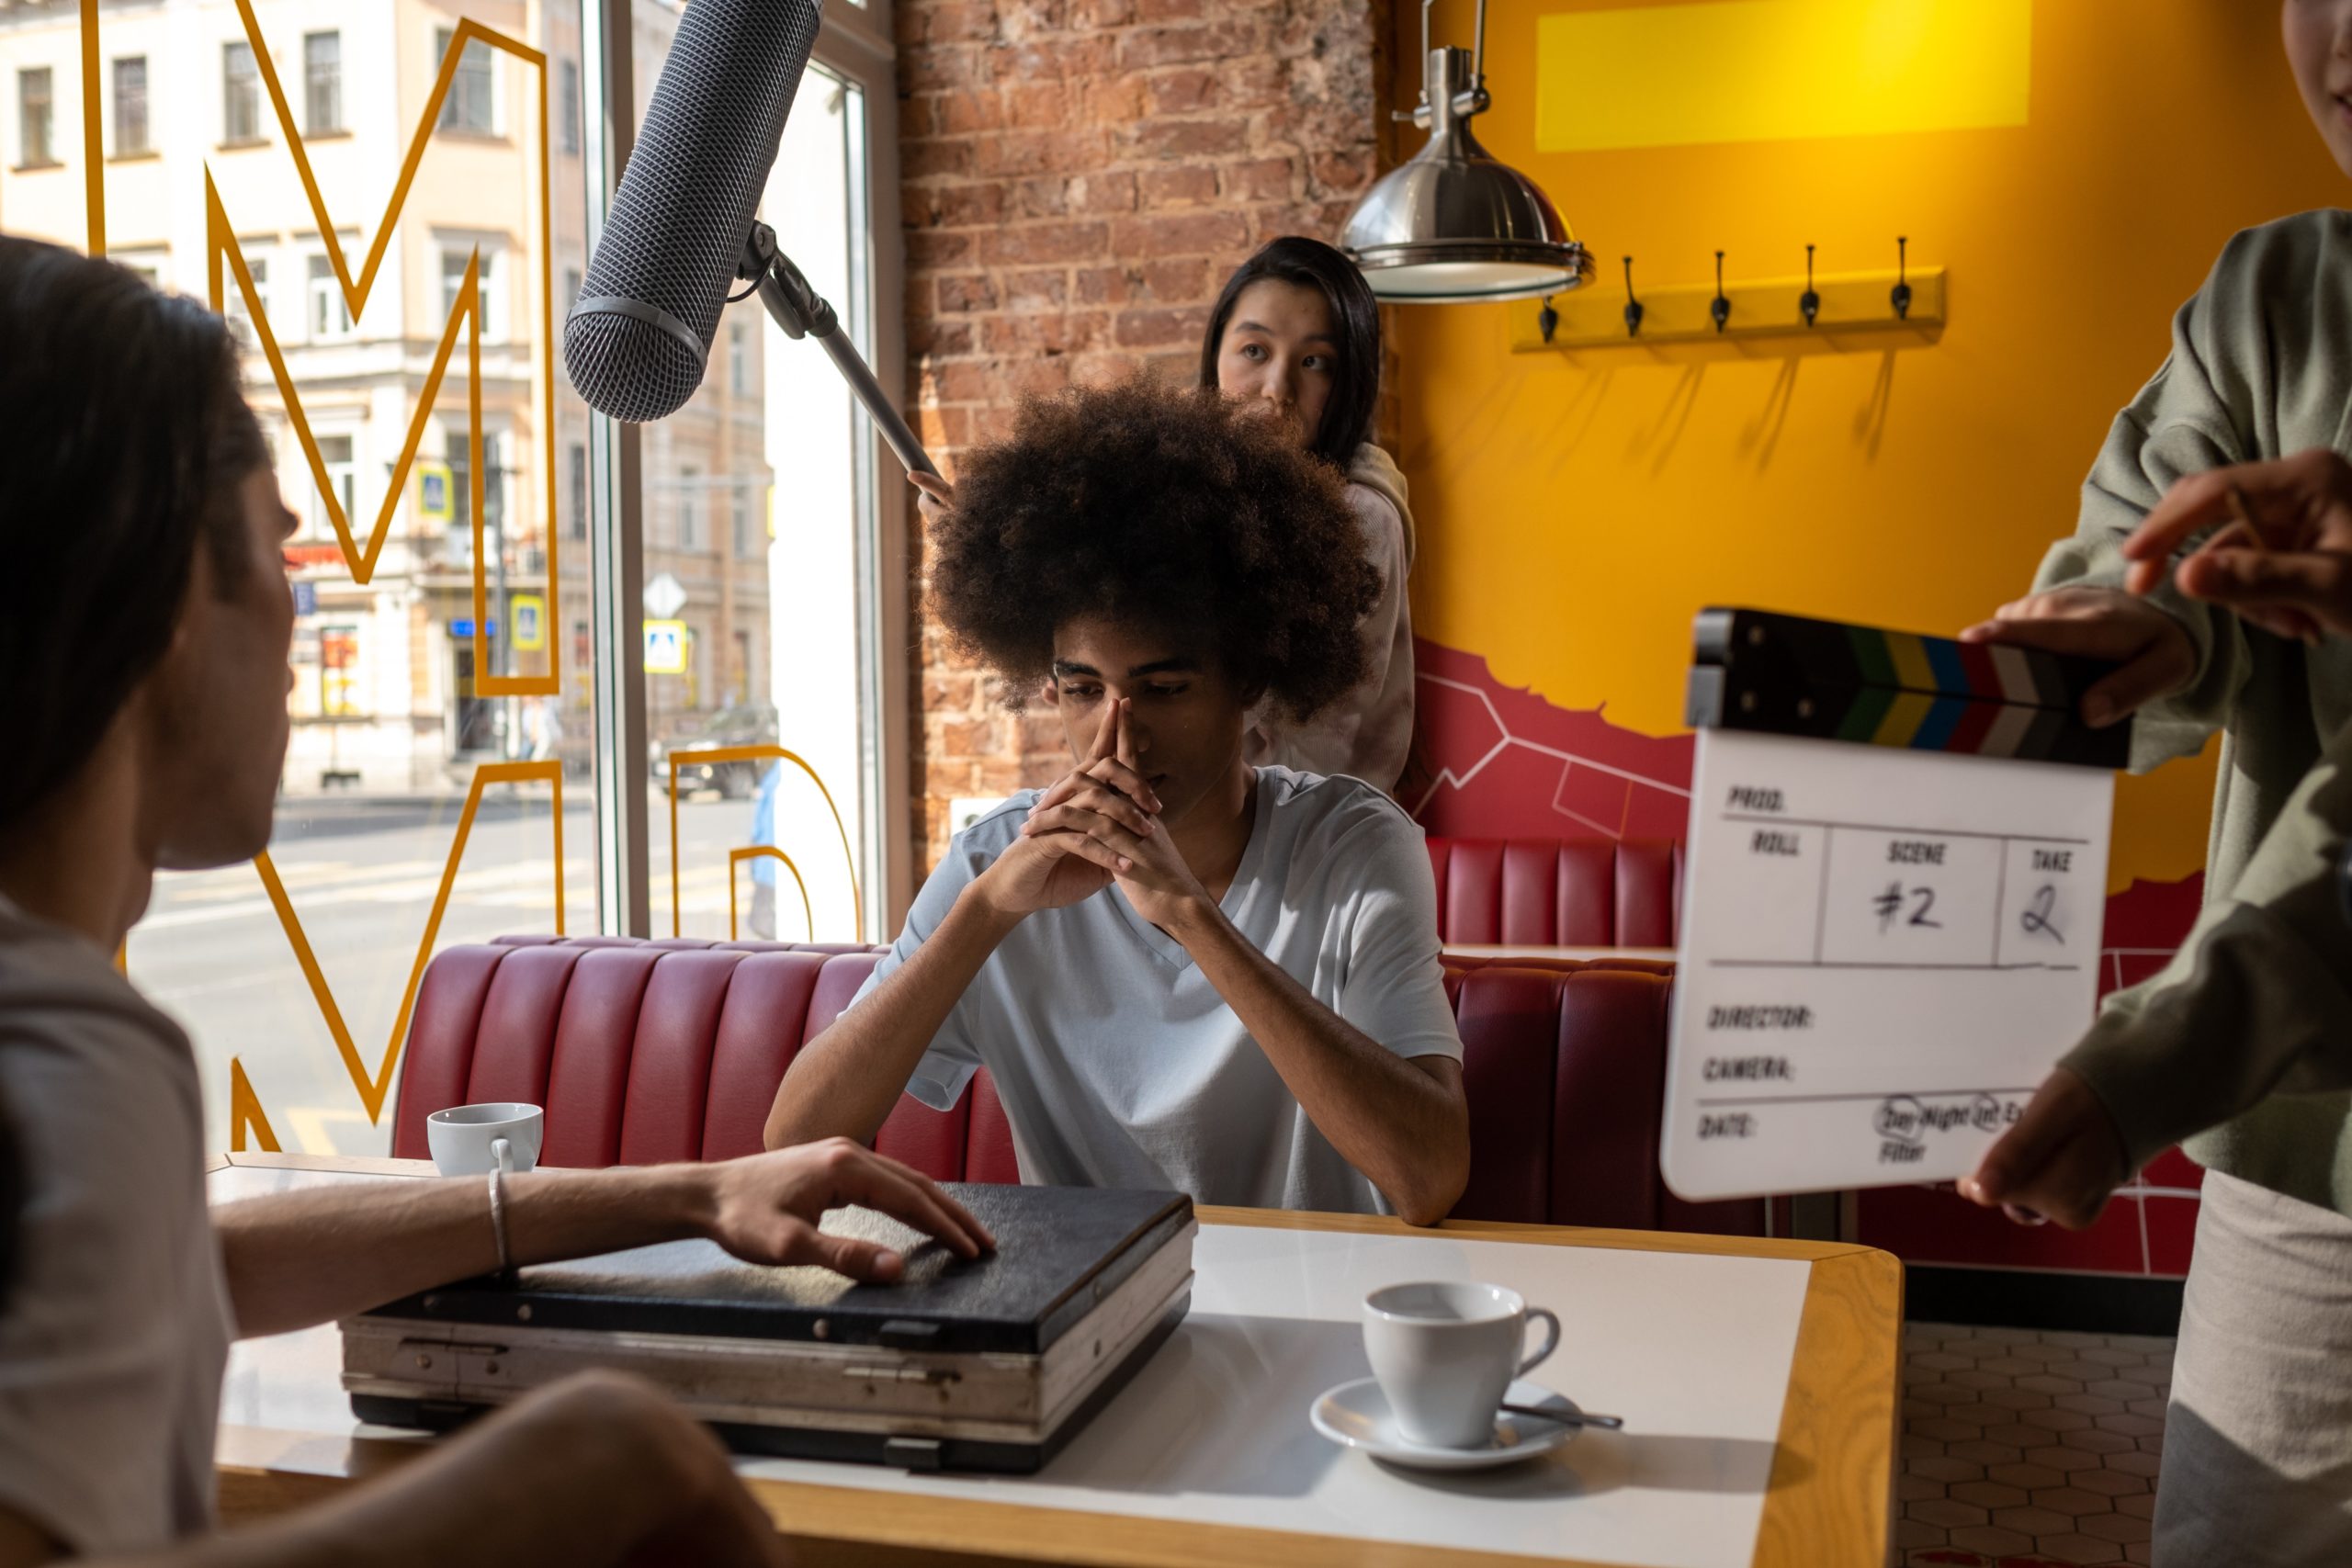
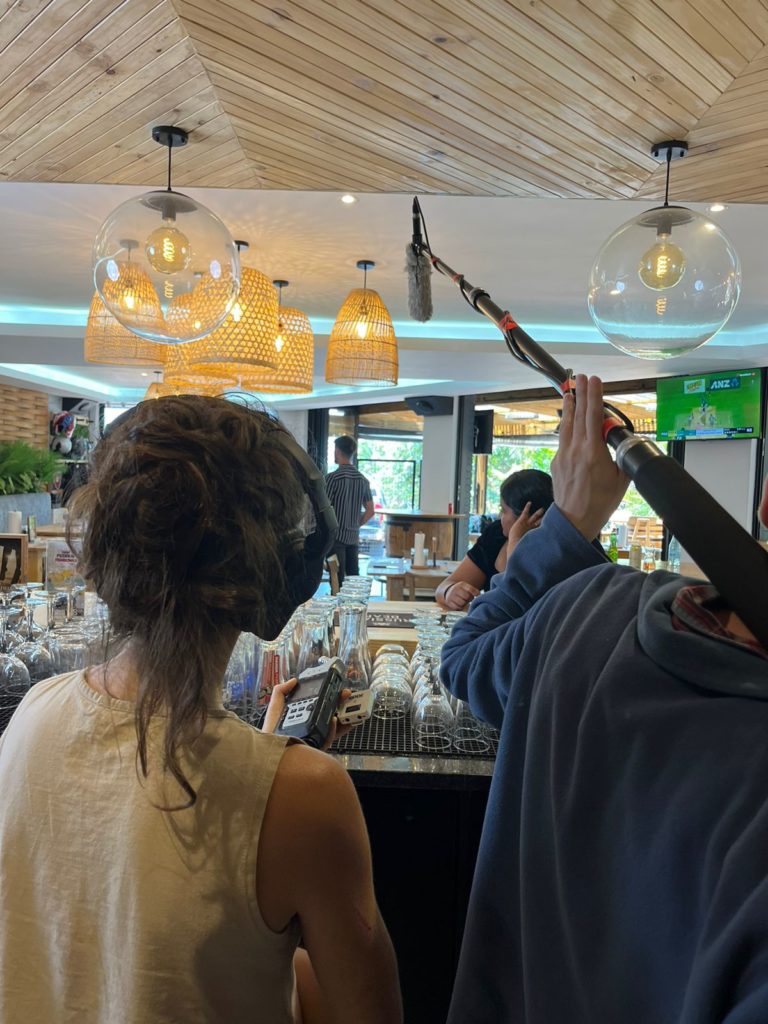
First, a note on best practices for specifically recording dialogue; I’ve worked on films and documentaries where the only audio I had was from a lavalier mic. Lav mics often sound chesty and unnatural, so it takes a long time in post to get the dialogue sounding crisp and clear. Clothing rustle and other movement sound from lavs take a long time to repair as well. Ideally, dialogue is captured on set with a shotgun mic with lavs as backup options. Shotgun mics are also handy to have in case the wireless catches interference. Booms usually can not be used during wide shots, but you can point the shotgun elsewhere and record ambience. (Even though that would be a mono recording. Still good to have options!)

Go beyond capturing dialogue when planning out gear. Spec out a kit that can get stereo recordings, especially outside. When editing and mixing the final product, extra environmental recordings can be a bed under dialogue and used to create smooth transitions into and out of scenes. Stereo backgrounds set a more immersive and natural sounding environment and are a satisfying, yet basic sound design method. Stereo audio can easily be captured with the mid/side technique, but if that option is not available to you, grab a stereo field recorder and record the environment before or after the interview or shoot.

If you have the inputs available on your mixer/recorder, arrive on location with an extra mic or two that you can plant to capture other audio. Is there a babbling brook nearby? It might be cool and interesting to record that on its own channel during the gig, so the sound designer can layer it in. Same if there is a sidewalk with foot traffic in the background – hiding a mic behind a trash can or in a bush (out of the shot, for film), and boom! You have environmental audio that is synced with the rest of the audio in the scene. For something like this, where you aren’t capturing anything specific, you could probably use an omnidirectional mic. But I say, fine to use whatever you get your hands on. It is far better to have audio recorded than to have a missed opportunity because you couldn’t get the perfect microphone.

To sum it up, here’s your list of gear: 1-2 wireless receivers/transmitters and lavalier mics, 1 shotgun mic and boom pole, 1 handheld field recorder, and/or a mid/side setup (a bidirectional mic, a hyper-cardioid or omnidirectional mic, and a blimp and pistol grip), and of course your trusty mixer/recorder such as a Zoom F8 or Sound Devices Mix-Pre 10. And hopefully other random microphones!

Best Practices

These are blue sky recommendations, so your projects may not allow you the time for all of these. If you can go back to a location and get purely environmental recordings, I highly recommend it. Some of these ideas are things you should advocate for in a production meeting before you step foot on location.

On the note of boom operation – ask the producers when they plan to do a site visit. Site visits are essential to figuring out wireless solutions, power, and possible sources of unwanted noise. In more run-and-gun situations, they are helpful to gain familiarity with the terrain before the shoot. Camera operators get the assistance of a spotter – location sound mixers/boom operators do not. Understanding the terrain beforehand will enable you to keep your boom steady and out of the shot, and reduce the risk of you tripping and getting hurt.

Try to carve out time to get extra audio of the environment or the room. In the post-production phase, it is helpful to have options to create smooth transitions into and out of scenes, with the added benefit of having audio to build an immersive scene through sound design. For indoor scenes, a minute of audio per room is usually fine. Advocate for a “meditation minute” where no one moves or talks on set. Since there is more variability in the environment outdoors, three minutes is usually best. It may be more ideal to go back and get that audio or stick around after the gig.

If you can swing it, try to grab other recordings of cars passing, planes, etc. If you need to stop recording, or a cut is made in post during one of those occurring in the background, it is unnatural and jarring to hear that element suddenly drop out. And background sounds can not always be removed.

Then there are the things you should try to avoid recording while capturing dialogue. Heavy traffic, airplanes, HVAC, fans, unwanted conversation, etc. Discuss sources of unwanted noise with your director/producer during the site visit so they are aware and can hopefully make plans. And if a plane flies overhead or a car passes by, or there are any issues at all, tell production to hold for it. As audio people, we are generally encouraged to keep our heads down, so it can be hard to adjust towards speaking up more. But in these situations, you will get so much more respect by courteously speaking up and advocating for getting good sound. (Though holding for planes only works for scripted shoots. In interviews and documentaries, there is no stopping once you’re rolling.)

Everything discussed here may or may not be possible for every project due to time and budget. I can not emphasize collaborating early to figure out what is possible. The end goal is to serve the project and immerse the audience. Vocalize your suggestions through the lens of bringing the story to life. Every department is there for a common goal – to make the story.

How to Own Your Work Without it Owning You

Working in theatre can be full of ups and downs. You get some jobs; you lose out on others. You don’t always get to know why. Some production processes are smooth; others are nightmares. Since I resumed working in live theatre in 2021, I’ve had my share of all these experiences, and everything else in between. But one thing that has changed for me post-shutdown is how I approach those messier situations. And learning to survive them and still do my job well has helped me learn an important lesson about letting go of some of my emotional attachment to my work.

This is not to say that I don’t still love what I do! I remain deeply passionate about mixing musicals. There’s almost no place I’d rather be than behind a console in a theatre. However, working in theatre isn’t just a source of joy for me; it is also my job and primary source of income. And one of the biggest discoveries I made over the course of the pandemic shutdown when this huge part of my life and livelihood went away for a while, was that it can be unhealthy to tie my emotional wellbeing to something as fleeting as anyone show. And when I think back on how I approached my work then vs now, I can see that I am in a much better place mentally.

It turns out there is an important distinction between loving your work and being ruled by it. And my success at doing the former without falling into the trap of the latter is key to my current healthier overall psyche. Here are some tips and techniques that I utilize every day at work to stay grounded in calm and stormy seas alike.

Practicing Gratitude

Even within a dumpster fire, there is good. I try to remind myself each day, or even each hour, to take a moment to name one thing I like about my current job or situation. It could be anything from “I am grateful that I’m getting along well with my colleagues” to “I am grateful that tomorrow is payday.” Any small acknowledgment of gratitude that helps you to simplify what’s going through your head can be a great aid in re-centering oneself in moments of chaos. I use this technique when I catch myself falling into bad behavioral habits, such as getting impatient or passive-aggressive about things outside of my control.

Lane departure warnings


We may think of this as being a safety feature in fancy new cars, but checking yourself or asking others to check you when you begin to let your emotions rule your actions will help you resist the pull of the drama and tension around you. I have worked hard (with a lot of help from my wonderful therapist) to learn what my emotional defense mechanisms are and to recognize them before they get out of hand. For example, I know that when I’m stressed or low on sleep, I can turn into a bit of a control freak and micromanager. At times earlier in my career, I also tended to accidentally overstep my departmental boundaries when I thought I could help with a problem, even when the issue at hand was totally outside my responsibilities. I’ve learned that this behavior, while well-meaning, is ultimately counterproductive because it can hide flaws or issues that need to be solved by the team organically, and not fixed with slapdash “band-aid” solutions. So, learning to stay in my lane has proven to be both a gift (because it allows me to feel pride and ownership of that which is my job), and a relief (because I can let go of everything that isn’t).

Set good goals

Another way I try to cultivate a feeling of satisfaction at every job is by defining for myself what would constitute “victory” or “success” in this situation. For example, on a recent out-of-town show, my primary goal was to develop a good work relationship with a sound designer I had never mixed for before. On a different show that I supervised back in March, my goal was simply to get paid and save money for a future cycling trip. So, regardless of what happens on any of my shows in the end, I can consider them wins for me because I have met my personal goals. Anything more than that is gravy!

Work-life balance


To the left, to the left!


I’m generalizing here, but I’ve found that because of our long hours, atypical work schedules, resultingly small social circles, and overly cultivated sense of “family” or “community” among each individual theatre company or show team, we (the denizens of the theatrical workforce) are especially prone to letting the work-life scale tip in the “work” direction. Find things you value off the clock and give them the time, attention, and emotional value they deserve. Some tactics I use to maintain my balance are intermission phone calls with my spouse, taking my cat with me when I travel for out-of-town shows, going out on walks or bike rides on my days off, or cooking a simple meal at home that I can bring in to eat on my dinner break. All those things and more help me to remember what I really care about and what makes me happiest, and as a result, I am not expecting work to provide a sense of completeness (or to fill a void) in my life.

One of the great things about being a stagehand is that most of my work can only be done at work. I can’t exactly EQ a microphone or hang a speaker from home. For this reason, I try to take the act of clocking in and out very literally. When I’m at work, I commit to being there fully, doing my best, and devoting my complete attention to the tasks at hand. When I leave the theatre, I try my best not to take any of that home with me. This applies on breaks too. Of course, the existence of modern technologies like smartphones, email, and push notifications can make that hard, but at the same time, especially if you’re paid hourly, then you don’t owe your employer anything when you’re not on the clock. Try using an app timer or similar feature on your devices to limit the times of day that you can check work email. Leave your show paperwork and mix script at the theatre so you aren’t tempted to look at them after hours. If there isn’t enough time in your scheduled shift to get all the needed work done that day, then it’s ok that it must wait until your next workday. And that’s not on you.


Accept reality and measure expectations


We all know that just existing in a stressful situation is easier said than done. Here I am preaching about detaching emotionally from work, and the next moment I’ll be texting a friend to vent about how frustrating some part of my workday was. Being emotional is an extremely logical human response to stressors. It means your body is working as intended! But acknowledging emotions and then letting them go will allow you to keep a cool head and not get stuck in a state of burnout. As my meditation app put it, “Acceptance doesn’t mean apathy. It means seeing clearly from a place of calm, knowing when to act, knowing when to let go.” Someone might come up to you and say something like, “the show is so behind, we’ll never be ready in time!” And that might in fact be the case. But unless one of you is part of the show’s upper management, then all you can do is acknowledge that yes, the current situation is less than ideal, but it’s still ok. Know it’s not your job to fix everything, just to ask for what you need to do your job well. And if that isn’t available to you, at least you’ve made your issues known in a calm and rational way and can now go back to focusing on the here and now of the situation.

At the end of the day, it’s ok to walk away

This blog was intended to dive a little deeper into tactics for maintaining good mental health and objectivity in stressful work situations. However, I want to emphasize that I am not writing this to condone improper work conditions in any way. Everyone deserves a workplace where the expectations of their job are laid out clearly, where each employee is treated with humanity and compensated fairly, and where issues that arise can be brought forward without fear of repercussions or retaliation. That is a bare minimum of what one deserves when one enters the theatre to work on a show. And if your current employer is not meeting those standards, feel free to go find one that will. While not every job will be ideal in every way, you are not “weak” or “a failure” for deciding that a situation you’re in is not the best for you as an individual and that the appropriate solution for your own mental health is to extract yourself from the project. It is hard to remember at the moment, but it’s always true that the ultimate power you have as a worker is the power to walk away, and no one can take that from you or make you feel bad for using it.

Above all, take care of yourself

Theatre is a job, but theatre is also objectively interesting and fun. That’s part of why I and many others choose to put on plays for money instead of seeking employment in other fields. However, “love of the art” does not mean one has to be married to it, as the saying goes. Any emotions that come up because of work are just emotions, no different than the rest of the time. I hope this blog has highlighted ways that creating an emotional separation from your work can ultimately make you a better worker because you will no longer be counting on a show to make you happy. It may do that anyway, but that’s a perk, not a job requirement. You also won’t feel like you’re carrying so much of its baggage if it makes you sad, angry, or stressed. If you can live by the philosophy that your job is to show up, do your work, get paid, and go home, you’ll hopefully find satisfaction in yourself even in less-than-ideal situations, and feel pride in your work at the end of the day regardless of what else happens.


A great tool for making a self-care action plan, courtesy of the Mental Health First Aid Association

X